Black Box ACU3001A User Manual
Servswitch brand cat5 kvm micro extender
Hide thumbs
Also See for ACU3001A:
- User manual (62 pages) ,
- Manual (56 pages) ,
- Specifications (4 pages)
Table of Contents
Advertisement
Quick Links
DECEMBER 2000
o d u le
d u le
d u le
l M o
l M o
o te M
L o c a
L o c a
R e m
ACU3001A
MICRO-1M3
ACU3009A
Customer Support Information:
FREE tech support 24 hours a day, 7 days a week: Call 724-746-5500 or fax 724-746-0746.
Mailing address: Black Box Corporation, 1000 Park Dr., Lawrence, PA 15055-1018
World-Wide Web: www.blackbox.com • E-mail: info@blackbox.com
© Copyright 2000. Black Box Corporation. All rights reserved.
Advertisement
Table of Contents

Related Manuals for Black Box ACU3001A


Summary of Contents for Black Box ACU3001A
- Page 1 Customer Support Information: FREE tech support 24 hours a day, 7 days a week: Call 724-746-5500 or fax 724-746-0746. Mailing address: Black Box Corporation, 1000 Park Dr., Lawrence, PA 15055-1018 World-Wide Web: www.blackbox.com • E-mail: info@blackbox.com © Copyright 2000. Black Box Corporation. All rights reserved.
- Page 2 ServSwitch system that’s just right for you. The ServSwitch ™ family from Black Box—the one-stop answer for all your KVM- switching needs! This manual will tell you all about your new ServSwitch™ Brand CAT5 KVM Micro Extender, including how to install, operate, and troubleshoot it. For an introduction to the Micro Extender, see Chapter 2.
- Page 3 ServSwitch, ServSwitch Affinity, ServSwitch Duo, ServSwitch Multi, ServSwitch Ultra, ServSwitch Wizard, ServSwitch Wizard Pro, ServManager, ServSelect, and ServShare are trademarks, of Black Box Corporation. Apple and Macintosh are registered trademarks of Apple Computer, Inc. IBM, PC/AT, PS/2, and RS/6000 are registered trademarks, and PC/XT is a trademark, of International Business Machines Corporation.
- Page 4 FCC/IC STATEMENTS FEDERAL COMMUNICATIONS COMMISSION AND INDUSTRY CANADA RADIO-FREQUENCY INTERFERENCE STATEMENTS This equipment generates, uses, and can radiate radio-frequency energy and if not installed and used properly, that is, in strict accordance with the manufacturer’s instructions, may cause interference to radio communication. It has been tested and found to comply with the limits for a Class A computing device in accordance with the specifications in Subpart J of Part 15 of FCC rules, which are designed to provide reasonable protection against such interference when the equipment is...
- Page 5 SERVSWITCH™ BRAND CAT5 KVM MICRO EXTENDER EUROPEAN UNION DECLARATION OF CONFORMITY This equipment complies with the requirements of the European EMC Directive 89/336/EEC with respect to the EN55022 (Class B), EN50082-1, and EN60555-2 standards, as well as the Low Voltage Directive.
- Page 6 NOM STATEMENT NORMAS OFICIALES MEXICANAS (NOM) ELECTRICAL SAFETY STATEMENT INSTRUCCIONES DE SEGURIDAD 1. Todas las instrucciones de seguridad y operación deberán ser leídas antes de que el aparato eléctrico sea operado. 2. Las instrucciones de seguridad y operación deberán ser guardadas para referencia futura.
- Page 7 SERVSWITCH™ BRAND CAT5 KVM MICRO EXTENDER 12. Precaución debe ser tomada de tal manera que la tierra fisica y la polarización del equipo no sea eliminada. 13. Los cables de la fuente de poder deben ser guiados de tal manera que no sean pisados ni pellizcados por objetos colocados sobre o contra ellos, poniendo particular atención a los contactos y receptáculos donde salen del aparato.
-
Page 8: Table Of Contents
TABLE OF CONTENTS Contents Chapter Page 1. Quick Start Guide ..................9 2. Specifications ................... 10 3. Introduction ..................... 13 3.1 Compatibility ..................14 3.2 Key Features ..................15 4. Checklist of System Components ............16 4.1 The Complete Package ..............16 4.2 The Cables You’ll Need .............. - Page 9 8.1.3 Both Keyboard and Mouse ............. 38 8.1.4 Video ..................39 8.1.5 Power ..................41 8.2 General Questions About the Micro Extender ....... 42 8.3 Calling Black Box ................44 8.4 Shipping and Packaging ..............44 Appendix: Cable Pinning/Pairing ..............45...
-
Page 10: Quick Start Guide
To install your Extender system, refer to the illustration below. A basic ACU3009A (Dual-Access) installation with a CPU and monitors, keyboards, and mice is shown; ACU3001A Single-Access systems will be set up exactly the same way, except that they won’t include the local keyboard, monitor, and mouse. -
Page 11: Specifications
Compatibility — Video: VGA, SVGA, XGA, XGA-2, or RGsB (sync on green), although if your system has monitor ID-bit requirements, you might need to call Black Box for technical support; Keyboard: IBM PC/AT or PS/2 compatible (PC/AT types require connector adapter);... - Page 12 CHAPTER 2: Specifications Maximum Distance — 5 m (15 ft.) from the Local Unit to the attached CPU or KVM switch; 5 m (15 ft.) from the Remote Unit to the attached monitor, keyboard, and mouse or KVM switch; 50 m (160 ft.) between Local and Remote Units Dual-Access (ACU3009A) model only: 5 m (16 ft.) from the Local Unit to the attached keyboard, mouse, and monitor...
- Page 13 Depth: 3.2" (8 cm); additionally, screws protrude less than 0.1" (0.2 cm) from the front and less than 0.1" (0.2 cm) from the back Remote Units, ACU3001A Local Unit: 8.3 oz. (240 g); Weight — ACU3009A Local Unit: 13.5 oz. (390 g)
-
Page 14: Introduction
All keyboard, mouse, and video signals are fully buffered to ensure consistent remote operation of your PC. The Single-Access (ACU3001A) model of the Extender is designed to perform KVM extension only. With the Dual-Access (ACU3009A) model, you can attach an additional monitor, keyboard, and mouse to the Local Unit;... -
Page 15: Compatibility
Section 4.2). Some older PC/XT™ or PC/AT type autosensing keyboards might not be compatible with the Extender. If the keyboard you want to use is some other type or has some other type of connector, call Black Box for technical support. -
Page 16: Key Features
CHAPTER 3: Introduction 3.2 Key Features The ServSwitch Brand CAT5 KVM Micro Extender has a number of useful features which contribute to the transparent remote operation of your PC. Some of the more important ones are: • Distance up to 50 m (160 ft.) Operate your PC from the next room or all the way down the hall. -
Page 17: Checklist Of System Components
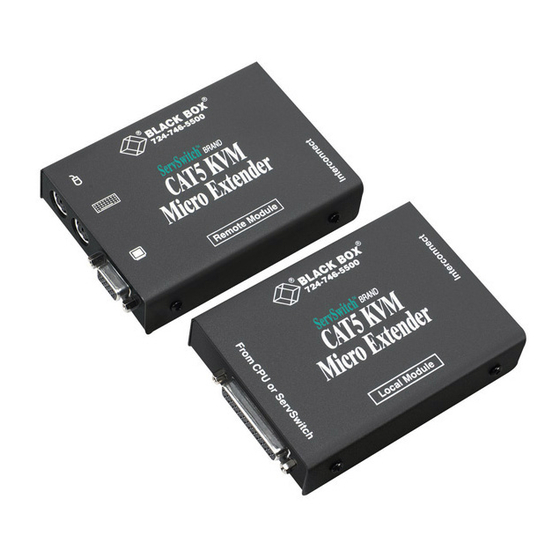
4. Checklist of System Components 4.1 The Complete Package These items should be included with your ServSwitch™ Brand CAT5 KVM Micro Extender package (please contact Black Box right away if any are missing or damaged): • (1) Micro Extender Local Unit. -
Page 18: To Connect A Cpu To The Local Unit
CHAPTER 4: Checklist of System Components 4.2.1 T ONNECT A TO THE OCAL You’ll use the three-in-one KVM-extension cable included with the ServSwitch™ Brand CAT5 KVM Micro Extender. 4.2.2 T KVM S ’ CPU P ONNECT A WITCH AMILY WITCH TO THE OCAL You would do this to extend the distance you can run from the KVM switch to a monitor, keyboard, and mouse. - Page 19 SERVSWITCH™ BRAND CAT5 KVM MICRO EXTENDER 4.2.2.B Switches Whose User Ports Are Compatible Composite Interfaces The user ports of some ServSwitch family KVM switches are composite (all-in-one) interfaces that are compatible with the Local Unit’s CPU port. On these switches, the user ports are DB25 connectors pinned out the same way as the DB25 connector on the Local Unit.
-
Page 20: To Connect A Monitor, Keyboard, And Mouse To The
CHAPTER 4: Checklist of System Components 4.2.3 T ONNECT A ONITOR EYBOARD OUSE TO THE EMOTE NIT OR TO THE ORTS ON THE CCESS OCAL You’ll be plugging the monitor, keyboard, and mouse directly into the corresponding user ports on the Remote Unit or Dual-Access Local Unit. 4.2.4 T KVM S ONNECT A... - Page 21 SERVSWITCH™ BRAND CAT5 KVM MICRO EXTENDER 4.2.4.B Switches Whose CPU Ports Are Compatible Composite Interfaces The CPU ports of some ServSwitch family KVM switches are composite (all-in-one) interfaces that are compatible with the CPU port on the Extender’s Local Unit. On these switches, the CPU ports are DB25 connectors pinned out the same way as the DB25 connectors on the Local Unit.
-
Page 22: To Connect The Local Unit To The Remote Unit
CHAPTER 4: Checklist of System Components 4.2.5 T ONNECT THE OCAL NIT TO THE EMOTE To interconnect the Local and Remote Units of the Micro Extender, you’ll need industry-standard structured cabling (Category 5 UTP or STP, 4-pair) terminated with RJ-45 plugs. This cable is not included with the Extender. Order CAT5 patch cables such as our product code EYN737MS or CAT5 bulk cable such as our EYN840A. -
Page 23: Configuration
SERVSWITCH™ BRAND CAT5 KVM MICRO EXTENDER 5. Configuration There are a pair of DIP switches on the bottom of the Remote Unit of the ServSwitch™ Brand CAT5 KVM Micro Extender. You might need to set these differently if you are running CAT5 cable to longer distances or if you need to use the Scroll Lock key on your keyboard for something other than an Extender reset. -
Page 24: Installation
CHAPTER 6: Installation 6. Installation To install your ServSwitch™ Brand CAT5 KVM Micro Extender system, first test- place it (if you want to) as described in Section 6.1, then attach devices as described in Section 6.2, then finish your installation as described in Section 6.3. 6.1 Test-Placing the Extender System (Optional) We recommend testing your Micro Extender system with a test setup confined to a single room;... -
Page 25: Attaching A Cpu To The Local Unit's Cpu Port
SERVSWITCH™ BRAND CAT5 KVM MICRO EXTENDER 6.2.1 A ’ CPU P TTACHING A TO THE OCAL Run the included KVM-extension cable from the Local Unit’s CPU port to the keyboard, video, and mouse ports on your PC. Included KVM- Local Unit extension cable Figure 6-1. - Page 26 CHAPTER 6: Installation 6.2.2.B Attaching a Switch with a Single Compatible User-Port Connector Run a ServSwitch-to-ServSwitch Expansion Cable (product code EHN284) from the Local Unit’s CPU port to one of the KVM switch’s user ports, which will be DB25 connectors. Regular ServSwitch (KV3108SA-R4) ServSwitch-to-...
-
Page 27: Remote Unit Or Dual-Access Local Unit
SERVSWITCH™ BRAND CAT5 KVM MICRO EXTENDER 6.2.3 A TTACHING A ONITOR EYBOARD OUSE TO THE EMOTE NIT OR CCESS OCAL Plug the monitor, keyboard, and mouse directly into the matching ports on the Remote Unit or Dual-Access Local Unit. Remote Unit Figure 6-5. - Page 28 CHAPTER 6: Installation 6.2.4 A KVM S TTACHING A WITCH AMILY WITCH TO THE EMOTE NIT OR TO THE ’ CCESS OCAL ORTS The way you’ll do this will depend on what kind of CPU ports the Switch has: multiple connectors (see Section 6.2.4.A), single connectors compatible with the Local Unit’s (see Section 6.2.4.B), or single connectors that aren’t compatible with the Local Unit’s (see Section 6.2.4.C).
- Page 29 SERVSWITCH™ BRAND CAT5 KVM MICRO EXTENDER 6.2.4.B Attaching a Switch with a Single Compatible CPU-Port Connector Run the included KVM-extension cable from one of the switch’s CPU ports to the monitor, keyboard, and mouse ports on the Remote Unit or Dual-Access Local Unit.
-
Page 30: User Ports
CHAPTER 6: Installation 6.3 Finishing Your Installation To finish installing your Micro Extender system after attaching devices to it as described in Section 6.2, take these steps: 1. Attach the output cord of the Remote Unit’s power supply to the Unit’s power jack. - Page 31 SERVSWITCH™ BRAND CAT5 KVM MICRO EXTENDER 5. If the Local Unit’s LED shows that the link between the Units appears to be working, make sure that the remote keyboard functions and that you’re getting video at the remote site. 6. Make sure the remote mouse functions. (If your PC normally boots up in DOS, you will need to run Windows or some application that supports the mouse.) If everything works in your test setup, repeat the above steps for your actual...
-
Page 32: Operation
CHAPTER 7: Operation 7. Operation 7.1 Keyboard and Mouse Emulation The ServSwitch™ Brand CAT5 KVM Micro Extender uses a microprocessor to emulate the presence of a directly connected keyboard and mouse for the attached PC. This means that you don’t have to connect a keyboard or mouse to the PC in order for it to boot;... -
Page 33: The Scroll-Lock Reset
SERVSWITCH™ BRAND CAT5 KVM MICRO EXTENDER 7.3 The Scroll-Lock Reset When a ServSwitch™ Brand CAT5 KVM Micro Extender system is set to its factory defaults, you can press and release the Scroll Lock key once on the keyboard attached to the Remote Unit (or twice on the keyboard attached to a Local Unit in a Dual-Access system—see Section 7.5) in order to reinitialize the keyboard and the associated mouse after you detach and reconnect either of them. - Page 34 4. If the mouse isn’t yet operating correctly, repeat steps 1 through 3 as many as two more times. (If this still doesn’t help, call Black Box Technical Support.) When the Micro Extender receives the Null Mouse Command, it sends a “null byte”...
-
Page 35: Shared User Access (Dual-Access Systems Only): The Inactivity Timeout And Private Mode
SERVSWITCH™ BRAND CAT5 KVM MICRO EXTENDER 7.5 Shared User Access (Dual-Access Systems Only): The Inactivity Timeout and Private Mode Because two user stations (one local, one remote) can be attached for each CPU, the Dual-Access Extender system has these “shared access” features: •... - Page 36 CHAPTER 7: Operation Very few applications today make extensive or important use of the Scroll Lock key. But if you are using such an application on a PC attached to the Extender, you can force the Extender to pass Scroll Lock through to the PC, disabling both Private Mode and the reset function (see Section 7.3) by setting DIP switch 2 on the Remote Unit to OFF (see Section 5.2).
-
Page 37: Troubleshooting
Brand CAT5 KVM Micro Extender, and suggests possible remedies. If the recommended actions don’t help, or if you don’t see your problem here, or if your problem keeps recurring, call Black Box Technical Support as directed in Section 8.3. 8.1.1 K EYBOARD The PC boots correctly with no error messages but the keyboard does not work at all. -
Page 38: Mouse
CHAPTER 8: Troubleshooting Connecting a keyboard to the Remote Unit has an adverse effect on the remote video. Try using a newer keyboard. (Some older keyboards require too high a current for the Remote Unit to properly drive the video signal.) I’m not using a keyboard, but the Extender doesn’t work at all. -
Page 39: Both Keyboard And Mouse
SERVSWITCH™ BRAND CAT5 KVM MICRO EXTENDER The mouse is behaving erratically. 1. Press Scroll Lock (once at the remote station, twice at the local station in a Dual-Access system) to reset the keyboard and mouse (see Section 7.3). 2. Issue the Null Mouse Command up to three times (see Section 7.4). 3. -
Page 40: Video
This could happen if your electrical power system is very noisy (particularly on the ground lead). Also, don’t route your interconnect cable anywhere near power lines or other powerful sources of interference such as generators, motors, or fluorescent lights. If this is a persistent problem, please discuss it with Black Box Technical Support. - Page 41 DDC, which the Extender doesn’t support. 2. The CPU might need to see monitor ID in order to boot into the correct video mode. Please contact Black Box Technical Support. Connecting a keyboard to the Remote Unit has an adverse effect on the remote video.
-
Page 42: Power
Local Unit’s CPU port to the keyboard port of the CPU or switch in order to power the Local Unit. If this is not possible, call Black Box Technical Support about getting an alternative power supply for the Local Unit. -
Page 43: General Questions About The Micro Extender
(160 ft.). You can try running cable farther, but not very far beyond 50 m the video quality begins to degrade rapidly. If you need to run longer distances, please contact Black Box Technical Support; they might be able to suggest more powerful alternative equipment. - Page 44 CHAPTER 8: Troubleshooting When using UTP, what’s the best way to make sure that the system does not suffer from any interference? The Micro Extender is designed to withstand high levels of interference while driving signals over UTP. To further reduce the potential for interference, consider taking these actions: a) Make sure that the Micro Extender’s Remote Unit, the remote monitor or KVM switch, and the local CPU or KVM switch are all connected to the same...
-
Page 45: Calling Black Box
• If you are shipping the unit for repair, please include all parts of its external power supply. If you are returning the unit, please include everything you received with it. Before you ship it back to Black Box for repair or return, contact us to get a Return Authorization (RA) number. -
Page 46: Appendix: Cable Pinning/Pairing
RX, Pair 3 White/Brown TX, Pair 4 Brown/White RX, Pair 4 NOTES The Micro Extender has been tested with all major makes of CAT5 cable including Black Box, Berk-Tek ™ , Mohawk ® , and AT&T ® . The Extender has... - Page 47 NOTES...
- Page 48 NOTES...
- Page 49 NOTES...
Need help?
Do you have a question about the ACU3001A and is the answer not in the manual?
Questions and answers