Table of Contents
Advertisement
Quick Links
®
NETWORK SERVICES
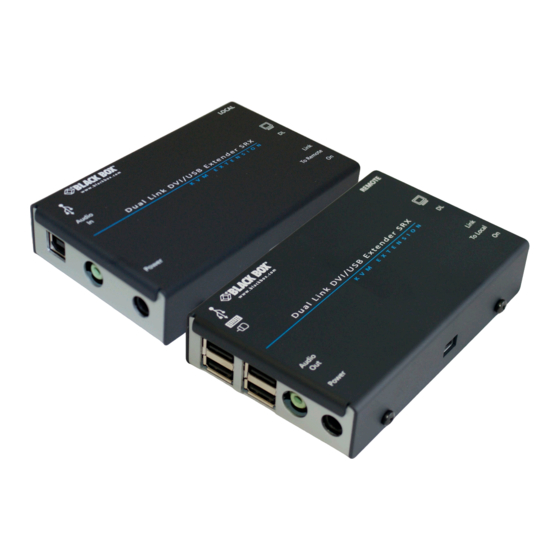
Dual Link DVI/USB Extender SRX
Extend DVI-D dual link video plus four USB devices
up to 165 feet (50m) from your computer.
Uses just one length of Category 6a or 7 twisted-pair cable.
Order toll-free in the U.S.: Call 877-877-BBOX (outside U.S. call 724-746-5500)
Customer
FREE technical support 24 hours a day, 7 days a week: Call 724-746-5500 or fax 724-746-0746
Support
www.blackbox.com • info@ blackbox.com
Information
®
™
ACU5520A
Advertisement
Table of Contents

Related Manuals for Black Box ACU5520A


Summary of Contents for Black Box ACU5520A
- Page 1 ® ® NETWORK SERVICES ACU5520A Dual Link DVI/USB Extender SRX ™ Extend DVI-D dual link video plus four USB devices up to 165 feet (50m) from your computer. Uses just one length of Category 6a or 7 twisted-pair cable. Order toll-free in the U.S.: Call 877-877-BBOX (outside U.S. call 724-746-5500)
- Page 2 Dual Link DVI/USB Extender SRX Trademarks Used in this Manual Black Box and the Double Diamond logo are registered trademarks, and ServSwitch is a trademark, of BB Technologies, Inc. Mac is a registered trademark of Apple Computer, Inc. Linux is registered trademark of Linus Torvalds.
- Page 3 FCC and IC RFI Statements Federal Communications Commission and Industry Canada Radio Frequency Interference Statements This equipment generates, uses, and can radiate radio-frequency energy, and if not installed and used properly, that is, in strict accordance with the manufacturer’s instructions, may cause inter ference to radio communication. It has been tested and found to comply with the limits for a Class A computing device in accordance with the specifications in Subpart B of Part 15 of FCC rules, which are designed to provide reasonable protection against such interference when the equipment is operated in a commercial environment.
- Page 4 Dual Link DVI/USB Extender SRX Instrucciones de Seguridad (Normas Oficiales Mexicanas Electrical Safety Statement) 1. Todas las instrucciones de seguridad y operación deberán ser leídas antes de que el aparato eléctrico sea operado. 2. Las instrucciones de seguridad y operación deberán ser guardadas para referencia futura. 3.
-
Page 5: Table Of Contents
Table of Contents Contents 1. Specifications ....................................6 2. Welcome ....................................7 3. Installation ....................................8 3.1 Mounting the modules – desk or rack..........................8 3.1.1 Desk mount ................................8 3.1.2 Rack mount ................................9 3.2 Connections ................................... 10 3.2.1 Connections at the local module ........................10 3.2.2 Connections at the remote module ........................ -
Page 6: Specifications
Dual Link DVI/USB Extender SRX 1. Specifications Approvals: CE, FCC Hardware Compatibility: All computers with DVI-D digital video and USB interfaces Software Compatibility: Operates with all known software and operating systems including Windows , Linux , Unix , BSD, all Sun OS, all Mac OS, NetWare , etc. -
Page 7: Welcome
2. Welcome Thank you for choosing the Black Box Dual Link DVI/USB Extender SRX units. These compact modules provide the quickest way to extend high quality dual link DVI digital video plus USB keyboard, mouse and stereo audio with an additional two USB periph- erals up to 165 feet (50 meters) away from your computer. -
Page 8: Installation
Dual Link DVI/USB Extender SRX 3. Installation 3.1 Mounting the modules – desk or rack The Dual Link DVI/USB Extender SRX modules can be situated on a desk or alternatively, for larger installations, mounted within an optional rack mount chassis. 3.1.1 Desk mount Apply the supplied self-adhesive rubber feet to the underside of the module as shown in Figure 3-1: Figure 3-1. -
Page 9: Rack Mount
Chapter 3: Installation 3.1.2 Rack mount Note: The module switches are not accessible once it is inserted into the rack, therefore, check all settings before insertion. 1 Place the rack securing plate (available as a separate kit) onto the front of the module and secure it with the two countersunk screws. -
Page 10: Connections
Dual Link DVI/USB Extender SRX 3.2 Connections Installation of the Dual Link DVI/USB Extender SRX modules is straightforward and requires minimal configuration in most cases. • Connections at the local module • Connections at the remote module Note: After all connections are made, power up the monitor connected to the remote module, then power up the remote mod- ule and finally switch on the computer connected to the local module. - Page 11 Chapter 3: Installation 3.2.1.2 USB connection 1 Use the supplied USB cable to link the USB socket of the local module to a vacant USB socket on the computer as shown in Figure 3-4: Figure 3-4. Attaching the USB link cable 3.2.1.3 Link connection 1 Connect the link cable (see page 2 for cable advice) to the local module socket labeled as shown in Figure 3-5:...
- Page 12 Dual Link DVI/USB Extender SRX 3.2.1.4 Audio connection Optionally link a audio input to the local module using a 3.5mm audio cable. Figure 3-6. Attaching an audio link to the local module 724-746-5500 | blackbox.com Page 12...
- Page 13 Chapter 3: Installation 3.2.1.5 Power connection 1 Connect the output lead of the supplied power adapter to the socket labeled ‘ ‘ on the local module as shown in Figure POWER 3-7: Figure 3-7. Attaching the power adapter connection to the local module 2 Insert the IEC connector of the separate power cord into the corresponding socket of the power adapter as shown in Figure 3-8: Note: Please pay close attention to...
-
Page 14: Connections At The Remote Module
Dual Link DVI/USB Extender SRX 3.2.2 Connections at the remote module 3.2.2.1 Video connections 1 Place the remote module adjacent to the user location. 2. Connect the DVI/D lead from the video monitor to the DVI output socket of the remote module as shown in Figure 3-9: Note: If dual link screen resolutions are required, the DVI-D cables used at both the local and remote modules must be dual link... - Page 15 Chapter 3: Installation 3.2.2.3 Link connections 1 Connect the link cable (see page 2 for cable advice) to the remote module socket labeled as shown in Figure 3-11: TO LOCAL Figure 3-11. Attaching the CATx link cable IMPORTANT: • This is NOT an Ethernet port and must not be connected to network switches or any device other than the remote module.
- Page 16 Dual Link DVI/USB Extender SRX 3.2.2.5 Power connection 1 Connect the output lead of the supplied power adapter to the socket labeled ‘ ‘ on the remote module as shown in POWER Figure 3-13: Figure 3-13. Attaching the power adapter connection 2 Insert the IEC connector of the separate power cord into the corresponding socket of the power adapter as shown in Figure 3-14: Note: Please pay close attention to...
-
Page 17: Operation
Chapter 4: Operation 4. Operation 4.1 General use In use, the Dual Link DVI/USB Extender SRX modules should be transparent - the system and its peripherals should operate exactly as normal, the only difference being that they are now up to 165 feet (50 meters) apart. 4.2 Video display (EDID) information Extended Display Identification Data (or EDID) is an industry standard scheme which allows video monitors to declare their capa- bilities to the computer’s video adapter circuitry, allowing the latter to optimize their outputs accordingly. -
Page 18: Power And Activity Indicators
Dual Link DVI/USB Extender SRX 4.4 Power and activity indicators Each module provides two indicators to confirm power status and also feedback about the various input signals: Local module Green: • On when power is present. Yellow: • On when a valid single link DVI video input signal is being received from the computer. -
Page 19: Appendix A. Troubleshooting
If you experience problems when installing or using the modules, please check through this section for a possible solution. If your problem is not listed here and you cannot resolve the issue, then please contact Black Box technical support. No video image is displayed on the remote monitor •... -
Page 20: Appendix B. Safety Information
Dual Link DVI/USB Extender SRX Appendix B. Safety Information • For use in dry, oil free indoor environments only. • Do not use to link between buildings. • Ensure that the twisted pair interconnect cable is installed in compliance with all applicable wiring regulations. •... - Page 21 About Black Box Black Box Network Services is your source for an extensive range of networking and infrastructure products. You’ll find everything from cabinets and racks and power and surge protection products to media converters and Ethernet switches all supported by free, live 24/7 Tech support available in 60 seconds or less.
Need help?
Do you have a question about the ACU5520A and is the answer not in the manual?
Questions and answers