Interquartz IQ750 Operating Instructions Manual
Caller id handsfree headset business
Hide thumbs
Also See for IQ750:
- Quick reference manual (2 pages) ,
- Operating instructions manual (45 pages)

Related Manuals for Interquartz IQ750


Summary of Contents for Interquartz IQ750
- Page 1 CALLER ID HANDSFREE HEADSET BUSINESS TELEPHONE MODEL IQ750 OPERATING INSTRUCTIONS...
-
Page 2: Table Of Contents
CONTENTS 1. FEATURES............... 5 2. SETTING UP ..............8 UNPACKING ............................. 8 GENERAL SETTING-UP ........................... 8 LINE CONNECTION ..........................8 DISPLAY BRIGHTNESS ADJUSTMENT ....................8 DATE AND TIME SET UP DISPLAY ......................9 BASIC OPERATION ..........................1 0 3. GENERAL CONTROLS AND INDICATORS ....11 RINGER/MESSAGE WAITING INDICATOR .................... - Page 3 6. MEMORY OPERATION ..........22 MEMORY STORAGE ..........................2 2 DIRECT ACCESS MEMORY KEYS ......................2 2 DIRECTORY MEMORY .......................... 2 6 LAST NUMBER REDIAL MEMORY ......................2 7 7. USING THE CALLER ID DISPLAY ........ 29 CALL WAITING DISPLAY ........................3 0 CALLER LIST ............................
- Page 4 ILLUSTRATIONS: FIGURE 1A DATE SETTING ............................9 FIGURE 1B HOUR MODE SETTING ........................... 9 FIGURE 1C AM/PM SETTING ........................... 10 FIGURE 1D TIME SETTING ............................10 FIGURE 2A: TOP VIEW ............................... 11 FIGURE 2B: BOTTOM VIEW ............................11 FIGURE 3A DISPLAY IN IDLE STATE ........................16 FIGURE 3B TYPICAL DISPLAY APPEARANCE WHEN SHOWING DETAILS OF A CALL .........
-
Page 5: Features
1. FEATURES "Headset Savvy" Features • Auto Detect circuitry disables Handsfree when Headset is in use • Mute Key for Headset microphone • Earpiece Volume Control • Built-in Headset Amplifier suits a wide range of Headset types • Headset Mic Adjustment allows any Headset mic type •... - Page 6 General Functions • Alpha-numeric keypad • Direct Redial allows immediate redialing of the last number without hanging up • Redial any of the last 5 dialed numbers • 20 Direct Access Memories, 10 One-Touch and 10 Two-Touch accessible via 10 keys;...
- Page 7 Operating Requirements • Any 2-wire analog line; if the IQ750’s Caller ID feature is required, please ensure that your line delivers the necessary Caller ID data • 240V mains outlet for 9V mains power adaptor (supplied) for full support of all functions •...
-
Page 8: Setting Up
2. SETTING UP UNPACKING The carton contains the following: • Telephone body and handpiece • Coiled Handset cord and line cord • 9V DC Adaptor • Quick Start-up Guide GENERAL SETTING-UP Fit the Coiled Cord to the appropriate sockets in the Handset and in the telephone base - please do not connect the coiled cord into the Headset jack Fit the Line Cord to the rear socket and to your telephone network outlet Set the Ringer Volume and the Ringer Pitch controls... -
Page 9: Date And Time Set Up Display
DATE AND TIME SET UP DISPLAY The best time to set up the Date and Time is during installation, as follows: Upon installation the display will automatically show step by step prompts to guide you through the Date and Time setup procedure. This procedure can also be used at any time to change the time and date settings. -
Page 10: Basic Operation
BASIC OPERATION IQ750 can be used in the same way as a normal telephone; simply lift the Handset to answer an incoming call, or lift the Handset and dial on the Keypad to commence an outgoing call. -
Page 11: General Controls And Indicators
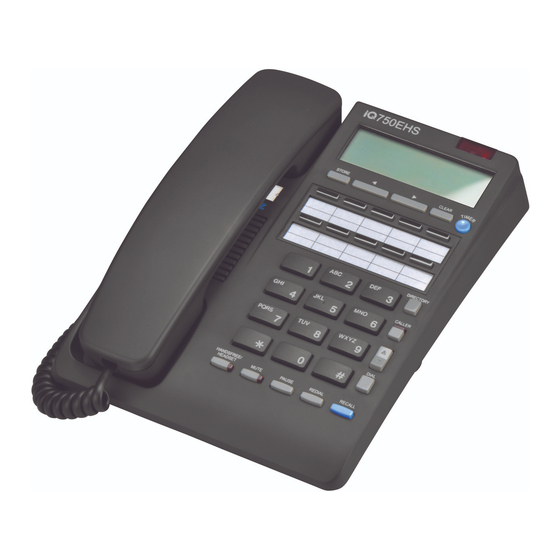
3. GENERAL CONTROLS AND INDICATORS DISPLAY STORE KEY RINGER/MESSAGE WAITING INDICATOR DIRECT ACCESS MEMORY KEYS CURSOR KEYS ( CLEAR KEY TIMER KEY RESET KEY MEMORY PROTECTION SWITCH DIRECTORY KEY CALLER KEY WITH NEW CALL INDICATOR AND CENTREX MESSAGE WAITING INDICATOR SCROLL KEY ( AND ) DIAL KEY... -
Page 12: Ringer/Message Waiting Indicator
If in doubt, contact Interquartz for further details. To retrieve your message, consult your voice mail system user guide. IQ750 is also fitted with a message waiting indicator lamp which is compatible with the voicemail features of Centrex networks (eg. Telstra Customnet) and residential line voicemail systems (eg. -
Page 13: Alpha-Numeric Keypad
ALPHA-NUMERIC KEYPAD In addition to normal dialling, the alphabetic characters are provided on the keys to enter names in the Direct Access and Directory memories as well as any online applications that require alphabetic keystrokes. RESET KEY Press to restore normal operation of the telephone in case of a malfunction or lock-up. The memories will not be erased when this key is pressed. -
Page 14: Redial Key
REDIAL KEY Press to redial the last number last dialed, which may be up to 32 digits long. When pressed while still on-line, the telephone will clear the call and retry the number. It can be used in Handset, Handsfree, and Headset modes. Dialing more than 32 digits during one call will cause erasure of the entire number from the Redial Memory. -
Page 15: Handsfree/Headset Key And Indicator
HANDSFREE/HEADSET KEY AND INDICATOR The HANDSFREE/HEADSET Key has an auto-detection function; which disables the Handsfree mode when a Headset is in use. When the HANDSFREE/HEADSET Key is pressed, a red indicator will glow to show that the Handsfree or Headset mode is activated. Press the key again to turn it off. -
Page 16: Battery Compartment
BATTERY COMPARTMENT As a precaution against the potential for an interruption of mains power to affect the progress of any ongoing call, 4 x AA alkaline batteries can be fitted to the compartment (they can provide up to one month’s support of all functions while mains power is absent). However, while mains power is present, battery power will not be consumed. - Page 17 (see “Message Waiting Light Compatibility” section) Indicates, when reviewing the Caller List, that the call was answered on the IQ750 Indicates, when reviewing the Caller List, that the call was NOT answered on...
-
Page 18: Handsfree Operation
4. HANDSFREE OPERATION To commence a Handsfree call press HANDSFREE/HEADSET; the telephone will activate the line, and the Speaker, and the Indicator will switch on to provide confirmation. Dialing and speech can then commence. Pressing the key again will terminate the call. The Handsfree state is storable in the Direct Access memory keys –... -
Page 19: Hints For Handsfree Operation
HINTS FOR HANDSFREE OPERATION As a courtesy, tell the other party that you are using the Handsfree function. He/She may or may not want people other than you to hear the conversation. A quiet environment ensures best Handsfree performance. When Handsfree is used in a noisy room or near a noise generating device (for example, a TV set), all or part of the message may be interrupted and cannot be heard. -
Page 20: Headset Operation
5. HEADSET OPERATION The IQ750 can be configured to suit many different headsets - please consult the INSTALLATION section for details to get the best performance from your headset. BASIC OPERATION To make or receive call using the Headset: Press HANDSFREE/HEADSET... -
Page 21: Alert Light Support
Press HANDSFREE/HEADSET to answer the call. ALERT LIGHT SUPPORT The IQ750 is designed to support the “Alert Light” available on some Headsets. When pressing HANDSFREE/HEADSET on the telephone, the “Alert light” indicator on the Headset will be illuminated, signifying that the user is on a call. This feature can be used effectively in call centre applications so that the user’s colleagues will be aware that the... -
Page 22: Memory Operation
CLEAR. DIRECT ACCESS MEMORY KEYS The IQ750 has 20 Direct Access speed-dial memories accessible via 10 keys near the DISPLAY (see Figure 2A). These keys each have five “One-Touch” memories and five “Two-Touch” memories. The One-Touch memories are accessed by pressing the key once briefly during the storage or retrieval procedures described in this manual. - Page 23 Direct Access Memory Capacity Each memory can store up to 32 digits plus Pause, Recall (Flash) and a Handsfree code. Speed-Dialling (Storable Handsfree code) When storing a number, you can add a “Handsfree” command to the start of the number. It appears as an “H”...
- Page 24 Before moving the switch to the “Non-Protected” position we recommend that you contact your system administrator, Interquartz or your dealer to discuss if they can be unlocked. Changing the switch setting may allow any pre-programming to be lost.
-
Page 25: Figure 4 Memory Protection Switch
To program or alter the contents of a protected Direct Access memory: Remove the memory card paper insert below the top row of Direct Access memory keys to reveal the MEMORY PROTECTION SWITCH Move the MEMORY PROTECTION SWITCH to the “Non-Protected” position as shown in Figure 4 Press STORE;... -
Page 26: Directory Memory
If your network does not send caller name information in conjunction with the caller’s number, the ability of the IQ750 to display the caller’s name during an incoming call will be dependent on the caller’s number matching a number already stored in the Directory Memory. -
Page 27: Last Number Redial Memory
To dial from the Directory Memory using Name Search Press DIRECTORY, the first entry in the directory will be displayed Enter the first Alpha Numeric character of the name you wish to dial Use Scroll to find the name Press DIAL to dial it out. To edit an entry in the Directory Memory Press DIRECTORY;... - Page 28 Using the 5-Stack Last Number Redial Memory To dial the most recently dialled number, press REDIAL. If you require an earlier number go to step 2, otherwise proceed to step 3 Press Scroll to select a number from the 5 redial memories. The most recently dialled number will be identified as “REDIAL 1”...
-
Page 29: Using The Caller Id Display
7. USING THE CALLER ID DISPLAY This section assumes that you are using the IQ750 in a network that is capable of supplying Caller ID data in the Bellcore GR-30-CORE format. In addition, you may need to request or subscribe to Caller ID and Call Waiting Services from your network provider before Caller ID data will be sent by the network. -
Page 30: Call Waiting Display
Directory Memory from the Caller List”. CALL WAITING DISPLAY The IQ750 can display the details of a current caller while you are already on a call. To enable the Call Waiting feature, you may need to request or subscribe the Call Waiting Service from your network provider. -
Page 31: Figure 5 Display Of A Typical Call From The Caller List
A typical call displayed from the Caller List is depicted in Figure 5. Date (month:day) of call, New of Repeat Call time of call (only one of these will be on) TIMER Entry Number in REPEAT CALL# the Caller List Caller’s number Caller’s name FIGURE 5 DISPLAY OF A TYPICAL CALL FROM THE CALLER LIST... - Page 32 Hour:Minute format for the clock readout and when reviewing the time that a call arrived in the Caller List (displays only in 12 hour mode) Indicates, when reviewing the Caller List, that the call was answered on the IQ750, Indicates, when reviewing the Caller List, that the call was NOT answered on the IQ750 To store a caller’s details in a Direct Access Memory from the Caller List...
- Page 33 To store a caller’s details in the Directory Memory from the Caller List Press CALLER; the most recent incoming caller’s name and number will be displayed Press Scroll to select the number you want to save into the Directory Memory Press STORE;...
-
Page 34: Advanced Network Operation
Message Waiting function in conjunction with Telstra’s Customnet, MessageBank and Home Messages 101 services The IQ750 has built-in compatibility with the above services. When the Message Waiting signal is received: the CALLER key will flash the display will show the words “Message Waiting” in the name field the display will show an envelope icon. -
Page 35: Pause Function When Dialing Out
To setup, model IQ750 accepts a one or two digit Trunk Access Code as follows: Press STORE Enter the TRUNK ACCESS DIGIT (example, 0 for Customnet) Press STORE Press “... -
Page 36: Pause Time
PAUSE TIME Sometimes the standard Pause time of 1 Second may be inappropriate, such as when a shorter Pause is needed to slow down a code stored in memory so that the telephone does not dial too quickly for the network. EXAMPLE: A particular network typically needs a short Pause in the Call Hold function code after “Recall”... -
Page 37: Holding And Transferring Calls
If two Pauses (i.e. 200 mSec) do not produce a long enough post-Recall pause for the network switch, try three pauses (300mSec) or four (400mSec) or more. The Pause time setting remains set until the user changes it - removal of power sources or line connection will not change the setting. -
Page 38: Installation
9. INSTALLATION GENERAL SETTING-UP Fit the Coiled Cord to the appropriate sockets in the Handset and the telephone base - please do not connect it to the Headset socket at the rear Fit the Line Cord to the rear socket and to your telephone network outlet Set the Ringer Volume and the Ringer Pitch controls See following sections to complete the installation If using a Headset, connect it to the Headset jack shown in Figure 9. -
Page 39: Figure 6A : Wall Mounting
Notes: 1. See Figure 8 for details of IQ235 Wall Mount Bracket 2. The IQ235 WALL MOUNT BRACKET, 7626 MODULAR WALL JACK and LINK CORD illustrated in Figure 6B are available from your authorized Interquartz dealer and can be ordered as Wall Mount Kit No.3. -
Page 40: Figure 7: Iq235 Wall Mount Bracket - Break-Off Lugs
This wall bracket may be secured onto the wall by using mounting holes “B” and “D” Lugs to break off before wall mounting the phone. BREAK OFF LUGS TELEPHONE MODELS IQ 90 IQ750 IQ 150 IQTEL 80 IQ 250 IQTEL 300 IQ 260 IQTEL 500 "B"... -
Page 41: Technical Adjustments - For Correct Operation
If the light does not function correctly, your IQ750 may need an optional circuit to be added to make it compatible with your system. If you have a Centrex system (eg. Spectrum) the Caller key indicator and the “Mail”... -
Page 42: To Make A Headset Mic Level Adjustment
TO MAKE A HEADSET MIC LEVEL ADJUSTMENT With the Headset connected as per the instructions in this manual: Put the Headset on and lift the Handset to your other ear and make an outgoing call Pressing the HANDSFREE/HEADSET Key, swap between Handset and Headset modes (the indicator will illuminate when the Headset is in use). -
Page 43: Headset Polarity Switch
HEADSET POLARITY SWITCH Located on the underside of the telephone (see Figure 8), this switch provides compatibility with the two commonly-used headset wiring standards. Position “V” suits Plantronics Vista Cords and other Headsets wired in the same configuration (also known as “reversed” wiring mode). Position “P”... - Page 44 TABLE 1...
-
Page 45: General Care And Maintenance
“suspect” telephone. Test the “suspect” telephone on a known good line. If the fault still occurs, the fault is in the “suspect” telephone. Consult your Interquartz dealer for further advice if necessary. -
Page 46: Thunderstorms
SIX YEARS from the date of purchase. Interquartz reserves the right to require proof of purchase and proof of date of purchase to determine validity of this warranty. This warranty does not... -
Page 47: Service And Product Services
13. SERVICE AND PRODUCT SERVICES Please call 1800 6 IQTEL (1800 647 835) or email enquiries@interquartz.com.au from anywhere in Australia. - Page 48 Manufactured by International Quartz Limited A Subsidiary of Chiaphua Industries Ltd. ©Copyright INTERNATIONAL QUARTZ LTD. 2004...
Need help?
Do you have a question about the IQ750 and is the answer not in the manual?
Questions and answers