
Related Manuals for INSTEON In-LineLinc 2475DA1


Summary of Contents for INSTEON In-LineLinc 2475DA1
- Page 1 In-LineLinc™ Dimmer ® INSTEON In-LineLinc Dimmer, Dual-Band Owner’s Manual (#2475DA1) Page 1 of 14 2475DA1 - Rev: 1/21/2014 7:52 AM...
-
Page 2: Table Of Contents
Local On-Level ............................6 Beeper Behavior ............................7 Setting Up an INSTEON Scene ........................7 Adding In-LineLinc Dimmer to a Scene as an INSTEON Responder ............7 Removing In-LineLinc Dimmer from a Scene as an INSTEON Responder ..........7 Advanced Features ............................. 7 Using In-LineLinc Dimmer as a Phase Bridge................... -
Page 3: In-Linelinc Dimmer Dual-Band
In-LineLinc Dimmer eliminates the need for a conventional light switch, reducing the “switch sprawl” common to automation projects. You can also use In-LineLinc Dimmer for INSTEON signal repeating and phase bridging (like an Access Point, #2443). In-LineLinc Dimmer supports voltages from 100-277V, 50/60Hz and loads up to 400W, making it the perfect energy-saving, wireless controller. -
Page 4: Installation
IMPORTANT! If you are not knowledgeable about and/or and comfortable with, electrical circuitry, you should have a qualified electrician install In-LineLinc Dimmer for you. If you have any questions, please consult an electrician or call the INSTEON Support Line at 800-762-7845. -
Page 5: Installing In-Linelinc Dimmer
13) Reinstall the fixture. 14) Turn on breaker(s). Wiring Diagram NOTE: Home’s wire colors and locations may vary Page 5 of 14 2475DA1 - Rev: 1/21/2014 7:52 AM... -
Page 6: Using In-Linelinc Dimmer
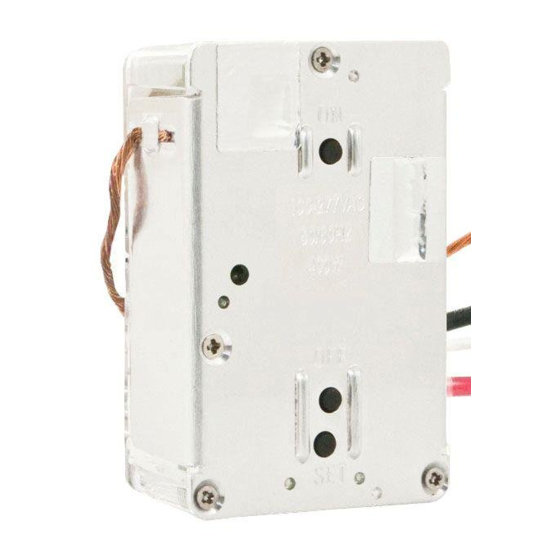
Unit is in linking mode Blinking Unit is in unlinking mode Fast blinking and optional Dimmer is off and INSTEON traffic received blink-on-traffic is turned on Fast blinking green and optional Dimmer is on and INSTEON traffic received blink-on-traffic is turned on Using the ON and OFF Buttons The small button switches allows you to test the load and functions prior to final installation. -
Page 7: Beeper Behavior
Setting Up an INSTEON Scene INSTEON remote control is done using scenes. Scenes allow you to instantly activate favorite lighting and appliance settings at the touch of a button (or in response to a command from a central controller or sensor). -
Page 8: Power Restoration
Instructions on setting X10 primary address and scene addresses can be found online at http://www.smarthome.com/insteon-x10-programming.html. Factory Reset Factory Reset clears all user settings from In-LineLinc Dimmer including INSTEON Scenes, On-Levels, Ramp Rates, X10 addresses, etc. Option 1 1) If possible, remove all scene memberships prior to performing the factory reset. -
Page 9: Local Ramp Rate
4) If your double-tap was not fast enough, you may have accidentally changed the local on-level instead of the local ramp rate. (Note: software such as HouseLinc allows you to remotely set on-levels and ramp rates exactly as desired and consistently around the house.) Page 9 of 14 2475DA1 - Rev: 1/21/2014 7:52 AM... -
Page 10: Specifications
400 (combined controller and responder) Scene commands supported Fast on Fast off as responder Brighten Software configurable Yes, always RF range 100-Feet open air X10 support X10 addresses 1 max, unassigned by default Page 10 of 14 2475DA1 - Rev: 1/21/2014 7:52 AM... - Page 11 Operating humidity range 0-90% relative humidity, non-condensing Storage conditions 4F to +158F (-20 – 70 degrees Celsius) Electrical Voltage 100 to 277VAC (+/- 10%) Frequency 50/60Hz Auto Detected at power-up Page 11 of 14 2475DA1 - Rev: 1/21/2014 7:52 AM...
- Page 12 Wired-in incandescent lighting Retains all settings without Yes, all saved in Non-volatile EEPROM power Standby power consumption < 1 watt Safety approved ETL (Intertek Testing Services) Certifications FCC, IC Canada Page 12 of 14 2475DA1 - Rev: 1/21/2014 7:52 AM...
-
Page 13: Troubleshooting
If you have tried these solutions, reviewed this manual and still cannot resolve an issue you are having with In-LineLinc Dimmer, please call the INSTEON Support Line at 800-762-7845. Page 13 of 14 2475DA1 - Rev: 1/21/2014 7:52 AM... -
Page 14: Certification And Warranty
The repair, replacement, or refund that is provided for above shall be the full extent of Seller’s liability with respect to this product. For repair or replacement during the warranty period, call the INSTEON Gold Support Line at 800-762-7845 with the Model # and Revision # of the device to receive...
Need help?
Do you have a question about the In-LineLinc 2475DA1 and is the answer not in the manual?
Questions and answers