Advertisement
Quick-Start Guide
LAMP DIMMER
For Models:
LampLinc
LampLinc
Your new INSTEON
Lamp Dimmer allows you to dim and remotely control any
TM
lamp in your home at the touch of a button.
N N e e e e d d H H e e l l p p ? ? F F o o r r a a s s s s i i s s t t a a n n c c e e c c a a l l l l y y o o u u r r f f r r i i e e n n d d l l y y I I N N S S T T E E O O N N
s s u u p p p p o o r r t t p p e e r r s s o o n n @ @ 8 8 0 0 0 0 -S S M M A A R R T T H H O O M M E E ( ( 8 8 0 0 0 0 -7 7 6 6 2 2 -7 7 8 8 4 4 6 6 ) )
Installing Your Lamp Dimmer
S S t t e e p p 1 1 . .
Two Signal Enhancers (SignaLinc
S S t t e e p p 2 2 . .
Plug your lamp into the outlet at the bottom of the Lamp Dimmer (labeled "Controlled").
S S t t e e p p 3 3 . .
Plug your Lamp Dimmer into an unswitched wall outlet.
S S t t e e p p 4 4 . .
If lamp is off, turn it on.
S S t t e e p p 5 5 . .
Select the INSTEON Controller you would like to use and set it to Linking Mode. Refer to your INSTEON
Controller's User's Guide for detailed instructions.
NOTE: The following will work for most INSTEON Controllers.
• On the INSTEON Controller, choose the ON/OFF Button Pair you want to use for controlling your Lamp
Dimmer.
• Set the INSTEON Controller to Linking Mode by pressing and holding the ON Button of the pair for 10
seconds.
S S t t e e p p 6 6 . .
Press and hold the black Set Button on the Lamp Dimmer for 3 seconds. The lamp you are controlling will
blink to confirm linking. Depending on the INSTEON Controller, you have about 4 minutes to perform this
step before setup mode times out automatically.
Congratulations! You can now dim and remotely control your lamp.
Smarthome Limited Warranty
Smarthome warrants to the original consumer of this product that, for a period of two years from the date of purchase, this product will be free from defects in material and workmanship and will
perform in substantial conformity to the description of the product in the owner's manual. This warranty shall not apply to defects or errors caused by misuse or neglect.
© Copyright 2005 Smarthome, 16542 Millikan Ave., Irvine, CA 92606-5 5 027
800.SMART.HOME - 949.221.9200 - www.smarthome.com
V2 2-pin (#2456D2)
TM
V2 3-pin (#2456D3) -
TM
RF #2442) must be installed if your home does not already have them.
TM
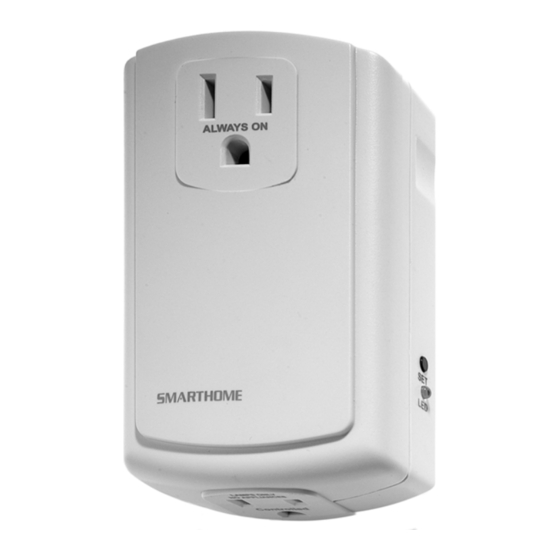
Pass-through
pictured
Outlet
Controlled
Outlet
HINTS
• Do not use an outlet controlled by
a switch
• Be sure to leave the lamp's local
switch in the on position
• Use to control incandescent
bulbs only.
Set Button
Status LED
Advertisement
Table of Contents

Subscribe to Our Youtube Channel
Summary of Contents for INSTEON LampLinc V2 2-pin 2456D2
- Page 1 • On the INSTEON Controller, choose the ON/OFF Button Pair you want to use for controlling your Lamp Dimmer. • Set the INSTEON Controller to Linking Mode by pressing and holding the ON Button of the pair for 10 seconds.
- Page 2 Setting the On-Level The On-Level is the brightness that the lamp you are controlling will go to when you turn it on using an INSTEON Controller. The On- Level is adjustable from OFF to 100% brightness. The default is 100%.


Need help?
Do you have a question about the LampLinc V2 2-pin 2456D2 and is the answer not in the manual?
Questions and answers