Table of Contents
Advertisement
WARNING
Improper installation, adjustment,
alteration, service or maintenance
can cause injury or property
damage.
Read the assembly, operation
and maintenance instructions
thoroughly before assembling
or servicing this equipment.
DANGER
Failure to follow these
instructions could result in fire
or explosion that could cause
property damage, personal
injury or death.
DANGER
DO NOT use gas grill for indoor
cooking or heating. TOXIC fumes
can accumulate and cause
asphyxiation. DO NOT use in or
on boats or recreational vehicles.
PROP 65 WARNING
Chemicals known to the state of
California to cause cancer, birth
defects or other reproductive
harm are created by the
combustion of liquid propane
gas
.
WARNING
FOR YOUR SAFETY:
For Outdoor Use Only.
(outside any enclosure)
GST1811
Owner's Manual
Tabletop Gas Grill
SAVE THESE INSTRUCTIONS FOR FUTURE
REFERENCE. IF YOU ARE ASSEMBLING THIS UNIT
FOR SOMEONE ELSE, GIVE THIS MANUAL TO HIM
OR HER TO SAVE FOR FUTURE REFERENCE.
FOR CUSTOMER SERVICE, EMAIL TO
SERVICE@PYROMAGICBBQ.COM
CALL 1-877-885-8227 (TOLL-FREE),
6 A.M. – 5 P.M.(PST),MONDAY-FRIDAY.
ITEM # 6860
OR
Printed in China
Advertisement
Table of Contents

Related Manuals for Perfect Flame 6860


Summary of Contents for Perfect Flame 6860
- Page 1 ITEM # 6860 Tabletop Gas Grill WARNING Improper installation, adjustment, alteration, service or maintenance can cause injury or property damage. Read the assembly, operation and maintenance instructions thoroughly before assembling or servicing this equipment. DANGER Failure to follow these instructions could result in fire...
- Page 2 Grill Operation Quick Reference Before Grilling, Step 1 Keep your grill a safe distance away from your property.* Step 2 Always Perform a Leak Test on all connections and hoses.* Step 3 Keep children away from the grill. During Grilling, (To avoid tripping safety valves, please follow these instructions carefully!) Step 1 First open lid and turn gas valve on slowly.
-
Page 3: Table Of Contents
Table of Contents For Your Safety ....................3 Illustrated Part List ....................4 Assembly Instructions ..................5 Operating Your Grill Propane Tank Connection ........9 Checking for Leaks ..........10 Lighting Your Grill ..........10 Excess Flow Safety Valve Reset Procedure ……11 Care and Maintenance ........11 Award-Winning Barbecue Recipes ..............12 Troubleshooting ....................13 Warranty Program ....................14... -
Page 4: For Your Safety
CAUTION-Prevention of Burns To avoid burns, do not touch metal parts of the grill until they have completely cooled for at least 45 minutes or unless you are wearing protective gear such as pot holders, gloves, BBQ mittens, etc. Always open the grill lid carefully and slowly as heat and steam trapped within the grill could cause severe burns. Clean and inspect the grill each use. -
Page 5: Illustrated Part List
Illustrated Parts List 1. Grill Body Assembly..1pc 2.Lid Wing……...…...1pc 3. Heat Plate………...1pc 4. Cooking Grid…..…...1pc 5. Warming Grid…..…...1pc 6.Grease Pan…………..1pc 7. Regulator……....1pc Hardware List Hardware listed above is not scaled to exact size All hardware is pre-attached on the unit. 2pcs Bolt M4 x10mm 2pcs... -
Page 6: Assembly Instructions
Assembly Instructions For Best Results Remove all contents from packaging, and make sure all parts are present before attempting to assemble! Tighten all bolt connections by hand first, then when the grill is fully assembled, go back and tighten with a screwdriver. - Page 7 Step 3 Put heat plate (3) inside the grill body upon the burner. Step 4 Put cooking grid (3) inside the grill body upon the burner. GST1811 Owner’s Manual...
- Page 8 Step5 Insert the hooks of the warming grid (5) into the pre-drilled holes in the lid and grill body Step 6 Slide the grease pan (6) onto the track located under the grill body as shown. GST1811 Owner’s Manual...
- Page 9 Step 6 Screw the regulator valve (7) into the burner . Step 7 Turn the control dial to the ‘’LOCK OFF’’ position. Connect propane cylinder with regulator inlet fitting by turning as shown. GST1811 Owner’s Manual...
-
Page 10: Operating Your Grill Propane Tank Connection
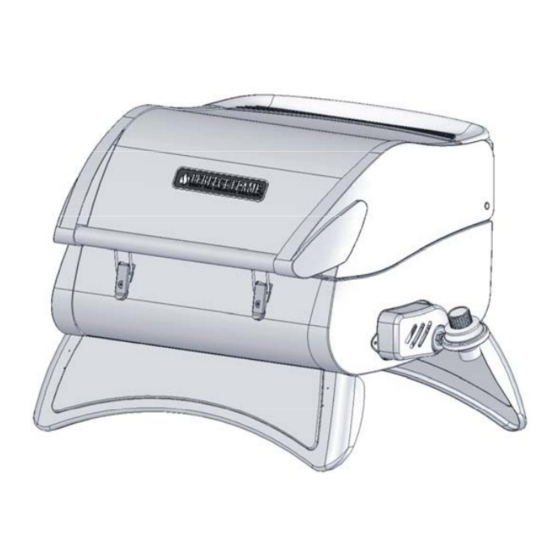
Fully Assembled View Operating the Grill USE ONLY THE REGULATOR PROVIDED! If a replacement is necessary, please call our customer service center. The use of unauthorized parts can create an unsafe conditions and environment. Connecting gas cylinder: The propane-gas supply cylinder to be used must be constructed and marked in accordance with the Specifications for LP-gas Cylinders of the U.S. -
Page 11: Checking For Leaks
Checking for Leaks Make a 2-3 oz. of leak solution by mixing one part liquid dishwashing soap with three parts water. Make sure control knob is in the “OFF” position. Spray some solution on the tank valve up to the regulator connection. Inspect the solution at the connections, looking for bubbles. -
Page 12: Excess Flow Safety Valve Reset Procedure
Excess flow safety valve reset procedure • The new regulators are equipped with a safety device that restricts the gas flow in the event of a gas leak. However, unsafe practices of grill operation could activate the safety device without having a gas leak. •... -
Page 13: Award-Winning Barbecue Recipes
Award Winning Barbecue Recipes Hardcore Grilled Trout Never-fail Barbecue Sauce Ingredients: Ingredients: ¼ cup Lemon or lime juice ¼ cup Finely chopped onion 2 tablespoons Melted butter 2 tablespoons Butter or margarine 2 tablespoons Vegetable oil ¼ cup Brown sugar, firmly packed 2 tablespoons Chopped parsley 1 tablespoon... -
Page 14: Troubleshooting
Troubleshooting Problem Possible Cause Prevention/Cure Burner will not light using a match No gas flow Check if propane tank is empty. If empty, replace. If propane tank is not empty, refer to Excessive flow safety valve reset procedure. Obstruction of gas flow Clear burner tube. -
Page 15: Warranty Program
Warranty Program Proof of purchase is required to access this warranty program, which is in effect from the date of purchase. Inability to provide proof of purchase or after the warranty has expired, customers will be subject to parts, shipping and handling fees. Product Registration is required to receive full warranty coverage, which is in effect from the date of purchase.
Need help?
Do you have a question about the 6860 and is the answer not in the manual?
Questions and answers