
Related Manuals for StarTech.com SV565UTPUL


Summary of Contents for StarTech.com SV565UTPUL
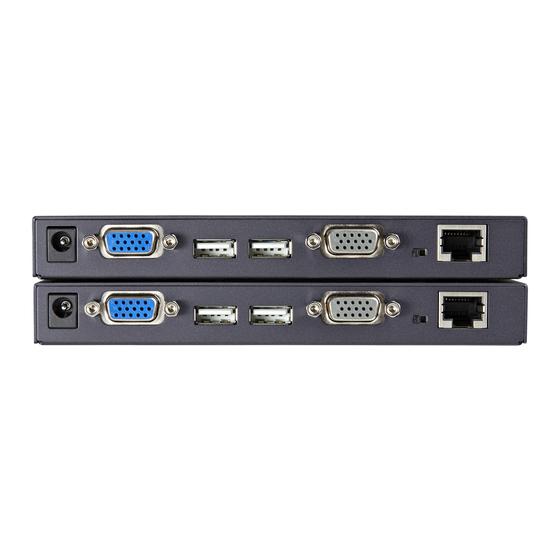
- Page 1 USB/VGA Cat 5 UTP Long Range Console Extender SV565UTPUL Instruction Manual *actual product may vary from photos...
- Page 2 StarTech.com. Where they occur these references are for illustrative purposes only and do not represent an endorsement of a product or service by StarTech.com, or an en- dorsement of the product(s) to which this manual applies by the third-party company in question.
-
Page 3: Table Of Contents
Using the KVM Extender ..........8 Using the Host Unit ..............8 Using the Remote Unit ..............12 Alternative Hot-Key Control............14 Specifications ..............15 RJ-45 Connector Pinout ............15 Accessory Products from StarTech.com ...... 16 Technical Support ............17 Warranty Information ............17... -
Page 4: Introduction
• USB computers are supported at the host and remote locations (USB keyboard and mouse required for remote console) System Requirements • 1 x StarTech.com integrated KVM cable for each, the host (included) and remote (optional) computer connections. If necessary, longer cables are available, StarTech.com ID: SVECONx (PS/2), SVECONUSx (USB) •... -
Page 5: Package Contents
Instruction Manual cannot exceed 984 feet (300 meters), including patch cables (if used). Category 5e and 6 cabling is compatible with this product and may improve performance. NOTE: Long cable lengths between the Host and Remote Units may adversely affect image quality at high resolutions and refresh rates. If you need to run your remote displays at high resolutions and frequencies, use as little cabling between locations as possible and avoid practices such as “coiling”... -
Page 6: Connecting Your Kvm Extender
Instruction Manual Connecting Your KVM Extender Preparing Your Site Before you can install the product, you need to prepare your site. 1. Determine where the Host computer will be located and set up the computer. 2. Determine where the console devices (mouse, keyboard, monitor) will be located and place them appropriately. -
Page 7: Installing The Host Unit
1. Place the Host Unit near the Host computer system. 2. Switch off the computer and disconnect any connected devices. 3. Using the provided StarTech.com integrated KVM cable (see page 16 for alternative part numbers), connect the end of the cable that has two... -
Page 8: Installing The Remote Unit
OPTIONAL: If connecting a computer system directly to the Remote Unit, switch off the computer and disconnect any existing VGA and input connections. Using a StarTech.com integrated KVM cable (see page 16 for part numbers), connect the end of the cable that has two (USB) or three (PS/2) connectors to the VGA Out connector and the USB or mouse and keyboard PS/2 connectors on the computer as appropriate. -
Page 9: Video Calibration (Remote Unit Only)
Instruction Manual Video Calibration (Remote Unit only) Video Calibration allows the user to adjust the equalization, gain and RGB skew on the Remote Unit to optimize video performance based on the length of the UTP cable being used, as well as other factors that may affect the signal. - Page 10 Instruction Manual To enter Video Calibration Mode: left [CTRL] - left [CTRL] - [F11] To enter Video Calibration Mode while in Compatibility Mode: left [CTRL] - left [CTRL] - [E] - [F11] When in Video Calibration mode, the Num Lock and Scroll Lock LEDs on the keyboard will flash simultaneously.
-
Page 11: Using The Kvm Extender
Instruction Manual Using the KVM Extender This section details how to use your KVM extender at both the host and remote locations. Using the Host Unit The Host Unit allows users connected to the Host and Remote units to share control of devices (hosts, computers, KVM Switches) connected to The Host Unit has three modes that control which user may access the system at a given time: Auto (the KVM extender looks for keyboard or mouse activity from both A and B and automatically accepts input from... - Page 12 Instruction Manual Keyboard Shortcut Command Sequences With Compatibility Standard Command Description Mode Enabled Toggles control of Computer [Ctrl] - [Ctrl] - [T] [Ctrl] - [Ctrl] - [T] A between Auto, Local, and Remote modes [Ctrl] - [Ctrl] - [Esc] [Ctrl] - [Ctrl] - [Esc] Cancels the hotkey sequence Enables (2 beeps) or disables (1 beep) Compatibility Mode...
- Page 13 Instruction Manual With Compatibility Standard Command Description Mode Enabled Privacy Setting: A. Host Unit in Local mode ( LED B: Off, LED A: On) 1 beep: Reset to Factory Default. 2/3 beeps: Disable the Local Unit output video signal. B. Host Unit in Auto mode ( LED A&B flashes alternately) 1 beep: Reset to Factory [Ctrl] - [Ctrl] - [F6]...
-
Page 14: Beep Codes
Instruction Manual Beep Codes Some of the keyboard command sequences you issue to the Host Unit have multiple possible settings. The unit will beep to indicate what setting you have selected for the command you issued. (A short beep followed by a long beep indicates an invalid command.) [Ctrl] - [Ctrl] - [Alt]+[E] (Compatibility Mode) 1 beep: disabled... -
Page 15: Using The Remote Unit
Instruction Manual Using the Remote Unit The Remote Unit allows a user at the Remote Unit to assume control of devices connected to the Host Unit, if the Host Unit is set to Auto or Remote mode, and it also permits the user seated at the Remote Unit to use any connected system as though the KVM Extender was transparent. - Page 16 Instruction Manual With Compatibility Standard Command Description Mode Enabled Toggles console control [Ctrl] - [Ctrl] - [F2] [Ctrl] - [Ctrl] - [E] - [F2] between Computer A and Computer B Set the maximum video resolution (requires computer [Ctrl] - [Ctrl] - [V] - 4 [Ctrl] - [Ctrl] - [V] - 4 restart) for both Remote and digit code...
-
Page 17: Alternative Hot-Key Control
Instruction Manual Alternative Hot-Key Control Instead of using the keyboard leading hot-key sequence, [Ctrl] - [Ctrl], the “Selection” button on the Host or Remote units can be used. These commands can be used regardless if the “Mask Hotkey” feature is enabled. -
Page 18: Specifications
Instruction Manual Specifications Maximum Resolution 1600x1200/1920x1200 (at maximum UTP cable length) Maximum Range 948 feet (300 meters) Network Cabling Straight-through Unshielded Twisted Pair (UTP) Type Cat. 5/5e/6 Each, Host and Remote Unit 1 x DE-15 VGA female 1 x DE-15 “Computer” female Connectors 1 x RJ-45 Ethernet female 2 x USB type A female (for keyboard/mouse only) -
Page 19: Accessory Products From Startech.com
Instruction Manual Accessory Products from StarTech.com Contact your local StarTech.com dealer or visit www.startech.com for cables or other accessories that will help you get the best performance out of your new product. R45PATCH35 35 ft Blue Snagless Category 5e (350 MHz) UTP Patch Cable... -
Page 20: Technical Support
Limitation of Liability In no event shall the liability of StarTech.com Ltd. and StarTech.com USA LLP (or their officers, directors, employees or agents) for any damages (whether direct or indirect, special, punitive, incidental, consequential, or... - Page 21 StarTech.com has been making “hard-to-find easy” since 1985, providing high quality solutions to a diverse IT and A/V customer base that spans many channels, including government, education and industrial facilities to name just a few. We offer an unmatched selection of computer parts, cables, A/V products, KVM and Serv-...
Need help?
Do you have a question about the SV565UTPUL and is the answer not in the manual?
Questions and answers