
Related Manuals for Defender DFDVR2


Summary of Contents for Defender DFDVR2
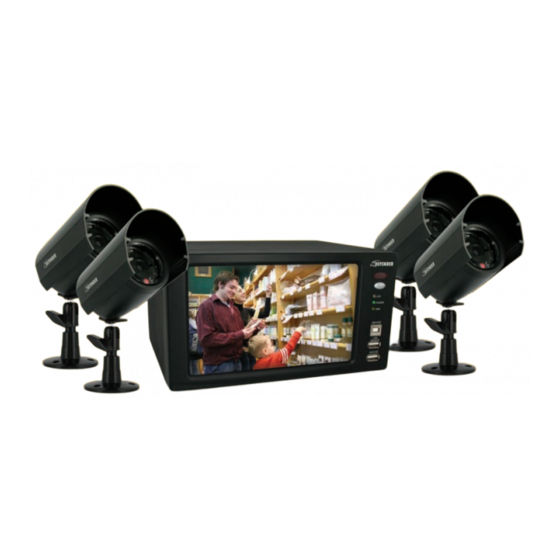
- Page 1 Internet Accessible DVR System Internet Accessible DVR System w/ Four Hi-Res Outdoor Night Vision Cameras INSTRUCTION MANUAL Model# www.defender-usa.com DFDVR2...
- Page 2 Warranty Terms 1. Defender products are guaranteed for a period of one year from the date of purchase against defects in workmanship and materials. This warranty is limited to the repair, replacement or refund of the purchase price at Defender’s option.
-
Page 3: Table Of Contents
• 4 power Adapters for Cameras • Quick Start Guide • Mounting Hardware • 1 Year Warranty 1 DVR 4 Outdoor Night PS/2 Mouse Remote • Instruction Manual • 4 Window Warning Stickers (320GB HDD) Vision Cameras • Online/Toll Free Tech Support DFDVR2... - Page 4 • Keep the DVR in a well-ventilated place and away from any heat-generating objects. • Do not block the DVR’s fan and vent. • Do not expose this unit to the direct sunlight. • If you are not sure of the installation and setup, please consult a qualified installer. DFDVR2...
-
Page 5: Dvr, Camera & Remote Functions
19. CDS Sensor......... Turns on the infrared LEDs when it gets dark. 20. Camera Housing......Made of anodized aluminum to prevent rust. 21. Camera Mount ......Allows the camera to be desk or wall mountable. 22. Connection to Extension Wire ..Converts to RCA. DFDVR2... - Page 6 14. P/T ...... Enters Pan/Tilt/Zoom (PTZ) mode. 15. ZOOM ....Zooms in on the picture. Use the arrow buttons to move to the area you want enlarged. 16. ESC ....Exits to the previous menu; exits the main menu. DFDVR2...
-
Page 7: Section 2: Installation
3. Plug the camera’s power adapter into an AC outlet. 4. Attach the BNC to RCA connectors to the camera inputs and the monitor outputs on the back of the DVR. 5. Connect the extension wire’s male RCA plug to CAMERA IN port for channels 1~4. DFDVR2... -
Page 8: 2-2: External Tv/Monitor Installation
MOTION or ALARM recording is triggered. 2-3: MOUSE INSTALLATION 1. For USB mice, plug the mouse into the USB MOUSE port on the DVR. 2. For PS/2 mice, plug the mouse into the PS/2 MOUSE PORT on the back of the DVR. DFDVR2... -
Page 9: 2-4: Powering On
2. DO NOT change the date and time after the recording starts. It may corrupt the DVR’s data archive and cause playback errors. If it is necessary to change date and time after the recording starts, please repeat step 1 to avoid errors. DFDVR2... -
Page 10: Section 3: Operation
(motion, scheduled or alarm); WHITE means that the DVR is not recording. 9. Menu Functions - MENU: Enter setup menu PIP: Picture In Picture ZOOM: Zoom in (200%) SEQUENCE: Automatically cycles through each camera in sequence SEARCH: Opens the playback search window ► PLAY: Quick playback mode DFDVR2... -
Page 11: 3-2: Mouse Control
1. Left click on the number icon to switch to the corresponding channel for its full screen view. 2. Left click the Quad icon to switch to Quad view. 3-4: PIP VIEW 1. In full screen mode, left click “PIP” to enter Picture-in-Picture mode. 2. Left click “PIP” again to cancel. DFDVR2... -
Page 12: 3-5: Zoom View
• The camera sequence order is, A > B > C > D …A > B … • The sequence time is fully adjustable in the system setup menu. Please see [SYSTEM MENU] ► [CONFIGURATION] ► [INTERVAL SETUP] for details and adjustments. DFDVR2... -
Page 13: 3-7: Open Setup Menu
Motion record: The DVR records when motion is detected. Continuous record: The DVR records continuously. • If the power is interrupted unexpectedly, the DVR will automatically resume its recording schedule after the power is restored. For record mode setup, please refer to Section 4-3: RECORD SETUP. DFDVR2... -
Page 14: 3-9: Playback
4. Installing a new HDD without formatting it or setting it to factory defaults. 5. When the Overwrite function is OFF and the HDD is full. 6. When updating firmware. 7. When in the HDD management screen of the system menu. 3-9: PLAYBACK DFDVR2... - Page 15 PERCENT, TIME/DATE and EVENT. PERCENT SEARCH - Allows you to search by specifying a recording percentage. TIME/DATE SEARCH - Allows search by specifying a time and date EVENT SEARCH - Allows you to search by the event list. DFDVR2...
- Page 16 3. EVENT - shows the type of events: Motion detection (MOT), Image Loss (LOS), Alarm trigger (ALM). The DVR stores up to 1000 events in its EVENT LIST. By using the left button on the mouse you can select events and also change event pages. DFDVR2...
- Page 17 Adjust the speed by using the SLOW-Motion keys (Slow playback in backward or in forward direction). Press the keys repeatedly to adjust the speed rate. Playback frame by frame by using the STEP keys (Step playback in backward or in forward direction). DFDVR2...
-
Page 18: Section 4: Setup
It is strongly recommended that you create a password after the initial setup. Please keep a record of your password. Rebooting the DVR and resetting the factory defaults will not reset the password to the default. If you forget the password, please contact DEFENDER for support. 4-1-2: SYSTEM MENU 1. -
Page 19: 4-2: Display Setup
2. BOTTOM OSD OFFSET - Adjusts the position of the bottom OSD. 4-3: RECORD SETUP 1. RECORD SETUP - This sets the recording mode, resolution, picture quality, and recording frame rate. 2. SCHEDULE SETUP - This programs the recording schedule. DFDVR2... - Page 20 3. ALL - By clicking on the times at the top, all blocks for the time can be activated or deactivated for the whole week. 4. 0~24 Hour - To activate or cancel the hours in a week which are scheduled. 5. SUN~SAT - To activate or cancel the hours scheduled in a day. DFDVR2...
-
Page 21: 4-4: Configuration
• FORMAT HDD: Format the HDD to factory specifications. Warning: Formatting the HDD will erase all of your recorded footage. If you decide to install a different HDD, it is necessary to format it before you begin recording. DFDVR2... - Page 22 Click the left mouse button to extend or retract the zone WITHOUT motion detection, and click the right mouse button to extend or retract the zone WITH motion detection. DFDVR2...
- Page 23 It is very important that you set up the system’s date and time before the DVR starts recording. Set the date and time by using the mouse wheel. DATE FORMAT - Asia/American/European TIME FORMAT - 12 hours/24 hours MONTH FORMAT - English/Numeric DFDVR2...
-
Page 24: 4-5: External Device
4. CONFIRM PW - Enter the new password again for confirmation. Note: Always write down your password and keep it in a safe location. If you lose your password, contact DEFENDER for support. 4-4-8: BUZZER SETUP 1. KEY TONE - Turns the beeps on or off while operating the DVR. - Page 25 6. IP ADDRESS - Indicates the current IP address recorded in the server. 7. IP PORT - Indicates the current IP port recorded in the server. 8. REMAIN TIME - Indicates the remaining time to report to the server. 9. LAST REGISTRATION DATE - Indicate the time of the last registration. DFDVR2...
- Page 26 2, Channel 1 pops up again. Setting the duration to a shorter time will make the channel pop ups more immediate. Setting the duration to a longer time may make it easier to see what is happening on each camera. DFDVR2...
-
Page 27: 4-6: Backup
AJP format. You will need to install the program “BACKUP PLAYER” to play the backup files on your computer. From this software you can convert your AJP files to a Windows native video format (.AVI). Please refer to Section 5: USB Backup for more details. DFDVR2... -
Page 28: 4-7: Language
4-7: LANGUAGE Selects a language for the OSD. Press enter to cycle through the languages. 4-8: FACTORY DEFAULT Reset the DVR to factory defaults. DFDVR2... -
Page 29: Section 5: Usb Backup Player
System status messages: USB STORAGE IS CHECKING 1. USB STORAGE IS AVAILABLE 2. START WRITE IN USB STORAGE 3. FINISH WRITE IN USB STORAGE 5-2: BACKUP PLAYER SOFTWARE INSTALLATION 1. Insert software CD. 2. Left click on Install backup player to start the installation. DFDVR2... - Page 30 3. Select a destination folder 4. Copy files to the destination folder. The computer system will build a new icon of for the BACKUP PLAYER on the desktop. Double click the icon of Backup Player from the desktop to run the program. DFDVR2...
-
Page 31: 5-3: Backup Player Software Interface
9. AVI SAVE - To save the backup video to AVI format 10. EDIT - Opens the dialog window to save a single frame as a JPEG file or print it out. 11. Open - Opens the backup file from a CD-R 12. EXIT - Exits the program DFDVR2... - Page 32 1. CHANNEL: Select a channel to save 2. FRAME RATE: Select how many frames to save every second 3. SIZE: Set the resolution as 360*240 or 720*480 4. START: Start saving AVI file 5. END: Cancel saving AVI file DFDVR2...
-
Page 33: Section 6: Network Installation & Setup
4. Press MENU and go back to the previous setup page (TCP/IP SETUP). Go to IP SETUP to configure the port number. You can either use the default port number or assign a new one (it is recommended that you use the default port number). DFDVR2... - Page 34 3. Go to EXTERNAL DEVICE ► TCP/IP SETUP ► IP SETUP to enter the IP address for the DVR and the values for your gateway and subnet mask. The gateway IP is your router’s IP address and the subnet mask should match the subnet mask values of your router. Continued on next page..DFDVR2...
-
Page 35: 6-2: Router Port Forwarding Guide
You will need to enable the ports by locating the port range forwarding screen. With most Belkin routers the port forwarding screen is located within the Virtual Servers option tab. The set up instruction outlined below is an example of port forwarding using Belkin Model F5D8230-4. Continued on next page..DFDVR2... - Page 36 If more ports are required to be port forwarded, repeat the above steps. When complete, select the Apply button located at the bottom of the page to save your changes. Port forwarding is now complete for the D-Link router! DFDVR2...
- Page 37 Open your web browser. Enter the router IP address 192.168.1.1 in the address bar, followed by pressing Enter. Step 2: Enter the user name and password (admin by default) and press the OK button. Step 3: Select the Applications and Gaming tab. Continued on next page..DFDVR2...
- Page 38 Forwarding Ranges of Port option. Finally click the Next button. Step 7: Use the Select a Service drop down box and select the configuration just created. Select the Enable button. Port forwarding is now complete for the Westell router! DFDVR2...
- Page 39 Netopia Router using Netopia Model 3346. Step 1: - Open your web browser. - Enter the router IP address 192.168.62.1 in the address bar, followed by pressing Enter. Continued on next page..DFDVR2...
- Page 40 Enter ‘admin’ in the User ID and ‘motorola’ in the Password dialog box followed by clicking ‘Log In’ to enter the Motorola configuration page. Step 3: Select the Gateway button Step 4: Select the Port Forwarding button Continued on next page..DFDVR2...
- Page 41 (e.g. 50000) and in the second box the ending port number (e.g. 50000). - Select the Add Definition button. - Finally select the Done button at the bottom of the screen. Port forwarding is now complete for the Two-Wire Router! DFDVR2...
-
Page 42: 6-3: Client Software
1. Insert the install CD into your CD-ROM drive 2. If the software does not autostart, click My Computer from either the Desktop or the Start Menu. Find your CD Drive icon and double-click. The software installation will begin. 3. Click ”Install client software” DFDVR2... - Page 43 6-3-2: INSTALL CLIENT SOFTWARE - Select a destination folder. - When finished, the software will create a shortcut on the desktop. - Click the shortcut to run the client software. DFDVR2...
- Page 44 9. Playback To enter playback. 10. Setup To enter the client software setup (see Section 6-3-4 for details) 11. Power To close the remote program. The connection to the DVR will be terminated after the remote software is closed. DFDVR2...
- Page 45 IP address space for private internet (local networks): 10.0.0.0 - 10.255.255.255 172.16.0.0 - 172.31.255.255 192.168.0.0 - 192.168.255.255 Also, IP addresses in the range of 169.254.0.0 -169.254.255.255 are reserved for Automatic Private IP Addressing. These IPs should not be used on the Internet. DFDVR2...
- Page 46 8. Click OK and then click CONNECT from the Remote Viewer Interface. DDNS LIST 1. DDNS SETUP LIST Show all saved DDNS setup. 2. OK/Cancel Choose a certain setup in the list then click OK or Cancel. 3. Delete Delete a selected item from the list. DFDVR2...
- Page 47 Use + / - to adjust PTZ Focus. 3. PAN/TILT CONTROL Click the direction buttons to control Pan and Tilt. 4. PTZ ID Show the PTZ camera that is under control. 5. +/- Click +/- to select a PTZ ID. DFDVR2...
- Page 48 EVENT : To show the DVR’s event list. RECORD : To save the record image to the assigned path as AVI format. User can play AVI file using Windows Media Player. 9. Power To close the playback program and return to Remote Viewer. DFDVR2...
- Page 49 - If the DVR cannot find the selected playback date and time, the playback will start from the next available video clip. PLAYBACK BY EVENT LIST - You can search a playback video clip by EVENT LIST. The events include Video Loss, Motion and Alarm. - Press “EVENT” DFDVR2...
- Page 50 - Press “STOP” and “PRINT” to print out the picture. Save as AVI - During playback, press “RECORD” to start saving to AVI and press “RECORD” again to stop. - A message “Saving OK” pops up when you successfully save the video to AVI. DFDVR2...
-
Page 51: 6-4: Ddns Setup & Operation
Before entering the remote connection, install ActiveX (If you are running Windows XP you most likely have it) and check your browser setup by following the procedures below: 1. Open Internet Explorer under “Tools” and select “Internet Options”. 2. Select “Security,” then “Custom Level”. DFDVR2... - Page 52 3. Under ActiveX, set “Download Unsigned ActiveX Controls” to “PROMPT” as seen in Figure A. 4. Under ActiveX, set “Initialize and script ActiveX controls not marked as safe” to “PROMPT” as seen in Figure B. Click OK to confirm. FIGURE A FIGURE B DFDVR2...
- Page 53 6-4-2: DDNS SERVER SETUP 1. Open Internet Explorer and type www.defender-usa.com/dvr in the address bar. 2. Select REGISTER to register a new account 2. Add a new account (choose a user name and password. This information is used to login to the DDNS server and does need to match the login information on your DVR).
- Page 54 • Press [OK] to save the settings. You will not be able to login to the DVR until you set up the DDNS settings in Section 6-4-3 7. Edit and delete DVR information EDIT: To edit the DVR information DELETE: To delete the DVR information DFDVR2...
- Page 55 Use these instructions to access your DVR from the Internet (not inside your network) using the Client software. However, in most cases, it is easier and more useful to access your DVR from Internet Explorer, as outlined in Section 6-4. 1. Run the client software and enter SETUP DFDVR2...
- Page 56 Load: Open the DDNS list. DVR INFO Get IP: Click “Get IP” to get the current DVR IP address and port number from DDNS server. IP Address: Show DVR’s current IP address and Port number User ID: Enter ADMIN DFDVR2...
- Page 57 6-4-5: CONFIGURATION OF DDNS CONNECTION 1. The DVR connects to the DDNS server automatically and updates the IP address periodically. 2. The client logs in to the DDNS server and attains the IP address automatically. 3. Client PC connects to the DVR. DFDVR2...
-
Page 58: 6-5: Remote Live View Via Internet Explorer
Shows the current connection status 5. MULTI-SCREEN MODES Switch between the different multi-screen display modes 6. CHANNEL SELECTION Select a single channel for full screen display 7. PTZ CONTROL Control up to four PTZ cameras (PTZ cameras not included) DFDVR2... - Page 59 2. FUNCTION SETUP: Connect Test: To test the connection status Lock: To get the recording start/end time Set Backup Time: Set the start/end time, size and path of file backup Start Backup: Begin backing up video DFDVR2...
- Page 60 (3) Set the file size of the backup file (30~700MB) (4) Set the start/end time of file backup 4. Click Apply to confirm your settings. 5. Select Start Backup to start backing up your video footage (you can stop anytime during backup). DFDVR2...
- Page 61 4. Switch multi-screen mode 5. Channel Selection (1~4) 6. SPEED: Playback Speed DELAY: Slow Motion Speed 7. Function bar on playback: Skip to the beginning of file Fast Rewind Rewind Pause Play Fast Forward Skip to the end of file DFDVR2...
- Page 62 FRAME RATE: Set the frame rate. The higher the frame rate the higher the file size will be. SIZE: Set the file size of the AVI START: Start converting to AVI STOP: Cancel converting to AVI The AVI file path will be saved under C:\WEB_BACKUP DFDVR2...
-
Page 63: Section 7: Advanced Device Installation
4 Sensor inputs, for sensor input installation 2. Relay Output NO/NC/COM The application of relay output is NO+COM + NC+COM SENSOR INSTALLATION Alarm will be triggered once one (or more than one) alarm input (D1~D4) causes a short circuit or open circuit with GND. DFDVR2... - Page 64 - Please connect the PTZ’s D+ to the DVR’s RS485 D+ , and D- to RS485 D-. - After the connection and the related setup is done, users are able to control the PTZ camera through the front panel buttons. DFDVR2...
- Page 65 DVR directly from a PC. Please note that any damages to the DVR caused by the incorrect use of this port will not be covered under warranty. Furthermore, DEFENDER does not offer technical support for serial port configuration, beyond the instructions provided below.
-
Page 66: Appendix: System Configuration
APPENDIX: SYSTEM CONFIGURATION APPENDIX 2: RECORD TIME TABLE DFDVR2... -
Page 67: Specifications
Disk Full Warning ......Yes Automatic Overwrite Option....Yes Playback Navigation ......Rewind, Play, Pause, Stop, Slow Motion LED Indicators ........LCD, Power, HDD Housing Material....... Aluminum Housing Color ........Midnight Black Cooling ..........Fan Based Power Input ........12V DC 5A DFDVR2... - Page 68 Video Output ........4 PIN DIN to RCA w/ 60ft Extension Wire TV System ........NTSC Microphone ........No Motion Detection....... No Viewing Angle ........60 Degrees Electronic Shutter ......1/60 ~ 1/100000 sec BLC...........No AGC ..........Automatic ELC...........Automatic Line Lock .......... No Iris Control ........No White Balance ........Automatic DFDVR2...
-
Page 69: Warranty Information
Seagate service centre or refer to www.seagate.com for more information regarding customer support within your jurisdiction. You also may obtain information regarding the location of authorized Seagate service centers and access Seagate automated customer service directory by calling +1-800-SEAGATE. You may go to http://www.seagate.com/ for more information. DFDVR2... - Page 70 DEFENDER SUPPORTS CRIME STOPPERS Crime Stoppers programs are operated as non-profit charities and are managed by a volunteer board of directors who raise funds and pay rewards to individuals who anonymously call with information that helps solve crime. Rewards are paid for tips that lead to the arrest and indictment of people charged with felony offenses, and to date Crime Stoppers statistics show a conviction rate of approximately 95%.
- Page 71 DEFENDER SUPPORTS CRIME STOPPERS To receive more information about Crime Stoppers or to make a charitable donation please fill in the fields below, cut on the dotted line an mail in. DFDVR2 www.defender-usa.com...
- Page 72 NOTES DFDVR2 www.defender-usa.com...
- Page 73 NOTES DFDVR2 www.defender-usa.com...
- Page 74 NOTES DFDVR2 www.defender-usa.com...
- Page 75 WWW.DEFENDER-USA.COM Disclaimer Defender does not endorse any of defender products for any illegal activities. Defender is not responsible or liable in any way shape or form for any damage, vandalism, theft or any other action that may occur while a Defender product is in use by the purchaser.
Need help?
Do you have a question about the DFDVR2 and is the answer not in the manual?
Questions and answers