Table of Contents
Advertisement
Quick Links
Advertisement
Table of Contents
Troubleshooting

Related Manuals for SMART Board Board 600 Series


Summary of Contents for SMART Board Board 600 Series
- Page 1 Installation and User’s Guide SMART Board 600 Series ™ Interactive Whiteboard...
- Page 2 The Bluetooth word mark and logos are owned by the Bluetooth SIG, Inc. and any use of such marks by SMART Technologies Inc. is under license. All other third-party product and company names may be the trademarks of their respective owners.
-
Page 3: Safety Warnings
Important Information NOTE: If you own a SMART product other than a SMART Board™ 600 series interactive whiteboard, refer to the installation manual that came with your product for relevant warnings and maintenance instructions. In this document, the term “interactive whiteboard” refers to the interactive whiteboard and its accessories and options. -
Page 4: Other Precautions
If you ship your interactive whiteboard frequently, consider purchasing a more durable, hard shipping case from SMART Technologies. With its foam-lined interior, aluminum edges and valances, and steel-reinforced corners, this shipping case protects both your SMART Board interactive whiteboard and, if you have one, a table stand. -
Page 5: Table Of Contents
Mounting SMART Board 600 Series Interactive Whiteboards on a Floor Stand..........................8 To mount the interactive whiteboard on a floor stand ............... 8 Wall-Mounting SMART Board 600 Series Interactive Whiteboards ..........10 Recommended Heights for Wall-Mounting ................10 To mount SMART Board 600 Series interactive whiteboards..........11 Securing the Pen Tray and Interactive Whiteboard .............. - Page 6 Flowchart 4: Ready Light Flashing Green ................39 Flowchart 5: Ready Light Steady Green................. 40 General Troubleshooting....................... 41 Waste Electrical and Electronic Equipment Regulations Contacting SMART Technologies Contacting SMART Technical Support ..................43 General Inquiries........................... 43 Warranty............................43 Table of Contents...
- Page 7 Registration ........................... 43 Sending Feedback ........................44 Obtaining More Information......................44 Index Table of Contents...
- Page 8 Table of Contents...
-
Page 9: About 600 Series Interactive Whiteboards
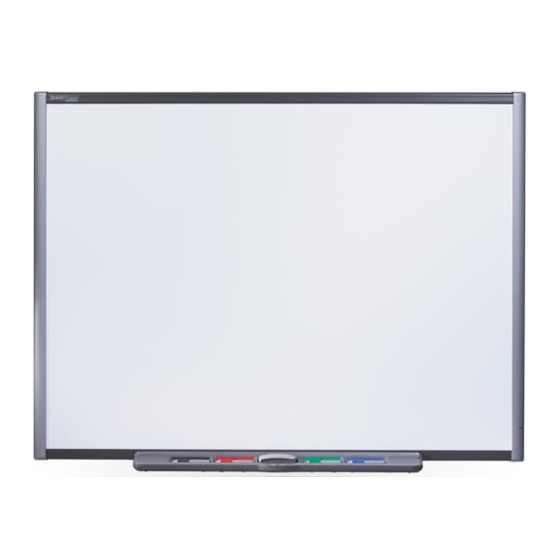
About 600 Series Interactive Whiteboards The SMART Board™ 600 Series product is a touch sensitive, front projection interactive whiteboard that enables you to do everything you can do at a computer workstation—open files, conference with others, work on documents, visit websites, play video clips and more—simply by touching the screen. -
Page 10: How Does A Smart Board Interactive Whiteboard Work
How Does a SMART Board Interactive Whiteboard Work? It may help you to think of the interactive whiteboard as an input device for the computer, just like a mouse. When you touch the interactive whiteboard's surface, the interactive whiteboard detects the contact’s vertical and horizontal (or x,y) coordinates. -
Page 11: Standard Accessories
Your 600 series interactive whiteboard comes with a 16' 5" (5 m) USB cable. This cable is all that is required to connect the SMART Board 600 series interactive whiteboard to a USB receptacle on your computer. SMART Board 600 Series Pens The pens have a rubberized grip area, colored to match the four colors of electronic ink: black, green, red, and blue. -
Page 12: Wireless Bluetooth Connection
Wireless Bluetooth Connection The Wireless Bluetooth Connection for 600 series interactive whiteboards uses Bluetooth technology to allow you to operate your SMART Board 600 series interactive whiteboard without USB cables. The Wireless Bluetooth Connection expansion module plugs into the controller module on the back of the interactive whiteboard, and the Bluetooth-to-USB converter plugs into your computer’s USB receptacle. -
Page 13: Usb Audio System
USB Audio System You can mount the USB speakers to a 600 series interactive whiteboard, or you can wall-mount the speakers using the provided hardware. The USB Audio System kit includes: • two speakers (one speaker contains a USB hub and an audio amplifier with a volume control) •... -
Page 14: Smart Board Interactive Whiteboard Floor Stand
SMART Board Interactive Whiteboard Floor Stand You can use floor stand model FS670 with the SMART Board 660 and 680 interactive whiteboards, and you can use floor stand FS640 with the SMART Board 640 interactive whiteboard. The illustration to the right shows the floor stand’s flip-down anti-tip feet in the down and locked position. -
Page 15: Installing And Setting Up 600 Series Interactive Whiteboards
Water and Fluid Resistance SMART Board 600 series interactive whiteboards are for indoor use only and do not meet any salt- spray or water ingress requirements. Do not pour or spray any liquids directly onto the interactive whiteboard or any of its sub-components. -
Page 16: Mounting Smart Board 600 Series Interactive Whiteboards On A Floor Stand
Mounting SMART Board 600 Series Interactive Whiteboards on a Floor Stand For operating safety and to avoid damage to the unit, carefully read and observe the following instructions. • Before moving a floor stand-mounted SMART Board interactive whiteboard, lower the interactive whiteboard to Position 2, and then proceed with care. - Page 17 5. Insert the bottom two bolts, and use the provided hex key to tighten all four bolts. Installing and Setting Up 600 Series Interactive Whiteboards...
-
Page 18: Wall-Mounting Smart Board 600 Series Interactive Whiteboards
Wall-Mounting SMART Board 600 Series Interactive Whiteboards WARNING It requires two people to safely mount the interactive whiteboard on a wall. Recommended Heights for Wall-Mounting You should consider the general height of your user community when you choose a location for your wall-mounted interactive whiteboard. -
Page 19: To Mount Smart Board 600 Series Interactive Whiteboards
Do not rest the interactive whiteboard on its side or on the top of the frame. To mount SMART Board 600 Series interactive whiteboards The following procedure illustrates the mounting of the 600 series interactive whiteboards onto a wall surfaced with gypsum or drywall. - Page 20 1. Using a pencil, a carpenter’s level and a measuring tape or ruler, draw a horizontal line on the wall, centered on the mid-point of the interactive whiteboard’s future position NOTE: The illustration to the right shows a common height for model 680 interactive whiteboards. Refer to the previous pages for recommended mounting heights 77 1/2"...
- Page 21 6. Below the bottom frame, you’ll find two L-shaped metal brackets. In the center of each bracket there is a metal tab. Push this tab back until it contacts the wall and, using a pencil, mark the location of the mounting holes.
- Page 22 10. Route the modular I²C cable under the lower-right end of the pen tray, and insert it into connector number 1 on the bottom of the pen tray. Press the cable into the strain relief channel on the bottom of the tray. This protects the modular cable’s RJ11 connector from damage if the pen tray is removed without first...
-
Page 23: Securing The Pen Tray And Interactive Whiteboard
Securing the Pen Tray and Interactive Whiteboard Because the pen tray that comes with your SMART Board interactive whiteboard is detachable, you may want to safeguard it—and the interactive whiteboard at the same time—by anchoring it with a security cable. Securing the pen tray can provide theft deterrence for the interactive whiteboard as IMPORTANT well. -
Page 24: Removing The Pen Tray
Removing the Pen Tray It might be necessary to remove the pen tray for purposes of transporting or repairing the interactive whiteboard. NOTE: There are no user serviceable parts inside the pen tray. Only qualified personnel should disassemble the pen tray’s printed circuit boards, and it must be done with proper Electrostatic discharge (ESD) protection. -
Page 25: Connecting The Interactive Whiteboard To A Computer
Connecting the Interactive Whiteboard to a Computer First connect your computer to the interactive whiteboard. You can connect all 600 series interactive whiteboards to a computer using the provided USB interface. You can also use the optional RS-232 serial or wireless Bluetooth connection expansion modules. In either case, SMART may provide the USB or serial cables, or you can purchase them locally. -
Page 26: Connecting With A Usb Cable
Connecting with a USB Cable SMART Board 600 series interactive whiteboards have a high-power USB 2.0 full-speed peripheral interface that runs at speeds of up to 12 Mbps. The unit works with USB 2.0- and USB 1.1-compliant USB interfaces. The interactive whiteboard’s main USB connection is a captive flying lead cable. -
Page 27: Usb Extender Cables And Hubs
To install SMART Board software 1. Insert the SMART Board software CD into your CD drive and follow the on-screen instructions. NOTE: If your computer already has SMART Board software installed, use this opportunity to upgrade the software to ensure compatibility. Immediately following the SMART Board software installation, the Ready light on the pen tray turns from flashing green to solid green. -
Page 28: Connecting Using The Optional Rs-232 Serial Expansion Module
Connecting Using the Optional RS-232 Serial Expansion Module The optional RS-232 serial expansion module provides an alternate method of connecting a 600 series interactive whiteboard to a computer. The module also uses its own external power supply to provide power to the SMART Board interactive whiteboard. You can use a standard straight-through DB9 male-to-female RS-232 cable to connect the RS-232 serial expansion module to your computer. -
Page 29: To Configure A Serial Connection (Com Port) On Your Computer
4. Connect the other end of the serial cable to a serial connector on your computer. 5. Plug the power cable into the power supply, and then plug it into a suitable wall outlet. The Ready light turns red. This indicates that the interactive whiteboard is receiving power. -
Page 30: Connecting With The Wireless Bluetooth Connection Option
Connecting with the Wireless Bluetooth Connection Option NOTE: Use this procedure only if your interactive whiteboard has been fitted with the optional Wireless Bluetooth Connection expansion module. The optional Wireless Bluetooth Connection kit uses Bluetooth technology to provide another way to connect an interactive whiteboard to a computer. -
Page 31: To Set Up The Wireless Usb Adapter
To verify the SMART Board firmware version 1. If SMART Board software is not already running, click the SMART Board Tools icon on your desktop. 2. Click the SMART Board icon in the system tray, and select Control Panel. The SMART Board Control Panel appears. 3. -
Page 32: Wireless Component Pairing
Wireless Component Pairing The expansion module and the Bluetooth-to-USB converter are "paired" at the factory so that they will only communicate with each other. You can synchronize the components at any time, as required. Both the wireless USB expansion module and its USB Pairing converter have a pairing button. -
Page 33: Orienting The Smart Board Interactive Whiteboard
Orienting the SMART Board Interactive Whiteboard At the factory, we load a default manufacturing orientation data set into the interactive whiteboard’s controller module that it uses if you haven’t oriented the interactive whiteboard with SMART Board software. An orientation performed with SMART Board software is called a User Orientation. Default Manufacturing Orientation When the interactive whiteboard uses the default manufacturing orientation data, the touch point on the screen corresponds fairly well to the projected computer desktop image, provided the... -
Page 34: Connecting A Guest Laptop
To set the orientation precision To select a 4-, 9-, 12- or 20-point orientation procedure from the Windows System Tray or Mac Dock: 1. Press the SMART Board icon. 2. Press Control Panel. 3. Press the SMART Board Settings button. 4. -
Page 35: Where To Find More Information
To access the Help Center press the pen tray’s Help button. This button also gives you access to the orientation screen and contact information for SMART Technologies. You should also check www.smarttech.com for more resources. At this site, you’ll find information on each product, including setup instructions and specifications. - Page 36 Connecting the Interactive Whiteboard to a Computer...
-
Page 37: Using And Maintaining 600 Series Interactive Whiteboards
Using and Maintaining 600 Series Interactive Whiteboards Tips for Trouble-Free Performance • Ensure that the interactive whiteboard is connected to a USB or serial interface that’s recognized by the operating system and that’s not being used by another application. • Make sure all the pens and the eraser are placed securely in the pen tray if you want to use your finger to touch the interactive screen. -
Page 38: Keeping The Writing Surface Clean
Keeping the Writing Surface Clean IMPORTANT • Before you clean your SMART Board interactive whiteboard shut down or disconnect the computer. Otherwise, you may scramble the desktop icons or inadvertently activate applications when you wipe the screen. • To view dirt or streaks more easily, put your projector on standby (lamp off). With proper care, your SMART Board interactive whiteboard will provide years of trouble-free service. -
Page 39: No Projector? Use Non-Projected Mode
No Projector? Use Non-Projected Mode The default mode for SMART Board software is the Projected (Mouse) mode. However, if you’re using your interactive whiteboard without a projector, you should change the software mode to Non-Projected (Whiteboard) mode. To access this option, open the SMART Board Control Panel, select SMART Board Settings and then select the Non-Projected (Whiteboard Mode) option. -
Page 40: Indicators And Controls
Indicators and Controls The 600 Series interactive whiteboards have the following indicators and controls: • the Ready light • the pen tray buttons, sensors and LEDs (see page 33) • the optional SystemOn control panel’s indicators and controls (see page 34) •... -
Page 41: The Pen Tray
The Pen Tray In addition to providing a convenient place to hold the pens and the eraser, the pen tray has several controls, sensors and indicators. Pen Tray Buttons In the center of the pen tray, there are three buttons. In Projected mode, the two large rectangular buttons default to Keyboard (the left button) and Right-Click (the right button) functions. -
Page 42: Systemon Control Panel Controls And Indicators
SystemOn Control Panel Controls and Indicators Located at the left end of the pen tray, the System Status optional SystemOn Control Panel has one (Green) large, illuminated On button and four status lights. Illuminated Sleep Status Computer Projector On Button (Amber) Fault (Red) Fault (Red) -
Page 43: Troubleshooting 600 Series Interactive Whiteboards
Troubleshooting 600 Series Interactive Whiteboards Adjusting the Projected Image You can fix many image problems by shifting the projector or adjusting its zoom lens. Optimally, you should have a margin of approximately 3/8" (1.0 cm) on both the right and left sides of the screen. -
Page 44: Troubleshooting Using The Ready Light
Troubleshooting Using the Ready Light Should you experience a problem with your interactive whiteboard, you can troubleshoot it by using the Ready Light, in conjunction with other observable symptoms and behaviors. Before you start troubleshooting, see page 32 to locate the Ready Light, and familiarize yourself with its states during normal operation. -
Page 45: Flowchart 2: Ready Light Off
Flowchart 2: Ready Light Off Ready Light not on Is the Is the Turn on the computer Ready light computer turned on? on now? Non-powered USB hubs or Is the repeaters can’t provide Verify/replace Is the USB cable connected USB cable Ready light enough power to the to the computer and... -
Page 46: Flowchart 3: Ready Light Red
Flowchart 3: Ready Light Red A red Ready light indicates that the interactive whiteboard is receiving power but isn’t communicating reliably with the computer. In most cases, pen tray LEDs won’t turn on and the screen isn’t responsive to touch. Things to try first: •... -
Page 47: Flowchart 4: Ready Light Flashing Green
Flowchart 4: Ready Light Flashing Green NOTES • This is the normal Mouse mode state when SMART Board software is not installed on the computer. • This mode may be desirable for occasional or guest users who don’t require the use of SMART Board tools or pen tray functions. -
Page 48: Flowchart 5: Ready Light Steady Green
Flowchart 5: Ready Light Steady Green NOTE: Before you can use the SMART Board tools or use the pen tray pens or the eraser, SMART Board software must be running. If the SMART Board icon doesn’t appear in the Windows system tray, click the SMART Board Tools icon on your desktop, or open the SMART Board Software folder in the Start menu’s list of programs and select SMART Board Tools. -
Page 49: General Troubleshooting
General Troubleshooting Refer to this table if the Ready light indicates that your interactive whiteboard is operating normally, but you are still experiencing problems. Symptom/Observation Action/Remedy The projected image is blurry or Adjust your projector’s position, zoom and focus settings. doesn’t fill the screen fully. -
Page 50: Waste Electrical And Electronic Equipment Regulations
If you need more information on the collection, reuse and recycling of electrical and electronic equipment, please contact your local WEEE recycling agency. Alternatively, contact your local reseller or SMART Technologies for information on the environmental performance of our products. -
Page 51: Contacting Smart Technologies
Warranty" that shipped with the SMART product at the time of purchase. Registration A User Registration card was included with your SMART product. To help us serve you better, fill in and mail this card to SMART Technologies Inc. or register online at www.smarttech.com/ registration. Contacting SMART Technologies... -
Page 52: Sending Feedback
Visit www.smarttech.com/support to: – download PDF versions of our user guides, installation instructions and more – read technical bulletins, FAQs and tips – troubleshoot a problem – explore our resource centers to learn about conferencing and room control systems Contacting SMART Technologies... - Page 53 Table Stand, 6 Pen Tray, 14 Audio System, 5 USB, 18 USB Flying-Lead, 18 USB Standard Compliant, 17 Contacting Basic features, SMART Board 600 series, 1 General Inquiries, 43 Buttons Technical Support, 43 Help, 27 Controller Module Keyboard, 33 Firmware Security, 38...
- Page 54 Indicators and Controls Safety and Precautions, 17 Controller Reset, 35 Safety Information, i Pen Tray Buttons, 33 SB640, Basic Features, 1 Ready light, 32 SB660, Basic Features, 1 SystemOn Control Panel, 34 SB680, Basic Features, 1 Wireless USB Expansion Module LED SB690, Basic Features, 1 Indicator, 23 Securing the Interactive Whiteboard, 15...
- Page 55 Waste Electrical and Electronic Equipment Regulations, WEEE, 42 Water and Fluid Resistance, 7 Wireless Component Pairing, 24 Index...
- Page 56 SMART Technologies Inc. Corporate Headquarters 1207 – 11 Avenue SW, Suite 300 Calgary, AB T3C 0M5 CANADA Toll Free 1.866.518.6791 support@smarttech.com www.smarttech.com...
Need help?
Do you have a question about the Board 600 Series and is the answer not in the manual?
Questions and answers