
Related Manuals for SMART Board 8070i-G4-SMP


Summary of Contents for SMART Board 8070i-G4-SMP
- Page 1 SMART Board® 8000i-G4 series Interactive flat panels Setup and maintenance guide For models 8070i-G4-SMP and 8084i-G4-SMP...
- Page 2 Product registration If you register your SMART product, we’ll notify you of new features and software upgrades. Register online at smarttech.com/registration. Keep the following information available in case you need to contact SMART Support. Serial number: Date of purchase: FCC warning This equipment has been tested and found to comply with the limits for a Class A digital device, pursuant to Part 15 of the FCC Rules.
-
Page 3: Important Information
Important information W A R N I N G Failure to follow the installation instructions shipped with your SMART product could result in personal injury and product damage which may not be covered by your warranty. Do not open or disassemble the SMART product. You risk electrical shock from the high voltage inside the casing. - Page 4 I M P O R T A N T I N F O R M A T I O N To prevent personal injury, do not attempt to mount or carry the interactive flat panel using your own strength. Instead, use a lifting device with the included attachable eyebolts. The eyebolts are not post-installation hardware.
- Page 5 I M P O R T A N T The following are the power requirements for your interactive flat panel: Model Power requirements 8070i-G4-SMP 100–240V, 8.9–4.5A, 50/60Hz, 700W 8084i-G4-SMP 100–240V, 50/60Hz, 530W For additional requirements and other information, refer to your interactive flat panel’s specifications (see Specifications on page 10).
-
Page 7: Table Of Contents
Contents Important information Chapter 1: Welcome About your interactive flat panel About this guide Other documentation and resources Chapter 2: Mounting your interactive flat panel Before mounting your interactive flat panel Choosing a location Choosing a height Chapter 3: Connecting power and devices Connector panels Connecting power Connecting the room computer... - Page 8 Resolving issues using SMART Board Diagnostics Appendix A: Using the on-screen display menu Changing settings in the on-screen display menu SMART Board 8070i-G4-SMP interactive flat panel on-screen display menu SMART Board 8084i-G4-SMP interactive flat panel on-screen display menu Appendix B: Remotely managing your interactive flat panel...
-
Page 9: Chapter 1: Welcome
Chapter 1 Welcome About your interactive flat panel Features Touch-enabled interactivity Gesture support Dual user support Presence detection Audio SMART software Components Screen Cameras and reflective tape channel Presence detection sensors Speakers Pens and eraser Color select module Front control panel Remote control I/O extension module Differences between models... -
Page 10: About Your Interactive Flat Panel
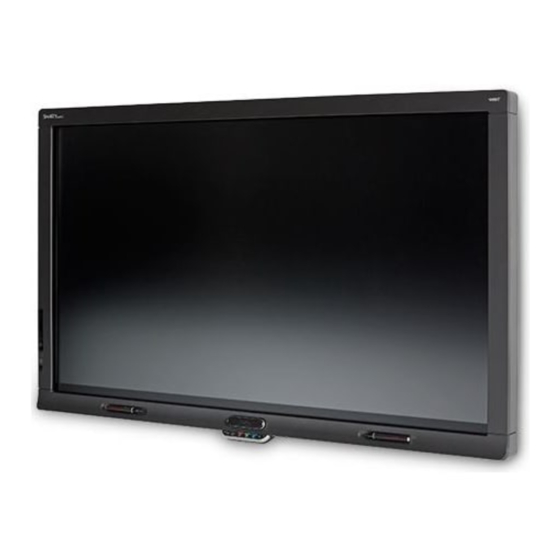
C H A P T E R 1 Welcome About your interactive flat panel Your SMART Board interactive flat panel features SMART’s proprietary DViT® (Digital Vision Touch) technology on an LCD screen with e-LED backlight which enables you to select, write and erase on the interactive surface. -
Page 11: Audio
C H A P T E R 1 Welcome Audio Your interactive flat panel includes two 10 W integrated front-firing speakers for presenting audio from connected input sources. SMART software You can install the following SMART software on the computers connected to your interactive flat panel to take full advantage of the interactive flat panel’s features: Software Description... -
Page 12: Components
Connector panels on page 18) and the menu control panel (see Menu control panel on page 41). Screen The active screen area specifications vary by model: Models Diagonal Width Height Aspect ratio 8070i-G4-SMP 70" (178 cm) 61" (154.9 cm) 34 3/8" (87.2 cm) 16:9 8084i-G4-SMP 84" (213.4 cm) 73 1/4" (186.1 cm) 41 1/4"... -
Page 13: Cameras And Reflective Tape Channel
If ECO Standby mode is enabled for SMART Board 8070i-G4-SMP interactive flat panels, presence detection functionality is limited. For more information on the on-screen display menu settings relevant for presence detection, see page 70 for SMART Board 8070i-G4-SMP interactive flat panels or page 78 for SMART Board 8084i-G4-SMP interactive flat panels. smarttech.com/kb/170446... -
Page 14: Speakers
C H A P T E R 1 Welcome Speakers Your interactive flat panel includes two 10 W integrated front firing speakers. You can connect external speakers if desired (see Connecting external speakers on page 24). Pens and eraser Your interactive flat panel comes with two pens and an eraser. The bottom bezel of the interactive flat panel includes magnetic holders for the pens and the eraser. -
Page 15: Front Control Panel
For information on diagnosing issues using the front control panel lights, see Resolving blank screen issues on page 54. For information on disabling the front control panel for multiple interactive flat panel installations, see page 70 for SMART Board 8070i-G4-SMP interactive flat panels or page 79 for SMART Board 8084i-G4-SMP interactive flat panels. smarttech.com/kb/170446... -
Page 16: Remote Control
USB and HDMI cables. Differences between models SMART Board 8000i-G4 series interactive flat panels include the following models: SMART Board 8070i-G4-SMP interactive flat panel SMART Board 8084i-G4-SMP interactive flat panel The following table presents the key differences between these models:... -
Page 17: About This Guide
C H A P T E R 1 Welcome Item 8070i-G4-SMP 8084i-G4-SMP Video and audio DVI-D outputs Stereo 3.5 mm (×3) Stereo 3.5 mm (×4) Dual RCA audio Speaker wire connector Speaker wire connector Guide icons N O T E S Other, minor differences between models are noted throughout this guide. -
Page 18: Other Documentation And Resources
Your interactive flat panel’s specifications define the product’s dimensions, weights, recommended operating and storage temperatures, power requirements and consumption and other important information for installation and maintenance. Models Specifications 8070i-G4-SMP smarttech.com/kb/170502 8084i-G4-SMP smarttech.com/kb/170451 Installation instructions Your interactive flat panel comes with installation instructions. These installation instructions explain how to unpack, assemble and mount your interactive flat panel and how to connect it to computers and other devices. -
Page 19: Help
C H A P T E R 1 Welcome Help SMART software includes extensive Help which explains how to use both your interactive flat panel and the software. To view SMART software Help on your interactive flat panel 1. Press the Help button on the color select module. The Help and Support for Your SMART Board Interactive Whiteboard window appears. -
Page 21: Chapter 2: Mounting Your Interactive Flat Panel
Chapter 2 Mounting your interactive flat panel Before mounting your interactive flat panel Choosing a location Choosing a height You can either mount your interactive flat panel on a wall, as documented in this chapter, or install it on a stand as documented in the installation instructions provided with the stand. To mount your interactive flat panel on a wall, you require a team of professional installers equipped with a lifting device. - Page 22 Refer to local building codes to ensure the wall can support the weight of the interactive flat panel and mounting equipment. Models Weight (lb.) Weight (kg) 8070i-G4-SMP 8084i-G4-SMP 118.3 Attach the included eyebolts and washers to assist in mounting, and remove them after you mount the interactive flat panel.
-
Page 23: Choosing A Location
C H A P T E R 2 Mounting your interactive flat panel Use M8 screws to fasten the wall bracket. The screws must be 14–15 mm long plus the thickness of the bracket and the washer. N O T E The recommended fasten force is 99.57–121.70 in-lb. -
Page 25: Chapter 3: Connecting Power And Devices
10). The connections in this chapter are based on the default USB mappings. However, you can customize these mappings (see page 71 for SMART Board 8070i-G4-SMP interactive flat panels or page 79 for SMART Board 8084i-G4-SMP interactive flat panels). -
Page 26: Connector Panels
There are connector panels on the top, left, right and bottom of your interactive flat panel as well as on the I/O extension module. SMART Board 8070i-G4-SMP interactive flat panel connector panels The following diagram and table present the connectors on SMART Board 8070i-G4-SMP interactive flat panels: Type... - Page 27 C H A P T E R 3 Connecting power and devices Type Details Identifier Bottom connector panel AC power AC power pass-through AC power AC power inlet and switch USB 2.0 Type-B receptacle USB2 Room control in RS-232 connector Room control out / RS-232 connector pass-through...
-
Page 28: Smart Board8084I-G4-Smp Interactive Flat Panel Connector Panels
C H A P T E R 3 Connecting power and devices SMART Board8084i-G4-SMP interactive flat panel connector panels The following diagram and table present the connectors on SMART Board 8084i-G4-SMP interactive flat panels: Type Details Identifier Top connector panel USB 3.0 Type-A receptacle Audio out Stereo 3.5 connector DC power... -
Page 29: Connecting Power
Connecting power Connect the supplied power cable from the AC power inlet on the bottom connector panel (SMART Board 8070i-G4-SMP interactive flat panels) or on the back of the interactive flat panel (SMART Board 8084i-G4-SMP interactive flat panels) to a power outlet. -
Page 30: Connecting The Room Computer
Ensure that any cables extending across the floor to your SMART product are properly bundled and marked to avoid a trip hazard. Connecting laptop cables to SMART Board 8070i-G4-SMP interactive flat panels You can connect up to one laptop to a SMART Board 8070i-G4-SMP interactive flat panel. smarttech.com/kb/170446... -
Page 31: Connecting Laptop Cables To Smart Board 8084I-G4-Smp Interactive Flat Panels
C H A P T E R 3 Connecting power and devices For this laptop: Connect a USB cable to the USB2 receptacle on the bottom connector panel. Connect an HDMI cable to the HDMI2 connector on the bottom connector panel. N O T E You can use the provided CAT 5 USB extender to extend the USB connection between the interactive flat panel and a laptop. -
Page 32: Connecting External Speakers
N O T E S For SMART Board 8070i-G4-SMP interactive flat panel, users can specify the current audio by selecting it in the on-screen display menu or by pressing the AUDIO INPUT button on the remote control (see page 69). - Page 33 C H A P T E R 3 Connecting power and devices To disable the USB receptacles 1. Locate the rectangular cut-out on the back of the top connector panel. 2. Remove the screw securing the cut-out with a Phillips screwdriver. Retain the screw and cut-out.
-
Page 35: Chapter 4: Setting Up Your Interactive Flat Panel And Room Computer
Chapter 4 Setting up your interactive flat panel and room computer Turning on your interactive flat panel and room computer for the first time Installing SMART software Downloading and installing SMART software Deploying SMART software to multiple computers This chapter explains how to set up your interactive flat panel and room computer after mounting your interactive flat panel and connecting power and devices. -
Page 36: Installing Smart Software
C H A P T E R 4 Setting up your interactive flat panel and room computer Installing SMART software To take full advantage of your interactive flat panel’s features, you must download and install SMART software on your room computer. Downloading and installing SMART software To download and install SMART software 1. -
Page 37: Chapter 5: Using Your Interactive Flat Panel
Chapter 5 Using your interactive flat panel Turning on and turning off your interactive flat panel Turning on and turning off SMART Board 8070i-G4-SMP interactive flat panels Turning on and turning off SMART Board 8084i-G4-SMP interactive flat panels Using presence detection Using your interactive flat panel with the room computer... -
Page 38: Turning On And Turning Off Smart Board 8070I-G4-Smp Interactive Flat Panels
C H A P T E R 5 Using your interactive flat panel Turning on and turning off SMART Board 8070i-G4-SMP interactive flat panels To turn on your interactive flat panel 1. Turn on your computer. 2. Press the Power/Standby button on the front control panel. -
Page 39: Using Presence Detection
C H A P T E R 5 Using your interactive flat panel Turning on and turning off SMART Board 8084i-G4-SMP interactive flat panels To turn on your interactive flat panel 1. Turn on your computer. 2. Press the Power/Standby button on the front control panel. Press the POWER button or the MONITOR ON button on the remote control. -
Page 40: Using Your Interactive Flat Panel With The Room Computer
Presence detection settings can be changed with the on-screen display menu. For more information on the on-screen display menu settings relevant for presence detection, see page 70 for SMART Board 8070i-G4-SMP interactive flat panels or page 78 for SMART Board 8084i-G4-SMP interactive flat panels. -
Page 41: Using Your Interactive Flat Panel With Guest Laptops
Using your interactive flat panel with guest laptops Users can connect up to one guest laptop to SMART Board 8070i-G4-SMP interactive flat panels or up to two guest laptops to SMART Board 8084i-G4-SMP interactive flat panels using the cables you installed (see Connecting cables for laptops on page 22). -
Page 42: Connecting A Guest Laptop Through A Smart Gowire Cable
C H A P T E R 5 Using your interactive flat panel 4. Press the Input Select button on the front control panel until the input source is HDMI2. T I P Alternatively, you can press the Input button on the remote control (see Remote control buttons on page 37). -
Page 43: Changing Input Sources
C H A P T E R 5 Using your interactive flat panel 2. Disconnect the USB cable from your laptop, and then connect it to the SMART GoWire cable’s USB receptacle. N O T E If the SMART GoWire cable isn’t connected to your interactive flat panel through a USB cable, you have access to SMART Meeting Pro PE software on your laptop for five minutes, and then the software closes. -
Page 44: Using The Remote Control
Using your interactive flat panel T I P The remote control for SMART Board 8070i-G4-SMP interactive flat panels has buttons for each input source (HDMI1, HDMI2, HDMI3/PC and so on). Press one of these input source buttons to display the connected device’s input. -
Page 45: Remote Control Buttons
C H A P T E R 5 Using your interactive flat panel I M P O R T A N T The remote control might not function when the infrared remote control sensor is blocked or when it is in direct sunlight or strong lighting. Remote control buttons The remote control enables you to access on-screen menus and to change display and input settings. -
Page 46: Smart Board 8070I-G4-Smp Interactive Flat Panel Remote Control
C H A P T E R 5 Using your interactive flat panel SMART Board 8070i-G4-SMP interactive flat panel remote control Name Description POWER ON Turn on your interactive flat panel ASPECT Select the aspect ratio STILL Turn on or off the still picture mode... - Page 47 C H A P T E R 5 Using your interactive flat panel Name Description Open a selected menu option in the on-screen display menu [Left and right buttons] Change the value of the selected menu option in the on-screen display menu AUTO SET UP Automatically set the H position, V position and clock phase (for...
-
Page 48: Smart Board 8084I-G4-Smp Interactive Flat Panel Remote Control
C H A P T E R 5 Using your interactive flat panel SMART Board 8084i-G4-SMP interactive flat panel remote control Name Description POWER Turn on or off your interactive flat panel MONITOR Alternate between different interactive flat panel modes (on, off and Standby) depending on how you have configured Standby mode [Number buttons] Press buttons on the number pad to set and change passwords,... -
Page 49: Menu Control Panel
C H A P T E R 5 Using your interactive flat panel Name Description 1/a/A Switch the number pad between number input (1, 2, 3), lowercase letter input (a, b, c) and uppercase letter input (A, B, C) MARK/ARC Set the aspect ratio VOL +/- Increase or decrease audio output level MUTE Mute audio inputs for your interactive flat panel... - Page 50 C H A P T E R 5 Using your interactive flat panel SMART Board 8070i-G4-SMP interactive flat panels Name MENU [Up] [Down] [Left] [Right] SMART Board 8084i-G4-SMP interactive flat panels Name MENU [Up] [Down] [Left] [Right] smarttech.com/kb/170446...
-
Page 51: Chapter 6: Maintaining Your Interactive Flat Panel
Chapter 6 Maintaining your interactive flat panel Opening SMART Settings Updating software Updating firmware Calibrating your interactive flat panel Orienting your interactive flat panel Replacing batteries in the remote control Replacing a pen nib Cleaning the screen Cleaning the presence detection sensors Cleaning the camera windows and reflective tape Maintaining ventilation Preventing condensation Checking the interactive flat panel installation... -
Page 52: Updating Software
C H A P T E R 6 Maintaining your interactive flat panel To open SMART Settings on Windows 8 operating systems 1. Open the Apps screen. 2. Press SMART Settings. SMART Settings appears. Updating software SMART Product Update (SPU) is included in the SMART software you installed to use your interactive flat panel (see Installing SMART software on page 28). -
Page 53: Calibrating Your Interactive Flat Panel
C H A P T E R 6 Maintaining your interactive flat panel To update firmware 1. Ensure your interactive flat panel is connected to your computer. 2. Launch the firmware updater at the following location: Operating Location system Windows (32-bit) C:\Program Files\SMART Technologies\SMART Product Drivers\ SMARTFirmwareUpdater.exe Windows (64-bit) C:\Program Files (x86)\SMART Technologies\ SMART Product Drivers\SMARTFirmwareUpdater.exe... -
Page 54: Orienting Your Interactive Flat Panel
C H A P T E R 6 Maintaining your interactive flat panel 5. Press Calibrate. The calibration screen appears. This can take a few moments. 6. Press the red target with the tip of an interactive flat panel pen. Hold the tip at the center of the target until the target turns green, and then lift the pen. -
Page 55: Replacing Batteries In The Remote Control
C H A P T E R 6 Maintaining your interactive flat panel Replacing batteries in the remote control The remote control requires two 1.5V AAA batteries. W A R N I N G To reduce the risk associated with leaking batteries: use only AAA type batteries do not mix used and new batteries orient the battery’s plus (+) and minus (-) terminals according to the markings found on the... -
Page 56: Cleaning The Screen
C H A P T E R 6 Maintaining your interactive flat panel Cleaning the screen Follow these instructions to clean the interactive flat panel screen without damaging its anti-glare coating or other product components. C A U T I O N Do not use permanent or dry-erase markers on the screen. -
Page 57: Cleaning The Camera Windows And Reflective Tape
C H A P T E R 6 Maintaining your interactive flat panel Cleaning the camera windows and reflective tape The DViT technology in your interactive flat panel uses four cameras in the corners of the frame and the reflective material between the screen and the bezels. Excessive dust buildup on the camera windows or reflective tape can impair touch performance. -
Page 58: Preventing Condensation
C H A P T E R 6 Maintaining your interactive flat panel Preventing condensation Your interactive flat panel screen contains layers of glass that can collect condensation, especially in the following conditions: Temperature extremes with high humidity Rapid changes in humidity, which can occur when you operate the product near water, such as a sink, pool, kettle or air conditioner ventilator Direct exposure to sunlight To evaporate condensation from your interactive flat panel... -
Page 59: Transporting Your Interactive Flat Panel
C H A P T E R 6 Maintaining your interactive flat panel I M P O R T A N T Follow the instructions included with the floor stand or mounting apparatus. To remove your interactive flat panel 1. Turn off your interactive flat panel and unplug the power cable from the wall outlet. 2. -
Page 61: Locating The Interactive Flat Panel Serial Number
When you contact SMART Support, you might be asked to provide the interactive flat panel serial number. The easiest way to locate this serial number is using the on-screen display menu (see page 69 for SMART Board 8070i-G4-SMP interactive flat panels or page 80 for SMART Board 8084i-G4-SMP interactive flat panels). -
Page 62: Resolving Blank Screen Issues
C H A P T E R 7 Troubleshooting your interactive flat panel Resolving blank screen issues Use the following troubleshooting table when your computer is turned on, but you don’t see an image on the interactive flat panel screen. Begin by looking at the interactive flat panel power light and system light on the front control panel. Power light Status light Causes... -
Page 63: Resolving Image Quality Issues
Solution The image is too large, too The computer’s video The native resolution of small or doesn’t completely resolution settings don’t SMART Board 8070i-G4-SMP fill the screen. match your interactive flat interactive flat panels is panel’s native resolution. 1920 × 1080 at 60 Hz. - Page 64 Refer to your computer’s video card Help for more information. If available, select the HDTV setting (ideally 1080p for SMART Board 8070i-G4-SMP interactive flat panels or 4K UHD for SMART Board 8084i-G4-SMP interactive flat panels) from your video card driver’s advanced menu.
- Page 65 You have a poor quality 1. Replace your video cable with a video cable. better quality video cable. 2. Press AUTO SETUP (on SMART Board 8070i-G4-SMP interactive flat panels) or AUTO (on SMART Board 8084i-G4-SMP interactive flat panels) on the remote control.
-
Page 66: Resolving Touch Control And Digital Ink Issues
Run the SMART Connection your interactive flat panel. Wizard’s troubleshooting icon displays a red X in procedures (see page 63). its bottom-right corner. Either the SMART Board Close the SMART Board Diagnostics window or Diagnostics window and SMART Settings is open. SMART Settings. smarttech.com/kb/170446... - Page 67 You aren’t touching the For more information, see the pointer appears in the screen at right angles. Touching and drawing on your wrong location. SMART Board interactive whiteboard is Inaccurate (smarttech.com/kb/131299). Your interactive flat panel Orient your interactive flat panel isn’t oriented.
-
Page 68: Resolving Audio Issues
C H A P T E R 7 Troubleshooting your interactive flat panel Symptom Causes Solution You try to erase using You’re in Locked Ink mode Press a color select button that something other than the and all objects are isn’t flashing to exit Locked Ink eraser, but you draw more interpreted as pens. -
Page 69: Resolving Remote Control Issues
The wrong audio input is Select the correct audio input selected for the video input. (see page 69 for SMART Board 8070i-G4-SMP interactive flat panels or page 76 for SMART Board 8084i-G4-SMP interactive flat panels). Resolving remote control issues Your remote control provides control of your interactive flat panel up to 23' (7 m) from the front control panel of your interactive flat panel. -
Page 70: Resolving Presence Detection Issues
Your interactive flat panel The sensors aren’t enabled. Enable presence detection (see isn’t turning on. page 70 for SMART Board 8070i-G4-SMP interactive flat panels or page 78 for SMART Board 8084i-G4-SMP interactive flat panels). There isn’t enough of a Reduce the room temperature. -
Page 71: Resolving Issues Using The Smart Connection Wizard
You can also access the SMART Connection Wizard by opening SMART Settings (see Opening SMART Settings on page 43) and then pressing Connection Wizard. 3. Select SMART Board 8000 series interactive flat panel, and then press Next. 4. Select the option that best describes the issue you’re encountering, and follow the on-screen instructions to troubleshoot your interactive flat panel. -
Page 72: Resolving Issues Using Smart Board Diagnostics
If you touch the interactive flat panel’s surface and nothing happens, or if there is no digital ink or the ink appears in some locations and not in others, use SMART Board Diagnostics to help identify and resolve these issues. -
Page 73: Appendix A: Using The On-Screen Display Menu
Using the on-screen display menu Changing settings in the on-screen display menu SMART Board 8070i-G4-SMP interactive flat panel on-screen display menu SMART Board 8084i-G4-SMP interactive flat panel on-screen display menu You can access the on-screen display menu using either the remote control (see Remote control buttons on page 37) or the menu control panel (see Menu control panel on page 41). -
Page 74: Smart Board 8070I-G4-Smp Interactive Flat Panel On-Screen Display Menu
A P P E N D I X A Using the on-screen display menu SMART Board 8070i-G4-SMP interactive flat panel on-screen display menu Option Values Function Notes (if any) PICTURE PICTURE MODE STANDARD Sets the picture mode Select USER to customize brightness, contrast, sharpness CINEMA/sRGB and other PICTURE options. - Page 75 A P P E N D I X A Using the on-screen display menu Option Values Function Notes (if any) 0–100 Sets the amount of red in the You can modify this option only if image you select USER in COLOR TEMPERATURE.
- Page 76 A P P E N D I X A Using the on-screen display menu Option Values Function Notes (if any) ADJUST AUTO SETUP [N/A] Automatically sets the H position, V You can modify this option only if position and clock phase when the the currently selected video input is interactive flat panel turns on VGA.
- Page 77 A P P E N D I X A Using the on-screen display menu Option Values Function Notes (if any) AUDIO BALANCE L50–R50 Balances the left and right volume TREBLE L50–R50 Sets the high frequency sound BASS L50–R50 Sets the low frequency sound LINE OUT FIXED Sets the audio line out...
- Page 78 A P P E N D I X A Using the on-screen display menu Option Values Function Notes (if any) OSD TRANSPARENCY TYPE1 Sets the on-screen display menu transparency TYPE2 OSD RESET [N/A] Resets all options in the OSD menu to their default values SETUP POWER SAVE Enables or disables Power Save...
- Page 79 A P P E N D I X A Using the on-screen display menu Option Values Function Notes (if any) BRIGHTNESS 0–100 Sets the brightness of the welcome You can modify this option only if screen you select ENABLE in PROXIMITY.
-
Page 80: Smart Board 8084I-G4-Smp Interactive Flat Panel On-Screen Display Menu
A P P E N D I X A Using the on-screen display menu Option Values Function Notes (if any) USB2 VGA1 Sets the video input for the USB2 The video input you select must be receptacle, or disables the unique for USB2. - Page 81 A P P E N D I X A Using the on-screen display menu Option Values Function Notes (if any) Light Threshold [Number] Sets the light threshold You can modify this option only if you select Ambient in Picture Mode. Sensing Lux [N/A] Displays the current illuminance...
- Page 82 A P P E N D I X A Using the on-screen display menu Option Values Function Notes (if any) Picture Option Noise Reduction Sets image noise reduction Medium High MPEG Noise Sets MPEG image noise reduction Reduction Medium High Black Level High Sets the level of brightness in the...
- Page 83 A P P E N D I X A Using the on-screen display menu Option Values Function Notes (if any) User EQ 100 Hz -10–10 Sets the sound equalization at You can modify this option only if 100 Hz you select User Setting in Sound Mode.
- Page 84 A P P E N D I X A Using the on-screen display menu Option Values Function Notes (if any) HDMI3/PC Line Output Fixed Sets the audio line out for the room Variable computer (HDMI3/PC) Audio Input Audio In 1 HDMI3/PC Specifies a video input to map to The video input you select must be...
- Page 85 A P P E N D I X A Using the on-screen display menu Option Values Function Notes (if any) TIME Clock Date 1–31 Specifies the current date Month Jan.–Dec. Specifies the current month Year 2010–2040 Specifies the current year Hour 00–23 Specifies the current hour...
- Page 86 A P P E N D I X A Using the on-screen display menu Option Values Function Notes (if any) Input2 Specifies the second video input You can modify this option only if for fail over mode you select Manual in Mode. HDMI1 DVI-D Display Port...
- Page 87 A P P E N D I X A Using the on-screen display menu Option Values Function Notes (if any) Welcome OSD Enabled Enables or disables the welcome screen Disable Welcome Timeout 5–30 Sets how long the welcome screen appears (in seconds) Ready State Brightness 0–100 Set the brightness of the welcome screen...
- Page 88 A P P E N D I X A Using the on-screen display menu Option Values Function Notes (if any) Software Version [N/A] Displays the interactive flat panel’s This option only displays firmware version number information. You’re unable to modify it. Serial Number [N/A] Displays the interactive flat panel’s...
-
Page 89: Appendix B: Remotely Managing Your Interactive Flat Panel
Decreasing a value for a setting Designating video control settings for a specific video input Identifying the value for a video control setting Assigning a value for a video control setting SMART Board 8070i-G4-SMP interactive flat panel commands Power state Source Video control... -
Page 90: Connecting And Configuring A Room Control System
To connect a computer to your interactive flat panel Connect an RS-232 cable from the serial output on your computer to the room control input on the bottom connector panel. 8070i-G4-SMP 8084i-G4-SMP I M P O R T A N T Do not use a null modem cable. -
Page 91: Configuring Your Computer's Serial Interface Settings
All commands are available when your interactive flat panel is on. Some commands are available when your interactive flat panel is in Standby mode. No commands are available when the interactive flat panel is off or in ECO Standby mode. SMART Board 8070i-G4-SMP interactive flat panels only smarttech.com/kb/170446... -
Page 92: Room Control System Programming Commands And Responses
A P P E N D I X B Remotely managing your interactive flat panel Room control system programming commands and responses To access interactive flat panel information or to adjust interactive flat panel settings using the room control system, type commands after the command prompt (>), and then wait for the response from your interactive flat panel. -
Page 93: Assigning A Specific Value
A P P E N D I X B Remotely managing your interactive flat panel Assigning a specific value You can assign a specific value for a setting within the command’s target range. In the example below, the user wants to set the contrast level for the interactive flat panel to 65. >set contrast=65 contrast=65 Increasing a value for a setting... -
Page 94: Assigning A Value For A Video Control Setting
70 for the HDMI1 video input. >set contrast HDMI1=70 contrast HDMI1=70 SMART Board 8070i-G4-SMP interactive flat panel commands The following tables contain commands for SMART Board 8070i-G4-SMP interactive flat panels. Power state Use the following commands to identify power state settings. Command Response... -
Page 95: Source
A P P E N D I X B Remotely managing your interactive flat panel Source Use the following commands to identify source settings. Command Response Possible values Standby mode get input input=[Value] VGA1 VGA2 Video S_Video DVD/HD DisplayPort HDMI1 HDMI2 HDMI3/PC get videoinputs... -
Page 96: Video Control
A P P E N D I X B Remotely managing your interactive flat panel Use the following commands to assign source settings. Command Possible values Response Standby mode set input [Value] =VGA1 input=[Value] =VGA2 =DVI =Video =S_Video =DVD/HD =DisplayPort =HDMI1 =HDMI2 =HDMI3/PC... - Page 97 A P P E N D I X B Remotely managing your interactive flat panel Command Response Possible values Standby mode get contrast contrast=[Value] 0–100 get displaymode displaymode=[Value] DYNAMIC STANDARD sRGB CINEMA SPORT GAME USER AMBIENT get saturation saturation=[Value] 0–100 get sharpness sharpness=[Value] 0–100...
-
Page 98: Audio Control
A P P E N D I X B Remotely managing your interactive flat panel Command Possible values Response Standby mode set displaymode [Value] =DYNAMIC displaymode=[Value] =STANDARD =sRGB =CINEMA =SPORT =GAME =USER =AMBIENT set saturation [Value] + [Incremental value] saturation=[Value] - [Incremental value] =0–100 set sharpness [Value]... - Page 99 A P P E N D I X B Remotely managing your interactive flat panel Use the following commands to assign audio control settings. Command Possible values Response Standby mode set audioinput [Value] =IN1 audioinput=[Value] =IN2 =IN3 =USB =HDMI =DPORT =HDMI3/PC_ANALOG =HDMI3/PC_DIGITAL set balance [Value]...
-
Page 100: System Information
A P P E N D I X B Remotely managing your interactive flat panel System information Use the following commands to identify system information settings. Command Response Possible values Standby mode get aspectratio aspectratio=[Value] 16:9 zoom1 zoom2 get autopoweroff autopoweroff=[Value] 15–240 get fwinfotouch... - Page 101 A P P E N D I X B Remotely managing your interactive flat panel Command Response Possible values Standby mode get resolution resolution=[Value] 800 × 600 1024 × 768 get serialnum serialnum=[Value] [Serial number] get tempsensor1 tempsensor1=[Value] [Temperature in ºC] get tempsensor2 tempsensor2=[Value] [Temperature in ºC]...
- Page 102 A P P E N D I X B Remotely managing your interactive flat panel Command Possible values Response Standby mode set language [Value] =English language=[Value] =Arabic =Danish =German =English_UK =Spanish =Spanish_MEX =French =Hindi =Hungarian =Italian =Korean =Dutch =Norwegian =Portuguese_BRA =Portuguese =Russian =Swedish...
-
Page 103: Service Information
A P P E N D I X B Remotely managing your interactive flat panel Service information Use the following commands to identify service information settings. Command Response Possible values Standby mode get displayhour displayhour=[Value] 0–20000 get fancontrol fancontrol=[Value] auto get highspeedfan highspeedfan=[Value] high... -
Page 104: Source
A P P E N D I X B Remotely managing your interactive flat panel Use the following commands to assign power state settings. Command Possible values Response Standby mode set intpowerstate [Value] =standby intpowerstate=[Value] =no-video =welcome =prox-reenable-wait =pre-eco =eco-standby =soft-reset =dpms =pre-standby-auto... - Page 105 A P P E N D I X B Remotely managing your interactive flat panel Command Response Possible values Standby mode get usb2source usb2source=[Value] VGA (default) DPort HDMI1 HDMI2 HDMI3/PC Disable get usb3source usb3source=[Value] DPort HDMI1 (default) HDMI2 HDMI3/PC Disable Use the following commands to assign source settings.
-
Page 106: Video Control
A P P E N D I X B Remotely managing your interactive flat panel N O T E You must specify unique values for set ubs1source, set usb2source and set usb3source. Video control Use the following commands to identify video control settings. Command Response Possible values... - Page 107 A P P E N D I X B Remotely managing your interactive flat panel Command Possible values Response Standby mode set brightness [Value] + [Incremental value] brightness=[Value] - [Incremental value] =0–100 set brightness [Video input] [Value] + [Incremental value] brightness [Video input]=[Value] - [Incremental value] =0–100...
-
Page 108: Audio Control
A P P E N D I X B Remotely managing your interactive flat panel Audio control Use the following commands to identify audio control settings. Command Response Possible values Standby mode get audioeq100 audioeq100=[Value] -10–10 get audioeq300 audioeq300=[Value] -10–10 get audioeq1k audioeq1k=[Value] -10–10... - Page 109 A P P E N D I X B Remotely managing your interactive flat panel Command Response Possible values Standby mode get rightspeaker rightspeaker=[Value] get speakersw speakersw=[Value] internal external get usbaudio usbaudio=[Value] DPort HDMI1 HDMI2 HDMI3/PC Disable get volume volume=[Value] 0–100 Use the following commands to assign audio control settings.
- Page 110 A P P E N D I X B Remotely managing your interactive flat panel Command Possible values Response Standby mode set audioin2 [Value] =VGA audioin2=[Value] =DVI =Component =Composite =DPort =HDMI1 =HDMI2 =HDMI3/PC =Disable set audioin3 [Value] =VGA audioin3=[Value] =DVI =Component =Composite =DPort...
-
Page 111: System Information
A P P E N D I X B Remotely managing your interactive flat panel N O T E You must specify unique values for set audioin1, set audioin2, set audioin3 and set usbaudio. System information Use the following commands to identify system information settings. Command Response Possible values... - Page 112 A P P E N D I X B Remotely managing your interactive flat panel Command Response Possible values Standby mode get language language=[Value] Arabic Chinese (Simplified) Danish Dutch English (UK) English (US) Finnish French French (Canada) German Hungarian Italian Japanese Korean Norwegian...
- Page 113 A P P E N D I X B Remotely managing your interactive flat panel Use the following commands to assign system information settings. Command Possible values Response Standby mode set aspectratio [Value] =justscan aspectratio=[Value] =16:9 =4:3 set autopoweroff [Value] + [Incremental value] autopoweroff=[Value] - [Incremental value]...
-
Page 114: Service Information
A P P E N D I X B Remotely managing your interactive flat panel Command Possible values Response Standby mode set monitorid [Value] =1–100 monitorid=[Value] set opsfail [Value] opsfail=[Value] =off set proximity [Value] proximity=[Value] =off set proximitydetected [Value] =yes proximitydetected=[Value] set proximityreenable [Value] =1–10... - Page 115 A P P E N D I X B Remotely managing your interactive flat panel Use the following commands to assign service information settings. Command Possible values Response Standby mode set failurelog [Value] =normal failurelog=[Value] set statereporting [Value] statereporting=[Value] =off smarttech.com/kb/170446...
-
Page 117: Hardware Environmental Compliance
Appendix C Hardware environmental compliance SMART Technologies supports global efforts to ensure that electronic equipment is manufactured, sold and disposed of in a safe and environmentally friendly manner. Waste Electrical and Electronic Equipment and Battery regulations (WEEE and Battery Directives) Electrical and electronic equipment and batteries contain substances that can be harmful to the environment and to human health. -
Page 119: Index
Index reflective tape 49 screen 48 Clear Voice II 75 AAA batteries 47 color select module 6 air conditioning 15, 50 color temperature 66, 73, 88, 98 ambient lighting 67, 98 component video 19-20, 87, 96 aspect ratio 4, 68, 74, 92, 103 composite video 19-20, 87, 96 audio computer See room computer... - Page 120 I N D E X software See software installation installation instructions 10 factory reset 72 fans 71, 95 .fcw files 35 firmware updates 44 keyboard See on-screen keyboard firmware versions 92 knowledge base 11 floor stand See stand 4K UHD 22 front control panel about 7 languages 69, 77, 92, 104 disabling 70, 79, 103...
- Page 121 I N D E X pens SMART Ink about 6 about 3 replacing nibs 47 installing 28 permanent markers 48 updating 44 Picture Wizard II 74 using on laptops 33 power 15, 21, 27, 29, 83, 86, 95 using on the room computer 32 presence detection sensors SMART Meeting Pro PE software 34 about 2, 5, 31...
- Page 122 I N D E X time 77 tint 66, 73, 89, 98 top connector panel 18, 20 training 11 transportation 51 treble 69, 90 TruMotion 74 updates firmware 44 software 44 USB cables and connectors 19, 21-22, 69, 71, 79, 87, 96 USB devices connecting 32 disabling the receptacle for 24...
- Page 124 SMART Technologies smarttech.com/support smarttech.com/contactsupport smarttech.com/kb/170446...
Need help?
Do you have a question about the 8070i-G4-SMP and is the answer not in the manual?
Questions and answers