
Subscribe to Our Youtube Channel
Related Manuals for SMART Board 685ix


Summary of Contents for SMART Board 685ix
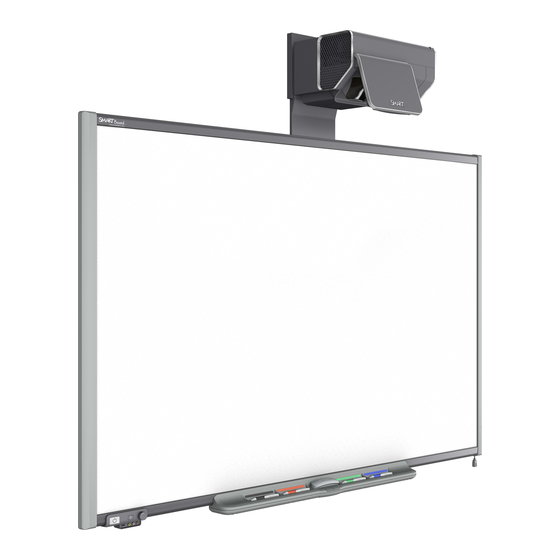
- Page 1 SMART Board™ 685ix Premium Interactive Whiteboard System (Appliance-Based) Installation on the FUWM-600 Wall Mount...
- Page 2 Trademark notice SMART Board, the SMART logo and smarttech are trademarks or registered trademarks of SMART Technologies ULC in the U.S. and/or other countries. Phillips is a registered trademark of Phillips Screw Company. All other third-party product and company names may be trademarks of their respective owners.
-
Page 3: Important Information
SMART Board interactive whiteboard and its accessories and helps prevent injuries and equipment damage. If you own a SMART product other than a SMART Board 685ix premium interactive whiteboard system, refer to the installation guide for your product for relevant warnings and maintenance instructions. -
Page 4: Other Precautions
I M P O R T A N T I N F O R M A T I O N CAUTIONS • If you need to lean your interactive whiteboard against a wall before you mount it, make sure that it remains in an upright position, resting on its pen tray brackets, which are designed to sustain your interactive whiteboard’s weight. -
Page 5: Table Of Contents
Installing your SMART Board 685ix premium interactive whiteboard system (appliance-based) ....................1 In this chapter ....................1 Before installing the SMART Board 685ix interactive whiteboard system ..2 Environmental requirements ..............2 Verify the installation of the FUWM-600 wall mount and the SMART Hub SE240/VE220 .............. - Page 6 CON T EN TS Installing the pen tray ................13 Configuring the projector to turn on or off..........14 Configuring the hub to control the projector ........... 14 Orienting your interactive whiteboard system ........15 Hardware environmental compliance ..............17 Waste Electrical and Electronic Equipment regulations (WEEE directive) ...
-
Page 7: Installing Your Smart Board 685Ix Premium Interactive Whiteboard System (Appliance-Based)
Refer to the FUWM-600 SE240/VE220 installation instructions included with the wall mount, document 99-01032-20, to install the wall mount. In this chapter Refer to these topics for information about mounting your SMART Board 685ix interactive whiteboard system (appliance-based) on its FUWM-600 wall mount. •... -
Page 8: Before Installing The Smart Board 685Ix Interactive Whiteboard System
SMART Hub SE240/VE220 You must complete the installation of the FUWM-600 wall mount and the SMART Hub SE240 or VE220 before you can install the UX60 projector, the SMART Board 685 interactive whiteboard and the control module. Refer to the FUWM-600 SE240/VE220 installation guide, document 99-01032-20, provided with your FUWM-600 wall mount unit for more information. -
Page 9: Mounting Your Smart Board 685Ix Interactive Whiteboard System On A Fuwm-600 Wall Mount
I N S T A L L IN G Y O U R S M A RT B O A R D 6 85 IX P R E MI U M I N T E R A C T I V E WH ITE BOARD S YS T E M ( A P P L I A NC E - B A S E D ) Mounting your SMART Board 685ix interactive whiteboard system on a... -
Page 10: Installing The Projector Mount And Wall Mount Bracket
I N S T A L L IN G Y O U R S M A RT B O A R D 6 85 IX P R E MI U M I N T E R A C T I V E WH ITE BOARD S YS T E M ( A P P L I A NC E - B A S E D ) Installing the projector mount and wall mount bracket To install the projector mount, use the screws labelled f (×7) shown on page 27 of the... - Page 11 To install the wall mount Using a Phillips No. 2 screwdriver, secure the wall bracket mount bracket to the wall mount with the included screws. IMPORTANT Use only one of the two wall-mounting brackets provided with your SMART Board 685 interactive whiteboard.
-
Page 12: Installing The Smart Hub Se240/Se220'S Power And Usb Cables
I N S T A L L IN G Y O U R S M A RT B O A R D 6 85 IX P R E MI U M I N T E R A C T I V E WH ITE BOARD S YS T E M ( A P P L I A NC E - B A S E D ) Installing the SMART Hub SE240/SE220’s power and USB cables... -
Page 13: Installing The Projector Cables
I N S T A L L IN G Y O U R S M A RT B O A R D 6 85 IX P R E MI U M I N T E R A C T I V E WH ITE BOARD S YS T E M ( A P P L I A NC E - B A S E D ) Installing the projector cables To install the projector... -
Page 14: Installing Sba Speakers And Cables
Don’t connect the power cable to a wall outlet at this time. Installing SBA speakers and cables SMART recommends that you install your SMART Board Audio (SBA) speakers on the wall on each side of the interactive whiteboard instead of attaching them to the interactive whiteboard. -
Page 15: Installing Additional Cables
I N S T A L L IN G Y O U R S M A RT B O A R D 6 85 IX P R E MI U M I N T E R A C T I V E WH ITE BOARD S YS T E M ( A P P L I A NC E - B A S E D ) 3. -
Page 16: Securing The Cables
10 | I N S T A L L IN G Y O U R S M A RT B O A R D 6 85 IX P R E MI U M I N T E R A C T I V E WH ITE BOARD S YS T E M ( A P P L I A NC E - B A S E D ) 4. -
Page 17: Installing The Control Module Cable
2. Run both ends of the cable through the notches in the track leaving the ends hanging near each end of the bottom frame. Mounting the interactive whiteboard Follow this procedure to mount your SMART Board 685 interactive whiteboard on the FUWM-600. To mount your 1. -
Page 18: Completing Your Installation
2. Follow the procedures in the SMART Board 685ix Interactive Whiteboard System Configuration and User’s Guide, document 99-00984-20, to align the projector. 3. Slide the interactive whiteboard from side to... -
Page 19: Installing The Control Module
13 | I N S T A L L IN G Y O U R S M A RT B O A R D 6 85 IX P R E MI U M I N T E R A C T I V E WH ITE BOARD S YS T E M ( A P P L I A NC E - B A S E D ) Installing the control module After you connect all of the cables, you can install the control module into the pen tray. -
Page 20: Configuring The Projector To Turn On Or Off
SMART Hub SE240 or SMART Hub VE220. IMPORTANT If you do not perform the following procedure, your UX60 projector doesn’t turn on or off when you press the control module’s Power button on your SMART Board interactive whiteboard’s pen tray. To select the State Report 1. -
Page 21: Orienting Your Interactive Whiteboard System
Orient your interactive whiteboard system before you orient it with other connected computers. To orient your interactive 1. Press both pen tray buttons on your SMART Board interactive whiteboard whiteboard system simultaneously. The SMART Hub SE240 Settings or SMART Hub VE220 Settings dialog box appears. - Page 22 16 | I N S T A L L IN G Y O U R S M A RT B O A R D 6 85 IX P R E MI U M I N T E R A C T I V E WH ITE BOARD S YS T E M ( A P P L I A NC E - B A S E D )
-
Page 23: Hardware Environmental Compliance
Appendix A Hardware environmental compliance SMART Technologies supports global efforts to ensure that electronic equipment is manufactured, sold and disposed of in a safe and environmentally friendly manner. Waste Electrical and Electronic Equipment regulations (WEEE directive) Waste Electrical and Electronic Equipment regulations apply to all electrical and electronic equipment sold within the European Union. -
Page 24: China's Electronic Information Products Regulations
18 | HA RD WAR E EN VI RON MEN T AL COM PLI ANC E China’s Electronic Information Products regulations China regulates products that are classified as EIP (Electronic Information Products). SMART Technologies products fall under this classification and meet the requirements for China’s EIP regulations. -
Page 25: Customer Support
Appendix B Customer support Online information and support Visit www.smarttech.com/support to view and download user’s guides, how-to and troubleshooting articles, software and more. Training Visit www.smarttech.com/trainingcenter for training materials and information about our training services. Technical support If you experience difficulty with your SMART product, please contact your local reseller before contacting SMART Technical Support. -
Page 26: General Inquiries
20 | CU ST O ME R S UPP O RT General inquiries Address SMART Technologies 3636 Research Road NW Calgary, AB T2L 1Y1 CANADA Switchboard +1.403.228.5940 or Toll Free 1.866.518.6791 (U.S./Canada) +1.403.228.2500 E-mail info@smarttech.com Warranty Product warranty is governed by the terms and conditions of SMART’s “Limited Equipment Warranty”... - Page 28 Toll Free 1.866.518.6791 (U.S./Canada) or +1.403.228.5940 www.smarttech.com...
Need help?
Do you have a question about the 685ix and is the answer not in the manual?
Questions and answers