Table of Contents
Advertisement
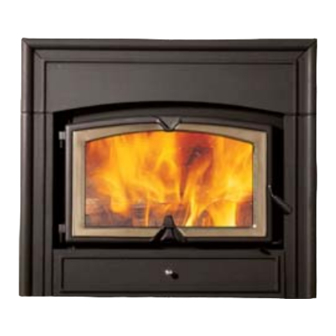
INSTALLATION AND OPERATION MANUAL
This manual is available for free download on the manufacturer's web site. It is a copyrighted
document. Re-sale is strictly prohibited. The manufacturer may update this manual from time to
time and cannot be responsible for problems, injuries, or damages arising out of the use of
information contained in any manual obtained from unauthorized sources.
Printed in Canada
PREFABRICATED WOOD-BURNING FIREPLACE
Keep this manual for future reference
Standards:
ULC-S610
UL-127
EPA Phase II
Manufactured by:
STOVE BUILDER INTERNATIONAL INC.
250, rue de Copenhague,
Saint-Augustin-de-Desmaures
(Quebec) G3A 2H3
Tel.: 418 878-3040
Fax: 418 878-3001
valcourtinc.com
45340A
08-01-2013
Advertisement
Table of Contents

Related Manuals for Valcourt Saguenay FP8


Summary of Contents for Valcourt Saguenay FP8
- Page 1 INSTALLATION AND OPERATION MANUAL Keep this manual for future reference Standards: ULC-S610 UL-127 EPA Phase II Manufactured by: STOVE BUILDER INTERNATIONAL INC. 250, rue de Copenhague, Saint-Augustin-de-Desmaures (Quebec) G3A 2H3 Tel.: 418 878-3040 Fax: 418 878-3001 valcourtinc.com This manual is available for free download on the manufacturer’s web site. It is a copyrighted document.
-
Page 2: Table Of Contents
TABLE OF CONTENTS Page INTRODUCTION .......................... 3 INSTALLATION ........................... 5 Fireplace Installation ........................8 Door overlay installation......................11 Chimney Installation ......................... 12 Installation Instructions for Masonry Application ..............15 Fireplace Finish ......................... 18 USE AND SAFETY ........................ -
Page 3: Introduction
INTRODUCTION This manual contains all the information required for safe, efficient installation and use of your Valcourt fireplace. Read carefully all the instructions contained herein and keep this manual handy so you may refer to it whenever necessary. Before starting to install the fireplace, consult local authorities to obtain a construction permit and learn about all applicable regulatory requirements. - Page 4 Figure #1: Saguenay Fireplace Dimensions CORNER VIEW...
-
Page 5: Installation
INSTALLATION This fireplace is designed and approved for installation with the following brands of chimneys measuring 6” (152 mm) in diameter as well as a minimum of 15’ (4.6 m) and maximum of 45’ (13.5 m) in height. No other device must be added to the chimney connected to the fireplace. CHIMNEY INNER BRAND... - Page 6 For optimal performance, install the chimney indoors if possible. In areas where temperatures are constantly below freezing (32°F/0°C), installing the chimney outdoors promotes functional problems such as low draft, excessive creosoting, and problems starting the fire. In addition, outdoor chimneys are subject to decreases in pressure and smoke flow reversal.
- Page 7 Figure #3: Chimney Configurations The table below shows the minimum chimney height requirements, fireplace included, according to the number of elbows: Chimney Number of Elbows Minimum Height Straight installation --------------- 15’ (4.6 m) 1 - 15° offset 2 - 15° elbows 15’...
-
Page 8: Fireplace Installation
FIREPLACE INSTALLATION 1. Remove all combustible floor coverings, e.g. carpeting, linoleum, etc., from the area where the fireplace is to be installed. 2. The fireplace must be installed directly on a platform with a minimum height of 2” (51 mm) and made of combustible or non combustible materials, such as wood or plywood or any other hard, sturdy surface. - Page 9 Electrical Installation Instructions 12.1 Install the connection box on the bottom right of the fireplace behind the lower louver. 12.2 Install the fan on the pegs at the back of the fireplace behind the lower louver. 12.3 Connect the terminals onto the thermo-disc found under the fireplace floor. 12.4 Insert a 110-volt wire into the box through the appropriate hole.
- Page 10 Figure #5: Hearth Extension Installation...
-
Page 11: Door Overlay Installation
DOOR OVERLAY INSTALLATION Your Valcourt fireplace is equipped with a door overlay. See drawing below for installation details. -
Page 12: Chimney Installation
CHIMNEY INSTALLATION 1. If possible, install an interior chimney as it will provide better performance. In areas with continuous temperatures below 18 C (0 F), the use of an exterior chimney increases the likelihood of operating problems such as low draft, high rate of creosoting, and poor start-up characteristics. Exterior chimneys are also prone to down-drafting and flow reversal. - Page 13 Figure 6.1a Figure 6.1b...
- Page 14 12. When you build a chase enclosure for chimney sections above the roof, the chimney must extend at least 3 ft. (92 cm) above the chase enclosure and at least 2 ft. (61 cm) higher than any wall, roof or building within 10 ft.
-
Page 15: Installation Instructions For Masonry Application
INSTALLATION INSTRUCTIONS FOR MASONRY APPLICATION WARNING: Before starting installation, the masonry chimney must be inspected by a qualified sweep. The following requirements must be respected: 1. The chimney must be absolutely clear of any soot residue or creosote. Check for cracks, loose or missing bricks that could inhibit correct installation of the liner. - Page 16 Figure #6.2: Masonry chimney installation...
- Page 17 Figure #7: Straight Chimney Installation Figure #8: Chimney with Elbows Installation Figure #9: Exterior Chimney Installation Figure #10: Isolated Chase Chimney Installation...
-
Page 18: Fireplace Finish
FIREPLACE FINISH 1. Combustible materials can be used to finish the fireplace in the area shown in Figure 11. The framing can be built directly on the sides of the appliance. 2. No side wall of more than 6” (152 mm) wide at right angle with the face of the appliance can be closer than 4”... - Page 19 Figure #11: Fireplace Finishing Figure #12a : Mantel Positioning...
- Page 20 Figure 12b : Combustible material positioning A : 48 po. B : Radius of 80 in. C : 80 in. Min.
- Page 21 Figure #13: Installation of Combustible and Non-Combustible Materials...
- Page 22 Figure #14: Chimney Enclosure...
-
Page 23: Use And Safety
USE AND SAFETY 1. Teach children fireplace safety rules. 2. Do not use the fireplace under the following conditions: 2.1 Whenever a Refractory brick is missing or broken. 2.2 Whenever the ceramic glass is cracked or broken. 3. Never use flammable liquids to light or revive a fire and keep such products away from any heat source. Before lighting a fire, make sure there are no flammable liquids, gases or fumes in the room. -
Page 24: The Use Of Manufactured Logs
THE USE OF MANUFACTURED LOGS There are numerous types of manufactured logs sold on the market. You must be very careful with this type of product. Many brands of manufactured logs contain chemical additives. DO NOT BURN ANY MANUFACTURED LOGS CONTAINING CHEMICAL ADDITIVES. IF YOU DO, YOU MAY OVERHEAT YOUR FIREPLACE, THEREFORE CAUSING A FIRE HAZARD AND VOIDING YOUR WARRANTY. - Page 25 Your Saguenay fireplace will work best if a thick bed of hot embers is maintained in the bottom of the firebox, and a minimum of two large pieces of seasoned fuel are added. Combustion efficiency is largely related to establishing a hot ember bed, and hot firebox temperatures. The quicker the fireplace and chimney (flue) get up to normal operating temperatures, the better.
- Page 26 Minimum Air Intake Burning wood with the air intake damper in the minimum open position maximizes combustion time, therefore, making it necessary to refuel only every 6 to 8 hours. Decreasing air intake will not put the fire out but it will substantially reduce its intensity, and the creosote produced by the smoldering fire may blacken the glass doors.
-
Page 27: Maintenance
MAINTENANCE GLASS AND METAL PLATING The Saguenay fireplace is designed to keep the glass clean under normal operating conditions. If the Saguenay fireplace is operated continuously with the combustion air controls closed, the glass will tend to get dirty unless the fuel, firebox and glass are maintained at hot. To clean the glass, there are a number of specially designed cleaners. -
Page 28: Door Installation And Alignment
DOOR INSTALLATION AND ALIGNMENT Figure #17: Door Adjustment To install the cast-iron door, place it on their pintles and make sure the door closes tightly. To adjust door positioning and spacing, loosen the pintle screw and pivot the pintle until the door is in the correct position. -
Page 29: Troubleshooting
TROUBLESHOOTING Expansion and contraction noises during the heating and cooling cycle are normal. Prevent smoke flow reversal by positioning air intake lever to maximum, slowly open the fireplace door before lighting the kindling, make a torch by lighting rolled up newspaper and hold it out to the smoke chamber until you feel the chimney begin to draw. -
Page 30: Heat Distribution Systems
HEAT DISTRIBUTION SYSTEMS EPA certified wood fireplaces generate a lot of heat. For the most part, they generate too much for the room where they are located. Therefore, you need to manage the excess heat and send it where it is needed. To provide a solution, our research and development laboratory has designed the Heat Management System, an innovative technology that allows the recovery of the heat produced during combustion and redirects it into distribution ducts to heat other areas in your home. -
Page 31: Gravity Distribution Kit
GRAVITY DISTRIBUTION KIT The Gravity Distribution Kit allows you to block the upper fireplace louver in order to bring hot air into the same room as the fireplace, in adjacent rooms, or upstairs at a maximum distance of 10’ (3 m). The minimum height of the hot air duct must be 68”... -
Page 32: Valcourt Limited Lifetime Warranty
VALCOURT LIMITED LIFETIME WARRANTY The warranty of the manufacturer extends only to the original consumer purchaser and is not transferable. This warranty covers brand new products only, which have not been altered, modified nor repaired since shipment from factory. Products covered under this warranty must have been manufactured after the revision date indicated below.
Need help?
Do you have a question about the Saguenay FP8 and is the answer not in the manual?
Questions and answers