
Related Manuals for Valcourt Saguency FP8


Summary of Contents for Valcourt Saguency FP8
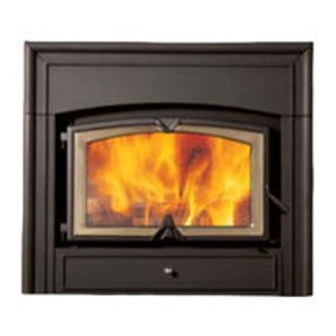
- Page 1 PREFABRICATED WOOD-BURNING FIREPLACE INSTALLATION AND OPERATION MANUAL Keep this manual for future reference Standards: ULC-S610 UL-127 EPA Phase II Revised: June 2009 Web Wite: valcourtinc.com...
- Page 2 REGISTER YOUR WARRANTY ONLINE To receive full warranty coverage, you will need to show evidence of the date you purchased your unit. Keep your sales invoice. We also recommended that you register your warranty online at: www.valcourtinc.com Registering your warranty online will help us track rapidly the information we need on your unit.
-
Page 3: Table Of Contents
Door Installation and Alignment ....................26 Gasket Replacement ........................26 TROUBLESHOOTING ....................... 27 HEAT DISTRIBUTION SYSTEMS ................... 28 Gravity Distribution Kit ......................28 Forced Air Distribution Kit ....................... 29 VALCOURT LIMITED LIFETIME WARRANTY ..............31 ... -
Page 4: Introduction
INTRODUCTION This manual contains all the information required for safe, efficient installation and use of your Valcourt fireplace. Read carefully all the instructions contained herein and keep this manual handy so you may refer to it whenever necessary. Before starting to install the fireplace, consult local authorities to obtain a construction permit and learn about all applicable regulatory requirements. -
Page 5: Installation
INSTALLATION This fireplace is designed and approved for installation with the following brands of chimneys measuring 6” (152 mm) in diameter as well as a minimum of 15’ (4.6 m) and maximum of 45’ (13.5 m) in height. No other device must be added to the chimney connected to the fireplace. CHIMNEY INNER BRAND... - Page 6 ATTENTION: Do not modify or adapt the fireplace’s construction or components. This would void the warranty. In this event, Valcourt would not be responsible for any damages which may occur.
- Page 7 Figure #2: Various Fireplace Locations Figure #3: Chimney Configurations...
- Page 8 The table below shows the minimum chimney height requirements, fireplace included, according to the number of elbows: Chimney Number of Elbows Minimum Height Straight installation --------------- 15’ (4.6 m) 1 - 15° offset 2 - 15° elbows 15’ (4.6 m) 2 - 15°...
-
Page 9: Fireplace Installation
12. Valcourt fireplaces can be equipped with a temperature control. The fan will come on as soon as the fireplace reaches its minimum start temperature. Have the wiring installed by a qualified electrician... - Page 10 Electrical Installation Instructions 12.1 Install the connection box on the bottom right of the fireplace behind the lower louver. 12.2 Install the fan on the pegs at the back of the fireplace behind the lower louver. 12.3 Connect the terminals onto the thermo-disc found under the fireplace floor. 12.4 Insert a 110-volt wire into the box through the appropriate hole.
- Page 11 Figure #5: Hearth Extension Installation...
-
Page 12: Door Overlay Installation
DOOR OVERLAY INSTALLATION Your Valcourt fireplace is equipped with a door overlay. See drawing below for installation details. -
Page 13: Chimney Installation
CHIMNEY INSTALLATION 1. Assemble the first chimney section with the adaptor (provided by the chimney manufacturer) using three ¾” (19 mm) screws. 2. Screw this assembly to the fireplace using four ¾” (19 mm) screws. 3. Continue the installation following the instructions in the chimney manufacturer’s manual. (Figures #6 through #14) 4. - Page 14 INSTALLATION The chimney must be relined with a stainless steel liner or any other listed liner or flexible liner to ULC-S635, CAN/ULC-S640 or UL777 of the same diameter as the outlet of the fireplace. Follow these steps: 1. Position the fireplace in its location. Temporarily install the chimney elbow on the top of the fireplace and, using a level, mark with an oval the location where the flue liner will enter the masonry chimney.
- Page 15 Figure #6: Masonry chimney installation Figure #6.1: Minimum Chimney Height...
- Page 16 Figure #7: Straight Chimney Installation Figure #8: Chimney with Elbows Installation Figure #9: Exterior Chimney Installation Figure #10: Isolated Chase Chimney Installation...
-
Page 17: Fireplace Finish
FIREPLACE FINISH 1. Combustible materials can be used to finish the fireplace in the area shown in Figure 11. The framing can be built directly on the sides of the appliance. 2. No side wall of more than 6” (152 mm) wide at right angle with the face of the appliance can be closer than 4”... - Page 18 Figure #11: Fireplace Finishing Figure #12: Mantel Positioning...
- Page 19 Figure #13: Installation of Combustible and Non-Combustible Materials...
- Page 20 Figure #14: Chimney Enclosure...
-
Page 21: Use And Safety
6. Valcourt fireplaces are designed to burn reasonable quantities of wood. Avoid making overly intense fires that would damage the appliance. Do not burn garbage, painted wood or wood that has been exposed to salt water. -
Page 22: Creosote
CREOSOTE When wood is burned slowly without a flame, it produces tar and other organic vapours which combine with expelled moisture to form creosote. The creosote vapors condense in ; the relatively cool chimney flue of a slow-burning fire. As a result, creosote residue accumulates on the flue lining. When ignited this creosote makes an extremely hot fire. - Page 23 In order to achieve an optimum efficiency from your unit, we suggest that you operate it with the air control completely closed. Make sure that you have a good fire going and an adequate ember bed before you completely close the air control. Closing the air control too soon will lower combustion efficiency and may cause the fire to die out.
- Page 24 AIR INTAKE ADJUSTMENT BURN TIME MAXIMUM 1 to 2 hours MEDIUM 3 to 4 hours MINIMUM 6 to 8 hours SOLUTIONS TO THE MOST COMMON PROBLEMS Difficulty starting the fire: Use more paper and dry kindling. The ideal size for kindling is approximately 1”...
-
Page 25: Maintenance
To clean the glass, there are a number of specially designed cleaners. Your authorized Valcourt dealer can recommend a suitable cleaner which is available in your area. Regular household glass cleaners will not clean creosote. Do not use abrasives such as steel pads, steel wool or oven cleaner as they will scratch the glass. -
Page 26: Door Installation And Alignment
DOOR INSTALLATION AND ALIGNMENT Figure #17: Door Adjustment To install the cast-iron door, place it on their pintles and make sure the door closes tightly. To adjust door positioning and spacing, loosen the pintle screw and pivot the pintle until the door is in the correct position. -
Page 27: Troubleshooting
TROUBLESHOOTING Expansion and contraction noises during the heating and cooling cycle are normal. Prevent smoke flow reversal by positioning air intake lever to maximum, slowly open the fireplace door before lighting the kindling, make a torch by lighting rolled up newspaper and hold it out to the smoke chamber until you feel the chimney begin to draw. -
Page 28: Heat Distribution Systems
HEAT DISTRIBUTION SYSTEMS Figure #18: Heat Distribution Options GRAVITY DISTRIBUTION KIT The Gravity Distribution Kit may be used to heat rooms located above, behind and either side of the room where the fireplace is located. Note that, if the hot air outlets are located at various levels, the heat will tend to seek the one at the highest level. -
Page 29: Forced Air Distribution Kit
The Forced Air Distribution Kit can be used to heat adjacent rooms or lower floors located up to 50’ (15.2 m) from your Valcourt Fireplace. Only 6” (15 cm) flexible isolated duct can be use for this installation. (Figure #18) If the fan is installed with a rheostat, the operation is manually controlled. - Page 30 2. The duct can also be safely connected to an existing heating system. However, do not connect any hot air ducts to the cold air return. The hot air duct must be connected to the main duct coming out of the blower. Install a back draft damper at the junction between the fireplace duct and the blower outlet duct.
-
Page 31: Valcourt Limited Lifetime Warranty
Paint (peeling), gaskets, insulation, firebrick, and ceramic fibre blankets. 1 year *Pictures required Shall your unit or a components be defective, contact immediately your VALCOURT dealer. Prior to your call make sure you have the following information necessary to your warranty claim treatment: •...
Need help?
Do you have a question about the Saguency FP8 and is the answer not in the manual?
Questions and answers