
Related Manuals for Haier AB092XCERA


Summary of Contents for Haier AB092XCERA
-
Page 1: Service Manual
SERVICE MANUAL X MULTI SERIES 4-WAY CASSETTE INDOOR UNIT CONVERTIBLE INDOOR UNIT CONSOLE INDOOR UNIT DUCT INDOOR UNIT WALL MOUNTED INDOOR UNIT OUTDOOR UNIT Haier Commercial Air Conditioner Version: 200708... -
Page 2: Table Of Contents
CONTENT 1.General information --------------------------------------------------------------------------------------------- 3 1.1 X Multi series line up ------------------------------------------------------------------------------------------3 1.2 Operation temperature range ------------------------------------------------------------------------------ 3 1.3 Product features ----------------------------------------------------------------------------------------------- 4 2.Specifications ---------------------------------------------------------------------------------------------------- 6 3.Dimension ---------------------------------------------------------------------------------------------------------17 4.Pipe and wiring installation ----------------------------------------------------------------------------------- 21 4.1 Conbination of indoor and outdoor units ----------------------------------------------------------------21 4.2 Wiring connection ---------------------------------------------------------------------------------------------31 4.3 Limitation on the installation ------------------------------------------------------------------------------- 34 4.4 Outdoor unit installation -------------------------------------------------------------------------------------37... -
Page 4: Product Features
Commercial Air Conditioner 1 .3 Product features High efficienct, universal outdoor unit The outdoor unit can match with cassette type ,duct type, convertible type, console type and wall mounted type indoor unit. Outdoor unit can match with multiple indoor units. Even when you have already installed the air conditioner, if you want to add or reduce one unit, go ahead freely as long as your operation complies with our design. - Page 5 Commercial Air Conditioner Self-diagnostic function In the course of operation, if the failure occurs, the failure code will display on the wired controller or on the operation panel. Then according to the failure code chart, you can eliminate the failure soon. Central control function, if connected with a detector and a central controller That is convenient for building management.
-
Page 6: Specifications
2. Specifications Item Model AU182XFERA Function Cooling Heating —— Rating capacity 5300 7000 Power input (indoor + outdoor) 1650 1800 Current input (indoor + outdoor) 3.21 3.89 EER / COP Minimum capacity 1500 1800 Power input Maximum capacity 5800 7300 Power input (indoor + outdoor) 2300 2300... - Page 7 Item Model AU222XFERA Cooling Heating Function —— Rating capacity 6400 7300 Power input (indoor + outdoor) 2100 2000 Current input (indoor + outdoor) EER / COP 3.04 3.65 Minimum capacity 1500 1800 Power input Maximum capacity 6800 7500 Power input (indoor + outdoor) 2900 2900 1PH, 220-230V~, 50Hz...
- Page 8 Item Model AU252XGERA Function Cooling Heating —— Rating capacity 7250 8000 Power input (indoor + outdoor) 2250 2200 Current input (indoor + outdoor) 10.4 10.4 3.22 3.64 EER / COP Minimum capacity 1500 1800 Power input Maximum capacity 8200 9000 3200 3000 Power input (indoor + outdoor)
- Page 9 Item Model AU282XHERA Cooling Heating Function —— Rating capacity 8000 10000 Power input (indoor + outdoor) 2480 2700 Current input (indoor + outdoor) 11.0 11.9 3.22 3.70 EER / COP Minimum capacity 1500 1800 Power input 9500 11000 Maximum capacity Power input (indoor + outdoor) 3800 3800...
- Page 10 Item Model AU342XHERA Cooling Heating Function —— Rating capacity 10000 11000 Power input (indoor + outdoor) 3200 3200 Current input (indoor + outdoor) 14.3 14.3 EER / COP 3.13 3.44 Minimum capacity 1500 1800 Power input Maximum capacity 11000 11500 Power input (indoor + outdoor) 4000 4000...
- Page 11 Item Model AU362XHERA Cooling Heating Function —— Rating capacity 10000 11000 Power input (indoor + outdoor) 3200 3200 Current input (indoor + outdoor) 14.3 14.3 EER / COP 3.13 3.44 Minimum capacity 1500 1800 Power input 11000 11500 Maximum capacity Power input (indoor + outdoor) 4000 4000...
- Page 12 Item Model AS072XVERA AS092XVERA Function Cooling Heating Cooling Heating —— Capacity 2000 2300 2500 2900 Power cable 3 × (1.0~1.5mm —— 2x(0.75~1.25mm ), must be shieled Communication cable —— Dehumidifying capacity 10‐³×m³/h Power source N, V, Hz 1,220-230~, 50 Running current A / A 0.15 0.15...
- Page 13 Item Model AB092XCERA AB122XCERA Function —— Cooling Heating Cooling Heating Capacity 2500 2900 3500 3800 Dehumidifying capacity 10‐³×m³/h Power cable 3 × (1.0~1.5mm —— Communication cable —— 2x(0.75~1.25mm ), must be shieled Power source 1, 220~230, 50 N, V, Hz Running current 0.45...
- Page 14 Item Model AD092XLERA AD122XLERA Function Cooling Heating Cooling Heating —— Capacity 2500 2900 3500 3800 Dehumidifying capacity 10‐³×m³/h 3 × (1.0~1.5mm Power cable —— 2x(0.75~1.25mm ), must be shieled Communication cable —— Power source 1, 220~230, 50 N, V, Hz Running current 0.35 0.35...
- Page 15 Item Model AC142XCERA AC182XCERA Cooling Heating Cooling Heating Function —— 4100 4600 5000 5500 Capacity Dehumidifying capacity 10‐³×m³/h Power cable 3 × 0.75mm —— 2x(0.75~1.25mm ), must be shieled Communication cable —— 1, 220~230, 50 Power source N, V, Hz shieled Running current 0.45...
- Page 16 Item Model AF092XCERA AF122XCERA Cooling Heating Cooling Heating Function —— 2500 2900 3500 3800 Capacity Dehumidifying capacity 10‐³×m³/h 3 × (1.0~1.5mm Power cable —— 2x(0.75~1.25mm ), must be shieled Communication cable —— 1, 220~230, 50 Power source N, V, Hz Running current 0.45 0.45...
-
Page 17: Dimension
3. Dimension AU182XFERA,AU222XFERA 319.5 113.5 113.5 AU282XHERA: 1068 -17-... - Page 18 -18-...
- Page 20 Console type unit: Wall Mounted Type model AS07/09/122XVERA AS182XVERA...
-
Page 21: Pipe And Wiring Installation
4. Pipe and wiring installation 4.1 Multi combination and the data AU182XFERA combination and the data COOLING total cooling total power input total current ENERGY capacity(kW) Combinations capacity(kW) (kW) (A)@230V LABEL (Nom. cooling) (W/W) min. rated max. min. rated max. min. - Page 22 AU222XFERA combination and the data COOLING total cooling total power input total current ENERGY Rated capacity(Kw) Combinations capacity(kW) (kW) (A)@230V (W/W) LABEL (Nom. cooling) min. rated max. min. rated max. min. rated max. Unit Unit Unit Unit Unit Unit rated data data data...
- Page 23 AU252XGERA combination and the data COOLING total cooling total power input total current ENERGY Rated capacity(Kw) Combinations capacity(kW) (kW) (A)@230V (W/W) LABEL (Nom. cooling) min. rated max. min. rated max. min. rated max. Unit Unit Unit Unit Unit Unit Unit Unit rated data...
- Page 24 HEATING total heating total power input total current ENERGY Rated capacity(kW) Combinations capacity(KW) (A)@230V LABEL (Nom. heating) (W/W) min. rated max. min. rated max. min. rated max. Unit Unit Unit Unit Unit Unit Unit Unit rated data data data data data Data data...
- Page 25 AU282XHERA combination and the data COOLING total cooling total power input total current ENERGY Rated capacity Output/kW Combinations capacity(kW) (kW) (A)@230V LABEL (Nom. cooling) (W/W) min. rated max. min. rated max. min. rated max. Unit Unit Unit Unit Unit Unit Unit Unit rated...
- Page 26 HEATING total heating total power input total current ENERGY Rated capacity Output/kW Combinations capacity(KW) (A)@230V LABEL (Nom. heating) (W/W) min. rated max. min. rated max. min. rated max. Unit Unit Unit Unit Unit Unit Unit Unit rated data data data data data Data...
- Page 27 AU342XHERA combination and the data COOLING total cooling total power input total current ENERGY Rated capacity Output/kW Combinations capacity(kW) (kW) (A)@230V LABEL (Nom. cooling) (W/W) min. rated max. min. rated max. min. rated max. Unit Unit Unit Unit Unit Unit Unit Unit rated...
- Page 28 HEATING total heating total power input total current ENERGY Rated capacity Output/kW Combinations capacity(KW) (A)@230V LABEL (Nom. heating) (W/W) min. rated max. min. rated max. min. rated max. Unit Unit Unit Unit Unit Unit Unit Unit rated data data data data data Data...
- Page 29 AU362XHERA combination and the data COOLING total cooling total power input total current ENERGY Rated capacity Output/kW Combinations capacity(kW) (kW) (A)@230V LABEL (Nom. cooling) (W/W) min. rated max. min. rated max. min. rated max. Unit Unit Unit Unit Unit Unit Unit Unit Unit...
- Page 30 HEATING total heating total power input total current ENERGY Rated capacity Output/kW Combinations capacity(KW) (A)@230V LABEL (Nom. heating) (W/W) min. rated max. min. rated max. min. rated max. Unit Unit Unit Unit Unit Unit Unit Unit Unit Unit rated data data data data...
-
Page 31: Wiring Connection
4.2. Wiring connection AU18-222XFERA... - Page 32 AU25-342X*ERA -32-...
- Page 33 AU362XHERA:...
-
Page 34: Limitation On The Installation
limitations on the installation -34-... - Page 35 AU28-342XHERA...
- Page 36 AU362XHERA...
-
Page 37: Outdoor Unit Installation
4.4 Outdoor units installation Installation drawings of indoor and outdoor units 1. Do not connected the embedded branch piping and the outdoor unit when only carrying out piping work without connecting the indoor unit in ordor to add another indoor unit later. Make sure no dirt or mositure gets into eigher side of the embedded branch piping. -
Page 38: Refrigerant Piping Work
Refrigerant piping work 1. Selection of pipe To this unit, both liquid and gas pipes shall be insulated as they become low temperature in operation. Use optional parts for piping set or pipes covered with equivalent insulation material. Liquid pipe 6.35mm ( 1/4'' ) x 0.8mm Gas pipe 9.52mm ( 3/8'' ) x 0.8mm... - Page 39 4.Cutting and Flaring work of piping Pipe cutting is carried out with a pipe cutter and burs must be removed. After inserting the flare nut, flaring work is carried out. Size A (mm) Pipe diameter Liquid side 6.35mm(1/4") 0.8~1.5 Gas side 9.52mm(3/8") 1.0~1.5 Flare tooling die...
- Page 40 Purging method: to use vacuum pump Liquid stop valve 1 .Detach the service portis cap of 3-way valve, the valve Gas stop valve 2 way valve rod's cap for 2-way valve and 3-way valves, connect the 3 way valve Gauge maifold(R410A) service port into the projection of charge hose (low) for gaugemanifold.
-
Page 41: Wiring Work
Wiring work 1. Electric wiring Note: The air conditioner must use special circuit , and wiring by the qualified electrician according to the wiring rules specified in national standard. The grounding wire and the neutral wire shall be strictly separated. Connect the neutral wire with grounding wire is incorrect. - Page 42 Wiring work Crimp connection method for connection wire After connection,the wire must be fastened by wire cover. The wire cover shall press on the protection coat of the connection wire,as shown in right top figure. Note:When connecting the wiring,confirm the terminal number of indoor and outdoor units carefully. Incorrect wiring will damage the controller of air conditioner or the unit can not operate.
-
Page 43: Test Running
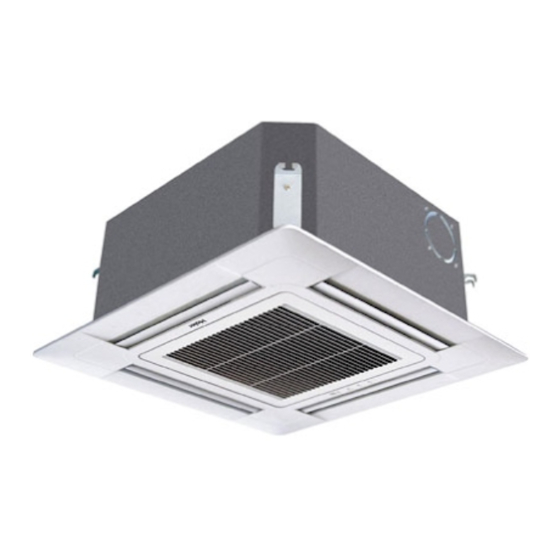
Test running Before starting the test running, please confirm the following works have been done successfully. 1) Correct piping work; 2) Correct wiring work; 3) Correct match of indoor and outdoor unit; 4) Proper recharge of refrigerant if needed; 5) Correct indoor unit addresses setting. Make sure that all the stop valves are fully open. - Page 44 4.5. Cassette type AB***XCERA...
- Page 45 -45-...
- Page 46 -46-...
- Page 47 -47-...
- Page 48 -48-...
- Page 49 -49-...
- Page 50 -50-...
- Page 51 4.6. Convertible type AC*** X CERA Floor console SELECTING THE MOUNTING POSITION Fig.A may be difference WARNING 1.5m Install at a place that can withstand the weight of the indoor and outdoor units and install positively so that the units will not topple or fall Left Right CAUTION...
-
Page 52: Preparing Indoor Unit Installation
PREPARING INDOOR UNIT INSTALLATION REMOVE THE INTAKE GRILL Open the intake grill and remove the three or four or six screws.(Fig. 1) Fig. 1 Remark: The main unit can be wired before the indoor unit is installed. Select the most appropriate installation order. - Page 53 2. INSTALLING DRAIN HOSE Wrap the insulation (drain hose) around the drain Select whether the drain hose will be connected hose connection. (Fig.7) to the left or right side.(Fig.3) Insert the drain hose into the drain pan, then secure the drain hose with a nylon fastener.
- Page 54 1. DRILLING FOR PIPING 3. INSTALLING BRACKETS Select piping and drain directions. Install the brackets with nuts, washers and spring (Fig.11) washers.(Fig. 15) Rear (Install the drain Fig. 15 hose in the direction.) Right Spring washer Bracket Special nut Fig. 11 CAUTION Bracket (Left) Bracket (Right)
-
Page 55: Outdoor Unit Installation
5. INSTALL THE DRAIN HOSE OUTDOOR UNIT INSTALLATION Select whether the drain hose will be connected to CONNECTING THE PIPING the left or right side.(Fig.3) Insert the drain hose into the drain pan, then secure 1. FLARE PROCESSING the drain hose with a nylon fastener.(Fig.6) (1) Cut the connection pipe with pipe cutters so Wrap the insulation (drain hose)around the drain that the pipe is not deformed. - Page 56 3. PIPING CONNECTION Flare connection 3-way valve Gas pipe AC142XCERA AC182XCERA Indoor Outdoor Unit unit Liquid 2-way valve pipe Flare connection (adaptor, from 9.52 to 12.7) To gas pipe To outdoor unit (1) Dimension of connecting pipe Gas pipe 12.7mm AC142XCERA AC182XCERA Liquid pipe...
-
Page 57: How To Connect Wiring To The Terminals
HOW TO CONNECT WIRING TO THE TERMINALS A. For solid core wiring (or F-cable)(Fig.24A) (1) Cut the wire with a wire cutter or wire-cutting pliers, then strip the insulation to about 25mm of the exposed solid wire. (2) Using a screwdriver, remove the terminal screw(s) on the terminal board. (3) Using pliers, bend the solid wire to form a loop suitable for the terminal screw. -
Page 58: Electrical Wiring
ELECTRICAL WIRING (2) Pull out the electric component box. CAUTION Fig.28 (1) Match the terminal block numbers and connection cord colors with those of the outdoor unit. Erroneous wiring may cause burning of the electric parts. (2) Connect the connection cords firmly to the terminal block. - Page 59 (5). Wiring of indoor unit The distance between the signal wires and the power cabes should be at least 50mm. 1(L) 2(N) 1(L) 2(N) To wired controller (In case of using wired To other controller) indoor unit Communication cable (Shield wire): H05RN-F 2X (0.75-1.5)mm C1 C2 (P) (Q)
- Page 60 (6). Indoor unit communication addresses setting CAUTION! FAIL TO DO THIS, THE UNIT WILL NOT WORK. 1.There are two methods to set the communication address A. Use the remote controller(default status in first installation). B. Use dip switches on the indoor unit PCB. 2.
- Page 61 SW03 INDOOR SW01 UNIT ADDRESS 1 2 3 4 5 6 7 8 1 2 3 4 5 6 7 8 1 2 3 4 5 6 7 8 1 2 3 4 5 6 7 8 1 2 3 4 5 6 7 8 4.
-
Page 62: Customer Guidance
ELECTRICAL WIRING (2) OUTDOOR UNIT (1) Is there any abnormal noise and vibration during WARNING operation? (1) Always use a special branch circuit and install a special (2) Will noise, wind, or drain water from the unit disturb receptacle to supply power to the room air conditioner. the neighbors? (2) Use a circuit breaker and receptacle matched to (3) Is there any gas leakage? - Page 63 2. Mount the cover plate.(Left) (1) Join the cover plate (left) and mount with screws. Fig. 33 3. Mount the intake grill. (1) Cut the right side of the intake grill. This is only when the pipe exits from the right side Fig.
-
Page 64: Preparation For Installation
4.7 Duct type AD***XLERA 2. Preparation for installation Installation tools Screw Driver (flat head, wabbler, triangle) 8 Pipe Expander Steel Saw Knives 60mm Drill 10 Clippers Inner Hexagon Spanner 11 Leakage Checker or Soap Liquid Shifting Spanner 12 Measuring Tape Spanner 13 Scraper or File Pipe Cutter... -
Page 65: Installation Procedure
5. Installation procedure 1. Drill a hole in the wall and insert the connecting pipe and wire through a PVC wall-through tube purchased locally. The wall hole shall be with a outward down slope of at least 1/100. (See Figure 1) 2. - Page 66 The distance between air duct outlet and air conditioner outlet is according to the length of actually installed air duct and in service behavior of the static pressure terminal: Installation sketch map for long and short air duct is showed below, when connect to short air duct, using low static terminal (terminal color is white), the distance between air duct outlet and air conditioner outlet is no more than 0.5m;...
- Page 67 2. Installation of air return duct Use rivets to connect the air return duct to the air return inlet of the indoor unit. The other end connects to the air return shutter. as shown in Fig.2. air return air return shutter duct indoor unit...
- Page 68 Original concrete slab Use hole hinge, hole plunger or hole bolt. Steel reinforcement structure Use steel angle or new support steel angle directly. Hanging bolt Support steel angle Suspension screw Hanging of the indoor unit Fasten the nut on the suspension screw and then hang the suspension screw in the Tslot of the suspension part of the unit.
- Page 69 Pipe and insulation material Pipe Rigid PVC pipe VP31.5mm (internal diameter) Insulation Foamed PE with thickness above 7mm Hose Drain pipe size: ? 19.05mm (3/4") PVC pipe. The hose is used for adjusting the off-center and angle of the rigid PVC pipe. Directly stretch the hose to install without making any deformation.
- Page 70 Piping Connection Flare connection 3-way valve Gas pipe AD092XLERA Indoor Outdoor AD122XLERA Unit unit Liquid 2-way valve pipe Flare connection Flare connection 3-way valve Gas pipe AD142XLERA AD182XLERA Indoor Outdoor Unit unit Liquid 2-way valve pipe Flare connection (adaptor, from 9.52 to 12.7) To gas pipe...
-
Page 71: Installation Check
1. Indoor unit communication addresses setting CAUTION! FAIL TO DO THIS, THE UNIT WILL NOT WORK. This kind of indoor units can only set the address by using the Dip Switches. (1).Please note that the address must be set as following: Indoor unit that connect to valve A, the address must be 1;... -
Page 72: Trial Operation
4.Trial operation The person who has completed this installation shall be requested to conduct a test operation for check: Is the temperature adjuster working normally? Does the location for installation conform to requirements? Winding up with Protective Plastic Tape.The connection pipes,drain pipe, and the connection wires shall be wound up with PVC tape. - Page 73 4 Wiring of indoor unit The distance between the signal wires and the power cabes should be at least 50mm. 1(L) 2(N) 1(L) 2(N) To wired controller(A,B,C) To other indoor unit Communication cable (Shield wire): H05RN-F 2X1.5 mm C1 C2 (P Q) Power cable : H05RN-F 3G 2.5 mm To outdoor unit...
- Page 74 4.8. Console type AF***XCERA Installation of indoor unit selection of installation place Place where it is easy to route drainage pipe and outdoor piping. Place ,away from heat source and with less direct sunlight. Place where cool and warm air could be delivered evently to every corner of the room.
- Page 75 Fixing of the unit Outdoor side 1. Position of the wall hole Indoor side Wall hole should be decided according to Wall hole Thickness installation of wall 70mm place and piping direction.(refer to installation drawings). 2. Making a wall hole Drill a hole of 120X70mm dia.
- Page 76 Piping connection of the indoor unit 1. Arrangement of piping and drainage pipe After opening inlet grill,you will see a control box. Remove the cover before working. Cut away, with a hammer or a saw, the lid for piping according to piping direction. Insulation material Drain hose Copper tube...
- Page 77 Others 1. Power supply requirements: Voltage: single-phase1PH,220-230V~,50Hz Dedicated electrical cable should be installed by a qualified technician in accordance with the state regulation for electrical engineering. The power source must be grounded. A circuit breaker must be installed Electrical cables should be connected by Y method. Damaged or wornelectrical cable must be replaced by authorized after sales agents.
- Page 78 Wiring of indoor unit Remove air intake screen and take out the front wires. Connect the wires as specified in the above methods and diagrams for indoor unit and wire con- nections. Properly apply capping clips on the wires. Wiring diagram of loop terminals Replace the air intake screen.
- Page 79 Indoor unit communication addresses setting CAUTION! FAIL TO DO THIS, THE UNIT WILL NOT WORK. 1.There are two methods to set the communication address A. Use the remote controller(default status in first installation). B. Use dip switches on the indoor unit PCB. 2.
- Page 80 SW02 INDOOR UNIT ADDRESS SW01 1 2 3 4 5 6 7 8 1 2 3 4 5 6 7 8 1 2 3 4 5 6 7 8 1 2 3 4 5 6 7 8 1 2 3 4 5 6 7 8 How to check the addresses? When finish all the above works, please power off and power on again to the whole system but set all the indoor units in STANDBY.
- Page 81 4.9. Wall mounted type AS***XVERA PRECAUTION Execute proper grounding. Do not connect the earth wire to a gas pipe, water pipe, lightening rod, or a telephone ground wire. Improper placement of earth wires can result in electric shock. An electric leakage breaker must be installed, otherwise electric shock or other accidents would occur. After completion of the installation, the air conditioner shall be electrified to check for electric leakage.
- Page 82 5. Method for Cutting and Expanding Pipes. When the pipe is too long or the mouth is damaged, the pipe needs to cut or expanded. 1.cutting hose 2.Removing burr 3.Put on nut 4.Expand Hose Expansion Size Hose dia. Size (mm)A 0.8-1.5 6.35 mm(1/4) 1.0-1.5...
- Page 83 Heat insulation material Piping signal wire Drain hose Lid for right piping Lid for under piping Indoor/outdoor Change-f or-fresh-air tube electric cable Lid for left piping Indoor/outdoor electric cord and drain hose must be bound with refrigerant piping by protecting tape Fix with adhesive tape 7.
- Page 84 I. If you want to change the address, please repeat the above steps from E to G. J. After setting all the addresses, please power off the system and then power on again. Otherwise the system will not start to work. K.
-
Page 85: Pcb Photo,Wiring Diagram And Function Description
5. PCB photo,Wiring diagram and function description 5.1 Outdoor unit 5.1. 1. Outdoor PCB photo CN13 CN14 CN15 CN16 CN17 CN18 CN19 CN20 CN21 CN12 Lamp1 CN22 CN11 CN23 CN10 0010452047 LED1 LED2 LED3 SW05 LED4 LED5 SW05 is used for factory quality control engineers, the default position is : OFF OFF OFF OFF... - Page 86 5.1.2. Wiring diagram AU182\222XFERA...
- Page 87 AU252XGERA:...
- Page 88 AU282XHERA,AU342XHERA Wiring Diagram -88-...
- Page 89 AU362XHERA...
- Page 90 5.1.3 . Switch setting and functions: Item Set in factory Switch function: SW5-1---outdoor fan motor selection, ON: DC fan motor; OFF: AC fan motor Switch function: SW5-2---defrosting data setting, ON=6degree, OFF=8degree (set when out of factory). For the place where is easy to frost, it is 6 degree; for the place hard to frost, it is 8 degree.
- Page 91 TinC TinB TinA Toci TaiC TaiB TaiA TouC TouB TouA HPSW Pipe system for AU182XFERA and AU222XFERA Pipe system for AU282XHERA 3.2 Outdoor frequency control 3.2.1 Compressor running frequency range: 20~90RPS 3.2.2 Defination of high-efficiency operation and its frequency control In order to meet the cooling request at high ambient temperature and the heating request at low ambient temperature, we set the high-efficiency operation.
- Page 92 3.3.2 Initialization of EEV EEV driving speed: open direction: 32MS; close direction: 32MS 3.3.3 Open angle limitation of EEV Unit stop Adjustable upper Thermostat ON Thermostat Adjustable lower limitation limitation Cool/dry 5(E) 450(E) standard open 5(E) 80(E) angle+tolerance heat 60(E) 450(E)...
- Page 93 not go down greatly. Ambient temp. TA≤27degree, when compressor stops, the electric heater will be electrified. When TA≥32degree, or compressor running, the electric heater will be off. Heater ON Ambient temp. TA(℃) 3.6 Control of liquid spray valve SV2: According to the compressor discharging temp., open or close the SV2. ①Control condition: A.
- Page 94 3.7.4 Defrosting operation flow chart beginning fixed frequency indicated FQY 60s defrosting FQY 80 Hz(E) soft startup compressor outdoor motor send defrosting signal to indoor Auto 4-way valve Spray valve SV2 OFF 450-pulse 450-pulse 350-pulse(E) all EEVs auto open angle auto open angle all indoor motors ON anti-cold air function...
- Page 95 3.9 Frequency control when there is CT over current protection Stop immediately, if abnormal stop 3 times in 1 hour, the unit will stop and alarm. 1.0 I Reduce FQY rapidly 2HZ/S 0.95I Reduce FQY rapidly 1HZ/S 0.93I Reduce FQY slowly 1HZ/10S 0.90I Remain FQY 0.88I...
- Page 96 ·When unit stops, the reason that system still checks the low pressure : in a long time stop, make protection for the compressor on the condition of great refrigerant leakage. ·The reason that low pressure switch action time is 30 seconds: when compressor stops, low pressure does not change, so it will be shorter than the set time in operation.
-
Page 97: Indoor Unit
5.2 Indoor unit 5.2.1 AB,AD PCB photo CN20 CN21 CN22 CN11 CN16 Lamps 3,4... - Page 98 5.2.2. Wiring Diagram AB, AD AB*XCERA:...
- Page 99 AD***XLERA...
- Page 100 5.2.3. AC142-182XCERA PCB Photo CN10 CN24 CN14 CN13 CN22 CN12 CN26 CN15 CN21 CN20 -100-...
- Page 101 5.2.4. AC142-182XCERA Wiring Diagram -101-...
- Page 102 5.2.5. . Electrical Control Functions For Cassette and Convertible type 1. Dip switch functions: 1.1 SW01 detailed definition is as following: SW01 Function ---- Passive contact valid Passive contact invalid To set indoor address(by remote/wired controller) To set indoor address(by dip switch) AC 3-speed motor AC stepless motor...
- Page 103 DRY, COOL, FAN) Indoor communication address 1 Indoor communication address 2 Indoor communication address 3 Indoor communication address 4 Indoor communication address 5 Indoor communication address 6 Indoor communication address 7 Indoor communication address 8 Note: “1” :dip switch at ON, “0”: dip switch at OFF. 2.
- Page 104 6.2 After indoor receives the ON command from wired controller, it will firstly confirm the outdoor current operation mode. If they are the same modes, indoor unit will run as the request of remote controller. If they are different modes, the system will forbid to operate, and indoor will keep the OFF mode and send the “standby”...
- Page 105 Full OFF 54º 54° Swing range Standard position HEAT, COOL mode 0° 12. Water pump control 12.1 Water pump will be electrified when indoor unit enters non-heating mode until indoor unit stops. 5 minutes later after indoor unit stops, water pump will stop. 12.2 When indoor unit is in heating mode, water pump will not operate.
- Page 106 will change mode; the sleep will begin to count. A. In cooling/dry mode, after running for 1 hour, the set temp. will increase 1℃, another 1 hour later, the set temp. will increase 1℃ again, then 6 hours (or set time-2) later , it will stop. B.
- Page 107 Digit type Temp. of indoor sensor Tai Actual data, decimal Temp. of indoor sensor Tc1 Actual data, decimal Temp. of indoor sensor Tc2 Actual data, decimal Opening angle/2 of indoor EEV Actual data, decimal Indoor address Actual data, hex Indoor central address Actual data, hex B.
- Page 108 5.2.6. AF092-122XCERA Remote controller receiver Power Timer To CN14 Main Board SW02 SW01 CN18 108-...
- Page 109 5.2.7. AF092-122XCERA -109-...
- Page 110 5.2.8. Dip switch functions: 0---OFF 1---ON Function description SW01 Default position:0000000 Default position:0000000 Default position:0000000 Default position:0000000 Default position:0000000 Set indoor address by remote controller Set indoor address by dip switches Function description SW02 See wiring drawing See wiring drawing See wiring drawing See wiring drawing See wiring drawing...
- Page 111 5.2.9. AS***XVERA PCB Photo CN27 CN24 CN25 Lamp 1,2 CN13 CN18 CN19 CN19 CN17 CN21 CN21 CN23 -111-...
- Page 112 5.2.10. AS***XVERA Wiring Diagram AS07/09/122XVERA: 112-...
- Page 113 AS182XVERA: 113-...
- Page 114 5.2.11. function -114-...
- Page 115 -115-...
- Page 116 -116-...
- Page 117 6. Diagnostic code and trouble shooting 6.1.1. Diagnostic code for AU18,22,28,342XHERA -117-...
- Page 118 6.1.2. Diagnostic code for AB*XCERA,AC*XCERA -118-...
-
Page 119: Diagnostic Code
6.1.3. Diagnostic code for AD*XLERA FAILURE CODE TROUBLE SHOOTING POSSIBLE REASONS (CHECK THE WIRED (indoor unit) REMOTE CONTROLLER) Sensor disconnected, or broken, or at wrong Faulty temperature sensor Tai position, or short circuit Sensor disconnected, or broken, or at wrong Faulty temperature sensor Tc1 position, or short circuit Sensor disconnected, or broken, or at wrong... - Page 120 FAILURE CODE TROUBLE SHOOTING POSSIBLE REASONS (CHECK THE WIRED (indoor unit) REMOTE CONTROLLER) Serious lack of refrigerant of the system, or Over hot protection of the ambient temperature too high, or PMVs be compressor blocked Ambient tempreatrue too high, or outdoor fan Over hot protection of SPDU be blocked, or bad air circulation of outdoor unit (or ISPM)
- Page 121 6.1.4. Diagnostic code for AF*XCERA FAILURE CODE (TIMER LED OF INDOOR TROUBLE SHOOTING POSSIBLE REASONS RECEIVER BOARD FLASHES TIMES) Sensor disconnected, or broken, or at wrong ONCE Faulty temperature sensor Tai position, or short circuit Sensor disconnected, or broken, or at wrong TWICE Faulty temperature sensor Tc1 position, or short circuit...
- Page 122 6.1.5. Diagnostic code for AS*XVERA -122-...
- Page 123 6.2. X MULTI Trouble Shooting: Trouble 1: No display on the operation panel start check if display replace display panel and the panel and check unit matched again well if the red diode if the power check the terminal and green diode terminal block is block and the on indoor PCB...
- Page 124 Trouble 3: Communication failure between indoor and outdoor start as per the wiring re-wiring, and diagram, check if check again communication wiring is correct check if the if the power cable and the PCB is faulty, communication port communication wire are replace and connecting to the too close, resulting in the...
- Page 125 Trouble 8: Outdoor unit alarms sensor failure start as per the wiring re-fix the diagram, check if sensor and connection port check again between sensor and PCB is correct check if the sensor check if the replace sensor is in open circuit or sensor resistor and check the connection port...
-
Page 126: Assistant Software
Failure 11: Low pressure switch failure Reason: 1. Too low system pressure causes that the unit stops and the compressor protection works, the failure can be resumed. 2. Pressure switch wire is not fixed well or in open circuit. start check if the connector check if the 2 if indoor fan motor... -
Page 127: Performance Curves
8. Outdoor performance curves AU182XFERA cooling capacity in relation to temperature 9000 8000 Indoor temperature W.B./D.B. 7000 14/20 16/22 6000 19/27 22/30 5000 4000 3000 Outdoor temperature D.B. AU182XFERA heating capacity in relation to temperature 9000 8000 7000 6000 5000 4000 3000 Outdoor temperature D.B. - Page 128 AU222XFERA cooling capacity in relation to temperature 9000 8000 7000 6000 14/20 16/22 5000 19/27 22/30 4000 3000 Outdoor temperature D.B. AU222XFERA heating capacity in relation to temperature 9000 8000 7000 6000 5000 4000 3000 Outdoor temperature D.B.
- Page 129 AU252XGERA cooling capacity in relation to temperature 10000 9000 8000 14/20 16/22 7000 19/27 22/30 6000 5000 4000 Outdoor temperature D.B. AU252XGERA heating capacity in relation to temperature 10000 9000 8000 7000 6000 5000 4000 -10 -7.5 -2.5 10 12.5 15 Outdoor temperature D.B.
- Page 130 AU282XHERA cooling capacity in relation to temperature 14000 13000 12000 11000 10000 9000 14/20 16/22 8000 19/27 22/30 7000 6000 5000 Outdoor temperature D.B. AU282XHERA heating capacity in relation to temperature 14000 13000 12000 11000 10000 9000 8000 7000 6000 5000 Outdoor temperature D.B.
- Page 131 AU342XHERA cooling capacity in relation to temperature 14000 13000 12000 11000 10000 9000 14/20 8000 16/22 19/27 7000 22/30 6000 5000 Outdoor temperature D.B. AU342XHERA heating capacity in relation to temperature 14000 13000 12000 11000 10000 9000 8000 7000 6000 5000 Outdoor temperature D.B.
- Page 132 AU362XHERA cooling capacity in relation to temperature 14000 13000 12000 11000 10000 9000 14/20 8000 16/22 19/27 7000 22/30 6000 5000 Outdoor temperature D.B. AU362XHERA heating capacity in relation to temperature 14000 13000 12000 11000 10000 9000 8000 7000 6000 5000 Outdoor temperature D.B.
-
Page 133: Indoor Air Velocity And Temperature Distribution
9. Indoor air velocity and temperature distribution curves 9.1 AB092-182XCERA: a. Cooling / Air Velocity Distribution Cooling Blowy angle:40 Air Velocity Distribution 2.7m 1.5m/s 1.5m/s 1.0m/s 1.0m/s 0.5m/s 0.5m/s b. Cooling / Temperature Distribution Cooling Blowy angle:40 Temperature Distribution 2.7m 133-... - Page 134 c. Heating / Air Velocity Distribution Heating Blowy angle:70 Air velocity Distribution 2.7m 1.5m/s 1.5m/s 1.0m/s 1.0m/s 0.5m/s 0.5m/s d. Heating / Temperature Distribution Heating Blowy angle:70 Temperature Distribution 2.7m 134-...
- Page 135 9.2 AC14/182XCERA: a) Grounding a. Cooling / Air Velocity Distribution Cooling Blowy angle:25 Air Velocity Distribution 0.5m/s 1.0m/s 1.5m/s b. Cooling / Temperature Distribution Cooling Blowy angle:25 Temperature Distribution 135-...
- Page 136 c. Heating / Air Velocity Distribution Heating Blowy angle:5 Air velocity Distribution 0.5m/s 1.0m/s d. Heating / Temperature Distribution Heating Blowy angle:5 Temperature Distribution 136-...
- Page 137 b) Ceiling a. Cooling / Air Velocity Distribution Cooling Blowy angle:25 Air Velocity Distribution 1.0m/s 0.5m/s b. Cooling / Temperature Distribution Cooling Blowy angle:25 Temperature Distribution 137-...
- Page 138 c. Heating / Air Velocity Distribution Heating Blowy angle:65 Air velocity Distribution d. Heating / Temperature Distribution Heating Blowy angle:65 Temperature Distribution 138-...
- Page 139 9.3 AF09/122XCERA: a. Cooling / Air Velocity Distribution Cooling Blowy angle:25 Air Velocity Distribution 2.4m 0.4m/s 0.8m/s 1.2m/s 5.5m b. Cooling / Temperature Distribution Cooling Blowy angle:25 Temperature Distribution 2.4m 5.5m 139-...
- Page 140 c. Heating / Air Velocity Distribution Heating Blowy angle:5 Air velocity Distribution 0.4m/s 0.8m/s 1.2m/s d. Heating / Temperature Distribution Heating Blowy angle:5 Temperature Distribution 140-...
-
Page 141: Wall Mounted Type
9.4 Wall mounted type: unit m/s Fig 1 top view 0.25 flow control panel horizal lourer:center unit m/s 0.5 0.25 Fig 2 top view flow control panel horizontal lourer:right and left 0.25 unit m/s Fig 3 top view flow control panel horizontal 0.25 lourer:center u n i t m /s... -
Page 142: Air Flow And Static Pressure Chart
10. Air flow and static pressure chart AD092XLERA/AD122XLERA AIRFLOW AND STATIC PRESSURE CHART 20Pa 15Pa 10Pa static pressure (Pa) AD142XLERA/AD182XLERA AIRFLOW AND STATIC PRESSURE CHART 20Pa 15Pa 10Pa static pressure (Pa)
Need help?
Do you have a question about the AB092XCERA and is the answer not in the manual?
Questions and answers