
Related Manuals for Lynx Hilo Preliminary


Summary of Contents for Lynx Hilo Preliminary
-
Page 1: User Manual
Mastering Analog to Digital / Digital to Analog Converter User Manual Preliminary Lynx Studio Technology, Inc. www.lynxstudio.com support@lynxstudio.com Updated: February 29, 2012... - Page 2 ©2012 Lynx Studio Technology Inc.
-
Page 3: Table Of Contents
User Manual Table of Contents Introduction ......................1 Overview ........................1 Features ........................1 In the Box ........................1 Power and Safety Information ................... 2 Rack-Mounting ......................2 Operation Requirements .................... 2 1.6.1 Audio Equipment Requirements ................... 2 1.6.2 Computer requirements ....................2 Using this manual ...................... - Page 4 3.7.7 Calibrate Touchscreen ....................42 Meter Button ......................42 Firmware Updates ....................42 Support ......................43 Lynx Website Support Resources ................43 Telephone Support ....................43 Registering your Hilo ....................43 Return Policy ......................43 Appendices ......................44 Battery Information ....................44 Setting Trim Pots .....................
-
Page 5: Introduction
1 Introduction Thank you for choosing Lynx Hilo for your audio needs. The device you have received has been precision engineered to provide the very best audio quality possible, coupled with an innovative, intuitive user interface, and a unique and powerful feature set. -
Page 6: Power And Safety Information
1.5 Rack-Mounting Hilo can be mounted in standard studio equipment racks using an optional two-space rack shelf available from Lynx. 1.6 Operation Requirements To operate Hilo successfully with your existing equipment, first let’s verify that you have compatible elements for best results. -
Page 7: Using This Manual
1.8 Registration Lynx is committed to providing you with the best service possible. To help us serve you better, please be sure to register your Hilo. Register on the web at: http://www.lynxstudio.com/register.html... -
Page 8: Getting Started
Next press the front panel standby switch and verify that Hilo powers up. If it does not, verify that the selected AC power source is operational. If it is and the unit still will not power up, please contact Lynx technical support. If Hilo DOES power up, move on to Setup…... -
Page 9: Cable Connections
2.3 Cable Connections Hilo features a treasury of I/O types, suitable to accommodate whatever audio devices you wish to integrate. USB 2.0 port Use the included USB cable or equivalent to connect Hilo to a USB 2.0 equipped computer. Cable Concerns: If using a third party cable, make sure that it is USB 2.0 compliant. -
Page 10: Power And Safety Information
S/PDIF/ ADAT Optical Use standard Toslink optical cables, of lengths up to 9 meters (30 feet). SPDIF Coaxial In Out Use 75 Ω S/PDIF cable with RCA connections. Recommended maximum length is 6 meters (20 feet) Wordclock In/Out Use standard 75 Ω... -
Page 11: Initial Setup
2.5 Initial Setup It is important to set up Hilo in the proper order to avoid any speaker damage calamities. Follow these steps for the best results: • Connect the AC power cord to Hilo and to a quality, surge-protected AC power source. Check the Power and Safety section of this manual for additional information. - Page 12 5. Accept the “End User License Agreement” to proceed. 6. Click “Install” to accept the default directory for program files. 7. After some time the following prompt will appear to allow changes to your computer. Click “Yes” in order to proceed.
- Page 13 9. After a pause, you will be prompted to connect the USB device. Connect the USB cable from the Hilo to a vacant USB 2.0 port on your computer. Then click “Next”. 10. In a few moments, you will be prompted to accept the installation directory. Click “Install” to proceed. 11.
- Page 14 13. Click Finish when prompted. 14. You may receive a warning that the driver has not been digitally signed by Microsoft. It is safe to disregard this warning and select “Continue Anyway.” On some systems the Windows hardware wizard will launch post driver installation. In this case, run the wizard using the “Automatic Installation”...
-
Page 15: Hilo Driver Devices - Windows Operating Systems
When output device selection is not an option, it can be assumed that the application uses the Windows default audio device. In this case, “Lynx USB Play 1&2” should be established as the system playback default: With Windows XP navigate to: Start >... - Page 16 When using an ASIO compatible program, the appropriate ASIO device must be selected from a settings or options menu in the application. The correct choice would be “ASIO Lynx LT-USB”. Many ASIO applications provide access to an ASIO Control Panel for the device being used. For Hilo, this button will launch the USB Audio Class Driver Control Panel.
- Page 17 This page is where the firmware image file is selected to program the LT-USB firmware. Device Info This page provides information for the Lynx Technical support staff. Please note that the “Streaming Mode” and “Volume Control” settings are not implemented at this time and should not be changed from their current values.
- Page 18 WDM and ASIO. This control panel can be launched from either the ASIO control settings within most audio applications or from “Start> All Programs> Lynx Studio Technology > LT-USB Control Panel”. In the “Buffer Settings” tab, the USB Streaming and ASIO buffer parameters control the size of the audio packets that are used to transfer audio to the LT-USB hardware.
-
Page 19: Installation For Macintosh Os X
Audio MIDI Setup. When the Lynx Hilo is selected as the output sound device, channels 1&2 are active by default. In this state, audio will be sent to ALL Hilo outputs simultaneously. If you wish to mute a stream to a particular output, you can do that from the Output Mix Routing Page, as describe in section 3.4.2 Output Mix Routing Page. - Page 20 Latency can be manipulated by changing the size of the buffers used to transfer data to and from Hilo. Core Audio buffer size controls are offered within most pro audio recording applications. With Hilo, buffer sizes typically range between 32 and 2048 samples. Smaller buffer sizes will give you lower latency.
-
Page 21: Using Hilo
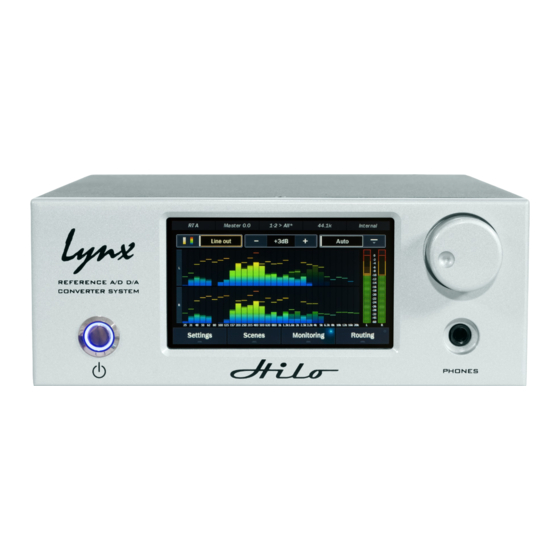
3 Using Hilo Hilo’s Touch Screen gives it a key advantage over other converters. As all of the functions are controlled by the software that runs the touch screen, Hilo is not locked into just one way to work. We can add features. We can change the graphics. -
Page 22: Headphone And Monitor Out Volume Control
3.1.1 Headphone and Monitor Out Volume Control If you turned Hilo off using the STANDBY switch on the front panel, all of your previous settings will be recalled. Your Headphone and Monitor Out levels will be the same as when you last used them. Caution: Be sure to check the volume level of the Headphone and Monitor before playing audio. -
Page 23: Choosing The Meter Source
Touch on the type of meter you would like to see. The new meter will instantly appear. The selection prompt will stay on the screen for up to 15 seconds. If no selection is made, the screen automatically goes back to the previous meter page. -
Page 24: Getting To The Menu
3.2.1.3 For the All I/O Meters With the All I/O meter page, no selection is needed as all input and output sources are shown. The All I/O page is useful for different reasons. When setting up your routing (explained later) this page gives you a global view of what input channels are active and which outputs are receiving audio from at least one source. -
Page 25: Menu Screen Conventions
3.3.1 Menu Screen conventions: When you engage a button, it “lights up”, just as if you are pushing a button on a console. The last button touched or changed will always light up when that Menu page is selected. Most buttons have a dual purpose. First they display the control’s current setting. Second by touching them, you can select a different setting. -
Page 26: Sync Source
3.4.3 SynchroLock Lynx’s SynchroLock™ technology is a very effective form of jitter reduction for digital signals. Jitter is a type of clock error that may potentially result in distortion in an audio signal. SynchroLock reduces jitter by a factor of 3000:1 by using the Hilo’s high resolution crystal oscillator to generate a clock signal that is phase locked to the external clock. -
Page 27: Optical Out Mode
There are four possible states for the SynchroLock button. Either Hilo is operating off of its Internal clock, or SynchroLock has achieved full Locked lock to the specified external clock source. In this state, playback and recording of audio is possible Hilo is operating off of its Analog Phase Lock Loop to lock to the incoming clock signal, while the SynchroLock circuitry is performing analysis on the incoming clock signal. -
Page 28: Line In Trim
3.4.5 Line In Trim Line In Trim can be set to any of eight preset trim settings. The Line In Trim button shows the currently selected trim level, the same for the Left and Right inputs. There are four Pro Level settings: +18 dBu; +20 dBu; +22 dBu; and +24 dBu. There are four additional levels most often used on Consumer Audio products: +0 dBV;... -
Page 29: Digital In Source
3.4.7 Digital In Source Hilo offers a choice of AES or S/PDIF as the digital input source. With S/PDIF you have the option of Coax or Optical Inputs. Before being pushed, this button shows the current selection. Upon pushing the button, you can select: AES; S/PDIF Coax;... - Page 30 First a few conventions: RED buttons mean that the associated signal source or output is OFF or MUTED GREEN buttons mean ON or UNMUTED A WHITE LINE around a button means this is the channel is in focus, and can be acted upon by the faders or ON/OFF switch below the fader.
- Page 31 The USB play routings are: Line Out: USB 1+2 Monitor Out: USB 1+2 and 3+4 Phones: USB 1+2 and 5+6 Digital Out XLR (AES): USB 1+2 and 7+8 Digital Out Coax: USB 1+2 and 9+10 Digital Out Optical: USB 1+2 and 11+12 ADAT Out 1-8: USB 1+2 and 9-16 The ADAT Outputs will not appear on the Outputs Mix Routing Page unless ADAT is selected as the Optical format...
- Page 32 3.4.8.1 Analog and Digital Level Controls for Monitor and Headphones When the Monitor Out and Phones Outputs are selected in the Output Mix Routing Page, you will see an additional button. For these two outputs you can control both the Digital output level and the Analog output level. Analog Output Level –...
- Page 33 3.4.8.2 Single Tap Source Select One of the advantages of the Touch Screen GUI, is that we can offer user-preferred options for the way onscreen buttons behave, a big advantage over standard, fixed- function hardware buttons. This is one such option. 1.
- Page 34 3.4.8.4 Adjusting levels of input sources and outputs The Output Mix Routing page has two faders, one on the input side and one on the output side. In both cases the single fader controls the level for two channels of audio. The fader on the input side adjusts the amount of signal from the input source that is in focus (with the white box around it) that is feeding the active output.
- Page 35 We already have signal from USB Play 1&2 carrying the streams from the computer. Now let’s add Line In as a source so there is the new keyboard parts along with the existing tracks. The keyboard level is a bit hot compared to the mix. Let’s attenuate the Line In signal by 10dB. Now let’s pull up the Phones Out to adjust the performer’s levels.
- Page 36 Now we’ll add Line In, so the performer can hear their input signal This performer likes the levels of the backing tracks louder, but the overall level down a bit, so we’ll nudge the USB Play source signal up by 6dB, and attenuate the Phones output by 10dB Now the performer and engineer each have their own monitor mix.
-
Page 37: Tools Page
At the time of this first writing of the owner’s manual, only 5 of these 8 buttons are used. Tools will be added that will add capabilities and features to Hilo. These will be available via Firmware update from the Lynx website. -
Page 38: Recall Scene
3.5.3 Recall Scene This button lets you recall the Scenes that you have stored using the Save Scene button. 1. Push Restore Scene. 2. Up to 6 Scenes will be selectable on the Pop up 3. Select the Scene you wish to reload. 4. -
Page 39: Lt-Usb Mode
3.5.5 LT-USB Mode The LT-USB that comes with Hilo has two modes of operation: • 16 Channel operation – 16 input and 16 output channels at sample rates to 96 kHz • 8 Channel operation – 8 input and 8 output channels at sample rates to 192 kHz 16 channel operation is the default. -
Page 40: Information Page
3.6 Information Page As with the Tools page, there are several open buttons for future features. Another advantage of the Touch Screen is that status information can be quickly accessed. This information tells you what is going on “under the hood” of Hilo and provides crucial data for trouble shooting in the field. All Information pages will stay open for a maximum of 15 seconds or until the Close button is pushed. -
Page 41: Digital Out Channel Status Button
Emphasis • Off (gray) Emphasis is off • 50/15us (green) 50/15us pre-emphasis • J17 (green) CCITTJ.17 emphasis • Unknown (green) Emphasis not indicated Rate. Clock Rate displays a real-time measurement of the sample rates of the incoming signals. These measurements are very useful for evaluating and validating digital inputs when synchronization or clocking issues are encountered. -
Page 42: Frequency Counters
3.6.3 Frequency Counters Also a Status button with no selections available. Measured settings will be shown on a Green button. If no signal is detected on an input, the button will be Gray and state “Not Present”. 3.6.4 About Hilo Also a status only button. -
Page 43: Display Controls
3.7 Display Controls These controls allow you to customize how you want the LCD screen to work and what information you want it to show. 3.7.1 Backlight • Shows the current backlight setting • Pushing the button engages a horizontal fader that lets you set the Backlight between 15% and 100% brightness in 5% increments •... -
Page 44: Menu Delay
3.7.2 Menu Delay Throughout this section we have frequently referred to a window staying open for “Up to 15 seconds”. This is where you can set that delay time. • Shows the current Menu Delay • This sets the time that any menu, selection page, pop up menu or status page will stay active before the screen defaults back to the selected Meter page. -
Page 45: Show/Hide Sample Rate
3.7.4 Show/Hide Sample Rate This is a Toggle type button. This button allows you to add Sample Rate status information to the VU or Horizontal Meters pages • Before pushing the button, it will show the alternate setting, whether the Sample Rate is present on the Meters page or hidden. -
Page 46: Show Battery Level
3.7.6 Show Battery Level THIS IS A FUTURE FEATURE Also a Toggle type button. When Hilo detects that Hilo is running on a battery pack connected to the 9-18V battery input on the back panel, this button allows you to show or hide the battery’s status on the VU or Horizontal Meters page. -
Page 47: Support
Friday, excluding United States Holidays. 4.3 Registering your Hilo Lynx is committed to providing you with the best service possible. To help us serve you better, please be sure to register your Hilo. Register on the web at: http://www.lynxstudio.com/register.html Once you are registered you will automatically receive notifications of new products and upgrades. -
Page 48: Appendices
5 Appendices 5.1 Battery Information Hilo can operate off of a portable DC Battery Pack for field recording or whenever AC power is not available. The BATTERY IN connector is located directly above the AC connector on the Hilo back panel. Battery Packs can be purchased from retailers of video cameras and other electronics equipment. -
Page 49: Xlr Connector Wiring And Adapters
Keep in mind that this variation will also be represented in other trim levels that are selected. For instance if a trim level of +22dB is active, and the trim pots have altered that to 22.25dB, if later a trim value of +24dB is selected from the Hilo, the resulting signal will be +24.25 dB. -
Page 50: Unbalanced Connections With Single Conductor Cable
The wiring method for unbalanced connections with XLR connectors to RCA/Phono phone connectors using shielded twisted pair cable (2 wire + shield) is as follows: XLR Pin 1 (GND) to cable shield with no connection on the other end XLR Pin 2 (+) to signal wire and to the Phono center pin XLR Pin 3 (-) to the other signal wire and to the Phono sleeve XLR Male or Female... -
Page 51: Setting The Monitor Out Level Mode
The wiring method for unbalanced connections with XLR connectors to unbalanced RCA/Phono phone connectors using coaxial cable (1 wire + shield) is as follows: XLR Pin 1 (GND) no connection XLR Pin 2 (+) to signal wire and to the Phono center pin XLR Pin 3 (-) to the cable shield and to the Phono sleeve XLR Male or Female... -
Page 52: Specifications
6 Specifications Line In L/R THD+N -114 dB @1kHz, -1dBFS, 20kHz filter, +22dBu trim Dynamic Range 121 dB, A-weighted, -60dBFS signal method Frequency Response ± 0.01 dB, 20 – 20kHz Crosstalk 140 dB maximum @ 1kHz, -1dBFS signal Full-scale trim settings: + 0dBV, +2dBV, +4dBV, +6dBV, +18dBu, +20dBu, +22dBu, +24dBu Female XLR connectors Line Out L/R... - Page 53 Windows 32-bit and 64-bit drivers provided by Lynx Macintosh OS X drivers provided by Apple LSlot™ Expansion Port Supports Lynx LSlot expansion cards with up to 32 input and outputs simultaneously LCD Display 480 x 282 LCD Touch Screen AC Power 110 to 230 VAC, 30 watts;...
-
Page 54: Warranty Information
Warranty coverage beings the day you buy your product. For one year thereafter, Lynx shall, at its sole and absolute option, either repair or replace free of charge any product that proves to be defective on inspection by Lynx or its authorized service representative.
Need help?
Do you have a question about the Hilo Preliminary and is the answer not in the manual?
Questions and answers