Table of Contents

Related Manuals for Lynx hilo


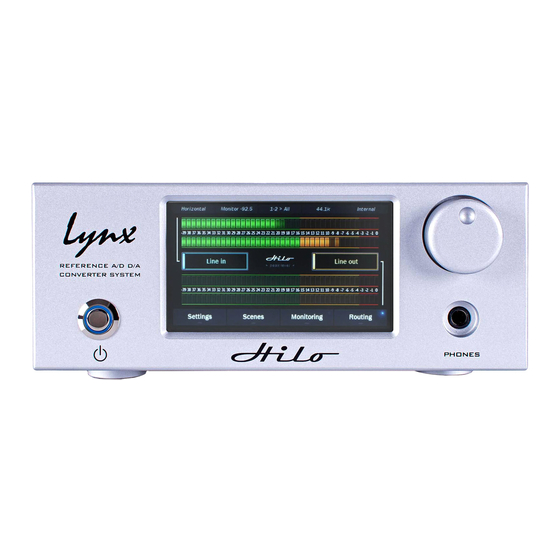
Summary of Contents for Lynx hilo
-
Page 1: User Manual
Mastering Analog to Digital / Digital to Analog Converter User Manual Including March 2015 Version 7 Firmware and Feature Update Lynx Studio Technology, Inc. www.lynxstudio.com support@lynxstudio.com Updated: November 20, 2015... - Page 2 Purchase Date: _____________________________________________________ Dealer Name: _____________________________________________________ Dealer Telephone: _____________________________________________________ Hilo Serial Number: _____________________________________________________ LSlot Serial Number: _____________________________________________________ Lynx Hilo User Manual © Copyright, 2015 Lynx Studio Technology Inc.
-
Page 3: Table Of Contents
Computer Set Up ......................6 2.5.1 Driver Installation for Windows XP, Vista or Windows 7/8/10 ..........6 2.5.2 Hilo Driver Devices – Windows Operating Systems ..............7 2.5.1 Installation for Macintosh OS X ....................9 2.5.2 Installation for iPad ........................10 3 Using Hilo .......................... - Page 4 5.4.1 Navigation Bar .......................... 36 5.4.2 Monitor Page ..........................39 5.4.3 Adapter Section ......................... 44 Using Hilo Remote from a WiFi or WLAN connected computer......... 46 5.5.1 Requirements ..........................46 5.5.2 Initial Setup ..........................46 5.5.3 Frequently Asked Questions ..................... 47 6 Support ............................
-
Page 5: Introduction
Features Hilo also has an extremely generous set of Digital I/O options. Apart from AD/DA conversion tasks, Hilo is one of the most powerful digital format converters/routers on the market. Digital formats include stereo AES/EBU, Stereo S/PDIF Coaxial, Stereo Optical S/PDIF which is switchable to 8-channel ADAT lightpipe, and 16 channels of USB2 communication to a host computer. -
Page 6: Operation Requirements
1.6.2 Computer requirements Hilo is configured to operate with Mac or PC computer systems via a USB connection. If one wishes to use this connection, check the system requirements below to insure compatibility. It also is important to note that most professional audio applications place significant demands on your computer’s resources, and it is therefore recommended that you meet or exceed the recommended system requirements for your Digital Audio Workstation or audio playback software, which will likely be greater than those listed for Hilo. -
Page 7: Using This Manual
Registration Lynx is committed to providing you with the best service possible. To help us serve you better, please be sure to register your Hilo. Register on the web at: http://www.lynxstudio.com/register.html Once you are registered you will automatically receive notifications of new products and upgrades. -
Page 8: Getting Started
2 Getting Started Hilo was designed to be a product that is so easy to use that this section of the manual would scarcely be necessary. However, it is quicker to learn how the device works in one go, then to spend precious minutes figuring things out by randomly pressing buttons. We recommend reading this section thoroughly, before putting Hilo to serious use, if you can manage it. -
Page 9: Cable Connections
Use the included AC power cord In Addition to the rear panel jack pack, there is one remaining cable connection on the Hilo front panel. The PHONES jack is a standard ¼” TRS connector, and is capable of driving the full range of stereo headphones available. -
Page 10: Initial Setup
Initial Setup It is important to set up Hilo in the proper order to avoid any speaker damage calamities. Follow these steps for the best results: • Connect the AC power cord to Hilo and to a quality, surge-protected AC power source. Check the Power and Safety section of this manual for additional information. -
Page 11: Hilo Driver Devices - Windows Operating Systems
“Lynx Hilo Speakers” with any WDM program, as this will insure that audio streams to every analog and digital output on Hilo. If you wish to route a stream to a particular output, you can choose “USB Play 9-16” and route that to the desired physical output from the Output Mix Routing Page, as described in section 3.4.8 Output Mix Routing... - Page 12 Latency can be manipulated by changing the size of the buffers used to transfer data to and from the LT-USB card installed into Hilo. The Hilo USB Control Panel provides access to buffer settings, both a Streaming Mode for WDM and ASIO, and also an ASIO Buffer Size control.
-
Page 13: Installation For Macintosh Os X
OS X, and is used for media playback applications as well as Pro Audio applications. Simply connect the USB cable from Hilo to your Mac OS X computer and Hilo will be immediately available for use. Please note that Hilo does require OS X version 10.6.4 or above. -
Page 14: Installation For Ipad
On Power Up Upon turning on Hilo, the first screen that you will see will be the METER page that was last selected when the unit was turned off. The dual Horizontal Meter set is shown below. -
Page 15: Changing The Meter Page
All I/O The “All I/O” Meter Screen now shows the active USB channels. Hilo can be toggled between USB 8-channel mode (the default) or 16-channel mode. 8-channel mode is appropriate for most users, supports sample rates up to 192 kHz and also DSD operation. 16- channel mode is most beneficial for users requiring more USB channels particularly when using Hilo’s ADAT I/O. -
Page 16: Choosing The Meter Source
The stereo 30 band Real-time Spectrum Analyzer (RTA) is a very useful diagnostic and reference tool. The Hilo RTA computes the RMS energy in 30 frequency bands for left and right channels of a selected stereo input or output every sample period. This is a brilliant tool for mixing, mastering and even system troubleshooting. -
Page 17: Getting To The Menu
Immediately changes the screen to the last selected meter set. Meters Allows settings that customize the information and format of the LCD Screen. Display Displays useful status about Hilo and its operation. Information Scene/routing memory and other, well, tools. Tools Basic settings and routing. -
Page 18: Home Menu
The box next to each clock source will display the clock rate when that port has a valid clock source attached. If that clock source is selected, that rate will become the current clock rate for Hilo. If Hilo detects that a specific Sync Source is not valid, that Sync Source button will be disabled and “Not Present”... -
Page 19: Synchrolock
As long as the clock frequencies are within +/- 100ppm of Hilo’s supported sample rates, SynchroLock will operate on the clock signal, and insure a low-jitter clock drives the Hilo and is also sent to devices downstream (i.e. clock slaves to the Hilo). -
Page 20: Line In Trim
When the button is pushed, a Selection Window pops up. Pushing the desired Level button resets the inputs and immediately indicates this on the Line In Button. You will typically hear a relay click from inside Hilo when a selection is made. -
Page 21: Output Mix Routing Page
3.4.8 Output Mix Routing Page Now this is where it gets interesting. Although Hilo is, at first glance, a two channel AD/DA converter, it is really much more and this page gets down to the nitty gritty. The Output Mix Routing page is where any combination of Hilo’s inputs can be routed to any combination of Hilo’s outputs. The principle here was to make the various I/O formats as independent as possible, very little is “hard-wired”. - Page 22 In this state, press any input source button and you will hear that audio exclusively. Pressing any other input source will instantly switch to the alternate source. When done, tapping the Solo button returns Hilo to the previous state, where multiple input sources can stream to an output simultaneously.
-
Page 23: Input Sources
Upon installation, each pair of computer play devices will be pre-assigned to physical outputs on Hilo. In addition, the first channel pair, USB 1+2, will deliver audio to every output on Hilo. This is very useful for initial set up, whether you are listening to the headphone out, a digital out, monitor outs, whatever –... - Page 24 The USB Record devices correspond to the input options that will appear in OSX or Windows recording software. As with the USB Play devices, there are default settings of Hilo inputs that stream to these record devices: USB Record 1+2...
- Page 25 However, since Hilo offers you the option of routing several inputs to these outputs, you may overload the digital output and cause distortion. When this is the case, use the Digital Output control to lower the level feeding the D/A converter. Note, this control is NOT for setting the volume level of the Monitor or Phone outputs, but to attenuate the digital signal to reduce distortion.
- Page 26 The fader on the input side adjusts the amount of signal from the input source that is in focus (with the white box around it) that is feeding the active output. It is not altering the input level itself (Hilo does not do this for sonic reasons), merely the amount of that input signal streaming to the output.
- Page 27 Routing tutorial These powerful routing features are probably best demonstrated with a real-world scenario. Let’s pretend that the Hilo is being used for a recording session, where a keyboard part is being overdubbed on an existing project. The pre-recorded tracks are streaming through the USB Play 1&2 channels in the computer.
- Page 28 Now we’ll add Line In, so the performer can hear their input signal. This performer likes the levels of the backing tracks louder, but the overall level down a bit, so we’ll nudge the USB Play source signal up by 6dB, and attenuate the Phones output by 10dB. Now the performer and engineer each have their own monitor mix.
-
Page 29: Tools Page
Once you have created a specific routing/level set up that you may want to recall, here is where you would store it. Hilo scenes store routing, clocking settings, level controls, sample rate conversion settings and more into an instantly recall-able “scene”. The “Save Scene”... -
Page 30: Recall Scene
This is a useful state for digital devices that do not have the option to be a clock slave. The SRC Mode is ON by default. When devices are connected to the Hilo digital inputs and valid clock synchronization is established between them, then it is recommended to turn SRC OFF to insure the best audio performance. -
Page 31: Lt-Usb Mode
DSD Mode DSD support was added with Hilo Firmware revision 5. This allows Hilo to play DSD audio files received via USB, AES-3 or S/PDIF. Hilo supports the recently adopted DoP V1.1 standard which is a method for transferring DSD audio over PCM frames. Playback of DSD using this method is provided by a growing number of software vendors including Channel D and Audirvana for Macintosh, and JRiver Media Player for Windows. -
Page 32: Test Tone Function
Test Tone Function Intended for system testing and calibration, Hilo’s Test Tone provides a 1 kHz audio signal which can be sent to any output or combination of outputs. The tone level can be controlled in 0.5 dB increments from a new dedicated screen. For reference, the same screen also shows the input levels coming into Hilo. -
Page 33: Information Page
3.6.1 Power The Hilo may be powered either by AC power through the IEC Mains connector, or by DC power through the 4-pin BATTERY IN connector on the back panel. AC power will indicated by “Mains AC” appearing in the Power indicator. The back panel power switch will control the AC power to the Hilo. -
Page 34: Digital Out Channel Status Button
Validity • Valid (green) Indicates the Valid channel status bit is set. • Invalid (red) Indicates the Valid channel status bit is not set. Emphasis • Off (gray) Emphasis is off. • 50/15us pre-emphasis. 50/15us (green) • J17 (green) CCITTJ.17 emphasis. •... -
Page 35: About Hilo
It can be set for as low as 0% (screen off) up to the default state of full brightness. If the screen goes completely dark, Hilo will return to the established Brightness Intensity by touching the screen, moving or pressing the Rotary Control or pressing the front panel Power Switch. -
Page 36: Return To Meters
3.7.2 Return to Meters Hilo will revert to the Meters screen after some period of inactivity. The default period is 5 minutes. This is where you can change that delay time. • Shows the current Menu Delay • This sets the time that any menu, selection page, pop up menu or status page will stay active before the screen defaults back to the selected Meter page. -
Page 37: Knob Settings
Hilo interface is reduced to 6 buttons and the METER selection icon. As soon as Standard Menu is selected, the Hilo does a Restore Defaults to return all routing and volume controls to the default setting. This may result in the audio from a previously muted or attenuated source to come through the Hilo at full volume. -
Page 38: Firmware Updates
METERs page. If any Hilo parameters that only appear in Advanced mode have been altered, and then the Hilo was switched to Standard Mode, the alterations will no longer be active. For instance, if the RETURN TO METERS selection was set to “15 seconds” in Advanced Mode, when switched to Standard Mode the default state of “5 minutes”... - Page 39 Now we need to update the LT-USB card inside of Hilo. Launch the Hilo Update application again. This time from the “Select Unit to Update” drop-down menu, choose “LT-USB”. Verify that the New Firmware Version is higher than the Current Firmware Version. If so, click “Update”.
-
Page 40: Hilo Remote Control Application
App Store (keywords Lynx Hilo). In addition to running the Hilo Remote on the computer that the Hilo is connected to, it is possible to use Hilo remote from a computer or iPad that is connected to the host computer via WiFi or WLAN. This use requires the Lynx MIDI Re-Director tool. We will explore that solution, later in this section. - Page 41 This feature provides the ability to save all user-selectable parameters. “Scenes” that contain the state of all device settings can be saved to a file on the computer hard drive. Recalling Scenes is a very quick and efficient way to revert Hilo to an appropriate state for different contexts of use.
- Page 42 Rate Select This button displays the current sample rate of the Hilo and can also be used to select a desired sample rate when the Hilo is operating off of its Internal Clock. However, when on Internal clock, the sample rate is generally determined by the audio application being used, or the default sample rate settings in the operating system.
-
Page 43: Monitor Page
LSLOT sources are relative to the connection method used by the Hilo, with a USB Hilo they would be the USB record and play devices in the computer. This section will show the Play Sources (signals coming FROM the computer) in the top row, and Record Sources (Signals going TO the computer) in the bottom row. - Page 44 The Monitor page is where signals are routed, levels and pan settings are established, and meters can be viewed for all channels on the Hilo. It is visible whenever the “Monitor” button is green in the Navigation Bar. The section on the right, with the Play and Record devices, is only visible when the LSLOT button is green.
- Page 45 Output Button This identifies the Outputs that are applicable to the fader and mute controls, and is also used to facilitate routing. Hilo Remote uses an Output oriented approach to routing. Clicking on an Output button, “selects” that output for sources to be assigned to it. When selected, the output label button is green.
- Page 46 RECORDED SIGNAL. It is only pertinent to monitoring. You would only hear the results of the panning if an input signal was being monitored through Hilo’s outputs. When channels are linked, then the pan controls are linked as well. Moving the pan control to the left will make the linked channel’s pan control move a corresponding value to the right.
- Page 47 The linked state also impacts the Pan controls. If one pan pot is moved to the left the other will move a corresponding amount to the right. For instance, if the left pot is set to -25, the right channel will pan to +25. Linked is the default state for pairs of inputs.
-
Page 48: Adapter Section
5.4.3 Adapter Section The Adapter Section is where the clock settings for the Hilo are established and monitored, as well as Trim and Digital Format settings. Current Source This displays the clock source that is active. This may differ from the selection in the “Preferred Clock Source”... - Page 49 Analog Reference Level This section is where the Trim levels can be set for the Hilo’s Line Inputs and Line Outputs. Trims can be set to any of eight preset trim settings, and they are the same for the Left and Right channels.
-
Page 50: Using Hilo Remote From A Wifi Or Wlan Connected Computer
Using Hilo Remote from a WiFi or WLAN connected computer. In some cases it is useful to run the Hilo Remote from a computer other than the one that Hilo is streaming audio to and from. This could be for control over a dedicated media server, a situation where level changes are made while monitoring from the “sweet spot”... -
Page 51: Frequently Asked Questions
Q) After I have connected to the Host computer, my Hilo Remote keeps showing disconnected, why? A) Hilo Remote will time‐out and disconnect from LynxRedirector if it doesn’t get a message from the Hilo for 3 seconds. This will be shown in Hilo Remote as a disconnected Wi‐Fi icon: . - Page 52 Simply uncheck the “Local Subnet” check‐box, then enter the IP Address, Computer Name or Domain Name in the “Address:” field. If the Host Computer is separated from the Target Computer/Tablet across a wide‐area network (such as behind a router with NAT [Network Address Translation]), you will need to specify the router’s IP Address and open port 5645 to forward to your Host Computer.
-
Page 53: Support
United States Holidays. Registering your Hilo Lynx is committed to providing you with the best service possible. To help us serve you better, please be sure to register your Hilo. Register on the web at: http://www.lynxstudio.com/register.html Once you are registered you will automatically receive notifications of new products and upgrades. -
Page 54: Appendices
7 Appendices Methods of Connection Hilo doesn’t just sound great, it is impressively versatile as well. There are a number of ways to use Hilo in a wide variety of contexts. 7.1.1 USB 2.0 This is the method detailed in this manual, a single USB cable connection to a Mac or Windows computer 7.1.2... -
Page 55: Setting Trim Pots
For this purpose, Hilo has ultra accurate, 25-turn trim pots accessible from the bottom of the chassis that can be used to adjust + or - .5dB from the established trim level. -
Page 56: Unbalanced Connections With Twisted Pair Cable
7.4.2 Unbalanced Connections with Twisted Pair Cable The wiring method for unbalanced connections with XLR connectors to ¼” phone connectors (tip and sleeve only) using shielded twisted pair cable (2 wire + shield) is as follows: XLR Pin 1 (GND) to cable shield with no connection on the other end XLR Pin 2 (+) to signal wire and to the ¼”... -
Page 57: Setting The Monitor Out Level Mode
Monitor Output Level Option +24 dBu This setting is established with jumpers on the Hilo mainboard. To access them, remove the bottom plate on the Hilo (it will be necessary to remove one of the rubber feet to accomplish that). The pins in question are labeled Mon Right Atten (short for Monitor Output Right Channel Attenuation) or Mon Left Atten. -
Page 58: Troubleshooting & User Tips
(e.g. consumer CD players). The SRC will re-clock the digital input signal to make sure it is in Sync with Hilo’s clock. Q. I am using a mono input into the Line In of Hilo. I have the Line In assigned to my Monitors and Phones Output but I am only hearing it one side (the side it is connected to). -
Page 59: Specifications
Windows 32-bit and 64-bit drivers provided by Lynx Macintosh OS X drivers provided by Apple LSlot™ Expansion Port Supports Lynx LSlot expansion cards with up to 32 input and outputs simultaneously LCD Display 480 x 282 LCD Touch Screen AC Power 110 to 230 VAC, 30 watts;... -
Page 60: Certifications
10 Certifications 10.1 FCC DECLARATION OF CONFORMITY MANUFACTURERS NAME: Lynx Studio Technology, Inc. MANUFACTURER ADDRESS: 190 McCormick Avenue Costa Mesa, CA 92626, U.S.A. TELEPHONE (714) 545-4700 COMPLIANCE TEST REPORT NUMBER: D11123R1 COMPLIANCE TEST REPORT DATE: January 12, 2012 TYPE OF EQUIPMENT:... -
Page 61: Ce Emc Declaration Of Conformity
10.2 CE EMC DECLARATION OF CONFORMITY MANUFACTURERS NAME: Lynx Studio Technology, Inc. MANUFACTURER ADDRESS: 190 McCormick Avenue Costa Mesa, CA 92626, U.S.A. TELEPHONE (714) 545-4700 COMPLIANCE TEST REPORT NUMBER: D20110Q1 COMPLIANCE TEST REPORT DATE: January 12, 2012 TYPE OF EQUIPMENT:... -
Page 62: Warranty Information
Lynx reserves the right to update any unit returned for repair. Lynx reserves the right to change or improve design of the product at any time without prior notice. - Page 63 NOTES...
- Page 64 LYNX STUDIO TECHNOLOGY, INC. www.lynxstudio.com © Copyright, 2012-2015 Lynx Studio Technology Inc.
Need help?
Do you have a question about the hilo and is the answer not in the manual?
Questions and answers