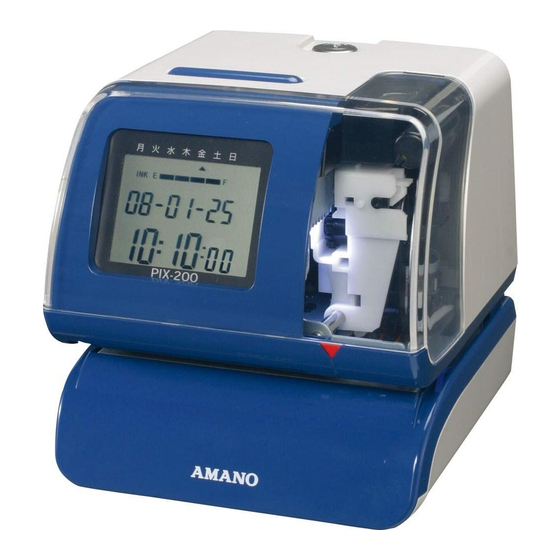
Amano PIX-200 Operation Manual
Atomic time clock
Hide thumbs
Also See for PIX-200:
- Repair bulletin (2 pages) ,
- Installation and operation manual (16 pages)
Table of Contents
Advertisement
Advertisement
Table of Contents

Related Manuals for Amano PIX-200


Summary of Contents for Amano PIX-200
- Page 1 PIX-200 Atomic Time Clock Operation Manual...
-
Page 2: Proprietary Notice
Proprietary Notice This document contains proprietary information and such information may not be reproduced in whole or part without the written permission from Amano Cincinnati, Inc. 140 Harrison Ave., Roseland, New Jersey 07068. Amano Cincinnati, Inc. reserves the right to make equipment changes and improvements, which may not be reflected in this document. -
Page 3: Table Of Contents
Displaying Settings; Programming Password and Time ....3-18 Chapter 4: Atomic Clock Feature ........4-1 Automatic Reception ................4-1 Setting the Atomic Clock ......4-3 (Germany, UK and others) Setting the Time Zone (US only) ............4-4 PIX-200 Atomic Clock/Time Code Signal.........4-5 Amano PIX-200 Operation Manual... - Page 4 Chapter 5: Maintenance and Troubleshooting ..... 5-1 Ribbon Cartridge Replacement............5-1 Cleaning ...................5-1 Error Codes..................5-2 Chapter 6: Appendix ............6-1 Amano PIX-200 Operation Manual...
-
Page 5: Chapter 1: Overview
Chapter 1: Overview Before attempting to use the Amano PIX-200 time recorder/stamp, please carefully review Chapter 1: “Overview”, and Chapter 2: “Getting Started”. This chapter of the manual covers the specifications, accessories, names and functions of parts, LCD Display, description of controls, and print position adjustment. -
Page 6: Names And Functions Of Parts
5 control buttons located on top of unit under the cover. Ribbon Cartridge Easy-to-replace ribbon cartridge. Clear LED Illuminates the printing position to increase visibility. Paper Sensor Sensors, which detect the paper position to automatically print. Amano PIX-200 Operation Manual... -
Page 7: Lcd Display
Description of Controls (function buttons) Normally, the Display Window shows the date and time. When you use the Quick Set or Program Mode to change the settings of the PIX-200, the instructions to change the clock are shown in this window. -
Page 8: Print Position Adjustment (Slide Lever)
Bottom View edge is adjustable by pressing and sliding the print position adjuster (slide lever) located on the right outside bottom of the PIX-200 unit as illustrated in the diagram. The slide lever can be adjusted using the latching mechanism which can move a total of 17 increments with each increment = 1.5mm (for a... -
Page 9: Chapter 2: Getting Started
Step 1 Step 2 Step 3 Mounting When choosing a mounting location for your PIX-200, you should consider the following: • The mounting surface or hardware must be capable of supporting the unit’s weight, 2.2 kg (4.85 lbs). • The area must be within the specified operating temperature range: 14°F~113°F (-10°C~45°C), 10% ~90% relative humidity. -
Page 10: Wall Mounting
Note: Wall mounting should only be performed by authorized Amano dealers. If the PIX-200 is improperly mounted, it could fall, resulting in damage to the unit or personal injury. When mounting the PIX-200 on a concrete wall, or other special wall material, special screws may be required. -
Page 11: Desktop Mounting
Desktop Mounting The PIX-200 should be placed on a level surface with adequate ventilation. Performing a Test Print To test print perform the following: Make sure the AC adapter for the PIX-200 is plugged in. The LED should light up and illuminate the printing position. - Page 12 * This page intentionally left blank * Amano PIX-200 Operation Manual...
-
Page 13: Chapter 3: Program Mode
Chapter 3: Program Mode Make sure the AC power adapter is plugged in and connected to the PIX-200 before making changes to the clock settings. Unlock and remove the cover. Locate the (-), (+), E,+1 HOUR, and +1 MIN. buttons on top of the clock. -
Page 14: Easy Way To Set The Time
Note: When the Atomic Clock is built-in and the clock is being used in Europe, please check if the Atomic Clock setting is correct. (Refer to page 4-3). Note: When you are using the PIX-200 in the US, please check if the time zone setting is correct. (Refer to page 4-4). -
Page 15: Setting The Date Format
(E) button to MON TUE WED THU FRI SAT SUN confirm and return back to the “set up △ △ ▲ △ △ △ △ program” display. Pr8ordEr 88 82 88 Amano PIX-200 Operation Manual... -
Page 16: Date Format Table
YMD N ‘05JUN 1 3:05PM MDY N JUN 1’ 05 C YMD RCVD’05 JUN 1 DMY N 1 JUN’ 05 C MDY RCVD JUN 1’05 C DMY RCVD 1 JUN’05 Customized comments imprint (up to 3 lines) Amano PIX-200 Operation Manual... -
Page 17: Setting Customized Comments
△ △ ▲ △ △ △ △ Once you finish selecting the characters for LinE 1884 line 1, press the (E) button. This will return 6F En 88 the display back to “P1 inPut CodE”. Amano PIX-200 Operation Manual... - Page 18 ABCDEFGHI → 41, 42, 43, 44, 45, 46, 47, 48, 49 GHI → 41, 42, 43, in, J, 44, 45, 46, in, Jn, 47, 48, 49 See Chapter 6 – Appendix, and the paragraph “Diagram of Character Code” for more information on codes. Amano PIX-200 Operation Manual...
-
Page 19: Setting The Layout For Customized Comments
△ △ △ △ △ △ desired layout. The layout selections are; 8LAyout8 right (ri9ht), center (CentEr), and left 8r i9 (LEFt). Press the (E) button to confirm the ht selection and display ”P3 tE5t Print”. Amano PIX-200 Operation Manual... -
Page 20: Test Printing For Customized Comments
4. Press the (E) button once at the “P4 End” 8PAP Er88 display to return to “Set UP Pro9” on bu tt on the display. ! WARNING : Touching the printing area while test printing may cause an accident resulting in injury. Amano PIX-200 Operation Manual... -
Page 21: Changing The Print Position
Hour, the printing type of Minutes (Refer to page 6-4 “Diagram of Printing Type of Minutes”), the Language, the preprogrammed comment, the type of Zero and the print of Leading Zero can be set. Amano PIX-200 Operation Manual... - Page 22 P58P rint 8L An Press the (E) button once to confirm the 9u setting, and display “P5 Print Lan9u” to set the printing language. Press the (E) button again to display “LAn9u Pr 3-10 Amano PIX-200 Operation Manual...
- Page 23 Code Meaning Print the leading 0 R oFF Disable 0 and print the number right aligned C oFF Disable 0 and print the number centered L oFF Disable 0 and print the number left aligned 3-11 Amano PIX-200 Operation Manual...
-
Page 24: Setting The Printing Length
The illustrations to the right show samples of the displays. The shaded area means that the symbols, numbers or characters are blinking. The PIX-200 will automatically change the character font to accommodate the allowed print length when you set the print length. However, if you have selected to use the Customized Comments, this function is not performed and the font is not automatically changed to vary the printing length. -
Page 25: Setting The Printing Activation/Detecting Sensor
Setting the Printing Activation/Detecting Sensor PIX-200 has two paper detecting sensors, which allow it to automatically print when a card or piece of paper is inserted. In this setup, you can select the printing activation (manual button, sensor or both) and detecting sensor method (Use the center sensor, Use the Edge sensor or Use both) as detailed in the following table. -
Page 26: Setting The Number
After the last digit displayed has been defined, press the (E) button to confirm your setting and display P2 nubEr di9it. 3-14 Amano PIX-200 Operation Manual... -
Page 27: Setting The Initial Number And Auto Reset
Continue pressing the (E) to advance to the right thru all the digits. Press the (E) button to confirm your setting and display P2 Auto rE5Et. 3-15 Amano PIX-200 Operation Manual... -
Page 28: Setting The Repeat Times Of A Number
► 88 81 △ blinking. Select the desired number by 88 △ pressing (-) or (+) button. Press the (E) button to confirm your setting and display SEt UP Pro9. 3-16 Amano PIX-200 Operation Manual... -
Page 29: Setting For Daylight Saving Time (Dst)
Select the desired month by △ pressing (-) or (+) button. Press the (E) △ button to confirm your month setting and now the date will be blinking. Select the desired date by pressing (-) or (+) button. 3-17 Amano PIX-200 Operation Manual... -
Page 30: Displaying Settings; Programming Password And Time
8P ro 98 ► △ Press the (+) button eleven times to position △ the “▲” alongside the 5 line down from the upper righthand corner of the display alongside “OTHERS” (on the label). 3-18 Amano PIX-200 Operation Manual... - Page 31 Press the (E) button to confirm the password setting and display “P4 CloC SynC” to set the time zone (for US only), select the Offical Standard Frequency (Europe), and whether the Atomic Clock function is on or off. 3-19 Amano PIX-200 Operation Manual...
- Page 32 If the PIX-200 requires a password • When you press the (+) and (E) button at the same time for 2 seconds to enter the “set up program” display. • When you press the (+1 HOUR) or (+1 MIN.) button to change the time.
-
Page 33: Chapter 4: Atomic Clock Feature
The unit receives the time code signal via its built-in antenna system. PIX-200 can receive standard frequencies from the countries listed in the following table. Country... - Page 34 Inside a large building, between tall buildings, underground, building without windows. − Close to overhead power lines, TV stations and train cables. − Close to home electrical appliances or devices such as TV’s, PC’s, refrigerators or fax machines. Amano PIX-200 Operation Manual...
-
Page 35: Setting The Atomic Clock (Germany, Uk And Others)
MON TUE WED THU FRI SAT SUN button. △ △ △ △ △ △ △ 8SEt 8UP8 5. Press (E) button to confirm your setting and 8P ro return to “SEt UP Pro9” display 98 ▲ Amano PIX-200 Operation Manual... -
Page 36: Setting The Time Zone (Us Only)
► button to confirm the setting, and go to the △ △ “P5 End” display. Note: if the unit can’t receive radio signals, try moving the unit to another place where it can receive radio signals. Amano PIX-200 Operation Manual... -
Page 37: Pix-200 Atomic Clock/Time Code Signal
6. Press the (E) button again to return to the “SEt UP Pro9” display. PIX-200 Atomic Clock/Time Code Signal Following is the amount of time for the PIX-200 to receive time code signals: • When the radio wave condition is good, the clock will require approximately 3 minutes to complete sysnchronization. - Page 38 This page intentionally left blank. Amano PIX-200 Operation Manual...
-
Page 39: Chapter 5: Maintenance And Troubleshooting
Cleaning For cleaning, unplug the power cord and wipe the case with a dry cloth. Do not use any chemical solvents or oils to clean or lubricate your PIX-200. This will damage your clock. To clean the inside of your clock, blow it out with compressed air. -
Page 40: Error Codes
Year Digit, Type of Hour, Language type, and Digit Number. If the error does not disappear, please contact your AMANO Cincinnati, Inc. representative for assistance. Note: Printing errors can be caused by the absence of grease on the printing carriage mechanism. -
Page 41: Chapter 6: Appendix
“(Year)(Month)(Date)(SP)(Hour)(:)(Minute)(AM/PM)(SP)(A)(M)(A)(N)(O)" the code will be; 10, 11, 12, 20, 13, 3A, 14, 1C, 20, 41, 4D, 41, 4E, 4F and the PIX-200 would print the following: IMPRINT IMAGE: ‘05DEC 15 8:23AM AMANO Note: Space characters in the bold square shown in the following illustration will not be recognized as one-byte font (7 dots in width), but instead will be recognized as a narrow font (5 dots in width). - Page 42 É Comment) \ Å (AM/PM) Γ ∆ Θ Code Function Insert character Delete character End of the sentence Code Function Start Two-Byte Undo Two-Byte Start Emphatic Byte Start Double-Width Byte Undo Emphatic/Double-Width Byte Undo Space Character Amano PIX-200 Operation Manual...
- Page 43 Special Symbols Two-Byte From A6 to B5 Emphatic Double-Width Space Character + "Un" Characters in the Bold Square (Refer to page 25) Emphatic Double-Width Second One-Byte AM/PM Fixed VII Chinese Character Fixed From 90 to 98 Amano PIX-200 Operation Manual...
- Page 44 33 minutes = 33/60*100 = 55 :33 00s .55 00s :33 01s .55 01s :33 35s .55 35s :33 36s .56 00s :59 24s .99 00s :59 57s .99 33s :59 58s .99 34s :59 59s .99 35s Amano PIX-200 Operation Manual...
- Page 45 NOTES Amano PIX-200 Operation Manual...
- Page 46 NOTES Amano PIX-200 Operation Manual...
- Page 48 Corporate Headquarters 140 Harrison Avenue, Roseland, NJ 07068-1239 (800) 526-2559 • • AJR-501100 Copyright © 2006 Amano Cincinnati, Inc. 6/06/0...
Need help?
Do you have a question about the PIX-200 and is the answer not in the manual?
Questions and answers