
Related Manuals for Amano pix-25


Summary of Contents for Amano pix-25
- Page 1 TO PLACE AN ORDER CALL: 866-487-4751 OR VISIT: WWW.TIMECLOCKEXPERTS.COM PIX-25 Atomic Time Clock Installation and Operation Guide PIX-25...
-
Page 2: Proprietary Notice
After you have finished reading this manual, be sure to store it in a safe place for future reference. For more information about Amano’s complete line of time products, visit our web site at: WWW.TIMECLOCKEXPERTS.COM... -
Page 3: Table Of Contents
PIX-25 Support ............................31 PIX-25 Cleaning ............................31 Resetting Clock After Extended Loss of Power ..................... 31 PIX-25 Power Modes ..........................31 PIX-25 Time Display Modes ........................32 Wall Mounting ............................32 PIX-25 Programable Features Summary ..................... 34 Warranty Notice ............................35 Wall Mounting (Optional) .......................... -
Page 4: Guidelines For Safe Operation
GUIDELINES FOR SAFE OPERATION To ensure safe operation, please carefully read the following warnings and cautions prior to using the PIX-25 Electronic time recorder/stamp. Warning ! Do not disassemble the unit. There is a high voltage present inside, possibly leading to an electric shock. - Page 5 Cover Removal PIX-25 VISIT: WWW.TIMECLOCKEXPERTS.COM : 866-487-4751...
-
Page 6: Remove The Cover & Packing Material
Note –Should the clock not power up, verify that the AC Adapter is plugged into the rear of the clock. Note – If your PIX-25 is located in an area that cannot receive the Atomic time signal, DO NOT be concerned. The PIX-25 will accurately keep the time using its Quartz mechanism (plus or minus three seconds per week). -
Page 7: Setting The Time (P1)
4. Press the ENTER button once for the month setup mode. The month will start flashing (the 2 line will display ). Press the CHANGE MONTH button to obtain the desired the month value. PIX-25 VISIT: WWW.TIMECLOCKEXPERTS.COM : 866-487-4751... -
Page 8: Enabling Or Disabling Daylight Saving Time (Dst) (P3)
Changing the Print Style (P4) 12Hr (Standard) or 24Hr (Military) Default = Preset 1 (12hr) 1. With the cover removed, press and hold the PROGRAM button to begin programming mode and will appear. P1 TIME PIX-25 VISIT: WWW.TIMECLOCKEXPERTS.COM : 866-487-4751... - Page 9 There will only be one line printed for the selected format. The “Print Year”, “Print Minute”, and “Print Hour” settings will be overridden by the selected pre-defined print format. However, these settings can be changed after selecting the pre-defined print format. PIX-25 VISIT: WWW.TIMECLOCKEXPERTS.COM : 866-487-4751...
-
Page 10: Set Other (P5)
P-51 LANGUAGE 7. Press the PROGRAM button to exit ALL programming or press the CHANGE button to go to the next submenu in P5 OTHER PIX-25 VISIT: WWW.TIMECLOCKEXPERTS.COM : 866-487-4751... -
Page 11: Set Print Direction (P-52)
With the cover removed, press and hold the PROGRAM button to begin programming mode and will appear. P1 TIME Press the CHANGE button to change the current programming mode until the display shows P5 OTHER PIX-25 VISIT: WWW.TIMECLOCKEXPERTS.COM : 866-487-4751... -
Page 12: Set Paper Detection (P-53)
The paper detect sensor can be set for Auto or Manual. Amano recommends the default setting of Auto for paper detection. If your PIX-25 is not printing, make sure you are triggering the paper sensor, which can be changed with this parameter. -
Page 13: Set Print Leading Zero (P-54)
2. Press the CHANGE button to change the current programming mode until the display shows P5 OTHER 3. Press the ENTER button once and the clock will display the submenu for other settings starting with P-51 LANGUAGE PIX-25 VISIT: WWW.TIMECLOCKEXPERTS.COM : 866-487-4751... -
Page 14: Changing Begin Date For Daylight Saving Time (P-56)
If the current year and date has been changed, the available daylight saving start/end date will be automatically updated as well. The PIX-25 during DLS advance/rollback at 2:00 AM will only shift 1 hour. If the DLS feature is enabled and the user sets the same start/end dates, the clock will not change its time on the start/end date. -
Page 15: Changing End Date For Daylight Saving Time (P-57)
If the current year and date has been changed, the available daylight saving start/end date will be automatically updated as well. The PIX-25 during DLS advance/rollback at 2:00 AM will only shift 1 hour. If the DLS feature is enabled and the user sets the same start/end dates, the clock will not change its time on the start/end date. -
Page 16: Set Display Hour Format (P-58)
2. Press the CHANGE button to change the current programming mode until the display shows P5 OTHER 3. Press the ENTER button once and the clock will display the submenu for other settings starting with P-51 LANGUAGE PIX-25 VISIT: WWW.TIMECLOCKEXPERTS.COM : 866-487-4751... -
Page 17: Customize
(Note: The Hours Display format can be different than the Hour Print format.) Customize The mode of the PIX-25 clock can be entered by removing the top cover and using the programming mode. 1. With the cover removed, press the... - Page 18 15. Press the ENTER button again to accept the print style settings and return back to the P6 CUSTOMIZE menu. 16. Press the PROGRAM button exit programming and return the clock back to normal operation. PIX-25 VISIT: WWW.TIMECLOCKEXPERTS.COM : 866-487-4751...
-
Page 19: Setting Custom Print (Symbol Printing) (P62)
Note – Pressing the PROGRAM button while performing custom print line setup with symbol printing will end the custom print submenu without altering the program. PIX-25 VISIT: WWW.TIMECLOCKEXPERTS.COM : 866-487-4751... - Page 20 PIX-25 Symbol Printing All available symbols are listed in the following table with the length expressed in dots and percent of maximum line length allowed (160 dots). Table: Symbols Displayed/Printed Symbol Description Length in Dots 2D YEAR 2-digit Year 25 = 16.45%...
- Page 21 Day, Space, Divider, Space, 24hr, 100hr/hr FR 20.17 RCV’D, Space, Block, Space, 12hr, RCV’DSPACEBLOCKSPACE12HR60TH RCV’D 11:35 SECONDSEND 60th/hr, Seconds 6D-COUNTBLOCKMONTHDATE2D- Counter, Block, Month, Date, 2digit Year 012345AUG23`15 YEAREND 6D-COUNTSLASH4D- Counter, Slash, 4digit Year, Month, Date 012345/2015AUG23 YEARMONTHDATEEND PIX-25 VISIT: WWW.TIMECLOCKEXPERTS.COM : 866-487-4751...
-
Page 22: Diagnostics
Diagnostics The diagnostic mode of the PIX-25 clock can be entered by removing the top cover and using the programming mode. 4. With the cover removed, press the PROGRAM button to begin programming mode and will appear. P1 TIME 5. Press the... -
Page 23: Show Number Printed (D3)
CHANGE button to go to the next diagnostic sub program menu. Show Number Printed (d3) Use this diagnostic to check the amount of PIX-25 printing. 1. With the cover removed, press the PROGRAM button to begin programming mode and will appear. -
Page 24: Warning Message (D5)
The feature must be Enabled by following the above steps. Warning Message (d5) Use this diagnostic to check the PIX-25 LCD for any warning messages. 1. With the cover removed, press and hold the PROGRAM button until appears to begin the programming mode. -
Page 25: Advanced Diagnostics (D6)
Repeat step 5 above and enter the correct code. Display Contents of Reset Tracking Parameters (Code 42) By entering code 42, the entire set of tracking data will be displayed on the LCD screen, pausing 2 seconds per parameter. PIX-25 VISIT: WWW.TIMECLOCKEXPERTS.COM : 866-487-4751... -
Page 26: Acceptable Print Media
the weight of the paper (thickness) is too light, the paper will curl up and tear off inside the PIX-25 clock. This may result in jams or damage to the clock. Note – Amano recommends using the manual print method (see “Setting the Print Method”) for large paper and transparent media... -
Page 27: Ribbon Cartridge Replacement
Once the correct minutes and seconds [time] is received the curved wave symbol will be displayed with the tower. If your PIX-25 is located in an area that cannot receive the Atomic time signal, DO NOT be concerned, since the PIX-25 is able to accurately keep the time using its quartz mechanism (plus or minus three (3) seconds per week). -
Page 28: Parts
Note – If the print mechanism is down (a piece of paper could not be inserted), press the RESET button to move the carriage to the up position. This will make the ribbon cartridge installation easier. Figure: PIX-25 Ribbon Cradle Location. Parts PIX-25 VISIT: WWW.TIMECLOCKEXPERTS.COM... -
Page 29: Error Messages
Need Ribbons, Keys and Accessories? Visit www.amano.com/time Or call 1-800-253-9836 The PIX-25 ribbon cartridge in Black ink is Amano Part No. CE-315151 The PIX-25 ribbon cartridge in ink is Amano Part No. YK-629671 The PIX-25 ribbon cartridge in Green ink is Amano Part No. YK-629771 Ribbon cartridges are good for approximately 9,000 stamps, and are supplied in sealed plastic to provide an average shelf life of 2 plus years. - Page 30 Table: Error Messages Error Cause Solution Unlock cover and remove. Set PIX-25 on its side with the ribbon side up. Press the Reset Home Position button to reset the printer carriage and blow Er 01 Error, Carriage air into the printer platen (see Error! Stuck.
-
Page 31: Pix-25 Support
3. E-mail us at: tkb@amano.com PIX-25 Cleaning Do not use any chemical solvents or oils to clean or lubricate your PIX-25. This will damage your clock. To clean the inside of your clock, simply blow it out with air. Resetting Clock After Extended Loss of Power If there has been an AC power interruption sufficient to drain the internal lithium battery, the date setting, and the clock setting will need to be reset. -
Page 32: Pix-25 Time Display Modes
17:25 (see Figure) = 5:25 PM, 12:00 = 12:00 (noon), 00:01 = 12:01 AM, and etc. Wall Mounting Remove the rear plate of the PIX-25 and use it as a template for wall mounting. Located and press the Tab on the bottom of the clock to help release the rear wall mounting plate. - Page 33 Figure: PIX-25 Clock Bottom Figure: PIX-25 Clock Back Removed for Wall Mounting PIX-25 VISIT: WWW.TIMECLOCKEXPERTS.COM : 866-487-4751...
-
Page 34: Pix-25 Programable Features Summary
PIX-25 Programable Features Summary The following table summarizes the PIX-25 features that are user programmable in the programming mode. Feature (Menu Item) Description P1 TIME CHANGE Set the displayed clock time. P2 DATE CHANGE Set the clock date [Month/Date/Year]. P3 DAYLIGHT SAVING Enable/disable automatic Daylight Saving adjustment. -
Page 35: Warranty Notice
For more information about the WWVB radio signal, actual signal coverage in North America visit NIST’s website at: http://tf.nist.gov/stations/radioclocks.htm For actual signal coverage in North America visit: www.boulder.nist.gov/timefreq/stations/wwvbcoverage.htm PIX-25 VISIT: WWW.TIMECLOCKEXPERTS.COM : 866-487-4751... -
Page 36: Wall Mounting (Optional)
Wall Mounting (Optional) Avoid the following: 1. Remove the rear mounting plate from the PIX-25 and use it to mark the three (3) mounting holes on the wall. 2. Hang the PIX-25 rear mounting plate level on the wall using #10 wood screws [not included] or equivalent. -
Page 37: Operation
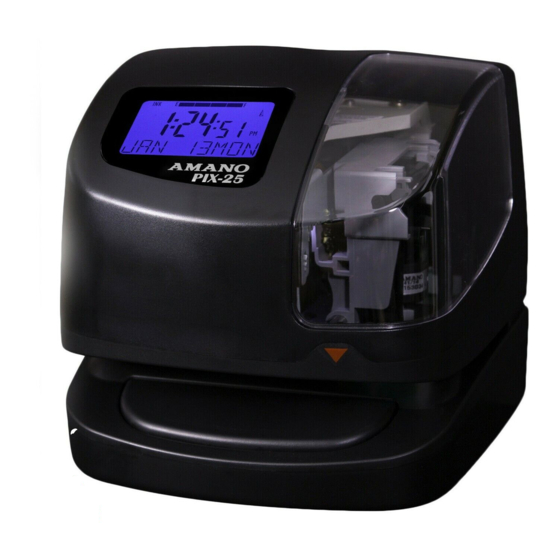
Operation PIX-25 Views Figure: Display View. Figure 1: Internal View. PIX-25 VISIT: WWW.TIMECLOCKEXPERTS.COM : 866-487-4751... -
Page 38: Pix-25 View Description
Time signal. Note – The atomic clock feature must be enabled for this time synchronization process. Amano recommends facing the front of the clock (display side) either in the South or North direction to increase potential atomic time signal reception. -
Page 39: Warranty Information
If the equipment fails within the one year period, Amano Cincinnati, Inc will, at its sole option, replace or repair at no charge, the equipment which, in its sole discretion is determined to be defective. -
Page 40: Specifications
± 10 seconds/week on Lithium Dimensions: 6-11/16"(170 mm) Wide X 6- 7/16” (163 mm) High X 6-5/8"(168 mm) Deep. Weight: Approximately 3.6 lbs. (1.63 kg) Environment: Indoor use only; dust-free environment. Keep out of direct sunlight. Standards Compliance: PIX-25 VISIT: WWW.TIMECLOCKEXPERTS.COM : 866-487-4751... -
Page 41: Product Registration
Search the Knowledge Base Find answers to frequently asked questions, and general product information such as a basic operation guide for this product at: www.amano.com/tkb Service and Support Contact us by; phone @ 800 253-9836, Mon – Fri. 8:15 am – 5pm EST E-mail: tkb@amano.com...
Need help?
Do you have a question about the pix-25 and is the answer not in the manual?
Questions and answers