Amano PIX-21 Operation Manual
Electronic time recorder
Hide thumbs
Also See for PIX-21:
- User manual (8 pages) ,
- Oeration manual (21 pages) ,
- Repair bulletin (2 pages)
Table of Contents
Advertisement
Advertisement
Table of Contents

Related Manuals for Amano PIX-21


Summary of Contents for Amano PIX-21
- Page 1 ® PIX-2 2 1 Electronic Time Recorder Operation Manual...
-
Page 2: Before You Begin
Amano Cincinnati, Inc., 140 Harrison Avenue, Roseland, New Jersey, 07068 Amano Cincinnati, Inc. reserves the right to make equipment changes and improvements which may not be reflected in this document. Portions of this document may have been updated to include the latest hardware or firmware version, if applicable. -
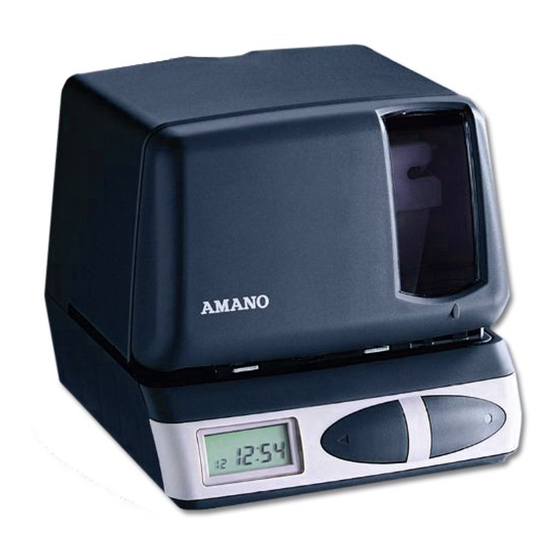
Page 3: External View
Page 1 External View Removing the Cover & Packing Materials Lift the printer block and remove the spacer. 2. Insert the key provided and turn clockwise to open the case. Lift the cover to remove. -
Page 4: Front Panel Description
When in the Program mode, press the PRINT/ENTER Button to accept a value or enter a selection into memory. When in the Normal mode, the PIX-21 as a default will automatically print when a time card or piece of paper is inserted. This default can be changed in the Program mode to require both PRINT buttons to be pressed simultaneously in order to print. -
Page 5: Mounting The Clock
Page 3 Mounting the Clock 1. Remove the mounting bracket from the clock by pushing forward on the top tabs “A” and then pushing the tabs down “B” (See below). 2. If you are using the Mobile Mounting Unit gooseneck and special mounting bracket (P/N AJR-208800), mount the gooseneck to the... -
Page 6: Understanding The Front Panel
Refer to page 9 to enter the Normal mode password. For a quick setup of a particular item in the PIX-21, use the alternate password which correlates to the print style of choice. (See chart on page 5.) The “Quick”... - Page 7 Page 5 Chart 1 - Passwords for the Quick Program Mode Password Print Style Print Direction 6510 DAY, 12H, 60th Right Side Printing 6210 DAY, 24H, 10th Right Side Printing 6810 DAY, 24H, 100th Right Side Printing 6520 DATE, 12H, 60th Right Side Printing 6620 DATE, 24H, 60th...
-
Page 8: Setting The Year, Month And Date
Page 6 4. Entering the Quick Program Mode The following steps describe how to get into the Quick Program mode. Note: Please refer to Chart 1 for the password listing. 1. Press and hold down the RESET button. 2. While holding down the RESET button, press and hold down the ENTER button. -
Page 9: Setting The Time
Saving Setting. 7. The Beginning of the Daylight Saving Setting Note: The PIX-21 will automatically adjust for Daylight Saving Time. This will take effect on the first Sunday in April and on the last Sunday in October. To disable Daylight Saving Time, set the beginning date equal to the ending date. -
Page 10: Exit Program Mode
Page 8 8. The End of the Daylight Saving Setting 1. When the display flashes , press the P P 4 4 E d L P P 4 4 ENTER button. 2. Press the CHANGE button until the correct year appears, l 0 2 8 9 9 0 0 then press the ENTER button. - Page 11 Page 9 Normal Program Mode These instructions must be followed in the order given. 1. Understanding the Front Panel LCD Display Window Print/Enter Button Print/Change Button 2. Plug In the Power Cord 3. The Reset Button Note: To exit the programming mode and return to the time display, press the RESET button at...
- Page 12 Page 10 5. Setting the Year, Month and Date d A E P P l l 1. When the display flashes , press the ENTER button. dA E P P l l 2. Press the CHANGE button until the correct year appears, 0 l 0 l 9 9 5 5 then press the ENTER button.
- Page 13 Page 11 7. The Beginning of the Daylight Saving Setting Note: The PIX-21 will automatically adjust for Daylight Saving Time. This will take effect on the first Sunday in April and on the last Sunday in October. To disable Daylight Saving Time, set the beginning date equal to the ending date.
-
Page 14: Setting The Print Style
Page 12 9. Setting the Print Style Note: The maximum printed line length equals 152 dots across. Please refer to the chart below for codes representing the print styles, number of dots and line lengths. Refer to page 14 for sample print styles. P S L P P 5 5 1. -
Page 15: Setting The Language
Page 13 10. Setting the Language 1. When the display flashes LAn9 , press the L A n 9 P P 6 6 P P 6 6 ENTER button. 2. Press the CHANGE button until the correct language E n 9 L L l l appears, then press the ENTER button. -
Page 16: Diagnostics Mode
Page 14 13. Setting the Leading Zero On or Off Note: The leading Zero appears on the print out before single digit times and dates (for example: DEC. 06, 08:00). 2 E r O P P 9 9 1. When the display flashes , press the ENTER button. - Page 17 Page 15 Replacing the Ribbon To Insert: To Remove: 1. If the print mechanism is down 1. Pull the two catches upward and a piece of paper cannot be “B” and hold with index and inserted, press the RESET button middle fingers.
-
Page 18: Using The Dc Power Cord
Page 16 Using the DC Power Cord 1. The DC version of the PIX-21 is meant to be used only in motor vehicles with a 12-volt negative ground electrical system. 2. Power to the cigarette lighter should be present with the ignition key in the “off”... -
Page 19: Possible Error Messages
Maintenance To keep your PIX-21 operating smoothly, periodically clean the printer shafts with alcohol and a cotton swab. Clean the outside of the PIX-21 using a soft cloth, if necessary. Specifications Power Requirements: For PIX-21 Input: AC16.5V, 60Hz, 0.6A (Max.) - Page 20 Dallas Sales Office (972) 556-0015 (800) 527-4037 Los Angeles Sales Office (714) 970-2280 (800) 854-5977 New Jersey Sales Office (973) 403-1900 (800) 526-2559 Toronto Sales Office (905) 624-4085 (800) 387-3388 AJR-209002 Copyright © 2001 Amano Cincinnati, Inc. Printed in U.S.A. 08/01/6M...
Need help?
Do you have a question about the PIX-21 and is the answer not in the manual?
Questions and answers