Table of Contents
Advertisement
Quick Links
GAS BBQ GRILL USER'S MANUAL
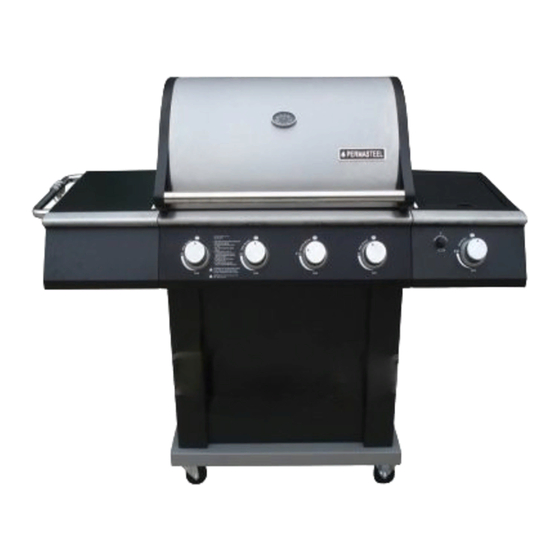
MODEL NUMBER: PG-40404S0LA
CUSTOMER SERVICE: (888)-287-0735
DANGER
If you smell gas:
1.
Shut off gas to the appliance.
2.
Extinguish any open flame.
3.
Open lid.
4.
If odor continues, keep away from the
appliance and immediately call your gas
supplier or your fire department.
FOR OUTDOOR USE ONLY
WARNING
1.
Do not store or use gasoline or other
flammable liquids or vapors in the
vicinity of this or any other appliance.
2.
An LP cylinder not connected for use
TM
shall not be stored in the vicinity of this
or any other appliance.
Advertisement
Table of Contents

Related Manuals for PERMASTEEL PG-40404S0LA


Summary of Contents for PERMASTEEL PG-40404S0LA
- Page 1 FOR OUTDOOR USE ONLY GAS BBQ GRILL USER’S MANUAL MODEL NUMBER: PG-40404S0LA CUSTOMER SERVICE: (888)-287-0735 DANGER WARNING If you smell gas: Do not store or use gasoline or other Shut off gas to the appliance. flammable liquids or vapors in the Extinguish any open flame.
- Page 2 Product, use contrary to this User’s Manual, or alteration by any one other than Permasteel Inc. All warranty coverage is void if this grill is ever used for commercial or rental purposes; this warranty is valid only in the USA.
-
Page 3: Table Of Contents
TABLE OF CONTENTS BEFORE YOU BEGIN MESSAGE TO OUR USERS PAGE 1 SAFETY SYMBOLS PAGE 1 INSTALLATION & SAFETY PRECAUTIONS PAGE 2 PROPANE & GAS WARNING PAGE 2 ASSEMBLY PARTS PAGE 3 STEP I&STEP II PAGE 6 STEP III & IV PAGE 7 STEP V &... -
Page 4: Message To Our Users
MESSAGE TO OUR USERS Thank you for your purchase of our BBQ Gas Grill. We sincerely wish you will enjoy using our fine products. Please read this User’s Manual in its entirety before using the grill. Please contact our customer service at (888)-287-0735 if you have any questions. Please read this User’s Manual carefully. -
Page 5: Installation/Safety Precautions
This grill is safety certified for use in the United States and Canada only. Never modify to use in other places. Modification may cause serious bodily injury or property damage. PermaSteel is not responsible for any modifications, and all warranties will be void. -
Page 6: Parts
GRILL PARTS LIST REF# DESCRIPTION Q’TY REF# DESCRIPTION Q’TY Side Burner Lid Tank Holder Rotate Rod, Side Burner Lid Hitch Pin Side Burner Cooking Grid Left Side Panel Side Burner Igniter Wire Match Holder Clip Side Burner Match Holder Side Burner Base Back Rail Warming Rack Grease Cup... - Page 7 GRILL PARTS DIAGRAM Notice: This part list is for your reference only, some parts will be different, please subject to the actual appliance in carton.
- Page 8 ASSEMBLY INSTRUCTIONS PLEASE READ AND FOLLOW THESE INSTRUCTIONS CAREFULLY STEP BY STEP WARNING Before Assembly Open shipping box by slicing down its edges with a box cutter. Remove all packed grill parts and packing materials from the styrofoam support pieces. Obtain the aid of an assistant to remove the grill head from the support pieces.
-
Page 9: Step I&Step
ASSEMBLY INSTRUCTIONS STEP I: Casters to Bottom Panel: Attach 4 casters to the bottom Panel underside with (16) M6*15 Truss head screws and (16)1/4" split lock washers and (16)1/4” flat washers as below. Note:Attach the casters without brake to the gas tank hole end of the bottom shelf STEP II:... - Page 10 ASSEMBLY INSTRUCTIONS STEP III: Lower / Upper Front Panel to Cart: Attach the front panels to the cart with (10) M4*10 screws as below(8pcs screws to the side panels, one to the bottom panel and one in the center to lock the front panels ) Note: do not tighten screws until 10 crews have been attached and line-up Do not over tighten.
-
Page 11: Step V
ASSEMBLY INSTRUCTIONS STEP V: Grill Head to Cart: Stand cart upright. This step requires two people to lift and position grill head onto cart. Carefully lower the grill head onto the cart. Make sure the regulator hose is hanging outside the cart. Attach with (4) M6x13 screws and 1/4”crack resistances washers. - Page 12 ASSEMBLY INSTRUCTIONS STEP VI: Left Side Shelf STEP VII: Right Side Shelf Attach fascia to right side shelf with(2) M5x10 screws, 3/16” lock washers and 3/16” flat washers. Attach fascia and right side shelf to firebox with (2) M6x13 screws, 1/4” lock washers and 1/4”...
-
Page 13: Step Viii
ASSEMBLY INSTRUCTIONS STEP VIII: Sideburner Loosen side burner in side shelf. To loosen, unscrew and remove two front screws and washers which hold sideburner in place. Note: Do not loosen electrode screw. Remove knob and bezel from sideburner control valve. To remove, pull knob straight out from valve steam. - Page 14 ASSEMBLY INSTRUCTIONS...
-
Page 15: Step Ix:
ASSEMBLY INSTRUCTIONS STEP IX: Flame Tamer, Cooking Grate and Warming Rack Place flame tamers over burners by inserting tabs into slots in front and back of firebox. Place cooking grates onto grate rests. Place warming rack onto warming rack brackets. - Page 16 ASSEMBLY INSTRUCTIONS STEP X: Hang grease cup clip from bottom of firebox and place grease cup into grease cup clip. LP tank is sold separately. Use only with an OPD (over-fill protection device) equipped LP tank. Fill and leak check before attaching to grill and regulator. Place LP tank into hole in bottom shelf with tank collar opening facing to side as shown.
-
Page 17: Gas Connection
GAS CONNECTION ONLY USE THE REGULATOR AND HOSE ASSEMBLY PROVIDED WITH THIS GRILL. REPLACEMENT PRESSURE REGULATORS AND HOSE ASSEMBLIES MUST BE THOSE SUPPLIED BY THE MANUFACTURER This is a LP (Liquefied Petroleum Gas) configured grill. Do not attempt to use a natural gas supply unless the grill has been reconfigured for natural gas use. - Page 18 GAS CONNECTION CONNECT THE REGULATOR TO THE LP TANK VERY IMPORTANT: - THE REGULATOR SHALL NOT BE IN A LOCATION THAT WILL ATTAIN A TEMPERATURE ABOVE 140℉(60℃). - THE REGULATOR SHALL INCORPORATE A PRESSURE RELIEF VALVE OR OVERPRESSURE DEVICE. - THE INLET OF THE PRESSURE REGULATOR SHALL BE FITTED TO CONNECT THE TYPE I CONNECTION OF THE TANK VALVE PER ANSIZ21.81.
- Page 19 GAS CONNECTION ONLY USE THE REGULATOR AND HOSE ASSEMBLY PROVIDED WITH THIS GRILL. REPLACEMENT PRESSURE REGULATORS AND HOSE ASSEMBLIES MUST BE THOSE SUPPLIED BY THE MANUFACTURER This is a LP (Liquefied Petroleum Gas) configured grill. Do not attempt to use a natural gas supply unless the grill has been reconfigured for natural gas use.
- Page 20 GAS CONNECTION WARNING Never insert any foreign objects into the valve outlet. It may damage the valve and cause leak, leaking gas may result in fire, explosion, heavy body injury, or even death. Do not connect this grill to the self-contained LP gas system of a motor home or camper trailer.
-
Page 21: Leak Testing
LEAK TESTING GENERAL Although all gas connections on the grill are leak tested at the factory prior to shipment, a complete gas tightness check must be performed at the installation site due to possible mishandling in shipment, or excessive pressure unknowingly being applied to the unit. -
Page 22: Final Installation Checklist
LEAK TESTING SAFETY TIPS: 1) ALWAYS CHECK FOR LEAKS AFTER EVERY LP TANK CHANGE. 2) ALWAYS CHECK FOR LEAKS BEFORE EACH USE. 3) USE LONG BBQ TOOL TO AVOID BURNS. 4) CHECK ALL GAS SUPPLY FITTINGS FOR LEAKS BEFORE EACH USE. IT IS HANDY TO KEEP A SPRAY BOTTLE OF SOAPY WATER NEAR THE SHUT-OFF VALVE OF THE GAS SUPPLY LINE. -
Page 23: Grill Lighting Instruction
GRILL LIGHTING INSTRUCTION VERY IMPORTANT: ALWAYS INSPECT THE HOSE PRIOR TO EACH USE. BEFORE LIGHTING: Inspect the gas supply hose before turning the gas “ON”. If there is evidence of cuts, wear, or abrasion, it must be replaced before use. The replacement hose assembly must be that specified by the manufacturer. -
Page 24: Operating Instruction
GRILL LIGHTING INSTRUCTION OPERATING INSTRUCTION WARNING For your safety: Keep grill area clear and free from any flammable material. NEVER let children operate the grill or play near the grill. This grill is for outdoor use ONLY. NEVER use in a enclosed area such as a carport,porch, covered patio, garage, or under a surface that can catch fire. - Page 25 Grease fire can’t be put out by closing the lid. Turn off knobs and LP tank IMMEDIATELY if any grease fire occurs. TOTAL GAS CONSUMPTION: Total gas consumption (per hour) of PG-40404S0LA grill with all burners on “HI”: Main burners...
-
Page 26: Care & Maintenance
CARE & MAINTENANCE MAINTENANCE 1) Keep the grill area clear and free from combustible materials, gasoline and other flammable vapors and liquids. 2) Keep the holes in the three sides of the cart clear and free from debris, thus ensure the flow of combustion and ventilation air is unobstructed. 3) Visually check burner flames as following: - Remove cooking grids and flame tamers. - Page 27 CARE & MAINTENANCE GRILL BURNER CLEANING - Be sure the tank valve and the knobs are in the “OFF” position. Make sure the grill is cool. - Clean the exterior of the burner with a wire brush. Clear stubborn scale with a metal scraper.
-
Page 28: Trouble Shooting
TROUBLE SHOOTING BEFORE CALLING FOR SERVICE Please check the following problems/solutions before contact our service center. -
Page 29: Food Safety
FOOD SAFETY FOOD SAFETY: 1) Always follow the following tips to enjoy safe and healthy outdoor grilling. 2) Always use hot soapy water to wash hands, surfaces & utensils after processing raw meat. 3) Always separate raw meat from cooked foods to avoid cross-contamination. 4) Always use clean utensils to handle the food. -
Page 30: Product Registration
Product Registration form and (1) fax the form and a copy of your receipt to FAX # 909-287-0733, or (2) mail the form and a copy of your receipt to PERMASTEEL INC 14231 FERN AVE. CHINO, CA 91710. - Page 31 PERMASTEEL, INC. 14231 Fern Ave, Building 10 CHINO, CA 91710 TEL: (888)-287-0735 FAX: (909)-287-0733 EMAIL: SERVICE@PERMASTEEL.NET...
Need help?
Do you have a question about the PG-40404S0LA and is the answer not in the manual?
Questions and answers