Furuno FM-8800D Operator's Manual
Vhf radiotelephone
Hide thumbs
Also See for FM-8800D:
- Service manual (268 pages) ,
- Operator's manual (127 pages) ,
- Installation manual (72 pages)
Table of Contents
Advertisement
Quick Links
Advertisement
Table of Contents

Related Manuals for Furuno FM-8800D


Summary of Contents for Furuno FM-8800D
- Page 1 OPERATOR'S MANUAL VHF RADIOTELEPHONE FM-8800D/8800S MODEL www.furuno.co.jp...
- Page 2 *00014993018* *00014993018* *00014993018* *00014993018*...
-
Page 3: Important Notices
Alliance (http://www.eiae.org/) for the correct method of disposal. How to discard a used battery Some FURUNO products have a battery(ies). To see if your product has a battery(ies), see the chapter on Maintenance. Follow the instructions below if a battery(ies) is used. -
Page 4: Safety Instructions
RF power density Description Distance on antenna aperture required by 100 W/m 0.11 m IEC 60945 FM-8800D/ CAUTION 10 W/m 0.33 m IEC 60945 8800S MPE by FCC 2 W/m 0.9 m Do not touch any part of the antenna (MPE: Minimum Permissible Exposure) when the equipment is transmitting. -
Page 5: Distress Alert Transmission
DISTRESS ALERT TRANSMISSION Transmit the distress alert when a life-endangering situation occurs on your vessel. 1. Open the DISTRESS key cover and press the DISTRESS key more than four seconds. 2. Wait until the distress acknowledge is received. Distress acknowledge received. - Page 6 CANCELING DISTRESS ALART If you have transmitted a false distress alert, cancel it immediately as follows. 1. Press the CANCEL key to show the following window. Distress call will be cancelled? 2. Select YES by rotating the CHANNEL knob and press the ENT key. CAUTION ! Cancel DISTRESS on CH16 by VOICE.
-
Page 7: Table Of Contents
TABLE OF CONTENTS FOREWORD ..................... viii SYSTEM CONFIGURATION ................x 1. OPERATIONAL OVERVIEW 1.1 Controls Keys and LCD Indication ................1-1 1.1.1 Front panel......................1-1 1.1.2 Controls ......................1-2 1.1.3 Indications on the LCD ..................1-5 1.1.4 Audio alarms..................... 1-7 1.2 VHF Basic Operation.................... - Page 8 TABLE OF CONTENTS 3. DSC OPERATION FOR NON-DISTRESS CASES 3.1 Coast or Ship Call ..................... 3-1 3.1.1 Sending a coast or ship call ................3-2 3.1.2 Receiving acknowledgement of coast or ship call ........... 3-4 3.1.3 Receiving a coast or ship call................3-5 3.2 Group Call........................3-10 3.2.1 Sending a group call ..................3-10 3.2.2 Receiving a group call..................3-12...
- Page 9 TABLE OF CONTENTS 5. SYSTEM SETUP 5.1 Displaying Self ID ...................... 5-1 5.2 Displaying Group ID List .................... 5-1 5.3 Naming Intercom ....................... 5-2 5.4 Displaying Program Version ..................5-3 6. MAINTENANCE & TROUBLESHOOTING 6.1 Maintenance ......................6-1 6.2 Troubleshooting......................6-1 6.3 Daily Test ........................
-
Page 10: Foreword
A Word to FM-8800D/8800S Owners Congratulations on your choice of the FURUNO FM-8800D/8800S VHF Radiotelephone. We are confident you will see why the FURUNO name has become synonymous with quality and reliability. For 60 years FURUNO Electric Company has enjoyed an enviable reputation for quality marine electronics equipment. - Page 11 FOREWORD Features The FURUNO FM-8800D/8800S is a cost-effective all-in-one marine VHF radio system consisting of a 25 W VHF radiotelephone, a DSC modem, and a CH 70 watch receiver. It complies with GMDSS carriage requirements for safety and general communications.
-
Page 12: System Configuration
SYSTEM CONFIGURATION The FM-8800D/8800S is a highly advanced 25 W VHF transceiver with DSC terminal. It is designed to satisfy the stringent requirements of marine communications, and complies with GMDSS carriage requirements for safety and general communications. CH 70 RX... -
Page 13: Operational Overview
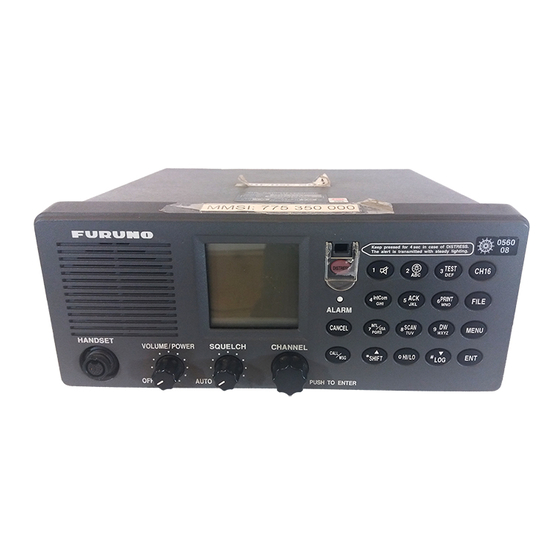
OPERATIONAL OVERVIEW The FM-8800D/8800S system consists of a transceiver block and two antennas. The transceiver block contains a VHF transmitter, receiver, and channel 70 watch receiver module. All operations are controlled on its front panel. Controls Keys and LCD Indication 1.1.1... -
Page 14: Controls
1. OPERATIONAL OVERVIEW 1.1.2 Controls The functions of keys of the transceiver unit and the remote station are almost the same. The table below shows the controls and keys for the transceiver unit. Controls Functions Selects a channel. CHANNEL Moves the cursor at menu opened. (PUSH TO ENTER) Registers a selected item when pressed. - Page 15 1. OPERATIONAL OVERVIEW Enters 1, ., ,, ’, ”, :, ;, -, +, *, #, , (, ), !, $, &, / character at entry mode. Turns the loudspeaker on or off when proceeded by the SHIFT key. In the off state, the loudspeaker icon appears. However, the key click actives and the alarm sounds when a distress call, urgent call, distress receive, or urgent receiver is activated.
- Page 16 1. OPERATIONAL OVERVIEW Enters “0”. Changes the output power high (25 W) or low (1 W) when proceeded by the SHIFT key. However, the following channels are always 1 W. INTL mode: CH15, CH17, CH75, CH76 HI/LO USA mode: CH13, CH17, CH67, CH77 CANADA mode: CH15, CH17, CH20, CH65, CH77 Press to activate secondary function.
-
Page 17: Indications On The Lcd
1. OPERATIONAL OVERVIEW 1.1.3 Indications on the LCD Below are all the indications which appear on the standby display on the transceiver unit. SEP 16/'05 12:57:48 Current date & time INTL SHIFT S CAN MANUAL ACK * AUTO CH:ENA * 02:44 LAT: 34°... - Page 18 1. OPERATIONAL OVERVIEW Below are the indications which appear on the standby display on the remote handset. SHIFT INTL MMSI: AUTO CH: DIS LAT: 12° 34. 1234’ N DEC05/08 LON: 123° Rx SCAN 11:39 45. 6789’ E 12:34 UTC AUTO MANUAL ACK** VOL 4 SQ 5 If you press...
-
Page 19: Audio Alarms
1. OPERATIONAL OVERVIEW 1.1.4 Audio alarms When you receive a distress alert or other DSC call, the audible and visual alarms are released. For the distress or urgency call, the audio alarm sounds until the CANCEL key is pressed. For all other calls, the audible alarm sounds for two minutes and automatically goes off. -
Page 20: Vhf Basic Operation
1. OPERATIONAL OVERVIEW VHF Basic Operation 1.2.1 Turning the power on and adjusting dimmer To turn the power on, turn the VOLUME/POWER control clockwise until you hear a click. To adjust the dimmer of the display, press the SHIFT key and press [2] key several times to set a suitable dimmer. -
Page 21: Adjusting Squelch
1. OPERATIONAL OVERVIEW 1.2.4 Adjusting squelch The SQUELCH control adjusts the squelch threshold level. Adjust it so that white noise heard in the loudspeaker just fades out. Perform this operation when no traffic is being received. AUTO squelch automatically reduces white noise. Usually select the AUTO position. -
Page 22: Quick Selection Of Ch16
1. OPERATIONAL OVERVIEW 1.2.8 Quick selection of CH16 Press the CH16 key to select CH16, the International Calling and Safety Channel. The use is limited to distress, safety and calling. The transmission on CH16 (156.800 MHz) should be limited to within 1 minute except for distress calling. -
Page 23: Remarks On Voice Communications
1. OPERATIONAL OVERVIEW To turn off the scanning, do one of following four methods. a) Press the CH16 key. b) Press the CANCEL key. c) If a handset is on-hook, off-hook it. d) If a handset is off-hook, press the PTT switch. In this case, press the PTT switch again to transmit. - Page 24 1. OPERATIONAL OVERVIEW 1.3.2 DSC operational overview Standby display When the FM-8800D/8800S is turned on, the following display appears. This display is known as the “standby display.” This is where you will begin most operations. SHIFT SEP 16/’05 12:57:48 INTL...
-
Page 25: Automatic Acknowledge On/Off
Distress alert transmission and output power When the distress alert is transmitted (by pressing the DISTRESS key), the output power of the FM-8800D/8800S is automatically set to maximum (25 W). When keyboard input is prohibited DSC-related controls cannot be operated while a DSC message is being transmitted. -
Page 26: Adjusting The Contrast
1. OPERATIONAL OVERVIEW How to set priority of the remote station 1. Disconnect the plug of a remote station to turn off the remote station. 2. While pressing the MENU key of a remote station, connect the plug to turn on the power. -
Page 27: Dsc Distress Communication
2. DSC DISTRESS COMMUNICATION Distress Alert Transmission from the DISTRESS If a distress situation occurs, do as follows: 1. Open the DISTRESS key cover and press the DISTRESS key more than four seconds. The alarm sounds and the red lamp in the key blinks. The lamp will light steadily four seconds later and at the same time the distress alert is transmitted. - Page 28 2. DSC DISTRESS COMMUNICATION 3) The screen changes to “distress acknowledge (DIST ACK) waiting” display. In this condition, distress communication with CH16 may be possible. ** Compose Message ** CALL TYPE: DISTRESS NATURE: UNDESIGNATED POS : 12° 34. 1234’ N 123°...
- Page 29 How to return to the normal mode When the DIST ACK is received, the FM-8800D/S changes to the distress mode. In this mode, the CALL, FILE and MENU keys are inoperative. After completing the distress communication and restoring to the normal state, cancel the distress mode as follows.
-
Page 30: Distress Alert Transmission With Nature Of Distress
POS : 34° 41. 1234’ N 134° 30. 4321’ E AT : 08 : 00 TELEPHONE ACK REQ The own ship's position and current time in UTC are displayed if your FM-8800D/8800S is connected to a navigation equipment, for example, GPS. -
Page 31: Distress Alert Transmission Starting With Call Key
2. DSC DISTRESS COMMUNICATION 4. Press the DISTRESS key more than four seconds. ** Compose Message ** CALL TYPE: DISTRESS NATURE: Flooding POS : 34° 41. 1234’ N 134° 30. 4321’ E Distress button Pressed! KEEP PRESSED FOR 4S The distress alert with nature of distress, ship's position and time are transmitted. - Page 32 2. DSC DISTRESS COMMUNICATION ** Compose Message ** CALL TYPE : DISTRESS NATURE : UNDESIGNATED POS : 12° 34. 1234’ N 123° 45. 6789’ E AT : 12 : 34 TELEPHONE ACK REQ 4. Press the ENT key to display the distress nature list. Sinking NDESIGNATED Disabled &...
-
Page 33: Canceling A False Distress Alert
2. DSC DISTRESS COMMUNICATION Canceling a False Distress Alert If you have transmitted a distress alert by mistake, do the following to cancel it. 1. Press the CANCEL key to show the following window. Distress call will be cancelled? 2. Select YES by rotating the CHANNEL knob and press the ENT key. CAUTION ! Cancel DISTRESS on CH16 by VOICE. -
Page 34: Receiving Distress Alert From Other Vessel, Transmitting Dist Ack Signal
2. DSC DISTRESS COMMUNICATION Receiving Distress Alert from Other Vessel, Transmitting DIST ACK Signal In no case is a ship permitted to transmit a DSC distress relay call upon receipt of a DSC distress alert on VHF channel 70. Flow chart for determining if you should/should not transmit DIST ACK signal DSC Distress alert received. - Page 35 Begin search and rescue operation for the vessel in distress. Procedure when in area A1 1. When the FM-8800D/S receives a distress alert from another vessel, the ALARM LED (red) blinks and the FM-8800D/S sounds the distress alarm. 2. Silence the alarm by pressing the CANCEL key.
- Page 36 2. DSC DISTRESS COMMUNICATION Your Ship About 20 to 30 miles (Sea area A1) Coast station Distress Alert Transmission Vessel in Distress Receiving distress alert from other vessel Transmitting DIST ACK signal If your vessel meets the requirements necessary to transmit the DIST ACK signal, do the following: When a distress alert from other ship is received, the following screen appears.
- Page 37 2. DSC DISTRESS COMMUNICATION 1. Press the CANCEL or ENT key to silence the alarm. The following message appears. ** Received Message ** MAY10/04 08:03 ECC : OK DISTRESS ID IN DIST : 123456789 NATURE : UNDESIGNATED POS : 12° 34. 1234’ N 123°...
-
Page 38: Sending Distress Relay On Behalf Of A Ship In Distress
2. DSC DISTRESS COMMUNICATION 4. Choose DISTRESS ACK and press the ENT key. ** Send Message ** DISTRESS ACK TO : 123456789 KIND : DISTRESS ACK NATURE : UNDESIGNATED POS : 12° 34. 1234’ N 123° 45. 6789’ E AT : 12 : 34 TELEPHONE PRESS CALL TO SEND 5. -
Page 39: Sending Distress Relay To Coast Station
2. DSC DISTRESS COMMUNICATION 2.6.1 Sending distress relay to coast station 1. Press the CALL key. The [Compose message] screen appears. ** Compose Message ** CALL TYPE : COAST CALL COAST ID : 00 ROUTINE COMM MODE : TELEPHONE COMM OPTION : NO INFO CH : NO INFO ACK REQ 2. - Page 40 2. DSC DISTRESS COMMUNICATION 11. Press the ENT key again. INPUT TYPE : AUTO LAT : 12° 34. 1234’ N LON : 134° 45. 6789’ E TIME : 08 : 00 12. Enter position of the ship in distress, following 1), 2) or 3) below. AUTO MANUAL NO INFO...
-
Page 41: Sending Distress Relay To All Ships
2. DSC DISTRESS COMMUNICATION 2.6.2 Sending distress relay to all ships 1. Press the CALL key. The [Compose message] screen appears. ** Compose Message ** CALL TYPE : COAST CALL COAST ID : 00 ROUTINE COMM MODE : TELEPHONE COMM OPTION : NO INFO CH : NO INFO ACK REQ 2. - Page 42 2. DSC DISTRESS COMMUNICATION 9. Press the ENT key again. INPUT TYPE : AUTO LAT : 12° 34. 1234’ N LON : 134° 45. 6789’ E TIME : 08 : 00 10. Enter position of the ship in distress, following 1), 2) or 3) below. AUTO MANUAL NO INFO...
-
Page 43: Receiving Distress Relay
2. DSC DISTRESS COMMUNICATION Receiving Distress Relay 2.7.1 Receiving distress relay all call If you receive a distress relay for all ships, continue monitoring CH16. 1. When a distress relay all ships call is received, the audio alarm sounds and the display looks like the one below. -
Page 44: Receiving Distress Relay From Coast Station
2. DSC DISTRESS COMMUNICATION 2.7.2 Receiving distress relay from coast station If you receive a distress relay call from a coast station, continue monitoring CH16. 1. When a distress relay call from a coast station is received, the audio alarm sounds and the display looks like the one below. -
Page 45: Receiving Distress Relay Area Call
2. DSC DISTRESS COMMUNICATION 2.7.3 Receiving distress relay area call If you receive a distress relay area call, continue monitoring CH16. 1. When a distress relay area call from a coast station is received, the audio alarm sounds and the display looks like the one below. Distress relay area call received. -
Page 46: Receiving Duplicated Distress Relay Call And/Or Distress Relay Area Call
2. DSC DISTRESS COMMUNICATION 2.7.4 Receiving duplicated distress relay call and/or distress relay area call If you receive a distress relay call and/or distress relay area call about a same vessel, twice or more within one hour, the following message appears. Duplicate Distress relay call received. -
Page 47: Dsc Operation For Non-Distress Cases
DSC OPERATION FOR NON-DISTRESS CASES Note: When you set a call type to RELAY ALL, RELAY SEL, or DISTRESS by error in the Compose Message screen, you cannot change the CALL TYPE in the same screen. If you want to cancel the call, press the CANCEL key and restart from scratch. ** Compose Message ** CALL TYPE : DISTRESS NATURE : UNDESIGNATED... -
Page 48: Sending A Coast Or Ship Call
3. DSC OPERATION FOR NON-DISTRESS CASES 3.1.1 Sending a coast or ship call 1. Press the CALL key. The display changes from the standby display to the COMPOSE MESSAGE screen and the CALL TYPE is displayed in reverse video. ** Compose Message ** CALL TYPE : COAST CALL TO : COAST AAA* COAST ID : 003456789... - Page 49 3. DSC OPERATION FOR NON-DISTRESS CASES 8. COMM MODE is selected; press the ENT key. (for ROUTINE only) TELEPHONE DATA 9. Choose TELEPHONE or DATA as appropriate followed by pressing the ENT key. The COMM OPTION always shows NO INFO. For the COAST CALL/ROUTINE, go to step 13.
-
Page 50: Receiving Acknowledgement Of Coast Or Ship Call
3. DSC OPERATION FOR NON-DISTRESS CASES 3.1.2 Receiving acknowledgement of coast or ship call 1. After a coast or ship call is sent, the equipment waits for acknowledgement of the call, showing the display below. Waiting for acknowledgement. COAST ID : 003456789 ROUTINE COMM MODE : TELEPHONE COMM OPTION : NO INFO... -
Page 51: Receiving A Coast Or Ship Call
3. DSC OPERATION FOR NON-DISTRESS CASES Able acknowledge call received a) The audio alarm sounds; press the CANCEL key to silence it, and the display changes as below. ** Received Message ** APR01/04 12 : 34 ECC : OK COAST ACK If a file is registered, FROM : 003456789 its registered name... - Page 52 3. DSC OPERATION FOR NON-DISTRESS CASES 1) Sending automatic acknowledge (ACK BQ) with comply status “ABLE.” See the procedure below. 2) Sending automatic acknowledge (ACK BQ) with comply status "UNABLE." See the procedure on page 3-7. 3) Manually acknowledging a coast or ship call with "ABLE." See the procedure on page 3-8.
- Page 53 3. DSC OPERATION FOR NON-DISTRESS CASES 2) Sending automatic acknowledge (ACK BQ) with comply status "UNABLE." 1. When the automatic acknowledge feature is active (AUTO ACK), the comply status is "UNABLE" and a coast or ship call is received, the display shown below appears, indicating that the auto acknowledge call with UNABLE (ACK BQ) has been sent.
- Page 54 3. DSC OPERATION FOR NON-DISTRESS CASES 3) Manually acknowledging a coast or ship call with "ABLE." 1. When the equipment is set up with manual acknowledge (MANUAL ACK) and a coast or ship call is received, the alarm sounds and the display looks like the one below.
- Page 55 3. DSC OPERATION FOR NON-DISTRESS CASES 4. Choose ABLE and press the ENT key. The display changes as shown below. ** Send Message ** SHIP ACK TO : 123456789 ROUTINE COMM MODE : TELEPHONE COMM OPTION : NO INFO CH : 12 PRESS CALL TO SEND 5.
-
Page 56: Group Call
3. DSC OPERATION FOR NON-DISTRESS CASES 3. To send the ACK BQ manually, press the ENT key. The pop-up window shown below is displayed. ABLE UNABLE 4. Choose UNABLE and press the ENT key. The following pop-up screen appears. NO REASON BUSY EQUIP DISBLD MODE UNAVAIL... - Page 57 3. DSC OPERATION FOR NON-DISTRESS CASES 2. Press the ENT key to open the call type list. TEST COAST CALL RELAY ALL SHIP CALL RELAY SEL GROUP CALL DISTRESS PSTN CALL ALL SHIPS POSITION 3. Rotate the CH knob (or press up / down arrow key) to choose GROUP CALL and press the ENT key.
-
Page 58: Receiving A Group Call
3. DSC OPERATION FOR NON-DISTRESS CASES 3.2.2 Receiving a group call Group ID must be registered in order to receive a group call. See paragraph 4.5. 1. When a group call is received, the alarm sounds and the ALARM LED blinks two minutes. -
Page 59: Pstn Call
3. DSC OPERATION FOR NON-DISTRESS CASES PSTN Call The PSTN call allows the making and receiving of telephone calls over public switched telephone networks. To use the PSTN call feature, use a handset which has a HOOK ON/OFF function. The standard supply handset has this feature. -
Page 60: Pstn Call Disconnection (Ship Disconnects Line)
Call in progress on CH70 COAST ID : 003456789 COMM MODE : DUPLEX TP COMM OPTION : NO INFO NAME : FURUNO When TEL no. is registered, TEL : 81798631131 the registered name is displayed. ACK REQ AUTO RETRY IN : 5S If a response from the coast station is received within five seconds, transmit PSTN CALL signal and then carrier frequency during two seconds. -
Page 61: Pstn Call Disconnection (Coast Station Disconnects Line)
3. DSC OPERATION FOR NON-DISTRESS CASES 3.3.3 PSTN call disconnection (coast station disconnects line) 1. The PSTN line is disconnected by the coast station when it finds no evidence of communications or the land subscriber hangs up. The coast station then sends charge information as below. -
Page 62: All Ships Call
3. DSC OPERATION FOR NON-DISTRESS CASES All Ships Call When an urgent but not life-endangering situation arises on your ship, for example, engine trouble, send an all ships call to request assistance. After sending the call, you can communicate by voice over the radiotelephone. Do the following before beginning actual communications: URGENCY priority: Say PAN three times followed by your call sign. - Page 63 3. DSC OPERATION FOR NON-DISTRESS CASES 7. Choose SELECT CH or MANUAL as appropriate followed by pressing the ENT key. 8. If you chose SELECT CH, the following channel list appears. Rotate the CH knob (or press up / down arrow key) to choose a channel and press the ENT key.
-
Page 64: Receiving An All Ships Call
3. DSC OPERATION FOR NON-DISTRESS CASES 3.4.2 Receiving an all ships call 1. When an all ships call is received, the audio alarm sounds and the display looks something like the one shown below. All ships call received. FROM : 123456789 SAFETY COMM MODE : TELEPHONE COMM OPTION : NO INFO... -
Page 65: Position Call
3. DSC OPERATION FOR NON-DISTRESS CASES Position Call There are two types of position calls: other station requires your ship's position and your ship requests position of another ship. Finding position of other station (1)Position request call (2)Position Information Own Station Other Station Sending own ship's position to other station (1) Requests ship's position... - Page 66 3. DSC OPERATION FOR NON-DISTRESS CASES 7. Press the CALL key more than three seconds to transmit position request. The following display appears. The timer counts down until a response is received. Waiting for acknowledgement. If a file is registered, SHIP ID : 123456789 its registration name SAFETY...
-
Page 67: Position Call: Other Ship Requests Your Position
3. DSC OPERATION FOR NON-DISTRESS CASES 3.5.2 Position call: other ship requests your position 1. When a position request call is received, the audio alarm sounds and the display changes as below. Position request call received. FROM : 123456789 SAFETY KIND : POSITION REQ COMM OPTION : NO INFO ACK REQ... -
Page 68: Receiving A Polling Call
3. DSC OPERATION FOR NON-DISTRESS CASES Receiving a Polling Call 3.6.1 Automatic reply 1. When a polling request call is received and the equipment is set up for automatic acknowledge POLLING CALL ON at the AUTO ACK menu and the ACK key is set to show AUTO ACK on the display, t he display changes as shown in the illustration below and the audio alarm sounds . -
Page 69: Manual Reply
3. DSC OPERATION FOR NON-DISTRESS CASES 3.6.2 Manual reply 1. When a polling request call is received and the setting of POLLING CALL on the AUTO ACK menu is OFF or the ACK key is set to show MANUAL ACK on the display, the display changes as shown in the illustration below and the audio alarm sounds. -
Page 70: Neutral Craft Call
3. DSC OPERATION FOR NON-DISTRESS CASES Neutral Craft Call The neutral craft call, which contains own ship position and ID, informs all ships that your ship is not a participant in armed conflict. Send the call BEFORE entering an area of armed conflict. To enable the neutral craft call, set the NEUTRAL CALL to ABLE in the SPECIAL CALL menu. -
Page 71: Receiving A Neutral Craft Call
3. DSC OPERATION FOR NON-DISTRESS CASES 3.7.2 Receiving a neutral craft call 1. When a neutral craft call is received, the alarm sounds and the display changes as below. Neutral craft call received. FROM : 123456789 URGENCY COMM MODE : TELEPHONE KIND : NEUTRAL CRAFT CH : 16 NO ACR REQ... -
Page 72: Medical Transport Call
3. DSC OPERATION FOR NON-DISTRESS CASES Medical Transport Call The medical transport call informs all ships, by urgency priority, that own ship carries medical supplies. To enable the medical transport call, set the MEDICAL CALL to ABLE in the SPECIAL CALL menu. See section “4.9 Special Call Setup.” 3.8.1 Sending a medical transport call 1. -
Page 73: Receiving A Medical Transport Call
3. DSC OPERATION FOR NON-DISTRESS CASES 3.8.2 Receiving a medical transport call 1. When a medical call is received, the alarm sounds and the display changes as below. Medical call received. FROM : 123456789 URGENCY COMM MODE : TELEPHONE KIND : MEDICAL CH : 16 NO ACK REQ CANCEL ALARM... -
Page 74: Log File
3. DSC OPERATION FOR NON-DISTRESS CASES Log File Three log files are provided for storage of calls: received ordinary log, received distress log and transmitted log. Each log file stores 50 calls, on a first-in, first-out basis. This means that the latest call is saved as log no.1 and the log no. of all previous calls in that log increments by one. - Page 75 3. DSC OPERATION FOR NON-DISTRESS CASES 4. Press the ENT key to open the message. Below is a sample message. ** Received Message ** APR 10/04 18:30 ECC : OK SHIP CALL FROM : 123456789 For a received message ROUTINE which requires a reply, COMM MODE : TELEPHONE ANSWER is displayed...
- Page 76 3. DSC OPERATION FOR NON-DISTRESS CASES This page is intentionally left blank. 3-30...
-
Page 77: Basic Setup
BASIC SETUP Alarm Setup This section provides the procedures for setting up various alarms. The alarm menu enables/disables internal and external alarms. Note that the Distress/Urgency alarm cannot be disabled. Old position alarm in manual position entry mode This alerts the operator when manually entered position data is older by the number of hours or minutes set. - Page 78 4. BASIC SETUP To set type of alarm to output 1. Rotate the CH knob (or press up / down arrow key) to choose EXT ALARM from the ALARM MENU and press the ENT key. The following setting window appears. Always ON DIST/URG : ON SAFETY...
-
Page 79: Auto Ack Setup
4. BASIC SETUP Auto ACK Setup The Auto Ack Menu enables/disables automatic acknowledgement of ship, coast, and polling calls. Comply status ABLE UNABLE Setting of SHIFT→5ACK key AUTO ACK Can send ABLE Can send UNABLE acknowledge automatically. acknowledge automatically. MANUAL ACK Can send ABLE Can send UNABLE acknowledge manually... - Page 80 4. BASIC SETUP To set reason for unable If you have chosen UNABLE as the COMPLY STATUS, set the reason as follows: 1. Rotate the CH knob (or press up / down arrow key) to choose UNABLE REASON from the AUTO ACK MENU and press the ENT key. The following menu appears.
-
Page 81: Erasing Logs
4. BASIC SETUP Erasing Logs Erasing received ordinary log 1. Press the MENU key. 2. Rotate the CH knob (or press up / down arrow key) to choose ERASE LOG and press the ENT key. The following window appears. *** ERASE LOG MENU *** RCVD ORDINARY RCVD DISTRESS TRANSMITTED... -
Page 82: Memory Channel Setup
4. BASIC SETUP Memory Channel Setup You can save up to 50 channels as follows. 1. Press the MENU key. 2. Rotate the CH knob (or press up / down arrow key) to choose MEMORY CHANNEL and press the ENT key. * Memory Channel 1/7* 01 CH-- -------- 02 : CH-- --------... -
Page 83: Message File Entry
4. BASIC SETUP Message File Entry In this section you will learn how to prepare and store ship, coast, PSTN, and group calls for future transmission. 100 calls can be stored. 1. At the standby display, press the MENU key to open the SETUP MENU. **** SETUP MENU **** ALARM AUTO ACK... - Page 84 4. BASIC SETUP 4. Rotate the CH knob to choose the call type and press the ENT key. One of the following display appears depending on the call type selected above. MESSAGE FILE 1 ENTRY MESSAGE FILE 1 ENTRY CALL TYPE : COAST CALL CALL TYPE : SHIP CALL COAST ID : 00...
- Page 85 4. BASIC SETUP 9. Choose SELECT CH with the CH knob (or up / down arrow key) and press the ENT key. SIMP CHANNEL In case of MANUAL, enter the channel number with numeric keys manually. 10. Choose a channel with the CH knob (or up / down arrow key) and press the ENT key.
- Page 86 4. BASIC SETUP To send a message file: Method1 1) Press the CALL key. 2) Choose call type and press the ENT key. 3) Highlighting xxx ID, press the FILE key to display list of message files. 4) Choose file to send and press the ENT key. 5) Set the Routine, COMM MODE, and CH.
-
Page 87: Position Setup
4. BASIC SETUP Position Setup This is where you enter your position, automatically or manually. 1. Press the MENU key at the standby display. 2. Rotate the CH knob (or press up / down arrow key) to choose POSITION from the second page of the main menu. **** SETUP MENU **** POSITION PRINT OUT... -
Page 88: Print Out Setup
4. BASIC SETUP Print Out Setup The PRINT MENU enables/disables automatic printing of all transmitted and received calls and the results of the daily test. 1. Press the MENU key at the standby display to open menu. 2. Rotate the CH knob (or press up / down arrow key) to choose PRINT OUT from the second page of the main menu and press the ENT key. -
Page 89: Volume Setup
4. BASIC SETUP Volume Setup The VOLUME menu enables/disables key beep (acknowledges correct key input) and adjusts the volume of the earpiece, intercom and off-hook loudspeaker. 1. Press the MENU key at the standby display. 2. Rotate the CH knob (or press up / down arrow key) to choose VOLUME and press the ENT key. - Page 90 4. BASIC SETUP 2. Rotate the CH knob (or press up / down arrow key) to set the earpiece volume level. The setting range is 8 to 16 for transceiver handset and 1 to 4 for remote handset. 3. Press the ENT key. (If you press the CANCEL key, the setting is not stored.) Intercom volume 1.
-
Page 91: Special Call Setup
4. BASIC SETUP Special Call Setup The Special Call menu enables/disables the neutral craft call and / or medical call. 1. Press the MENU key at the standby display. 2. Rotate the CH knob to choose SPECIAL CALL and press the ENT key. **** SPECIAL MENU **** NEUTRAL CALL : ABLE... -
Page 92: Auto Ch Setup
4. BASIC SETUP 3. Press the ENT key again to show date entry box. DATE : 2005-08-24 TIME : 01:24:17 2006-01-24 4. Enter current date and press the ENT key. Time entry box appears. 5. Enter current time and press the ENT key. 6. -
Page 93: Auto Revert Setup
4. BASIC SETUP 4.13 AUTO REVERT Setup AUTO REVERT sets what channel to set when the handset is hung in the handset hanger. The default setting (ON) reverts to CH16. 1. Press the MENU key at the standby display. 2. Rotate the CH knob to choose AUTO REVERT and press the ENT key. * AUTO REVERT MENU * AUTO REVERT : ON 3. - Page 94 4. BASIC SETUP This page intentionally left blank. 4-18...
-
Page 95: System Setup
SYSTEM SETUP Displaying Self ID 1. Press the MENU key. **** SETUP MENU **** **** SETUP MENU **** **** SETUP MENU **** ALARM POSITION PROPOSE CH SPECIAL CALL AUTO ACK ERASE LOG PRINT OUT CONTRAST MEMORY CHANNEL AUTO REVERT VOLUME SYSTEM MESSAGE FILE ENTRY AUTO CH... -
Page 96: Naming Intercom
5. SYSTEM SETUP Naming Intercom 1. Press the MENU key. 2. Rotate the CH knob (or press up / down arrow key) to choose SYSTEM from page 3 of the menu and press the ENT key. The following window appears. * SYSTEM SETUP MENU * SELF ID 123498765 GROUP ID LIST... -
Page 97: Displaying Program Version
5. SYSTEM SETUP Displaying Program Version 1. Press the MENU key 2. Rotate the CH knob to choose the SYSTEM and press the ENT key. The following selection window appears. * SYSTEM SETUP MENU * SELF ID 123456789 GROUP ID LIST INTERCOM NAMING PROGRAM VERSION 3. - Page 98 5. SYSTEM SETUP This page is intentionally left blank.
-
Page 99: Maintenance & Troubleshooting
1) Check if power plug is firmly connected. 2) Check fuses in the power cable. If it has tripped, replace it with a new one (15A). 3) If power cannot be turned on (after checking 1 and 2), contact a FURUNO agent or representative for advice. -
Page 100: Daily Test
3. To stop the daily test, press the CANCEL key. “NG” may be displayed depending on the receiving conditions. In this case, repeat the daily test a couple of times. If NG is displayed always, contact a FURUNO agent or representative for advice. -
Page 101: Dsc Test Transmission
6. MAINTENANCE & TROUBLESHOOTING DSC Test Transmission 6.4.1 Transmitting a DSC test message 1. Press the CALL key. The display changes from the standby display to the COMPOSE MESSAGE screen and the CALL TYPE is displayed in reverse video. 2. Press the ENT key to open the call type list. 3. - Page 102 6. MAINTENANCE & TROUBLESHOOTING b) When the ACK is received, the alarm sounds and the screen changes as follows. Test acknowledge received. FROM : 987654321 SAFETY KIND : TEST COMM MODE : NO INFO CANCEL ALARM 7. Press the CANCEL key to stop the alarm and confirm the message received. ** Received Message ** JAN03/06 11:18 ECC : OK...
-
Page 103: Receiving A Test Message
6. MAINTENANCE & TROUBLESHOOTING 6.4.2 Receiving a test message When a test call is received, the alarm sounds. If the manual ACK is set, the following message appears. Test request call received. FROM : 002444888 SAFETY KIND : TEST COMM MODE : NO INFO ACK REQ CANCEL ALARM 1. -
Page 104: Error Message
There is no L/L input from a positioning sensor for more than ten minutes. System Error The DSP (digital signal processor) is abnormally. Printer PE Printer is disconnected or paper runs out. Parts Location Transceiver unit FM-8800D/8800S TX/RX pcb PWR pcb 05P0774 05P0776 DUPLEXER FM-8800S... - Page 105 6. MAINTENANCE & TROUBLESHOOTING RTC pcb 05P0802 Bottom cover removed Handset HS-2003 HANDSET pcb 05P0780 Remote station RB-8800/RB-8810/ RB-8810-W/HS-8800/ HS-8800-W TB pcb 05P0779 TB pcb HS CONT pcb 07P0782 REMOTE pcb 05P0798 05P0781 RB-8810 HS-8800 RB-8800 HS-8800-W RB-8810-W...
- Page 106 6. MAINTENANCE & TROUBLESHOOTING Junction box IF-8810 JUNCTION pcb 05P0790 DMC Interface IF-8820 DMC IF pcb 05P0778...
-
Page 107: Appendix
APPENDIX Menu Tree Bold: Default [MENU] 4H/3H/2H/1H/0.5H ALARM POSITION OLDER EXT ALARM DIST/URG, ON SAFETY ON/OFF ROUTINE ON/OFF COMPLY STATUS AUTO ACK ABLE/UNABLE UNABLE REASON NO REASON/BUSY/EQUIP DISBLD/ MODE UNAVAIL/CH UNAVAIL POLLING CALL ON/OFF ERASE LOG RCVD ORDINARY RCVD DISTRESS TRANSMITTED MEMORY CHANNEL 50 entries... - Page 108 APPENDIX [CALL] RELAY SEL COAST ID COAST CALL COAST ID ID IN DIST ROUTINE KIND: DISTRESS RELAY SAFETY UNDESIGNATED NATURE URGENCY Fire COMM MODE TELEPHONE Flooding DATA Collision COMM OPTION NO INFO Grounding NO INFO Listing Sinking SHIP ID SHIP CALL Disabled &...
-
Page 109: Marine Vhf Channel Lists
APPENDIX Marine VHF Channel Lists 1) International Channels Remark Remark 156.050 160.650 156.025 160.625 156.100 160.700 156.075 160.675 156.150 160.750 156.125 160.725 156.200 160.800 156.175 160.775 156.250 160.850 156.225 160.825 156.300 156.300 156.275 160.875 156.350 160.950 156.325 160.925 156.400 156.400 156.375 156.375 156.450... - Page 110 APPENDIX 2) USA Channels Remark Remark 156.050 156.050 156.175 156.175 156.250 156.250 156.300 156.300 156.275 156.275 156.350 156.350 156.325 156.325 156.400 156.400 156.375 156.375 156.450 156.450 156.425 156.425 156.500 156.500 156.475 156.475 156.550 156.550 156.525 156.600 156.600 156.575 156.575 156.650 156.650 156.625 156.625...
- Page 111 APPENDIX 3) Canadian Channels Remark Remark 156.050 160.650 156.025 160.625 156.100 160.700 156.075 156.075 156.150 160.750 156.125 156.125 156.200 156.200 156.250 156.250 156.225 156.225 156.300 156.300 156.275 156.275 156.350 156.350 156.325 156.325 156.400 156.400 156.375 156.375 156.450 156.450 156.425 156.425 156.500 156.500 156.475...
- Page 112 APPENDIX 4) Inland waterways (INLND-W) Channels Remark Remark 156.050 160.650 156.025 160.625 156.100 160.700 156.075 160.675 156.150 160.750 156.125 160.725 156.200 160.800 156.175 160.775 156.250 160.850 156.225 160.825 156.300 156.300 156.275 160.875 156.350 160.950 156.325 160.925 156.400 156.400 156.375 156.375 156.450 156.450 156.425...
- Page 113 APPENDIX 5) Private Channels CH NO (current) Remark Simplex Simplex Semi-dup 155.000 155.000 159.600 155.025 155.025 159.625 155.050 155.050 159.650 155.075 155.075 159.675 155.100 155.100 159.700 155.125 155.125 159.725 155.150 155.150 159.750 155.175 155.175 159.775 155.200 155.200 159.800 155.225 155.225 159.825 155.250 155.250...
- Page 114 APPENDIX CH NO (current) Remark Simplex Simplex Semi-dup 155.975 155.975 160.575 156.000 156.000 160.600 Min DUPch 156.025 156.025 160.625 156.050 156.050 160.650 156.075 156.075 160.675 156.100 156.100 160.700 156.125 156.125 160.725 156.150 156.150 160.750 156.175 156.175 160.775 156.200 156.200 160.800 156.225 156.225 160.825...
- Page 115 APPENDIX CH NO (current) Remark Simplex Simplex Semi-dup 156.975 156.975 161.575 157.000 157.000 161.600 157.025 157.025 161.625 157.050 157.050 161.650 157.075 157.075 161.675 157.100 157.100 161.700 157.125 157.125 161.725 157.150 157.150 161.750 157.175 157.175 161.775 157.200 157.200 161.800 157.225 157.225 161.825 157.250 157.250...
- Page 116 APPENDIX CH NO (current) Remark Simplex Simplex Semi-dup 157.975 157.975 162.575 158.000 158.000 162.600 158.025 158.025 162.625 158.050 158.050 162.650 158.075 158.075 162.675 158.100 158.100 162.700 158.125 158.125 162.725 158.150 158.150 162.750 158.175 158.175 162.775 158.200 158.200 162.800 158.225 158.225 162.825 158.250 158.250...
- Page 117 APPENDIX CH NO (current) Remark Simplex Simplex Semi-dup 158.975 158.975 163.575 159.000 159.000 163.600 RX.max.freq 159.025 159.025 159.050 159.050 159.075 159.075 159.100 159.100 159.125 159.125 159.150 159.150 159.175 159.175 159.200 159.200 159.225 159.225 159.250 159.250 159.275 159.275 159.300 159.300 159.325 159.325 159.350 159.350...
- Page 118 APPENDIX CH NO (current) Remark Simplex Simplex Semi-dup 159.975 159.975 160.000 160.000 160.025 160.025 160.050 160.050 160.075 160.075 160.100 160.100 160.125 160.125 160.150 160.150 160.175 160.175 160.200 160.200 160.225 160.225 160.250 160.250 160.275 160.275 160.300 160.300 160.325 160.325 160.350 160.350 160.375 160.375 160.400...
- Page 119 APPENDIX CH NO (current) Remark Simplex Simplex Semi-dup 160.975 160.975 161.000 161.000 161.025 161.025 161.050 161.050 161.075 161.075 161.100 161.100 161.125 161.125 161.150 161.150 161.175 161.175 161.200 161.200 161.225 161.225 161.250 161.250 161.275 161.275 161.300 161.300 161.325 161.325 161.350 161.350 161.375 161.375 161.400...
-
Page 120: Digital Interface (Iec 61162-1 Edition 2
APPENDIX Digital Interface (IEC 61162-1 Edition 2) Input sentences GGA, GLL, RMC, ZDA, GNS Schematic diagram 05P0773 U13 LTC1480 100P TXD-H 100P TXD-C RXD-H RXD-C 1SS355 1000p 1000p PC400 Load requirements as listner Isolation Optocoupler Input impedance 560 ohms Max. Voltage ±15V Threshold 4 mA... - Page 121 APPENDIX GGA - Global positioning system (GPS) fix data AP-15...
- Page 122 APPENDIX GLL - Geographic position - latitude and longitude GNS-GNSS fixed data $--GNS,hhmmss.ss,llll.ll,a,yyyyy.yy,a,c--c,xx,x.x,x.x,x.x,x.x,x.x*hh<CR><LF> +--- 11 +------ 10 +---------- 9 +-------------- 8 +------------------ 7 | +---------------------- 6 +------------------------- 5 | +------------------------------ 4 +-------+--------------------------------- 3 +--+--------------------------------------------- 2 +------------------------------------------------------------- 1 1. UTC of position 2.
- Page 123 APPENDIX RMC - Recommemded minimum specific GPS/TRANSIT data $--RMC,hhmmss.ss,A,llll.lll,a,yyyyy.yyy,a,x.x,x.x,xxxxxx,x.x,a,a*hh<CR><LF> | | | +------- 10 +--------- 9 +--+--------- 8 +------------------ 7 +---------------------- 6 +------------------------ 5 +----- +------------------------ 4 +----+--------------------------------- 3 +-------------------------------------- 2 +-------------------------------------------- 1 1. UTC of position fix 2. Status: A=data valid, V=navigation receiver warming 3.
- Page 124 APPENDIX TLL – Target latitude and longitude $--TLL,xx,llll.lll,a,yyyyy.yyy,a,c--c,hhmmss.ss,a,a*hh<CR><LF> | | | | | +--------- 8 | +----------- 7 +------------- 6 +-------------------- 5 | +-------------------------- 4 +-----+------------------------------ 3 | +----+------------------------------------------ 2 +----------------------------------------------------- 1 1. Target number 00 - 99 2. Latitude, N/S 3.
-
Page 125: Thermal Printer Utp-80Fk
APPENDIX Thermal Printer UTP-80FK 1. Printer usage cautions Do not disassemble or attempt to repair the printer. Do not allow water to enter the printer. Do not drop or jar the printer. Fix a paper jam after turning off the power. Turn off the power when there is some problem (for example, strange smell or smoke), and confirm that the trouble is not continuous. -
Page 126: Index
APPENDIX Parts Paper feed slot Shaft VR for adjusting printing density DIP switch Case Vent Guard plate A Guard plate B Front panel Cutter Lock lever Rear panel Screw hole for fixing case I/O connector 4. Operation Loading roll paper 1) Unlocking the Slide lock Slide the Lock lever at the right bottom of the panel to the FREE position to unlock the front panel1. - Page 127 APPENDIX 5) Attaching roll paper Insert roll paper into the shaft. NOTE) Insert the paper so it feeds from above as shown in the figure at right. 6) Inserting paper Turn on the POWER and confirm that the PE LED lights red.
- Page 128 APPENDIX Lock lever: Locks the front panel. The LOCK position prevents opening of the front panel. Cutter: Cuts paper. Pull up the paper to cut it. Paper feed slot: Feeds paper. Setting the DIP switch The DIP switch at the top of the frame functions to change printer specifications. Default specifications are shown in the table below.
- Page 129 APPENDIX Printing test Turn on the power while pressing and holding down the FEED switch to start the test printing. All standard characters and six lines of filled squares are printed and then the equipment goes into ON-LINE. To stop printing during the test, hit the SEL key. NOTE1: Below are samples for 20 digits printing.
- Page 130 If torn paper cannot be removed with fingers use a tweezers, being careful not to scratch parts. NOTE) Scratched printing head, platen or rubber roller can cause printing or paper feed malfunction. c) If torn paper cannot be removed, consult a FURUNO dealer for advice. Rubber roller (one each right and left) Retainer plate...
- Page 131 APPENDIX Thermal Printer UTP-58E For general operation notice, see Thermal printer UTP-80FK. UTP-58E for RC-8800S/D-B (Rack Console) and PP-8800A (Printer) Push the POWER switch and the POWER Lamp goes on. When the lamp in on data received from the radiotelephone is printed. After completion of printing, feed paper out by pressing the LINE FEED button.
- Page 132 APPENDIX This page is intentionally left blank. AP-26...
- Page 133 *: CH75&76 can be included MEMORY CH: 50 for some countries. (2) Frequency Stability Within ±1.5 kHz (3) Communication System FM-8800S: Simplex/Semi-duplex FM-8800D: Simplex/Full-duplex (4) Class of Emission 16K0G3E (Voice) 16K0G2B (DSC) (5) Antenna Impedance 50 ohms 2. TRANSMITTER (1) Frequency Range...
- Page 134 1.6 A at 4 W audio output 1.6 A at 1 W output, Transmit 4.7 A at 25 W output Waiting 0.5 A FM-8800D Receive 1.6 A at 4 W audio output 2 A at 1 W output, Transmit 6 A at 25 W output 3.6 A at 1 W output,...
-
Page 135: Index
INDEX Able acknowledge call ........3-5 Key click ........... 4-13 ACK BQ ............3-7 Alarm setup..........4-1 LCD ............1-5 All ships call..........3-16 Log file............3-28 Audio alarms..........1-7 Loudspeaker..........1-8 Auto ACK setup ..........4-3 Automatic acknowledge.....1-13, 3-6 Maintenance..........6-1 Manually acknowledging ......3-8 Call key.............1-12 Medical transport call........ - Page 136 INDEX Transceiver unit .......... 1-1 Volume ............1-8 Transmitting..........1-9 Volume setup ........... 4-13 Troubleshooting.......... 6-1 Unable acknowledge call......3-5 IN-2...
Need help?
Do you have a question about the FM-8800D and is the answer not in the manual?
Questions and answers