Table of Contents
Advertisement
Quick Links
Advertisement
Table of Contents
Troubleshooting

Related Manuals for Roche Accu-Chek Active


Summary of Contents for Roche Accu-Chek Active
- Page 1 Active BLOOD GLUCOSE METER Owner’s Booklet...
- Page 3 ACCU-CHEK Active system with comfort, convenience, and control in mind – to help make living with diabetes a little easier. This booklet will help you get the most from your ACCU-CHEK Active system. We also invite you to visit www.accu-chek.com to find out about services, tools, and information that can help you manage your diabetes.
- Page 4 The ACCU-CHEK Active System* Your new ACCU-CHEK Active meter and accessories work together to measure the amount of sugar (glucose) in your blood to help you and your doctor control your diabetes. The system includes: • ACCU-CHEK Active Meter with Battery •...
- Page 5 Why Regular Blood Sugar Testing Is Important Checking your blood sugar can make a big difference in how well you manage your diabetes on a daily basis. We’ve made it as simple and comfortable as possible. ACCU-CHEK meters are easy to use, and you can adjust the ACCU-CHEK Softclix lancet device to make testing more comfortable.
-
Page 6: Before You Start Testing
• The meter, test strips and control solutions are only for use outside the body ( in vitro ). Do not eat the test strips. Do not swallow or inject control solutions, or use control solutions for any purpose other than testing the ACCU-CHEK Active system. Accu-Chek Customer Care Service Center 1-800-858-8072... - Page 7 (like blood taken from fingertips or alternative sites) outside the body ( in vitro diagnostic use). It should not be used to diagnose diabetes. • Be sure to use only ACCU-CHEK Active test strips with the meter. Other test strips may produce inaccurate results.
- Page 8 Health-Related Information • Certain substances can interfere with the ACCU-CHEK Active blood glucose system and cause falsely high results. For example, peritoneal dialysis solutions containing icodextrin (such as Extraneal) or certain immunoglobulin therapies that contain maltose (such as Octagam 5%), cause inaccurate results. For more information, refer to the Test Strip Package Insert, or ask your doctor.
- Page 9 Health-Related Information (continued) • DO NOT CHANGE YOUR TREATMENT BASED ON A SINGLE RESULT THAT DOES NOT MATCH HOW YOU FEEL OR IF YOU BELIEVE THAT YOUR TEST RESULT COULD BE INCORRECT. If your blood sugar result doesn’t match how you feel and you have followed the instructions in this manual, follow your doctor’s instructions, or call your doctor.
-
Page 10: Table Of Contents
Contents Chapter 1: Understanding Your New System ................10 Connecting (or Changing) the Battery..................12 Setting the Beeper, Year, Time, and Date ................14 Coding the Meter ........................16 Chapter 2: Control Testing .....................17 Why Run Control Tests ......................17 About the Control Solution ....................17 Running a Control Test .......................18 Understanding Control Test Results ..................20 Chapter 3: Testing Your Blood Sugar... - Page 11 Chapter 4: Using Your Meter’s Memory .................35 Storing Test Results ......................35 Viewing Test Results ......................35 Viewing Trend Information ....................36 Downloading Your Meter to a Computer or PDA ..............37 Chapter 5: Maintenance and Troubleshooting ..............40 Cleaning Your Meter ......................40 Maintenance and Testing ....................41 Screen Messages and Troubleshooting ................42 Chapter 6: Technical Information ..................46...
-
Page 12: Chapter 1: Understanding Your New System
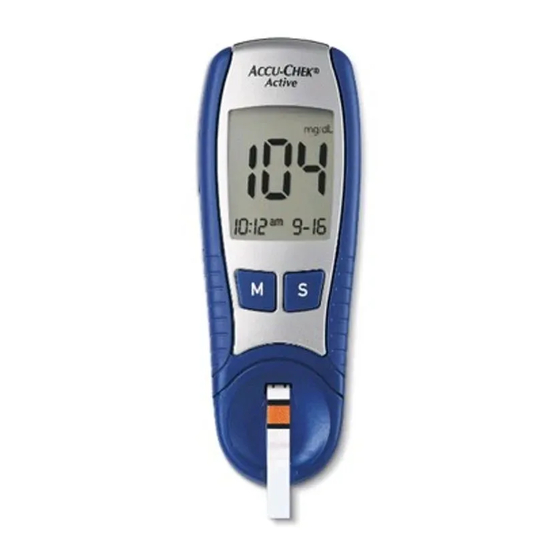
Chapter 1: Understanding Your New System* *Items may be sold separately. Battery Tray – S Button – Display – Slide tray out to Shows blood sugar Press this button change battery. to enter the Set results, messages, and results stored mode, move in memory. - Page 13 Cap with Comfort Dial Ejector Depth Selection Arrowheads Protective Cover Plunger Lancet Device Release Button Orange Code Key Test Strip Container Test Strip Lancet (included with test strips) Clear Cap (for alternative site testing)
-
Page 14: Connecting (Or Changing) The Battery
Connecting (or Changing) the Battery Use your thumb to slide the battery Remove the plastic strip and tray up and out of the meter. throw it away. Chapter 1: Understanding Your New System ACCU-CHEK Customer Care Service Center 1-800-858-8072... - Page 15 Slide the battery tray back into the meter • The battery symbol on the screen means until it locks into place. the battery is low and should be changed soon. To change the battery, remove the old • If the meter shuts off after 3 seconds, no battery and place the new one in the more tests can be run.
-
Page 16: Setting The Beeper, Year, Time, And Date
Setting the Beeper, Year, Time, and Date Setting the time and date is important if you use the meter’s memory or connect to a computer. With the Press meter off, (MEMORY button) press to change the (SET button). time format (12- or 24-hour). -
Page 17: Setting The Beeper
Setting the Beeper The beeper is designed to make the ACCU-CHEK Active meter easier to use, but you can turn it off and not affect your test results in any way. When you first get your meter, the beeper is set to “On” and sounds whenever: •... -
Page 18: Coding The Meter
Coding the Meter With the meter off, slide the orange code key into the code key slot. It should easily snap into place. When you insert a test strip (see Chapter 3, “Running a Blood Sugar Test”), make sure the code on the meter matches the code on the Code Key test strip container. -
Page 19: Chapter 2: Control Testing
• You want to check the performance of the meter and test strips About the Control Solution • Make sure you use only ACCU-CHEK Active • Never use control solution that has expired. control solution. • Always close the control solution bottle tightly. -
Page 20: Running A Control Test
Running a Control Test For control testing, you’ll need your meter, a test strip, a bottle of ACCU-CHEK Active control solution, and a Arrowheads napkin or paper towel. Take a new test strip from the container. Make sure the yellow color in the round window on the back of the strip matches the yellow color above “0 mg/dL”... - Page 21 When the flashing blood drop appears on the screen, press to mark the test as a control. You can also do this right after you get your test result, but not after the meter turns off. A control bottle symbol is displayed on the screen and stored in the memory to show that this result is from a control test.
-
Page 22: Understanding Control Test Results
Understanding Control Test Results The label on your test strip container shows the acceptable Range (mg/dL) ranges for low and high test solutions. Your control test results should be within the listed range. Make sure you 42–72 compare the result to the range for the level of control HIGH 290–328 solution you used (low or high). -
Page 23: Troubleshooting Checks
When a control test isn’t within the acceptable range, there could be several reasons. Follow these steps to find out why: Action Troubleshooting Checks 1. Check the expiration dates of the test strips Replace solution or test strips that have expired or and control solutions. -
Page 24: Chapter 3: Testing Your Blood Sugar
Chapter 3: Testing Your Blood Sugar Preparing the ACCU-CHEK Softclix Lancet Device With the ACCU-CHEK Active meter, you have a choice in test sites. To test using an alternative site instead of your fingertip, see Chapter 3, “Testing with Blood from Alternative Sites.”... - Page 25 Twist the cap to set the lancet Press the plunger (like a pen) until Snap the cap back on after depth. Start at 2 or 3. For tougher it clicks. The release button turns lining up the notches. The skin, dial to a higher number. yellow when the device is ready.
-
Page 26: Running A Blood Sugar Test
Running a Blood Sugar Test Before running your first test, make sure you set up your meter properly and run a control test. See Chapters 1 and 2 for details. Do not operate the meter without the test strip guide attached. For more information, see Chapter 5, “Maintenance and Troubleshooting.”... - Page 27 When you see the flashing blood drop, hold the lancet device against the side of your fingertip and press the release button. Gently squeeze your fingertip to get a drop of blood. Notes: • Once the blood drop appears on the screen, you have 2 minutes to apply the drop of blood.
- Page 28 Touch the blood drop to the center of the square orange pad. Do not bend the test strip. An hourglass symbol appears on the screen, then the test result appears. To remove the lancet, take off the lancet device cap and point the lancet end away from yourself.
-
Page 29: Applying Blood With Test Strip Outside Of The Meter
Applying Blood with Test Strip Outside of the Meter Do not operate the meter without the test strip guide attached. For more information, see Chapter 5, “Maintenance and Troubleshooting.” Follow Steps 1 through 6 of “Running a Blood Sugar Test,” Chapter 3, then: Take the test strip out of the meter. -
Page 30: Testing With Blood From Alternative Sites
Testing with Blood from Alternative Sites With the ACCU-CHEK Active system, you have the option to use blood from an alternative site (palm, forearm, upper arm, thigh, or calf) in addition to blood taken from your fingertip. Although blood from your fingertip may be tested at any time, there are times when testing from alternative sites is not ideal. - Page 31 Alternative site testing may be done: Alternative site testing is NOT recommended: • Immediately before a meal • After a meal (two hours or less) • When you are in a fasting state • After exercise • During sickness • When you think your blood sugar is very low (hypoglycemic) •...
- Page 32 Wash the alternative site with warm water and dry, then follow Steps 2-4 from Chapter 3, “Running a Blood Sugar Test.” Make sure you are using the clear cap specially designed for alternative site testing with the ACCU-CHEK Softclix lancet device. Adjust the clear cap to the highest setting.
- Page 33 Take the test strip out of the meter. You have 20 seconds to apply the blood to the test strip and put it back in the meter. Turn the test strip down on top of the blood drop, aiming for the center of the orange pad. Put the test strip back into the meter with the orange pad facing up.
-
Page 34: Recording Your Results
Recording Your Results Always record your blood sugar results after testing. This helps you and your healthcare professional find patterns in your blood sugar results. This information helps you better manage your diabetes, reducing your chances for complications. Record your results in the self-test diary included in your kit, the meter’s memory, or on your computer. -
Page 35: Using Your Test Strips
Using Your Test Strips • For accurate results, use only approved test • Close the container cap tightly immediately after strips. removing a test strip. • Do not bend the test strip • Note the expiration (“Use By”) date on the test strip container. -
Page 36: Symptoms Of High Or Low Blood Sugar
Symptoms of High or Low Blood Sugar Being aware of the symptoms of high or low blood sugar can help you understand your test results and decide what to do if they seem unusual. Here are the most common symptoms. High blood sugar (hyperglycemia): fatigue, increased appetite or thirst, frequent urination, blurred vision, headache, or general aching. -
Page 37: Chapter 4: Using Your Meter's Memory
Chapter 4: Using Your Meter’s Memory Storing Test Results Your meter automatically stores up to 200 test results, and you can review them at any time. If you’ve set the time and date on the meter (see Chapter 1, “Setting the Beeper, Year, Time, and Date”), this information is stored and displayed with your test results. -
Page 38: Viewing Trend Information
Viewing Trend Information The ACCU-CHEK Active meter displays 7- and 14-day blood sugar averages. The time and date must be set to use this feature. With the meter off, press and release Press at the same time to display the 7-day average. -
Page 39: Downloading Your Meter To A Computer Or Pda
Notes: Do not change your therapy based on one individual result recorded in memory. Talk to your doctor before changing therapy based on results in memory. • Results stored in memory will not be lost when you replace the battery, but you will need to reset the time and date. -
Page 40: Transferring Data
Transferring Data Infrared (IR) Window Install the software according to the instructions. Run the software program and follow the instructions about how to download information. Make sure the software is ready to accept data from the meter. Locate the infrared (IR) window on the top of the meter. Locate the IR window on the infrared cable or PDA. - Page 41 When “PC” flashes on the display, you have 2 minutes to start transferring data before the meter shuts off. After the information has been transferred to your computer, “End” will appear and you can turn off the meter by pressing The software program may turn off your meter automatically when the transfer is complete.
-
Page 42: Chapter 5: Maintenance And Troubleshooting
Chapter 5: Maintenance and Troubleshooting Cleaning Your Meter Caring for your ACCU-CHEK Active meter is easy. If the display or the outside of the meter is dirty, wipe it off with a slightly damp cloth. Only use water to dampen the cloth. -
Page 43: Maintenance And Testing
Maintenance and Testing Your meter needs little or no maintenance with normal use. It automatically tests its own systems every time you turn it on and lets you know if something is wrong. (See Chapter 5, “Screen Messages and Troubleshooting”). If you drop the meter or think it’s not giving accurate readings, make sure that your test strips and control solution haven’t expired, then run a control test. -
Page 44: Screen Messages And Troubleshooting
Screen Messages and Troubleshooting ▲ Never make treatment decisions based on an error message. If you have any concerns, please call the ACCU-CHEK Customer Care Service Center at 1-800-858-8072, 24 hours a day, 365 days a year. The meter won’t turn on or the display is blank. Possible cause Solution Battery is dead. - Page 45 Your surroundings are too bright. Blood sugar is higher than the Repeat the test in a darker environment measuring range of the system. (shaded from direct sunlight), using a See Chapter 3, “Understanding Your new strip. Test Results.” The temperature is above or below The code key is missing or not working the proper range for the meter properly.
- Page 46 A test error has occurred, or there is The meter is having trouble reading electromagnetic interference. the code key. Take the orange code Repeat the test. If you get the same key out and put it back in again. message, move away from sources of For help, see Chapter 1, “Coding interference and repeat the test.
- Page 47 There was not enough blood on the test The test strip was not inserted strip to start the test. Repeat the test correctly, it was removed during with a larger drop of blood. testing, or blood was applied too soon. Repeat the test with a new test strip.
-
Page 48: Chapter 6: Technical Information
Specifications Display 96-segment LCD Automatic power-off After 2 minutes Power supply One 2032 or equivalent lithium battery Meter type ACCU-CHEK Active Meter Measuring range 10-600 mg/dL Sample size 1µL Measuring time Approximately 5 seconds System operating conditions Refer to the test strip package insert... - Page 49 Meter storage conditions -40°F to 158°F (-40°C to 70°C) Test strip storage conditions Refer to the test strip package insert Relative humidity operating range Less than 85% Altitude <10,150 ft. Memory capacity 200 blood glucose results with time and date Dimensions 4.6 x 1.7 x 0.9 inches (118 x 44 x 23 mm) Weight...
-
Page 50: Product Safety Information
Product Safety Information Explanation of Symbols One 2032 or equivalent The ACCU-CHEK Active meter This product fulfills the This product fulfills the CAUTION has been listed by requirements of requirements of lithium battery. Please refer to safety-related Underwriter’s Laboratories, Directive 98/79/ EC on... -
Page 51: Money-Back Guarantee
Roche Diagnostics’ Non-Warranty Service Policy applies to meters where the above warranty has not become effective, has become inapplicable, or has expired. Roche Diagnostics will replace at its option meters returned to it for a service charge (not to exceed $35). Replacement will be with the same or similar product. -
Page 52: Warranty And Service Instructions
Warranty and Service Instructions All requests for return of ACCU-CHEK Active meters under the above warranty or service policy must be made to the ACCU-CHEK Customer Care Service Center by calling 1-800-858-8072. You will be mailed a return authorization label, which must be affixed to your carton for shipping the system to Roche Diagnostics. Cartons received without this label will be returned to you at your expense. -
Page 53: Patent Information
1-800-858-8072. Except where prohibited by statute, all warranties covering the ACCU-CHEK Active system are voided by use of the ACCU-CHEK Active system with any test strip or code keys other than ACCU-CHEK Active test strips and ACCU-CHEK Active code keys. -
Page 54: Additional Supplies
Additional Supplies The following supplies and accessories are available from authorized diabetes healthcare centers, pharmacies, or medical/surgical supply dealers: Test Strips ACCU-CHEK Active Test Strips Cat. No. 3146332, 3272656, 3184862 Control Solution ACCU-CHEK Active Control Solutions Cat. No. 3146324 Lancets ACCU-CHEK Softclix Lancet Device Cat. -
Page 55: Information For Professional Caregivers
Information for Professional Caregivers ▲ Healthcare Professionals: Follow the infection control procedures appropriate for your facility. Decisions about whether to recommend alternative site testing (AST) should take into account the motivation and knowledge level of the patient and his or her ability to understand the considerations relative to diabetes and AST. If you are considering recommending AST for your patients, you need to understand that there is a potential for a significant difference between fingertip and alternative site blood glucose results. -
Page 56: Index
Index control solution, 17 – 21, 52 fatigue, 34 control test results, frequent urination, 34 ACCU-CHEK Softclix Lancet understanding, 20 – 21 heartbeat, rapid, 34 Device, 22 – 23, 52 control test, acceptable high blood sugar, 34 appetite, increased, 34 range, 19 –... - Page 57 33 rapid heartbeat, 34 test results, unusual, 34 results, control test, test strips, understanding, 20 – 21 ACCU-CHEK Active, 11, 18, 24, 52 results, logging, 32 thirst, increased, 34 results, test, understanding, 33 time and date, setting, 14, 39 Index...
- Page 58 Notes Index ACCU-CHEK Customer Care Service Center 1-800-858-8072...
- Page 60 ACCU-CHEK Active ® ACCU-CHEK Customer Care Service Center 1-800-858-8072 www.accu-chek.com ©2007 Roche Diagnostics. All rights reserved. Roche Diagnostics 9115 Hague Road Indianapolis, IN 46256 ACCU-CHEK, ACCU-CHEK ACTIVE, SOFTCLIX, and ACCU-CHEK COMPASS are trademarks of Roche. 03503143004-0507...
Need help?
Do you have a question about the Accu-Chek Active and is the answer not in the manual?
Questions and answers