Table of Contents
Advertisement
Quick Links
Advertisement
Table of Contents

Related Manuals for Roche Accu-Chek Aviva Combo


Summary of Contents for Roche Accu-Chek Aviva Combo
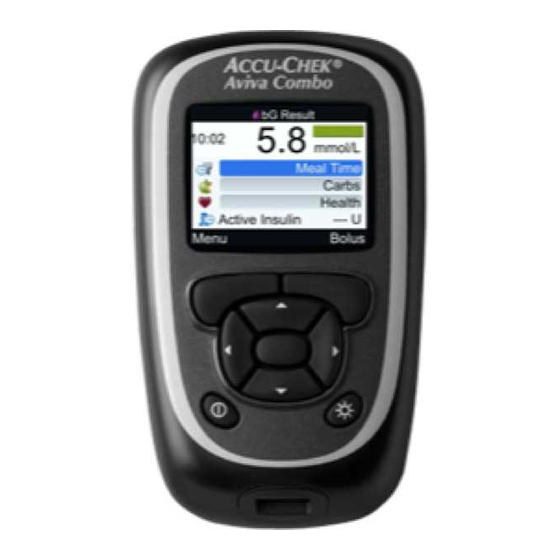
- Page 1 User’s Manual Accu-Chek Aviva Combo ®...
-
Page 3: Table Of Contents
Contents Introduction ..........................5 Chapter 1: Understanding Your New System ..............7 1.1 Safety Information ......................7 1.2 Summary of Features .......................7 1.3 The Accu‑Chek Aviva Combo Meter at a Glance ...............9 1.4 Test Strips ........................12 1.5 Screen Content and Navigation ..................13 1.6 The Accu‑Chek Spirit Combo Insulin Pump at a Glance ..........19 Chapter 2: Introduction to Bolus Advice ................21 2.1 Overview ........................21 2.2 Before Using Bolus Advice ....................22... - Page 4 Chapter 6: Administering a Bolus ..................61 6.1 Important Information .....................61 6.2 Choosing Your Bolus Type ....................62 6.3 Delivering a Bolus ......................63 Chapter 7: Programming the Pump Using the Meter ............71 7.1 Controlling the Pump with the Meter ................71 7.2 Programming a Bolus for the Pump ................76 7.3 Programming a Temporary Basal Rate (TBR) ..............82 7.4 Selecting a Basal Rate Profile ..................85 7.5 Managing Pump Errors and Warnings ................87...
- Page 5 Chapter 9: Changing Meter Settings................119 9.1 Overview ........................119 9.2 Setting Up Bolus Advice for the First Time ..............119 9.3 Time Blocks: Bolus Advice Is Set Up ................126 9.4 Health Event Percentages .....................129 9.5 Advice Options: Meal Rise, Snack Size, Acting Time, Offset Time ........130 9.6 Time Blocks: Bolus Advice Is Not Set Up ...............132 9.7 Warning Limits: Hypo, Hyper ..................135 9.8 Key Lock ........................137...
- Page 6 Chapter 12: Care and Maintenance .................165 12.1 Overview ........................165 12.2 Testing the Display .....................165 12.3 Changing the Batteries ....................166 12.4 Power‑Saving Tips ......................167 12.5 Cleaning the Meter .....................168 Chapter 13: Troubleshooting ....................169 13.1 Overview ........................169 13.2 Warnings ........................171 13.3 Errors .........................184 Chapter 14: Product Information ..................191 14.1 Specifications and Limitations ..................191 14.2 Technical Information....................192...
-
Page 7: Introduction
Introduction Read this User’s Manual carefully before you operate your Accu-Chek Aviva Combo meter. To use your meter correctly and dependably, you need to understand its operation, screen displays and all individual features. If you have any questions, contact one of our customer support and service centres. A listing is at the back of this manual. - Page 8 (in vitro diagnostic use) by people with diabetes and/or by healthcare professionals in a clinical setting as an aid to effective diabetes management. Testing sites include the traditional fingertip site. The Accu-Chek Aviva Combo meter can also be used to interface with and remotely control compatible Accu-Chek insulin infusion pumps via Bluetooth wireless technology (radio frequency communication).
-
Page 9: Chapter 1: Understanding Your New System
Understanding Your New System 1.1 Safety Information w WARNING • Choking hazard. Small parts. Keep away from children under the age of 3 years. • Any object coming into contact with human blood is a potential source of infection (see: Clinical and Laboratory Standards Institute: Protection of Laboratory Workers from Occupationally Acquired Infections;... - Page 10 Understanding Your New System • Time blocks allow you to divide a day into different time periods. • Setting time blocks to fit your own schedule helps you and your healthcare professional to see how patterns in your blood glucose are affected by your daily activities and lifestyle. •...
-
Page 11: The Accu-Chek Aviva Combo Meter At A Glance
Understanding Your New System 1.3 The Accu‑Chek Aviva Combo Meter at a Glance 1. Display 4. Backlight Button Shows menus, test results, messages Adjusts the backlight level. Or, when the and data stored in the diary. Bluetooth screen is displayed, press and hold to turn the Bluetooth function on or off. - Page 12 Understanding Your New System Button Combinations Function Press and hold simultaneously. Unlocks the buttons whenever the Key Lock feature is turned on. Begins the meter and pump pairing With the meter turned off , press and hold and then press process.
- Page 13 Understanding Your New System 11. Test Strip Container* 14. Control Solution Bottle* (for example) (for example) 12. Test Strip* – Metallic End 15. Activation Chip Insert this end into the meter. See NOTE. 13. Test Strip* – Yellow Window 16. Batteries Touch blood drop or control solution here.
-
Page 14: Test Strips
Understanding Your New System 1.4 Test Strips • Use only Accu-Chek Aviva test strips. • Use the test strip immediately after removing it from the test strip container. • Do not apply blood or control solution to the test strip before you insert it into the meter. •... -
Page 15: Screen Content And Navigation
Understanding Your New System 1.5 Screen Content and Navigation This section provides an explanation of how to understand and navigate the screens on the meter. Each time the meter is turned on, this splash screen (Accu-Chek logo screen) is displayed for a short period of time. - Page 16 Understanding Your New System Features on the Main Menu 1. Sound Icon Displayed when the beeper is turned on. 2. Time 3. Vibrate Icon Displayed when vibrate is turned on. 4. Date 5. Low Battery Icon Displayed when the meter batteries are low in power.
- Page 17 Understanding Your New System Bluetooth Icon Communication States You may turn the Bluetooth function on or off at any time using the meter. Icon Communication State The Bluetooth function is on. The meter and pump are communicating. When the icon is not shown, the Bluetooth function is off . The meter and pump are not communicating.
- Page 18 Understanding Your New System Features on a screen 1. Title Bar Primary menu title is displayed here. 2. Highlighted Option When a menu choice or item is selected, it is highlighted in blue. 3. Left Soft Key Option Press to select the option shown on the screen above the left soft key.
- Page 19 Understanding Your New System Information can be entered on some screens. Numerical entry fi elds appear as pop-up entry fi elds. When an option must be selected, it appears as a pop-up menu. 1. To open a pop-up menu or entry field, select it and press 2.
- Page 20 Understanding Your New System General Navigation Steps Press to select a menu option and press NOTE Specifi c to the Time Blocks menu selection: If the bolus advice feature has been activated, then the Time Blocks selection is found under the Bolus Advice menu option. Select Save by pressing to save changes and return to the previous screen.
-
Page 21: The Accu-Chek Spirit Combo Insulin Pump At A Glance
Understanding Your New System 1.6 The Accu‑Chek Spirit Combo Insulin Pump at a Glance 1. Menu Key 6. Up Key Cycles through menus, functions Moves forward in an information screen, and information screens. increases a setting, turns the backlight on, programs a Quick Bolus, cancels a Quick 2. - Page 22 Understanding Your New System...
-
Page 23: Chapter 2: Introduction To Bolus Advice
Introduction to Bolus Advice 2.1 Overview When enabled, bolus advice provides recommendations on the amount of insulin for food intake and for correcting blood glucose levels that are not within your target range. Bolus advice is intended exclusively for use by well‑trained individuals who perform their own insulin therapy. It is recommended you discuss your bolus advice settings with your healthcare professional prior to setting up this feature. -
Page 24: Before Using Bolus Advice
Introduction to Bolus Advice 2.2 Before Using Bolus Advice Intended Users As with any specialised feature, you need to understand certain information in order to use bolus advice. Working closely with your healthcare professional, you must be completely familiar with your diabetes therapy. - Page 25 Introduction to Bolus Advice Safety Information Regarding Bolus Advice w WARNING • Bolus advice should not be used if you are using an intermediate‑acting insulin like Neutral Protamine Hagedorn (NPH) insulin or any other intermediate‑acting insulin. • Long‑acting insulin should not be used as a meal bolus or as a correction bolus. •...
- Page 26 Introduction to Bolus Advice Summary • It is recommended you set up bolus advice with your healthcare professional. • Carefully check all of your entries. • Make sure all recent meals and insulin doses are entered into the diary for accurate bolus advice recommendations.
-
Page 27: Chapter 3: Getting Started
Getting Started 3.1 Setup Wizard w WARNING • It is important to discuss your individual settings for warning limits, time blocks, bolus advice and bG test reminders with your healthcare professional. It is recommended that you review the Setup Wizard: Important Information section in this chapter. •... - Page 28 Getting Started NOTE • The Setup Wizard is activated every time you turn the meter on until you complete the process. • If you turn the meter off during the Setup Wizard process, you must reconfi rm all of the settings the next time you turn the meter on in order to complete the Setup Wizard.
- Page 29 Getting Started To Change the Time: Select the Time entry fi eld and press Set the Hour and press Set the Minutes and press If the Time Format is 12 hr, select am or pm and press IMPORTANT: Once bolus To Change the Hyper advice is activated, the carbs ( Upper) Blood Glucose To Change the Date:...
- Page 30 Getting Started If you select No, Bolus Advice The settings for the fi rst time Select a time block to edit can be set up later. Refer to block that you edit are copied and press the Setting Up Bolus Advice to all of the other time blocks.
- Page 31 Getting Started Time Block Start Time Time Block End Time Target Range Lower Limit Value Target Range Upper Limit Value Carb Ratio–Amount of Insulin Units (Bolus Advice) scroll down Carb Ratio–Number of Carbohydrates (Bolus Advice) Scroll Bar Insulin Sensitivity–Amount of Insulin Units (Bolus Advice) Insulin Sensitivity–Change in Glucose Level (Bolus Advice)
- Page 32 Getting Started Set the value and press To Change the End Time: For this fi rst time block, the values for Carb Ratio and Select the entry fi eld for the Select the End Time entry Insulin Sensitivity must be upper limit value and press fi eld and press entered.
- Page 33 Getting Started To Remove a Time Block: Select the time block you want to remove and press Select the End Time entry fi eld and press Set the End Time to match the Start Time of the time block and press Select OK.
- Page 34 Getting Started Select an individual time If not setting up bolus advice, block to modify its settings, go to Step 17. including the End Time. If setting up bolus advice, Repeat as needed for other go to Step 14. time blocks. When all of the time block settings have been completed, select Next.
- Page 35 Getting Started NOTE: For more information, refer to the bG Test Reminders: After High bG, After Low bG, After Meal section in the chapter Meter Reminders. Select OK. To set up bG Test Reminders, select Yes and continue to the next step. If you do not want to set up bG Test Reminders at this time, select No and go to...
- Page 36 Getting Started Remind After Time: Select the Remind After entry fi eld and press Set the time and press To Continue: Select Next. To Turn the After Low bG To Turn the After Meal Reminder On: Reminder On: Select the Reminder entry Select the Reminder entry fi eld fi eld and press and press...
- Page 37 Getting Started If the meter and pump are If the meter and pump are paired, the Setup Completed NOT paired, the Pair with Successfully screen appears. Pump screen appears. Select Next. You are ready to Turn the meter off. begin using your new meter. To Cancel the Pairing Process: Congratulations on...
- Page 38 Getting Started On the pump, repeatedly press and release until the BLUETOOTH SETTINGS screen appears. Press Turn the meter on. Select Yes to cancel the pairing process and then Select Cancel. proceed to Step 33. Ensure that the meter is turned off . On the meter, press and hold and then press...
- Page 39 Getting Started On the pump, repeatedly press and release until the ADD DEVICE INITIATE PAIRING screen appears. Press to initiate the On the pump, select the If the NO DEVICE FOUND pairing process. meter to add and then press meter to add and then press screen appears on the pump, see the pump User Guide for information on...
- Page 40 Getting Started Turn the meter off . Once the meter has turned off , the pairing process is complete. Turn the meter on. On the meter, ensure the PIN code matches the numbers on the pump. Select Confi rm. If the correct PIN was entered, this Pair with Pump screen is displayed on the meter and the DEVICE PAIRED screen is...
-
Page 41: Setup Wizard: Important Information
Getting Started 3.2 Setup Wizard: Important Information w WARNING It is important to discuss your individual settings with your healthcare professional. Carbs (Carbohydrates) Unit You have a choice among different carbs units in the meter that best fit your needs. Once the carbs unit is set and bolus advice is activated, the carbs unit cannot be changed. - Page 42 Getting Started Time Blocks Setting time blocks to fit your own schedule helps you and your healthcare professional see how patterns in your blood glucose may be affected by your daily activities and lifestyle. Time blocks combine to cover a 24-hour time period (from midnight to midnight). The meter comes with five default time blocks.
- Page 43 Getting Started Talk to your healthcare professional about setting up time blocks to help you manage your diabetes. Here is a suggested pattern: Time Block Start Time End Time 1. Night time Midnight The time you normally wake up 2. Breakfast The time you normally wake up 1½ hours before you normally eat lunch...
- Page 44 Getting Started Pairing Pairing is when your meter and pump exclusively communicate and transfer information with each other. When obtained as a kit, your meter and pump come paired utilising Bluetooth wireless technology. The meter may be paired with only one pump at a time. Other Bluetooth enabled devices (e.g., mobile phone, printer, etc.) cannot be paired with, communicate with or access your personal information on your meter or pump.
- Page 45 Getting Started Bolus Advice Bolus advice calculates a recommended bolus for you that is adapted to the time of day and your changing situations. This function is activated only if you set up bolus advice on your meter. Bolus advice provided by the meter is only advice. Do not change your therapy based on one blood glucose result.
- Page 46 Getting Started Active Insulin Active insulin is the bolus insulin that has been given to lower your blood glucose, but has not yet been fully used. The meter automatically calculates the active insulin amount and it is displayed on the Bolus Advice screen.
-
Page 47: Chapter 4: Testing Your Blood Glucose
Testing Your Blood Glucose 4.1 Before You Start Testing Before you perform your fi rst blood glucose test, ensure the meter is set up correctly and that you have completed a control test. You need the meter, a test strip and a fi nger pricker with a lancet inserted. For important information regarding the use and storage of test strips, refer to the Test Strips section in the chapter Understanding Your New System. -
Page 48: Performing A Fingertip Blood Glucose Test
Testing Your Blood Glucose 4.2 Performing a Fingertip Blood Glucose Test Wash your hands with warm Check the use by date on the Remove a test strip from the soapy water and dry test strip container. Do not test strip container. thoroughly. - Page 49 Testing Your Blood Glucose When the test strip has The test result is displayed. enough blood, the Analyzing A green status bar indicates screen appears. the test result is within the target range for the current time block. Touch the blood drop to the front edge of the yellow window of the test strip.
- Page 50 Testing Your Blood Glucose A light blue status bar with A light blue status bar A yellow status bar indicates “Hyper” indicates the test indicates the test result is the test result is below the result is above the hyper above the target range for the target range for the current warning limit.
- Page 51 Testing Your Blood Glucose A red status bar with “Hypo” “LO” indicates the test “HI” indicates the test result indicates the test result is result may be below the may be above the measuring below the hypo warning measuring range of the range of the meter.
- Page 52 Testing Your Blood Glucose Approximately 3 seconds later, the detailed bG Result screen appears. Remove and discard the used test strip. Test Time Meal Time Carbohydrates Health Event Active Insulin Status Bar Blood Glucose Result Unit of Measurement NOTE • Active insulin is displayed only if bolus advice is activated. •...
- Page 53 Testing Your Blood Glucose Continue with one of the To enter a value, select an Continue with one of the following: entry fi eld and press following: Proceed to the next step to For Meal Time, select either Select Bolus to deliver a enter values for Meal Time, No Entry, Pre Meal, Post bolus.
-
Page 54: Unusual Blood Glucose Results
Testing Your Blood Glucose 4.3 Unusual Blood Glucose Results If your blood glucose result does not match how you feel, check this list to help solve the problem. Troubleshooting Checks Actions Did you wash your hands? Wash your hands with warm soapy water and dry thoroughly. -
Page 55: Symptoms Of Low Or High Blood Glucose
Testing Your Blood Glucose 4.4 Symptoms of Low or High Blood Glucose Being aware of the symptoms of low or high blood glucose can help you understand your test results and decide what to do if they seem unusual. Low blood glucose (hypoglycaemia): Symptoms of hypoglycaemia may include, but are not limited to, anxiety, shakiness, sweating, headache, increased hunger, dizziness, pale skin colour, sudden change in mood or irritability, fatigue, difficulty concentrating, clumsiness, palpitations and/or confusion. - Page 56 Testing Your Blood Glucose...
-
Page 57: Chapter 5: Control Testing
Control Testing 5.1 When to Perform a Control Test Performing a control test lets you know the meter and test strips are working properly. You should perform a control test when: • you open a new test strip box. • you left the test strip container open. •... -
Page 58: Performing A Control Test
Control Testing 5.3 Performing a Control Test You need the meter, a test strip and control solution Level 1 or Level 2. For important information regarding the use and storage of test strips, refer to the Test Strips section in the chapter Understanding Your New System. - Page 59 Control Testing Check the use by date on the Remove a test strip from Insert the metallic end of test strip container. Do not the test strip container. the test strip into the meter. use test strips past the use The meter turns on.
- Page 60 Control Testing Touch the drop to the front When the test strip has The control result is displayed. edge of the yellow window enough control solution, the Select Level. of the test strip. Do not put Analyzing screen appears. control solution on top of the NOTE: If you select Menu, or turn test strip.
- Page 61 Control Testing Wipe the tip of the bottle with No control solution level was a tissue. Cap the bottle entered (No Entry) and the tightly. meter does not indicate “Within range” or “Out of Remove and discard the used range”. test strip.
-
Page 62: Out-Of-Range Control Results
Control Testing 5.4 Out‑of‑Range Control Results The control ranges are printed on the test strip container label. If the control result is out of range, check this list to help solve the problem: Troubleshooting Checks Actions Have the test strips or control solutions Discard the test strips or control solution if either is past expired? the use by date. -
Page 63: Chapter 6: Administering A Bolus
Administering a Bolus 6.1 Important Information w WARNING • The meter must be configured with your personal settings prior to administering a bolus. Incorrect meter settings may cause inappropriate insulin delivery. If you are not sure about your personal settings, talk to your healthcare professional. •... -
Page 64: Choosing Your Bolus Type
Administering a Bolus 6.2 Choosing Your Bolus Type There are several types of bolus delivery available. Standard The pump immediately delivers the entire bolus amount in one portion. This bolus type is the best choice for correcting glucose and when compensating for food intake with fast-acting carbohydrates. -
Page 65: Delivering A Bolus
Administering a Bolus 6.3 Delivering a Bolus w WARNING • If bolus advice is activated: – Take note of all warning messages, especially those regarding high or low blood glucose results. Immediate action may be necessary. – Bolus advice provided by the meter is solely advice. Contact your healthcare professional prior to changing your diabetes therapy. - Page 66 Administering a Bolus Perform a blood glucose test. From the Main Menu, select Add information to the bG Bolus Advice and press Result screen, if necessary, and select Bolus. Refer to the chapter Testing Your Blood Glucose.
- Page 67 Administering a Bolus bG Result Active Insulin Carbs Entry Health Event Entry Total Bolus Amount Bolus Type If you have not performed a blood glucose test recently, “bG Test” is displayed near the top of the meter screen instead of an actual bG result.
- Page 68 Administering a Bolus Carbs Entry: Select the Carbs entry fi eld and press Set the amount of carbohydrates and press Health Event Entry: Select the Health entry fi eld and press Select a bolus type and Make sure all entries are press correct and then select Select a Health Event and...
- Page 69 Administering a Bolus Standard Bolus The meter displays the The meter displays this remaining bolus amount screen when the entire To return to the Bolus Advice to be delivered. bolus amount has been screen before the bolus delivered. delivery is started, select To stop bolus delivery, select Back.
- Page 70 Administering a Bolus The meter displays the The meter displays this The meter displays this remaining bolus amount screen when the immediate screen when the entire bolus to be delivered. bolus amount has been amount has been delivered. delivered. To stop bolus delivery, select Select Menu.
- Page 71 Administering a Bolus w WARNING Start delivery of the exact bolus amount on the pump within 10 minutes or there will be an extra record entered into My Data. Extra records may influence future bolus Manual Bolus Pen/Syringe Bolus advice. To return to the Bolus Advice To return to the Bolus Advice screen, select Back.
- Page 72 Administering a Bolus...
-
Page 73: Chapter 7: Programming The Pump Using The Meter
Programming the Pump Using the Meter 7.1 Controlling the Pump with the Meter The Accu-Chek Aviva Combo meter can be used to remotely control the Accu-Chek Spirit Combo insulin pump using Bluetooth wireless technology. The meter and pump must be paired and the devices may not be able to communicate if they are more than 2 metres apart. - Page 74 Programming the Pump Using the Meter The System at a Glance When the meter displays a pump screen, the meter buttons can operate the pump. The pump can always be operated independently. The pump sends screens to the meter. The meter buttons operate the pump.
- Page 75 Programming the Pump Using the Meter Meter Button Functions for the Pump Screens Meter Button Pump Key Function • Move forward in an information screen • Increase a setting • Turn off the STOP-Warning • Move backward in an information screen •...
- Page 76 Programming the Pump Using the Meter To display the pump RUN screen on the meter, select Pump on the Main Menu. Pump RUN Screen on the Meter Information From the Pump Corresponding Meter Buttons (Arrow Buttons) Go to the Meter Main Menu Bluetooth Icon Return to the Previous Screen In remote control mode, the Bluetooth icon appears on the meter display (see 4 above) and on the pump...
- Page 77 Programming the Pump Using the Meter Controlling Pump Functions All pump functions can be controlled from the meter, except: • Changing the insulin cartridge • Priming the infusion set • Rewinding the piston rod • Transferring data from the pump to a computer •...
-
Page 78: Programming A Bolus For The Pump
Programming the Pump Using the Meter 7.2 Programming a Bolus for the Pump Using the meter, you can program the pump for Standard, Extended and Multiwave boluses. For more about bolus types, refer to the Choosing Your Bolus Type section in the chapter Administering a Bolus. Standard Extended Multiwave... - Page 79 Programming the Pump Using the Meter Make sure your pump is in Repeatedly press and release Press to select. RUN mode and the pump until either the STANDARD display is blank. From the BOLUS, EXTENDED BOLUS Main Menu, select Pump or MULTIWAVE BOLUS screen and press appears.
- Page 80 Programming the Pump Using the Meter Pump Pump Pump EXTENDED BOLUS BOLUS AMOUNT BOLUS DURATION O4:OO O4:OO 2.5U Exit Back Exit Back Exit Back Press to increase or Press to increase or Press to select. decrease the bolus amount. to decrease the duration time.
- Page 81 Programming the Pump Using the Meter Pump Pump Pump MULTIWAVE BOLUS BOLUS AMOUNT IMMEDIATE BOLUS O4:OO O.7U O4:OO 2.5U Exit Back Exit Back Exit Back Press to increase or Press to increase or Press to select. to decrease the total bolus to decrease the immediate amount.
- Page 82 Programming the Pump Using the Meter Make sure that all entries are Standard Bolus and correct. Press to confi rm. Multiwave Bolus: The bolus icon blinks for 5 seconds. If you do not confi rm within The purpose of this delay is 20 seconds, the meter to allow you to prevent the automatically returns to the...
- Page 83 Programming the Pump Using the Meter Cancelling a Bolus Using the Meter Situation Cancelling the Bolus Result During programming Choose one of the following: A bolus is not delivered. • Press and return to either the STANDARD BOLUS, EXTENDED BOLUS or MULTIWAVE BOLUS screen.
-
Page 84: Programming A Temporary Basal Rate (Tbr)
Programming the Pump Using the Meter 7.3 Programming a Temporary Basal Rate (TBR) Using the meter, you can program the pump to temporarily increase or decrease your basal rate. In some cases your body needs more or less insulin than usual. Speak to your healthcare professional to learn when you should use a TBR. - Page 85 Programming the Pump Using the Meter Press to increase or Press to increase or The new TBR is immediately decrease the TBR percentage. decrease the TBR duration activated. The meter displays time. the pump RUN screen with When the desired percentage the TBR.
- Page 86 Programming the Pump Using the Meter Cancelling a Temporary Basal Rate Using the Meter Situation Cancelling the Temporary Basal Rate Result During programming Choose one of the following: The pump continues to deliver the normal • Press basal rate. • Do not press any meter button for 20 seconds. The meter returns to the pump RUN screen.
-
Page 87: Selecting A Basal Rate Profile
Programming the Pump Using the Meter 7.4 Selecting a Basal Rate Profi le You can choose between fi ve diff erent basal rate profi les to match your varying daily routines. Discuss your basal rate profi le needs with your healthcare professional. Refer to the pump User Guide for more information on how to program basal rate profi les on the pump. - Page 88 Programming the Pump Using the Meter NOTE A running Temporary Basal Rate increase or decrease stays active even if you change the basal rate profi le. Press to select a basal rate profi le. The basal rate profi le number and its daily insulin total appear.
-
Page 89: Managing Pump Errors And Warnings
Programming the Pump Using the Meter 7.5 Managing Pump Errors and Warnings If the meter is off when a pump error or warning occurs and you turn the meter on, after communication to the pump is established, the pump error or warning appears on the meter screen. When a pump warning or error occurs: Snooze the warning or error by pressing on the meter. - Page 90 Programming the Pump Using the Meter Cartridge Low Warning W1 Cartridge Empty Error E1 Bolus Cancelled Warning W8 The content of the insulin The insulin cartridge is A bolus was cancelled. cartridge has dropped to empty. You must change it Press twice to snooze 20 units of insulin.
-
Page 91: Setting A Pump Reminder
Programming the Pump Using the Meter 7.6 Setting a Pump Reminder You can set a reminder on your pump to occur once or be repeated every day at a set time. Pump REMINDER SETTINGS Exit Back Make sure your pump is in Repeatedly press and release Press to select. - Page 92 Programming the Pump Using the Meter Pump Pump Pump REMINDER REMINDER HOUR 11:32 ONCE 11:32 Exit Back Exit Back Exit Back The current reminder status Press to set the Press to change the and alarm is displayed. hour. pump reminder setting to OFF, ONCE or EVERY DAY.
-
Page 93: Turning The Pump Key Lock On And Off
Programming the Pump Using the Meter 7.7 Turning the Pump Key Lock On and Off The pump Key Lock function prevents you from accidentally turning pump functions on, for example while you are sleeping or playing sports. Communication between the meter and pump is interrupted when any key is pressed on the pump while it is unlocked. - Page 94 Programming the Pump Using the Meter Pump Pump KEY LOCK KEY LOCK Exit Back Exit Back The current pump Key Lock Press to turn the Status (ON or OFF) is Key Lock ON or OFF. displayed. Press to save and exit.
-
Page 95: Adjusting The Pump Sound Volume
Programming the Pump Using the Meter 7.8 Adjusting the Pump Sound Volume Your pump beeps when you press a pump key or when a pump warning or error occurs. You can set the sound volume for this beep. Following these steps does not change the volume of the meter beeps. Pump PUMP SETTINGS Exit... -
Page 96: Changing The Pump Signal Settings
Programming the Pump Using the Meter 7.9 Changing the Pump Signal Settings The pump alerts you when a pump warning or error occurs. The pump signal setting can be set to beep only, vibrate only or beep and vibrate. Beep and vibrate cannot both be turned off at the same time. Pump PUMP SETTINGS Exit... -
Page 97: Chapter 8: Managing Your Data
Managing Your Data 8.1 Overview From the diary, you are able to view a specific record with its attributes. In addition you are able to change or add attributes for a record, or add a new diary record. Each diary record can contain: •... - Page 98 Managing Your Data NOTE • Do not change your therapy based on one individual record or blood glucose result in the diary. • You must be the only user of the meter, because the diary data will be incorrect if the meter is shared.
-
Page 99: Viewing Or Modifying Your Data
Managing Your Data 8.2 Viewing or Modifying Your Data From the Main Menu, select Select View Data and press My Data and press... - Page 100 Managing Your Data Date of Record(s) Multiple records are grouped under each date. Time of Record Blood Glucose Icon Shown when there is a bG result for the record. Meal Time Icon Shown when there is a meal time entry for the record.
- Page 101 Managing Your Data NOTE • If data is not available, the No Data Available screen is displayed. • The View Data screen displays the records in the order in which they occurred, with the most recent record shown on top. •...
- Page 102 Managing Your Data bG Value View Bolus View Carbs View View Data 2 Feb 16 20:06 17:33 16:06 13:52 9:03 Back Select View To choose another view, Blood Glucose Result Column press and a pop-up menu Indicates bG Value View. appears.
- Page 103 Managing Your Data Select an entry fi eld to To view or modify the details Press to view the previous modify and press of a record, select the record record or press to view the and press next (newer) record. Make the change in the entry fi eld and press To modify a diary record,...
-
Page 104: Adding A Diary Record
Managing Your Data 8.3 Adding a Diary Record You can add a diary record with entries for carbs, health event and bolus, but not for a bG result. From the Main Menu, select Select Add Data and press My Data and press... - Page 105 Managing Your Data Time Entry Field Cannot be set in the future Date Entry Field Cannot be set in the future Carbs Entry Field Health Event Entry Field Bolus Entry Field Save Appears once data has been entered to an entry fi eld Press to select a fi eld and press .
-
Page 106: Reporting Your Data
Managing Your Data 8.4 Reporting Your Data You can view many different statistics for your blood glucose results. The meter can display the data by the following meal time selections: Overall, Pre Meal, Post Meal, Bedtime or Other. bG Averages The report displays your bG result averages and standard deviations. - Page 107 Managing Your Data Follow these tips to get the most value from My Data reports: If you delivered a bolus directly on the pump, go to My Data on the meter to receive the bolus information automatically. Do this before your next blood glucose test. Replace the batteries when the Low Battery icon appears.
- Page 108 Managing Your Data Viewing a Report From the Main Menu, select Select Reports and press Select a report and press My Data and press To change the time range, To change the meal time, Select Back to return to the press to highlight the time press either...
- Page 109 Managing Your Data bG Averages Time Range Meal Times Standard Deviation (SD) Number of Tests bG Average...
- Page 110 Managing Your Data Trend Graph Time Range 12. Bolus Value Blue bar: height shown is in relation to Meal Time the bolus insulin amount. Blood Glucose Unit of Measurement 13. Individual Blood Glucose Result Blood Glucose Icon Points are connected with lines to display your trend.
- Page 111 Managing Your Data NOTE • On the right side of the graph, the Maximum Bolus Amount Indicator is a horizontal line with the corresponding value shown above it. The purpose of this indicator is to scale the top portion of the graph for the Bolus Value blue bars. The Maximum Bolus Amount Indicator values available on the meter are 1, 5, 15, 30 and 60 U.
- Page 112 Managing Your Data Trend Table Time Range Meal Time Date of Records The most recent record is displayed fi rst. Time of Record Blood Glucose Result Time Change Icon Only shown when the meter time has been changed for this data. Carbs Amount Bolus Amount Scroll Bar...
- Page 113 Managing Your Data Standard Day Graph Time Range • The top of the box indicates 1 standard deviation above the average and the Meal Time bottom of the box indicates 1 standard Blood Glucose Unit of Measurement deviation below the average. The box is not displayed if there is not enough data Blood Glucose Icon to determine standard deviation.
- Page 114 Managing Your Data Standard Day Table Time Range Meal Time Time Block bG Average Standard Deviation (SD) Number of Tests Scroll Bar When shown, press to scroll the screen to view additional records. Graph View Press to display the Standard Day Graph.
- Page 115 Managing Your Data Standard Week Graph Time Range • The top of the box indicates 1 standard deviation above the average and the Meal Time bottom of the box indicates 1 standard Blood Glucose Unit of Measurement deviation below the average. The box is not displayed if there is not enough data Blood Glucose Icon to determine standard deviation.
- Page 116 Managing Your Data Standard Week Table Time Range Meal Time bG Average Day of Week Standard Deviation (SD) Number of Tests Scroll Bar Press to scroll the screen to view additional records. Graph View Press to display the Standard Week Graph.
- Page 117 Managing Your Data Target Target Graph Target Table Time Range Meal Time Legend Blood glucose result categories Pie Chart Depicts the percentages for the blood glucose result categories. Percentages Percentage for each blood glucose result category Table or Graph View Press to switch between the table and graph.
-
Page 118: Transferring Data To A Computer
Managing Your Data 8.5 Transferring Data to a Computer You can transfer your data from the meter to a computer to view or print your results. Install the computer software Run the software program according to the instructions. and follow the instructions on how to transfer data. - Page 119 Managing Your Data Infrared (IR) Window Follow the prompts on your Once the data transfer is Locate the infrared (IR) computer software to start complete, the Data Transfer window on the top of the the data transfer. Complete screen is displayed meter.
- Page 120 Managing Your Data...
-
Page 121: Chapter 9: Changing Meter Settings
Changing Meter Settings 9.1 Overview You have the flexibility to change the meter settings that you had initially selected during the Setup Wizard process. You can make adjustments to the meter settings in order to meet changing conditions. Consult with your healthcare professional to ensure the appropriate settings are selected. Important Information •... - Page 122 Changing Meter Settings From the Main Menu, select Select Bolus Advice and Select Yes to continue with Settings and press press bolus advice setup. If you do not want to set up bolus advice, select No and return to the Settings screen. The settings for the fi...
- Page 123 Changing Meter Settings Time Block Start Time Time Block End Time Target Range Lower Limit Value Target Range Upper Limit Value Carb Ratio–Amount of Insulin Units Carb Ratio–Number of Carbohydrates scroll down Scroll Bar Insulin Sensitivity– Amount of Insulin Units Insulin Sensitivity–...
- Page 124 Changing Meter Settings Select the entry fi eld for the For this fi rst time block, the upper limit value and press values for the carb ratio and insulin sensitivity must be entered. Set the value and press Carb Ratio: w WARNING Select the entry fi...
- Page 125 Changing Meter Settings Set the End Time of the Select the End Time entry Time Blocks Start selected time block and fi eld and press press . This will be the 0:00 5:30 Set the End Time to match 5:30 11:00 start time of the added time the Start Time of the time...
- Page 126 Changing Meter Settings Select an individual time To Enter Health Event block to modify its settings, Percentages: including End Time. Repeat Select a Health Event entry as needed for other time fi eld and press blocks. Set the percentage and press When all of the time block settings have been completed, select Next.
- Page 127 Changing Meter Settings You must enter a Snack Size Off set Time: amount in order to complete Select the Off set Time the bolus advice setup. entry fi eld and press Meal Rise: Set the time of duration Select the Meal Rise entry and press fi...
-
Page 128: Time Blocks: Bolus Advice Is Set Up
Changing Meter Settings 9.3 Time Blocks: Bolus Advice Is Set Up If bolus advice has been set up, use this section for: • Changing the values for the blood glucose target range, carb ratio and insulin sensitivity for any time block •... - Page 129 Changing Meter Settings To Remove a Time Block: Select the time block you want to remove and press Select the End Time entry fi eld and press Set the End Time to match the Start Time of the time Add or remove time blocks, Select a time block to edit block and press otherwise continue to the...
- Page 130 Changing Meter Settings Insulin Sensitivity: Select the entry fi eld for the amount of insulin units and press Set the value and press Select the entry fi eld for the change in glucose level and press End Time: To modify the settings for another time block, select the Select the End Time entry Set the value and press...
-
Page 131: Health Event Percentages
Changing Meter Settings 9.4 Health Event Percentages Select Bolus Advice and From the Main Menu, select Select Health Events and Settings and press press press Select a Health Event entry Repeat to change other fi eld and press Health Event percentages. Set the percentage and press Select Save. -
Page 132: Advice Options: Meal Rise, Snack Size, Acting Time, Offset Time
Changing Meter Settings 9.5 Advice Options: Meal Rise, Snack Size, Acting Time, Off set Time From the Main Menu, select Select Bolus Advice and Select Advice Options and Settings and press press press... - Page 133 Changing Meter Settings Acting Time: Select the Acting Time entry fi eld and press Set the time of duration and press Off set Time: Select the Off set Time entry If you changed the Snack Meal Rise: fi eld and press Size, the meter displays this Select the Meal Rise entry Advice Options screen.
-
Page 134: Time Blocks: Bolus Advice Is Not Set Up
Changing Meter Settings 9.6 Time Blocks: Bolus Advice Is Not Set Up If bolus advice is not set up, use this section for: • Changing the values for the blood glucose target range for any time block • Adding or removing time blocks •... - Page 135 Changing Meter Settings To Add a Time Block: To Remove a Time Block: Select the last time block Select the time block you and press want to remove and press Select the End Time entry Select the End Time entry fi...
- Page 136 Changing Meter Settings Target Range: Select the entry fi eld for the lower limit value and press Set the value and press Select the entry fi eld for the upper limit value and press End Time: To modify the settings for another time block, select Set the value and press Select the End Time entry...
-
Page 137: Warning Limits: Hypo, Hyper
Changing Meter Settings 9.7 Warning Limits: Hypo, Hyper You can set blood glucose warning limits for hypoglycaemia (Hypo) or hyperglycaemia (Hyper) conditions. w WARNING This function is no substitute for hypoglycaemia or hyperglycaemia training by your healthcare professional. If your blood glucose result is If your blood glucose result is below the hypo warning limit, above the hyper warning limit,... - Page 138 Changing Meter Settings From the Main Menu, select Select Meter and press Select Warning Limits and Settings and press press Hyper (Upper) Blood Hypo (Lower) Blood Glucose Glucose Limit: Limit: Select the Hyper entry fi eld Select the Hypo entry fi eld and press and press Set the value and press...
-
Page 139: Key Lock
Changing Meter Settings 9.8 Key Lock The key lock feature allows you to lock all of the buttons on the meter, except for the power and backlight buttons. This serves as a safety measure against unintentional activation of meter functions. From the Main Menu, select Select Meter and press Select Key Lock and... -
Page 140: Language
Changing Meter Settings 9.9 Language From the Main Menu, select Select Meter and press Select Language and press Settings and press Press to display the available languages. Select the desired language and press Select Save. -
Page 141: Carbs (Carbohydrates) Unit
Changing Meter Settings 9.10 Carbs (Carbohydrates) Unit The following carbs units are available on the meter. Once bolus advice is activated, the carbs unit that has been selected cannot be changed. Abbreviation Carbs Unit Gram Equivalent Grams 1 gram Kohlenhydrateinheit 10 grams Bread Equivalent 12 grams Carbohydrate Choice... -
Page 142: Beeper, Vibrate, Key Sound
Changing Meter Settings 9.11 Beeper, Vibrate, Key Sound You can set up the meter for sound mode and/or vibrate mode. The beeper sound level can be set to low, medium or high. Sounds may occur for: • Button presses • Errors •... - Page 143 Changing Meter Settings Turn Vibrate On or Off : Select the Vibrate entry fi eld and press Select the Vibrate mode (On or Off ) and press Turn Key Sound On or Off : Select the Key Sound entry Beeper Sound Level: fi...
-
Page 144: Time Format, Time, Date
Changing Meter Settings 9.12 Time Format, Time, Date NOTE • It is recommended you set the date and time on the pump. The date and time on the meter will automatically synchronise to match the pump. • Changing the date and time will impact the Trend Graph and the Trend Table. Refer to the Reporting Your Data section in the chapter Managing Your Data. - Page 145 Changing Meter Settings Time: Date: Select the Time entry fi eld Select the Date entry fi eld and press and press Set the Hour and press Set the Day and press Set the Minutes and press Set the Month and press Set the Year and press If Time Format is 12-hour, Select Save.
-
Page 146: Backlight Level
Changing Meter Settings 9.13 Backlight Level The backlight on your meter helps you read the information on the meter display under different lighting conditions. You can adjust the backlight level by pressing the backlight button on the front of the meter. The backlight adjusts from low, to medium, to high and back to low again. -
Page 147: Chapter 10: Meter Reminders
Meter Reminders 10.1 Overview Reminders help you to remember a variety of tasks, for example when to test your blood glucose, when to change your pump infusion set and when you have an appointment with the doctor. The diff erent types of reminders are: •... -
Page 148: Bg Test Reminders: After High Bg, After Low Bg, After Meal
Meter Reminders 10.2 bG Test Reminders: After High bG, After Low bG, After Meal The meter can remind you to retest your blood glucose after either a high or low bG result, or after a meal. After High bG reminder: When your blood glucose result is above the high blood glucose threshold setting, the meter schedules this reminder to occur after the time duration elapses. - Page 149 Meter Reminders • When the meter displays the reminder and you do not press any meter buttons within 30 seconds, the meter turns off and displays the reminder again in 2 minutes. After the fourth time that the meter displays the reminder, the meter dismisses the reminder. •...
- Page 150 Meter Reminders bG Threshold: Select the bG Threshold entry fi eld and press Set the value and press Remind After: Select the Remind After entry fi eld and press Make a selection and press Turn Reminder On or Off : Set the time and press Select the Reminder entry Select Save.
- Page 151 Meter Reminders Snack Size: Select the Snack Size entry fi eld and press Set the amount and press Remind After: Select the Remind After entry fi eld and press Turn Reminder On or Off : If you changed the Snack Set the time and press Size, the After Meal screen Select the Reminder entry...
-
Page 152: Alarm Clock Reminders: Bg Test, Other
Meter Reminders 10.3 Alarm Clock Reminders: bG Test, Other bG Test alarm clock reminders are a helpful way to remind you to test your blood glucose. The Other alarm clock reminders can be used for any other daily appointments. NOTE •... - Page 153 Meter Reminders Other • Every day at the scheduled time, the meter turns on and displays this reminder if a test strip has not been inserted. • When the meter displays this reminder and you do not press any meter buttons, after 30 seconds the meter turns off...
- Page 154 Meter Reminders From the Main Menu, select Select Reminders and press Select Alarm Clock and press Settings and press Press . Select the type of Reminder (i.e., bG Test or Other) and press Repeat to set additional reminders. Turn Off a Reminder Select the type of Reminder entry fi...
-
Page 155: Date Reminders: Dr. Visit, Lab Test, Infusion Set Change
Meter Reminders 10.4 Date Reminders: Dr. Visit, Lab Test, Infusion Set Change Date reminders are a helpful way to remind you of an upcoming Dr. visit or lab test. In addition, you can set up an ongoing reminder for an infusion set change for the interval you choose (1 day, 2 days or 3 days). - Page 156 Meter Reminders Infusion Set Change Reminder • Displayed when you turn the meter on and a test strip has not been inserted. • Dismiss the reminder by pressing • Snooze the reminder either by pressing or by inserting a test strip. The reminder is displayed the next time the meter is turned on.
- Page 157 Meter Reminders Select Reminders and press Select Date Reminders and Make a selection and press press Dr. Visit: Go to Step 5. Lab Test: Go to Step 6. Infusion Set Change: Go to Step 7. Date: Time (Optional): Select the Time entry fi eld Select the Date entry fi...
- Page 158 Meter Reminders Date: Select the Date entry fi eld and press Set the Day and press Set the Month and press Set the Year and press Time (Optional): Turn Reminder On or Off : Select the Time entry fi eld Select the Reminder entry and press fi...
-
Page 159: Chapter 11: Meter And Pump Communication
Meter and Pump Communication 11.1 Overview The meter and pump use Bluetooth wireless technology to communicate. Communication may not be possible if the devices are more than 2 metres apart. If you are experiencing communication problems between the meter and pump, it is recommended that you go directly to the pump and operate the pump manually. -
Page 160: Turning Bluetooth Wireless Technology On Or Off
Meter and Pump Communication 11.2 Turning Bluetooth Wireless Technology On or Off You may turn the Bluetooth function on or off at any time using the meter. w WARNING When travelling on an aircraft, you must ensure that the Bluetooth function is turned off on the meter and on the pump prior to closure of the aircraft door. - Page 161 Meter and Pump Communication From the Main Menu, select Select Meter and press Select Bluetooth and press Settings and press To turn the Bluetooth function either On or Off , press and hold until the Bluetooth icon changes. Release and select Back.
-
Page 162: Pairing The Meter And Pump
Meter and Pump Communication 11.3 Pairing the Meter and Pump When obtained as a kit, the meter and pump are paired. If the meter and pump are not paired, see the following instructions. NOTE • A blood glucose test cannot be performed during the pairing process. •... - Page 163 Meter and Pump Communication On the pump, if the PAIRED On the pump, press On the pump, press DEVICE NONE screen delete the device so the confi rm deletion of the paired appears, proceed to Step 6. pump can be paired with device.
- Page 164 Meter and Pump Communication On the pump, press initiate the pairing process. On the pump, select the If the NO DEVICE FOUND meter to add and then press meter to add and then press screen appears, see the pump User Guide for information on troubleshooting.
- Page 165 Meter and Pump Communication On the meter, ensure the PIN code matches the numbers on the pump. Select Confi rm. If the correct PIN was entered, this Pair with Pump screen appears on the meter and the DEVICE PAIRED screen appears on the pump.
-
Page 166: Cancelling The Pairing Of The Meter And Pump Prompt
Meter and Pump Communication 11.4 Cancelling the Pairing of the Meter and Pump Prompt If the meter and pump are not paired, the meter prompts you to complete the pairing process each time you turn the meter on, unless you cancel the pairing process. You turn the meter on and Select Yes to cancel the Select Next to go to the Main... -
Page 167: Chapter 12: Care And Maintenance
Care and Maintenance 12.1 Overview The meter automatically tests its own systems every time you turn it on and lets you know if something is wrong. For information on troubleshooting the meter, refer to the chapter Troubleshooting. If you drop the meter or think the results are not accurate, contact the Accu‑Chek Pump Careline on 0800 731 22 91 (UK) or 1 800 88 23 51 (Ireland). -
Page 168: Changing The Batteries
Care and Maintenance 12.3 Changing the Batteries w WARNING • Using batteries other than those supplied or recommended for use with the meter may signifi cantly reduce the life of the batteries. Batteries other than those recommended may leak and corrode the battery contacts within the meter. Using batteries not supplied or recommended may void the warranty. -
Page 169: Power-Saving Tips
Care and Maintenance NOTE • Alkaline batteries of high quality are recommended for use with the meter. • After you change the batteries, the meter prompts you to confirm the time and date settings. • It is a good idea to have spare, packaged batteries available. •... -
Page 170: Cleaning The Meter
Care and Maintenance 12.5 Cleaning the Meter Keep the meter free of dust. If you need to clean or disinfect it, follow these guidelines carefully to help you get the best performance possible. w WARNING • Do not allow liquid to enter any openings in the meter. •... -
Page 171: Chapter 13: Troubleshooting
Troubleshooting 13.1 Overview For most problems, the meter displays a message with a short description of the symptom and, along with it, a proposed solution. This chapter goes into more detail by describing the symptom, the possible cause and the possible solution. If the possible solutions do not solve the problem, contact the Accu-Chek Pump Careline on 0800 731 22 91 (UK) or 1 800 88 23 51 (Ireland). - Page 172 Troubleshooting Display Shows Possible Cause(s) Possible Solution(s) The display is Batteries are dead. Install new batteries. Refer to the Changing blank or the meter the Batteries section in the chapter Care and will not turn on. Maintenance. Display is damaged. Contact the Accu-Chek Pump Careline on 0800 731 22 91 (UK) or 1 800 88 23 51 (Ireland).
-
Page 173: Warnings
Troubleshooting 13.2 Warnings Warning Icon Warning Title Warning Message Only shown on a few warning screens. Yes or OK NOTE • The meter beeps when it displays a warning if the beeper setting is on. • Blood glucose and bG are interchangeable and mean the same thing. - Page 174 Troubleshooting Warning Title Warning Message Possible Cause/Solution Above Hyper Consider checking for ketones, Your bG result is above the hyper warning limit set Warning Limit bG and insulin regularly in the meter. • Treat your high blood glucose as recommended by your healthcare professional.
- Page 175 Troubleshooting Warning Title Warning Message Possible Cause/Solution Bolus Advice Bolus Advice data deleted Bolus advice data integrity cannot be confi rmed. Wait 8 hours for accurate bolus advice. Contact the Accu-Chek Pump Careline on 0800 731 22 91 (UK) or 1 800 88 23 51 (Ireland) for additional assistance.
- Page 176 Troubleshooting Warning Title Warning Message Possible Cause/Solution Bolus Delivery Communication lost. Retry This warning occurs when the selected bolus type Unavailable or set to Manual Pump. is either Standard, Multiwave or Extended and the meter cannot communicate with the pump. •...
- Page 177 Troubleshooting Warning Title Warning Message Possible Cause/Solution Calculation Out of No Bolus Advice available The meter has detected a high out of range Range condition. Press (OK) to confi rm the warning. The meter redisplays the Bolus Advice screen and sets the calculated bolus fi elds to blank for the bG result, Carbs and Health.
- Page 178 Troubleshooting Warning Title Warning Message Possible Cause/Solution Communication Pump data not available, Communication of bolus data from the pump was Warning recent Bolus data may not not successful and therefore, pump data is not available. Recent bolus data or active insulin may be accurate not be accurate.
- Page 179 Troubleshooting Warning Title Warning Message Possible Cause/Solution Corrupt Language Choose another language The selected language cannot be used. Contact the Accu-Chek Pump Careline on 0800 731 22 91 (UK) or 1 800 88 23 51 (Ireland) for assistance. Diary Entry Used Diary entry used for Advice, The data for this diary entry has been used for For Advice...
- Page 180 Troubleshooting Warning Title Warning Message Possible Cause/Solution Incorrect Pump Pump time/date incorrect. This warning occurs when the meter is Time/Date Set time/date on the Pump. synchronising time/date with the pump and the pump sends an invalid time/date, or sends a time/date that is older than the meter manufacturing time/date.
- Page 181 Troubleshooting Warning Title Warning Message Possible Cause/Solution Invalid Active Unable to calculate the Active An error has occurred in calculating the Active Insulin Insulin. Bolus Advice not Insulin. Press (OK) to confi rm the warning. available. • For the Detailed bG Result screen, the meter sets the Active Insulin fi eld to blank.
- Page 182 Troubleshooting Warning Title Warning Message Possible Cause/Solution Invalid Target Range selected conflicts with Either the minimum target range value entered Range Hyper and/or Hypo Warning is less than the Warning Limits Hypo value, or the Limit settings maximum target range value entered is greater than the Warning Limits Hyper value.
- Page 183 Troubleshooting Warning Title Warning Message Possible Cause/Solution Meter Battery Replace soon. No Pump Battery power is low. Replace the batteries. connection. Refer to the Changing the Batteries section in the chapter Care and Maintenance. When this warning is displayed: • The Bluetooth communication is disabled. •...
- Page 184 Troubleshooting Warning Title Warning Message Possible Cause/Solution Pump Not Ensure Bluetooth is on and The meter and pump are not communicating. Available Pump is within range of Meter • Ensure that both the meter and pump have the Bluetooth function turned on. •...
- Page 185 Troubleshooting Warning Title Warning Message Possible Cause/Solution Time Mismatch Meter time has been changed The time or date on the meter is more than by more than 5 minutes to 5 minutes different than the time or date on match the Pump the pump.
-
Page 186: Errors
Troubleshooting 13.3 Errors Error Icon Error Title Error Message Menu or OK Only shown on a few error screens. NOTE The meter beeps when it displays an error, even if the beeper setting is turned off. - Page 187 Troubleshooting Error Title Error Message Error Cause/Solution E-51 Bad Strip Reinsert or replace with new This error may occur if the test strip is damaged, Error Strip or if the test strip is not properly inserted into the meter. • Remove the test strip and reinsert it, or replace it if damaged.
- Page 188 Troubleshooting Error Title Error Message Error Cause/Solution E-53 Bad Test Retest with new Strip A meter or test strip error has occurred. Error Discard the test strip and repeat the test. Your blood glucose may be extremely high. If this matches how you feel, contact your healthcare professional immediately.
- Page 189 Troubleshooting Error Title Error Message Error Cause/Solution E-55 Code Key Turn Meter off , replace Code Key This message may appear when using a white Expired and Strips activation chip in the meter. It means the test strips expire at the end of the current month. NOTE: Code key and activation At the end of the month, discard the white chip are interchangeable and...
- Page 190 Troubleshooting Error Title Error Message Error Cause/Solution E-58 Temp. Error Move Meter to correct The temperature is above or below the meter temperature and wait 5 minutes operating range. Move the meter to an area within the proper temperature range indicated for test strip use on the test strip package insert.
- Page 191 Troubleshooting...
- Page 192 Troubleshooting...
-
Page 193: Chapter 14: Product Information
94 x 55 x 25 mm LWH Weight Approximately 103 g with batteries inserted Construction Hand-held Protection class Meter type The Accu-Chek Aviva Combo meter is suitable for continuous operation. Control solution storage Refer to the control solution package insert. conditions Interface IR; LED/IRED – Class 1... -
Page 194: Technical Information
You may also turn off the interfering device. In addition, you may turn off Bluetooth wireless technology on the meter and deliver insulin directly using the pump. Changes or modifications to the device not expressly approved by Roche could void the user’s authority to operate the device. -
Page 195: Information For Healthcare Professionals
Refer to the test strip package insert. Declaration of Conformity Roche hereby declares that the Accu-Chek Aviva Combo blood glucose meter conforms with the basic requirements and other relevant regulations of the European Directives 1999/5/EC and 2014/53/EU. The transition period for the European Directive 1999/5/EC ends June 12th 2017, from which date only 2014/53/EU will be applicable. -
Page 196: Explanation Of Symbols
14.4 Explanation of Symbols These symbols may appear on the packaging, on the type plate and in the instructions for the Accu-Chek Aviva Combo meter. Consult instructions for use Caution, refer to safety-related notes in the instructions for use accompanying this product. -
Page 197: Guarantee
Product Information 14.5 Guarantee The statutory provisions on rights in consumer goods sales in the country of purchase shall apply. 14.6 Additional Supplies Test Strips: Accu-Chek Aviva Test Strips Control Solutions: Accu-Chek Aviva Control Solutions 14.7 Discarding the Meter w WARNING •... -
Page 198: Meter Default Settings And Range Limits
Product Information 14.8 Meter Default Settings and Range Limits mmol/L Data Type Unit of Increment Default Setting Measurement Acting Time hours:minutes 1:30 8:00 0:15 4:00 Active Insulin Units 99.9 bG Threshold mmol/L 19.5 Hyper Warning Limit (High) bG Threshold mmol/L Hypo Warning Limit (Low) Carb Ratio... - Page 199 Product Information Data Type Unit of Increment Default Setting Measurement Illness (health event) Insulin Sensitivity mmol/L 55.4 No entry (“--- mmol/L”) (bG) Insulin Sensitivity Units (insulin) Meal Rise (bG) mmol/L 11.1 Multiwave Bolus Units (insulin) Offset Time hours:minutes 0:45 Acting 0:15 1:00 Time...
- Page 200 Product Information...
-
Page 201: Appendices
Appendices Appendix A: List of Icons Icon Name Icon Icon Name Icon Active Insulin Extended Bolus Confi rmed By The Pump Add Data Health Event Analyzing Low Battery Beeper Manual Bolus Not Confi rmed By The Pump Meal Time Blood Glucose Averages Meter Blood Glucose Test Meter (Settings) - Page 202 Appendices Icon Name Icon Settings Sound/Vibrate (Settings) Standard Bolus Not Confi rmed By The Pump Standard Bolus Confi rmed By The Pump Time Time Block (Settings) Time Change Time/Date (Settings) Vibrate View Data Warning...
-
Page 203: Appendix B: Bolus Advice Overview
Appendix B: Bolus Advice Overview Bolus advice is only available if you have set up bolus advice on the Accu-Chek Aviva Combo meter. For instructions on how to set up bolus advice, refer to the chapter Getting Started, or the Setting Up Bolus Advice for the First Time section in the chapter Changing Meter Settings. - Page 204 Appendices Correction Bolus If your current blood glucose level is above your upper target limit, a correction bolus is recommended. Discuss your blood glucose limits with your healthcare professional. bG Result Hyper Warning Limit Upper Target Limit Target Value Lower Target Limit Hypo Warning Limit...
- Page 205 Appendices The calculation for the recommended correction bolus depends on your current blood glucose result, your insulin sensitivity for the current time block and whether you are planning to eat. Example Bolus Advice Calculations Blood Glucose Level Without Food Intake (No Carbohydrates) Prior to a Meal Above Upper Target Limit (bG - Target bG) x Insulin Sensitivity =...
- Page 206 Appendices bG Level Target Value Acting Time Offset Time Meal Rise Target Range Time Currently Allowed bG Value: Current bG Bolus Not Meal Bolus Meal Rise Values Required The dotted line shows how your blood glucose level might change after a meal bolus. Bolus advice tolerates an increase in your blood glucose level within the meal rise range (green) without calculating an extra correction bolus.
- Page 207 Appendices bG Result Section 1 Section 2 Offset Time Delta bG (Correction Insulin) Acting Time Time Correction Bolus Subsequent Correction Boluses: If your blood glucose result is within Section 1 of the graph, a correction bolus is not recommended. If your blood glucose result is within Section 2 of the graph, a correction bolus is recommended.
- Page 208 Appendices After a Correction Bolus bG Level Target Value Acting Time Offset Time Corrected bG Target Range Time Current bG Currently Allowed bG Value: Bolus Bolus Not Values Corrected bG Required The above diagram shows an example of the effect of this rule. The first correction bolus at 12:00 remains active during the acting time (the width of the blue area).
- Page 209 Appendices bG Level Target Value Target Range Time Current bG Bolus Values When a blood glucose result is greater than the currently allowed blood glucose value, a bolus is calculated (light blue) that only considers the difference between the current blood glucose value (orange dots) and the currently allowed blood glucose value (the top of the blue area).
- Page 210 Appendices bG Level 1. Target Value 2. Acting Time 3. Offset Time 4. Meal Rise 5. Target Range Time Current bG Currently Allowed bG Value: Meal Bolus Bolus Not Values Meal Rise Required Subsequent Meals If you eat several meals in a row, the meal rise is restarted for each new meal bolus.
-
Page 211: Appendix C: Bolus Advice Calculations
Appendices Appendix C: Bolus Advice Calculations The Mathematical Basis for Bolus Calculations The following is a list of the most important formulas and the calculation principles on which bolus advice is based. It is difficult to accurately calculate a bolus yourself using these formulas when the acting time and offset time of recent meals and correction boluses are considered. - Page 212 Appendices Meal Bolus The following formula is used to calculate the bolus for meals: Meal Bolus = Carbohydrate Intake x Carbohydrate Ratio Where: Carbohydrate Ratio = Insulin ÷ Carbohydrates Currently Allowed Blood Glucose Value The target range average value used in the calculation of the correction bolus, as shown below, changes with the definition for the time blocks.
- Page 213 Appendices Correction Bolus A correction bolus is only calculated if the current blood glucose value is above the hypo bG warning limit and outside the target range. If the current blood glucose value is above the target range, the currently allowed blood glucose value must also be exceeded.
- Page 214 Appendices...
-
Page 215: Glossary
Glossary Term Definition 7‑day average A bG average that includes results generated today and the previous 6 days. Acting Time The period of time from the start of the meal rise or the delivery of a correction bolus until your blood glucose level is expected to return to the target level. - Page 216 Glossary Term Defi nition Bolus Advice When enabled, bolus advice provides recommendations on the amount of insulin for food intake and for correcting blood glucose levels that are not within your target range. Bolus Advice Options See Advice Options. Bolus Delivery Start Delay A 5‑second delay (the bolus icon blinks for 5 seconds) before the meter communicates to the pump to begin delivery of the bolus amount.
- Page 217 Glossary Term Definition Extended Bolus The pump delivers the bolus amount over a period of time. This bolus type can be helpful during a prolonged meal, or when you have meals that are digested slowly. It may also be appropriate for people who have gastroparesis (delayed digestion).
- Page 218 Glossary Term Definition The test result is below the meter’s measuring range. Manual Pump Bolus You must manually program the pump to deliver the bolus. A bolus that can be used at any time, but is intended for when the meter and pump are not communicating.
- Page 219 Glossary Term Definition Personal Identification Number Pump See Insulin Pump. Quick Bolus A bolus delivery on the pump using the pump UP and DOWN keys. One key press equals 1 bolus increment (i.e., 0.1, 0.2, 0.5, 1.0, 2.0). See the pump User Guide for more information. Remind After A bG test reminder setting.
- Page 220 Glossary Term Definition Target Range The desired upper and lower limits of your blood glucose level considered acceptable as set by your healthcare professional. Target Value The meter automatically calculates the target blood glucose level (e.g., target value) as the average between the upper and lower blood glucose target limits.
- Page 221 Glossary...
- Page 222 Glossary...
-
Page 223: Index
Index bolus advice calculations 209 acting time 44 intended users 22 setting 32, 125, 131 meter screen features 65 activation chip 10, 11 overview 21, 43, 201 active insulin 44, 50, 65 safety information 23 troubleshooting 179 setting up 28, 119 advice options 44, 130 bolus amount 65, 80 after high bG reminder 33, 41, 145, 146, 148... - Page 224 Index data health event 43 storing in the diary 95 diary record 98, 103 transferring to a computer 116 selecting 50, 51, 65, 66 date, reminders 145, 153 health event percentages, setting 32, 124, 129 date, setting 27, 142 HI 49, 99 diary hyper warning limit 39, 48, 135 adding a record 102...
- Page 225 Index maintenance, meter 165 remind after time 146 manual pump bolus 62 setting 33, 34, 148, 149 delivering 69 reminders meal bolus calculation 201 meter 145 meal rise 44 pump 89 setting 32, 125, 131 meal time safety information 7 diary record 98 blood glucose testing 45, 53 selecting 50, 51, 106...
- Page 226 Index target percentages report 104, 115 upper blood glucose warning limit, setting 27, 39, 136 target range 29, 41, 121 use by date 12, 46, 52, 55, 57, 60, 185 setting 30, 122, 128, 134 troubleshooting 180 vibrate, setting 140 temporary basal rate (TBR) cancelling 84 warnings...
- Page 227 Distributed in the United Kingdom by: Roche Diabetes Care Limited Charles Avenue, Burgess Hill West Sussex, RH15 9RY, United Kingdom Accu-Chek Pump Careline 1): UK Freephone number: 0800 731 22 91 ROI Freephone number: 1 800 88 23 51 calls may be recorded for training purposes Some mobile operators may charge for calls to these numbers.
- Page 228 Sandhofer Strasse 116 68305 Mannheim, Germany www.accu-chek.com ACCU-CHEK, ACCU-CHEK AVIVA, ACCU-CHEK AVIVA COMBO, ACCU-CHEK SPIRIT COMBO, and COMBO are trademarks of Roche. The Bluetooth word mark and logos are registered trademarks owned by Bluetooth SIG, Inc. and any use of such ®...
Need help?
Do you have a question about the Accu-Chek Aviva Combo and is the answer not in the manual?
Questions and answers