Roche ACCU-CHEK User Manual
Hide thumbs
Also See for ACCU-CHEK:
- User manual (144 pages) ,
- Instructions (2 pages) ,
- Quick start manual (2 pages)
Table of Contents
Advertisement
Available languages
Available languages
Quick Links
Advertisement
Table of Contents

Related Manuals for Roche ACCU-CHEK


Summary of Contents for Roche ACCU-CHEK
- Page 1 Blood Glucose Monitoring System Sistema de monitorización de glucemia User’s Manual for Single Patient Use Only Blood Glucose Meter Instrucciones de uso únicamente para uso de un paciente individual Medidor de glucemia...
-
Page 3: Table Of Contents
Contents Important Safety Information ....................3 Chapter 1: Your New System ....................7 Chapter 2: The Accu-Chek FastClix Lancing Device ..............13 Chapter 3: Blood Glucose Tests .....................17 Chapter 4: Control Tests ......................25 Chapter 5: Review Your Data....................31 Chapter 6: Wireless Communication, Meter Pairing, and Data Transfer .........35 Chapter 7: Meter and Lancing Device Cleaning and Disinfecting...........41... -
Page 5: Important Safety Information
The Accu-Chek Guide Me Blood Glucose Monitoring System is intended for in vitro diagnostic single-patient use by people with diabetes. The Accu-Chek Guide Me Blood Glucose Monitoring System is intended to be used by a single person and should not be shared. - Page 6 For questions, contact the Accu-Chek Customer Care Service Center toll-free at 1-800-858-8072. Hours of operation are Monday through Friday between 8:00 am and 8:00 pm eastern standard time (EST). We offer assistance in many languages. You can also visit accu-chek.com for diabetes management tools and product demonstrations.
- Page 7 Important Safety Information About Testing Yourself or Others WARNING • DO NOT CHANGE YOUR THERAPY BASED ON A TEST RESULT THAT DOES NOT MATCH HOW YOU FEEL OR IF YOU BELIEVE THAT YOUR TEST RESULT COULD BE INCORRECT. • It is always a good idea to have a back-up testing method available. Failure to test could cause a delay in therapy decisions and lead to a serious medical condition.
- Page 8 Contact the Accu-Chek Customer Care Service Center. Damaged test strips can cause inaccurate results, which could lead to improper therapy.
-
Page 9: Chapter 1: Your New System
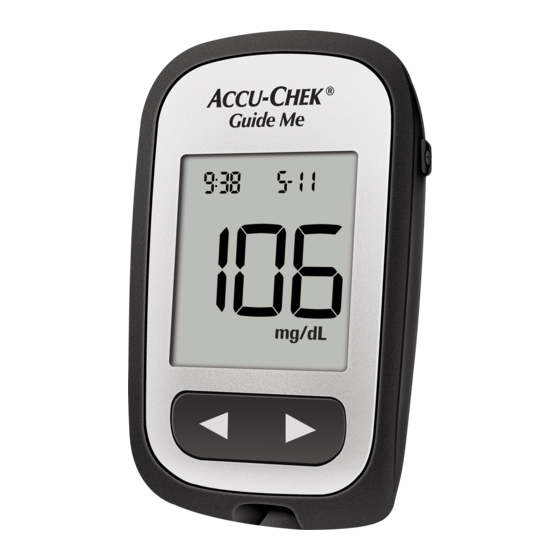
Your New System The Accu-Chek Guide Me Meter Front View Back View Side View 1. Power/Set Button 5. Test Strip Slot Turns the meter on or off and sets Insert test strip here. options. 6. Battery Door 2. Display Open to replace batteries. - Page 10 Your New System 8. Test Strip Container* 12. Batteries 9. Test Strip* – Metallic End 13. USB Cable* Insert this end into the meter. Connects the meter to a PC. 10. Test Strip* – Yellow Edge * Some items may not be included in the kit. Touch blood drop or control solution here.
- Page 11 Your New System The Accu-Chek FastClix Lancing Device 1. Cap 4. Lever For fingertip testing. Advance to a new lancet. 2. Comfort Dial with Depth Selection 5. Lancet Counter Window Select penetration depth. Shows number of available lancets. 3. Penetration Depth Indicator 6.
- Page 12 If one of the segments is missing or looks set-up different from this picture, do not use the meter. Contact the Accu-Chek Customer Care Service Center at 1-800-858-8072. memory Adjust settings for time and date, scroll Press and release or press and hold to through test results in memory.
- Page 13 Your New System Symbols Symbol Description 7-day average symbol. This indicates that you are viewing the 7-day average of your blood glucose results. 14-day average symbol. This indicates that you are viewing the 14-day average of your blood glucose results. 30-day average symbol.
- Page 14 Your New System Setting the Time and Date set-up set-up Press and release to turn Press and hold until set-up Press to set the hour and the meter on. appears on the display. The move to the next field. hour flashes. The flashing test strip symbol appears on the display.
-
Page 15: Chapter 2: The Accu-Chek Fastclix Lancing Device
The Accu-Chek FastClix Lancing Device Using the Accu-Chek FastClix Lancing Device • The black cap is for fingertip testing only. • Remember that the opening where the lancet comes out is not in the center of the cap. • Remove the cap by pulling it straight off. Do not twist the cap. - Page 16 The Accu-Chek FastClix Lancing Device Inserting a Lancet Drum You must first load the lancet drum into the lancing device to get it ready for use. Remove the cap. Slide the cap on until it stops by You are now ready to use the aligning the notch on the cap first lancet.
- Page 17 The Accu-Chek FastClix Lancing Device Using the Accu-Chek FastClix Lancing Device Using the Accu-Chek FastClix Lancing Device Obtain a blood drop. See the chapter Blood Glucose Tests. Adjust the lancet depth by Adjust the lancet depth by turning the comfort dial.
- Page 18 The Accu-Chek FastClix Lancing Device Changing the Lancet Drum When you have used the sixth and last lancet, change the lancet drum. Remove the cap. Hold the lancet drum between your thumb and index finger and pull it straight out.
-
Page 19: Chapter 3: Blood Glucose Tests
• Blood glucose results can be displayed in either mg/dL or mmol/L. The back label of the meter shows the unit of measurement. If the meter shows the wrong unit, contact the Accu-Chek Customer Care Service Center at 1-800-858-8072. The correct unit of measure in the US is mg/dL. - Page 20 • Discard the test strips if they are past the Use By date printed on the test strip container. If the Use By date is missing or cannot be read, do not use the test strips. Contact the Accu-Chek Customer Care Service Center at 1-800-858-8072.
- Page 21 Blood Glucose Tests Performing a Blood Glucose Test with Blood from Your Fingertip Refer to the Important Safety Information section at the beginning of this manual. NOTE • Before you perform your first blood glucose test, set the meter time and date. •...
- Page 22 Blood Glucose Tests Remove a test strip from the Insert the metallic end of the test strip container. test strip into the meter. The meter turns on. Close the cap tightly. When the flashing drop symbol Press the lancing device firmly appears, obtain a blood drop.
- Page 23 Blood Glucose Tests Touch the yellow edge of the Remove your finger from the Gently squeeze your finger to assist the blood flow. This helps test strip to the blood drop. Do test strip when the flashing you get a blood drop. not put blood on top of the test appears.
- Page 24 • if you sometimes do not notice when your blood glucose is low. If you are interested in AST, talk to your healthcare professional first. To obtain an AST cap and detailed AST instructions, contact the Accu-Chek Customer Care Service Center at 1-800-858-8072.
- Page 25 Blood Glucose Tests Unusual Blood Glucose Results If your blood glucose result does not match how you feel, follow these steps: 1. Perform a control test. See the chapter Control Tests. 2. Repeat the blood glucose test. If your blood glucose result still does not match how you feel, follow your healthcare professional’s instructions or contact your healthcare professional immediately.
- Page 26 Blood Glucose Tests Symptoms of Low or High Blood Glucose WARNING The meter is designed to provide a numerical value for blood glucose in the range of 20–600 mg/dL. Being aware of the symptoms of low or high blood glucose can help you understand your test results and decide what to do if they seem unusual.
-
Page 27: Chapter 4: Control Tests
• you want to check if you are performing the test correctly. About the Control Solutions • Use only Accu-Chek Guide control solutions. • Close the control solution bottle tightly after use. • Write the date you open the control solution bottle on the bottle label. The control solution must be discarded 3 months from the date the control solution bottle was opened (discard date) or on the Use By... - Page 28 Control Tests Performing a Control Test NOTE • Most people just test the Level 1 control. If you wish, you can also test a Level 2 control. A set of Level 1 and Level 2 control solutions is available for purchase. • The ranges for Level 1 and Level 2 controls are printed on the test strip container label. •...
- Page 29 Control Tests Insert the metallic end of The meter turns on. the test strip into the meter. A flashing drop symbol Place the meter on a flat appears. surface. Select the control solution to Remove the bottle cap. Wipe Touch the drop to the yellow edge of the test strip.
- Page 30 Control Tests The control result, the bottle symbol, and the flashing L1 or L2 A flashing appears when appear on the display. Press to confirm the control level you there is enough control tested. solution in the test strip. Press the to alternate between L1 and L2.
- Page 31 If you chose the wrong control solution level, you can still level, either 1 or 2, when you performed the compare the control result to the range printed on the test test? strip container. Are you still unsure of the problem? Contact the Accu-Chek Customer Care Service Center at 1-800-858-8072.
- Page 32 Control Tests...
-
Page 33: Chapter 5: Review Your Data
Review Your Data Overview • The meter automatically stores up to 720 blood glucose results in memory with the time and date of the test. • Once 720 blood glucose results are in memory, adding a new blood glucose result deletes the oldest blood glucose result. - Page 34 Review Your Data Reviewing Blood Glucose Results in Memory memory memory With the meter off, press Press to view previous to view blood glucose test results from newest to results stored in memory. oldest. The most recent stored blood glucose result appears on the display.
- Page 35 Review Your Data Viewing 7, 14, 30, and 90-day Averages memory memory memory With the most recent test With the meter off, press Press to scroll through 7, result on the display, to view blood glucose 14, 30, and 90-day averages. press ...
- Page 36 Review Your Data...
-
Page 37: Chapter 6: Wireless Communication, Meter Pairing, And Data Transfer
Wireless Communication, Meter Pairing, and Data Transfer Overview The process of creating a connection between the meter and the mobile device is called pairing. You will need an application on your mobile device that can accept the meter’s data. You can use this application to wirelessly and automatically synchronize your diabetes information between the meter and the mobile device. - Page 38 Wireless Communication, Meter Pairing, and Data Transfer On Your Meter On Your Mobile Device Within the app, follow the instructions and select your meter. When prompted, enter the meter’s 6-digit PIN. The meter times out after 30 seconds once you are prompted to enter the PIN.
- Page 39 Wireless Communication, Meter Pairing, and Data Transfer Turning Bluetooth Off Turn Bluetooth off to disable wireless communication (flight mode). Turning Bluetooth off will not unpair your meter. With the meter off, press Press and hold until the or . The last stored Bluetooth symbol disappears.
- Page 40 Wireless Communication, Meter Pairing, and Data Transfer Turning Bluetooth On If you have turned Bluetooth off (flight mode), follow the steps below to turn it back on. This will enable wireless communication with your mobile device. With the meter off, press Press and hold until the ...
- Page 41 Wireless Communication, Meter Pairing, and Data Transfer Transferring Data Using a USB Cable This feature allows you to transfer data from your meter to special software for diabetes management on a PC using a USB cable. Start the diabetes management software on the PC and initiate a data transfer.
- Page 42 Wireless Communication, Meter Pairing, and Data Transfer...
-
Page 43: Chapter 7: Meter And Lancing Device Cleaning And Disinfecting
Always use Super Sani-Cloth to clean and disinfect the meter and lancing device. • Roche has demonstrated that the product is good for 5-year use, after testing in a total of 260 disinfection cycles (equal to cleaning and disinfecting once per week for 5 years). - Page 44 Meter and Lancing Device Cleaning and Disinfecting NOTE For technical assistance or questions on cleaning and disinfecting, contact the Accu-Chek Customer Care Service Center at 1-800-858-8072. Cleaning and Disinfecting the Meter WARNING If the meter is being operated by a second person who is providing testing assistance to the user, the meter and lancing device should be cleaned and disinfected prior to use by the second person.
- Page 45 Meter and Lancing Device Cleaning and Disinfecting How to Clean and Disinfect the Meter WARNING Failure to follow these instructions will damage the meter and stop it from working properly. • DO NOT clean or disinfect the meter while performing a blood glucose or control test.
- Page 46 Meter and Lancing Device Cleaning and Disinfecting Wash hands with soap and water and dry thoroughly.
- Page 47 Accu-Chek Customer Care Service Center at 1-800-858-8072: residue around buttons, difficulty in priming the device, difficulty in inserting the lancet drum.
- Page 48 Meter and Lancing Device Cleaning and Disinfecting How to Clean and Disinfect the Lancing Device WARNING Failure to follow these instructions may damage the lancing device and stop it from working properly. • DO NOT get any moisture into any openings. •...
-
Page 49: Chapter 8: Meter Maintenance And Troubleshooting
If you have problems with the meter, drop the meter, or think the results are not accurate, perform a control test with an unexpired test strip and control solution. If the control result is not within the acceptable range, contact the Accu-Chek Customer Care Service Center at 1-800-858-8072. WARNING Keep new and used batteries away from children. - Page 50 Error Messages WARNING • Never make therapy decisions based on an error message. • If you have any concerns or see any other error message, contact the Accu-Chek Customer Care Service Center at 1-800-858-8072. NOTE • The error code and Err will alternate on the display for all coded error messages (E-1 through...
- Page 51 Insert new batteries. resume testing or review test • Display is damaged. / Meter results. is defective. Contact the Accu-Chek Customer Care Service Center at 1-800-858-8072. • Extreme temperatures. Move the meter to a more temperate area.
- Page 52 Meter Maintenance and Troubleshooting The meter is connected to a PC The meter was unable to pair and a blood glucose or control with a mobile device. test cannot be performed. Retry the pairing. EITHER remove the USB cable and perform a blood glucose or control test OR remove the test strip and start a data transfer.
- Page 53 Meter Maintenance and Troubleshooting (The error code and Err will alternate on the display.) (The error code and Err will alternate on the display.) A meter or test strip error has occurred. The test strip may be damaged, Repeat the blood glucose test. If a second E-3 code appears, not properly inserted, or was perform a control test with the control solution and a new test previously used.
- Page 54 Meter Maintenance and Troubleshooting (The error code and Err will alternate on the display.) (The error code and Err will alternate on the display.) Not enough blood or control solution was drawn Blood or control solution was applied to the test into the test strip for measurement or was strip before the flashing drop symbol appeared applied after the test had started.
- Page 55 Meter Maintenance and Troubleshooting (The error code and Err will alternate on the display.) (The error code and Err will alternate on the display.) The batteries may be out of power. The time and date setting may be incorrect. A flashing wave symbol appears while the meter Turn the meter back on.
- Page 56 Fluid or foreign material may be present in the An electronic error has occurred. test strip slot. Contact the Accu-Chek Customer Care Service Remove and reinsert the test strip or repeat Center at 1-800-858-8072. the blood glucose or control test with a new test strip.
-
Page 57: Chapter 9: Technical Information
Technical Information Product Limitations See the literature packaged with the test strips and control solutions for the latest information on product specifications and limitations. Specifications Blood volume Refer to the test strip package insert. Sample type Measuring time Measuring range Test strip storage conditions System operating conditions Meter storage conditions... - Page 58 Technical Information Specifications Meter type The Accu-Chek Guide Me meter is suitable for continuous operation. Control solution storage conditions Refer to the control solution package insert. Interfaces USB: micro-B connector; Bluetooth low energy; Continua Certified to a Continua Certified manager.
- Page 59 Technical Information Electromagnetic Compatibility – The meter meets the electromagnetic emission requirements as per EN ISO 15197. The chosen basis for electrostatic discharge immunity testing was basic standard IEC 61000-4-2. In addition, the meter meets the electromagnetic emissions requirements as per EN 61326-2-6 / EN 60601-1-2. Its electromagnetic emission is thus low. Interference from the meter to other electrically-driven equipment is not anticipated.
- Page 60 Performance Analysis – Refer to the test strip package insert. Test Principle – Refer to the test strip package insert. Communication Protocol – The Accu-Chek Guide Me blood glucose meter is Continua Certified. Continua Certified signifies that this product complies with applicable IEEE 11073-10417 standards and that it has been tested and certified against the 2016 Continua Design Guidelines which include the Blood Glucose specification for Bluetooth low energy technology, Bluetooth SIG, Glucose Profile Version 1.0 and...
- Page 61 • Lancing devices may also be considered sharps. Disposal of sharps is regulated by law in many jurisdictions. Roche is committed to recycling and sustainability. Comply with any laws or ordinances relating to the disposal of sharps and/or contaminated products. Contact your local health department or other appropriate authorities for proper handling and disposal of used meters, used test strips, used lancets, and used batteries.
- Page 62 Technical Information Explanation of Symbols These symbols may appear on the packaging, on the type plate, and in the instructions for the Accu-Chek Guide Me meter. Caution, refer to safety-related notes in the instructions for use accompanying this product. This device complies with Part 15 of the FCC Rules.
- Page 63 Additional Supplies Test Strips: Accu-Chek Guide test strips Control Solutions: Accu-Chek Guide control solutions Lancets: Accu-Chek FastClix 102-ct. lancet drums (17 6-ct. drums) References FDA Public Health Notification: “Use of Fingerstick Devices on More than One Person Poses Risk for Transmitting Bloodborne Pathogens: Initial Communication, (2010).
- Page 64 Technical Information...
-
Page 65: Chapter 10: License And Warranty
Accu-Chek Guide Me Meter Limited 3-Year Warranty Roche warrants to the original purchaser of the meter that your Accu-Chek Guide Me meter will be free from defects in materials and workmanship for three years from the date of purchase. If, during this 3-year period, the meter does not work properly because of a defect in materials or workmanship, Roche will replace it with a new Accu-Chek Guide Me meter or equivalent product free of charge. - Page 66 Warranty and Service Instructions All requests for return of Accu-Chek Guide Me meters under the above warranty or service policy must be made to the Accu-Chek Customer Care Service Center. You will be mailed a return authorization label, which must be affixed to your carton for shipping the system to Roche. Cartons received without this label will be returned to you at your expense.
- Page 67 Using the Accu-Chek Guide Me system indicates your acceptance of the restricted license to use the Accu-Chek Guide Me system only with Accu-Chek Guide test strips. If you do not agree to the terms and conditions of the restricted license, you may return, at the place of purchase, the unused Accu-Chek Guide Me system for a full refund.
- Page 68 READ CAREFULLY THE LIMITATIONS RECITED BELOW. The Accu-Chek FastClix system (lancing device and lancet drums) and its use are protected by U.S. Patent Nos. 7,322,998 (expires 3-March-2020); and 7,785,338 (expires 5-January-2026). A license to use the Accu-Chek FastClix system is required until the expiration of the last-to-expire patent listed above and is only granted when Accu-Chek FastClix lancet drums are used with the Accu-Chek FastClix lancing device.
-
Page 69: Index
Index alternative site testing 22 maintenance, meter 49 averages, reviewing 33 memory 32 meter, cleaning and disinfecting 42 batteries, changing 47 battery type 47, 55 pairing 35 blood glucose results, unusual 23 product limitations 55 blood glucose test, performing 19 product specifications 55 blood glucose, warning 24, 50 button, functions 7, 10... - Page 70 Index...
- Page 71 Índice de contenidos Información importante de seguridad ..................3 Capítulo 1: Su nuevo sistema ....................7 Capítulo 2: El dispositivo de punción Accu-Chek FastClix .............13 Capítulo 3: Mediciones de glucemia ..................17 Capítulo 4: Controles del funcionamiento ................27 Capítulo 5: Consultar datos ....................33 Capítulo 6: Comunicación inalámbrica, sincronización del medidor y transferencia de datos ......................37...
- Page 73 El sistema de monitorización de glucemia Accu-Chek Guide Me está previsto para el uso por personas con diabetes para el diagnóstico in vitro de un paciente individual. El sistema de monitorización de glucemia Accu-Chek Guide Me está previsto para el uso de un paciente individual y no debe ser compartido.
- Page 74 Por favor, registre su medidor de glucemia por Internet en accu-chek.com/register para recibir el mejor servicio postventa posible, además de las actualizaciones de nuestros productos.
- Page 75 Información importante de seguridad Información para realizar mediciones para Ud. mismo o para terceros ADVERTENCIA • NO MODIFIQUE SU TRATAMIENTO BASÁNDOSE EN UN RESULTADO DE MEDICIÓN QUE NO COINCIDA CON CÓMO SE SIENTE O SI PIENSA QUE SU RESULTADO DE MEDICIÓN PODRÍA SER INCORRECTO. •...
- Page 76 Póngase en contacto con Accu-Chek Customer Care Service Center. Las tiras reactivas dañadas pueden causar resultados incorrectos, lo que puede conducir a un tratamiento inadecuado.
- Page 77 Su nuevo sistema El medidor Accu-Chek Guide Me Vista frontal Vista posterior Vista lateral 1. Botón Power/Set 5. Ranura de la tira reactiva Púlselo para encender y apagar el Inserte la tira reactiva por aquí. medidor y ajustar las opciones. 6. Tapa del compartimento de las pilas 2.
- Page 78 Su nuevo sistema 12. Pilas 8. Tubo de tiras reactivas* 9. Tira reactiva* – Extremo metálico 13. Cable USB* Inserte este extremo en el medidor. Conecta el medidor con una computadora. 10. Tira reactiva* – Borde amarillo * Algunos artículos pueden no estar incluidos en el kit. Rócelo con la gota de sangre o la solución Se pueden adquirir por separado.
- Page 79 Su nuevo sistema El dispositivo de punción Accu-Chek FastClix 1. Capuchón 4. Palanquita Para punciones en la yema del dedo. Avance hasta una lanceta nueva. 2. Selector de profundidad de punción 5. Ventana del contador de lancetas Seleccione la profundidad de punción.
- Page 80 Póngase en contacto con Accu-Chek Customer Care Service Center al 1-800-858-8072. memory Configurar los ajustes de fecha y hora, Pulse y suelte o pulse y mantenga desplazarse por los resultados de pulsado para desplazarse más...
- Page 81 Su nuevo sistema Símbolos Símbolo Descripción Símbolo del promedio de 7 días. Indica que está viendo el promedio de 7 días de sus resultados de glucemia. Símbolo del promedio de 14 días. Indica que está viendo el promedio de 14 días de sus resultados de glucemia. Símbolo del promedio de 30 días.
- Page 82 Su nuevo sistema Ajustar la hora y la fecha set-up set-up Pulse y suelte para Pulse y mantenga pulsado Pulse para guardar la hora y encender el medidor. hasta que aparezca set-up en pasar al campo siguiente. la pantalla. La hora parpadea. En la pantalla aparece el símbolo de la tira reactiva Pulse ...
- Page 83 El dispositivo de punción Accu-Chek FastClix Usar el dispositivo de punción Accu-Chek FastClix • El capuchón negro solo es apto para punciones en la yema del dedo. • Recuerde que la abertura por la que sale la lanceta no se encuentra en el centro del capuchón.
- Page 84 El dispositivo de punción Accu-Chek FastClix Insertar un cartucho de lancetas Para que el dispositivo de punción esté listo para usar, es necesario insertar un cartucho de lancetas primero en el dispositivo de punción. Retire el capuchón. Deslice el capuchón hasta que Ahora puede usar la primera pare y la muesca del capuchón...
- Page 85 El dispositivo de punción Accu-Chek FastClix Usar el dispositivo de punción Accu-Chek FastClix Usar el dispositivo de punción Accu-Chek FastClix Obtenga una gota de sangre. Consulte el capítulo Mediciones de glucemia. Ajuste la profundidad de Ajuste la profundidad de punción girando el selector de punción girando el selector de...
- Page 86 El dispositivo de punción Accu-Chek FastClix Cambiar el cartucho de lancetas Cambie el cartucho de lancetas después de usar la sexta y última lanceta. Retire el capuchón. Agarre el cartucho de lancetas con los dedos pulgar e índice y tire de él directamente hacia fuera.
- Page 87 Si el medidor muestra la unidad de medida incorrecta, póngase en contacto con Accu-Chek Customer Care Service Center al 1-800-858-8072. La unidad de medida correcta en EE.UU. es mg/dL. Si no sabe cuál es la unidad de medida correcta para Ud., póngase en contacto con el personal sanitario que...
- Page 88 Mediciones de glucemia Usar el sistema Accu-Chek Guide Me • Las tiras reactivas Accu-Chek Guide son aptas para realizar mediciones de glucemia en sangre capilar fresca total. • Use únicamente tiras reactivas Accu-Chek Guide. • Use la tira reactiva inmediatamente después de retirarla del tubo de tiras reactivas.
- Page 89 Mediciones de glucemia ADVERTENCIA Para evitar resultados incorrectos: • Si se le ha caído el medidor, o si se le ha caído el medidor con una tira reactiva insertada, el medidor y/o la tira reactiva pueden estar dañados. Deseche la tira reactiva y realice un control del funcionamiento con una tira reactiva nueva, no usada, y solución de control para asegurarse de que el medidor y las tiras reactivas funcionan correctamente.
- Page 90 Mediciones de glucemia Realizar una medición de glucemia con sangre de la yema del dedo Consulte el apartado Información importante de seguridad al principio de estas instrucciones de uso. NOTA • Antes de realizar la primera medición de glucemia, ajuste la hora y la fecha del medidor. •...
- Page 91 Mediciones de glucemia Retire una tira reactiva del tubo Inserte el extremo metálico de de tiras reactivas. la tira reactiva en el medidor. El medidor se enciende. Cierre el tubo herméticamente con la tapa. Cuando aparezca el símbolo de Presione firmemente el la gota parpadeando, obtenga dispositivo de punción contra el una gota de sangre.
- Page 92 Mediciones de glucemia Roce el borde amarillo de la Retire el dedo de la tira reactiva Apriétese ligeramente el dedo para estimular el flujo de tira reactiva con la gota de cuando aparezca el símbolo sangre. Esto le ayuda a obtener sangre.
- Page 93 Si está interesado en el procedimiento AST, póngase primero en contacto con el personal sanitario que le atiende. Para obtener un capuchón AST e instrucciones detalladas para el procedimiento AST, póngase en contacto con Accu-Chek Customer Care Service Center al 1-800-858-8072.
- Page 94 Mediciones de glucemia Resultados de glucemia no esperados Si su resultado de glucemia no coincide con cómo se siente, siga estos pasos: 1. Realice un control del funcionamiento. Consulte el capítulo Controles del funcionamiento. 2. Repita la medición de glucemia. Si su resultado de glucemia aún no coincide con cómo se siente, siga las instrucciones del personal sanitario que le atiende o póngase en contacto con él inmediatamente.
- Page 95 Mediciones de glucemia Síntomas de un nivel de glucemia bajo o alto ADVERTENCIA El medidor está diseñado para proporcionar un valor numérico para la glucemia en el intervalo de 20–600 mg/dL. El conocimiento de los síntomas de un nivel de glucemia bajo o alto puede ayudarle a interpretar los resultados de medición y a decidir cómo actuar si obtiene resultados de medición no esperados.
- Page 96 Mediciones de glucemia...
- Page 97 • La solución de control puede manchar los tejidos. Elimine las manchas con agua y jabón. • La solución de control está disponible a la venta. Para adquirir la solución de control, consulte al farmacéutico o visite accu-chek.com para hacer un pedido por internet.
- Page 98 Controles del funcionamiento Realizar un control del funcionamiento NOTA • La mayoría de personas sólo realizan el control del nivel 1. Si lo desea, también puede realizar el control del nivel 2. Puede adquirir un paquete de solución de control que incluya el nivel 1 y el nivel 2. •...
- Page 99 Controles del funcionamiento Inserte el extremo metálico El medidor se enciende. de la tira reactiva en el Aparece el símbolo de la medidor. Coloque el gota parpadeando. medidor en una superficie plana. Roce el borde amarillo de la Seleccione la solución de Retire la tapa del frasco.
- Page 100 Controles del funcionamiento En la pantalla aparecen el resultado de control, el símbolo del Cuando hay suficiente frasco y L1 o L2 parpadeando. Pulse para confirmar el nivel solución de control en la tira de control que ha utilizado. reactiva, aparece el símbolo parpadeando.
- Page 101 ¿Aún no está seguro de cuál es la causa? Póngase en contacto con Accu-Chek Customer Care Service Center al 1-800-858-8072.
- Page 102 Controles del funcionamiento...
- Page 103 Consultar datos Resumen • El medidor guarda automáticamente hasta 720 resultados de glucemia en la memoria con la hora y la fecha de la medición. • Cuando ya hay 720 resultados de glucemia guardados en la memoria, al añadir un resultado de glucemia nuevo se borra el resultado más antiguo.
- Page 104 Consultar datos Consultar resultados de glucemia en la memoria memory memory Con el medidor apagado, Pulse para consultar pulse o para resultados de glucemia consultar los resultados de anteriores desde el más glucemia guardados en la reciente al más antiguo. memoria.
- Page 105 Consultar datos Ver promedios de 7, 14, 30 y 90 días memory memory memory Con el medidor apagado, Con el resultado de glucemia Pulse para desplazarse pulse o para más reciente en la pantalla, por los promedios de 7, 14, consultar los resultados de pulse ...
- Page 106 Consultar datos...
- Page 107 Comunicación inalámbrica, sincronización del medidor y transferencia de datos Resumen El procedimiento para establecer una conexión entre el medidor y el dispositivo móvil se denomina sincronización. Necesitará una aplicación en el dispositivo móvil que pueda aceptar los datos del medidor. Puede usar esta aplicación para sincronizar de modo inalámbrico y automáticamente su información sobre la diabetes entre el medidor y el dispositivo móvil.
- Page 108 Comunicación inalámbrica, sincronización del medidor y transferencia de datos En su medidor En su dispositivo móvil Siga las instrucciones de la aplicación y seleccione su medidor. Cuando el dispositivo lo solicite, introduzca el número PIN de 6 cifras. El medidor seleccionado se desactiva 30 segundos después de que se le haya solicitado que introduzca el PIN.
- Page 109 Comunicación inalámbrica, sincronización del medidor y transferencia de datos Desactivar la conexión Bluetooth Desactive la conexión Bluetooth para deshabilitar la comunicación inalámbrica (modo avión). Al desactivar la conexión Bluetooth no se desactivará la sincronización del medidor. Con el medidor apagado, Pulse y mantenga pulsado ...
- Page 110 Comunicación inalámbrica, sincronización del medidor y transferencia de datos Activar la conexión Bluetooth Si ha desactivado la conexión Bluetooth (modo avión), siga los pasos siguientes para volver a activarla. De este modo se habilitará la comunicación inalámbrica con el dispositivo móvil. Con el medidor apagado, Pulse y mantenga pulsado ...
- Page 111 Comunicación inalámbrica, sincronización del medidor y transferencia de datos Transferencia de datos con un cable USB Esta función permite transferir datos mediante cable USB desde el medidor al software especial para el tratamiento de la diabetes de una computadora. Inicie el software para el tratamiento de la diabetes en la computadora e inicie una...
- Page 112 Comunicación inalámbrica, sincronización del medidor y transferencia de datos...
- Page 113 • Roche ha demostrado que el producto es apto para ser usado durante 5 años, después de probarlo con un total de 260 ciclos de desinfección (lo que equivale a limpiar y desinfectar el producto una vez por semana durante 5 años).
- Page 114 Accu-Chek Customer Care Service Center al 1-800-858-8072: residuos alrededor de los botones, pantalla turbia, mal funcionamiento de los botones, resultados de control fuera del rango aceptable.
- Page 115 Limpiar y desinfectar el medidor y el dispositivo de punción Cómo limpiar y desinfectar el medidor ADVERTENCIA Si no se siguen estas instrucciones, el medidor puede sufrir daños o dejar de funcionar correctamente. • NO limpie ni desinfecte el medidor mientras realiza una medición de glucemia o un control del funcionamiento.
- Page 116 Limpiar y desinfectar el medidor y el dispositivo de punción Lávese las manos con agua y jabón y séqueselas completamente.
- Page 117 Accu-Chek Customer Care Service Center al 1-800-858-8072: residuos alrededor de los botones, dificultad para tensar el dispositivo de punción, dificultad para insertar el cartucho de lancetas.
- Page 118 Limpiar y desinfectar el medidor y el dispositivo de punción Cómo limpiar y desinfectar el dispositivo de punción ADVERTENCIA Si no se siguen estas instrucciones el dispositivo de punción puede sufrir daños o dejar de funcionar correctamente. • NO deje que entre humedad en las aperturas. •...
- Page 119 Si tiene problemas con el medidor, si se le ha caído el medidor o piensa que los resultados obtenidos no son correctos, realice un control del funcionamiento con una tira reactiva y una solución de control no caducadas. Si el resultado de control está fuera del rango aceptable, póngase en contacto con Accu-Chek Customer Care Service Center al 1-800-858-8072.
- Page 120 • Nunca tome decisiones terapéuticas basadas en un mensaje de error. • Si tiene dudas o ve cualquier otro mensaje de error en la pantalla, póngase en contacto con Accu-Chek Customer Care Service Center al 1-800-858-8072. NOTA • El código de error y Err se alternarán en la pantalla para todos los mensajes de error...
- Page 121 • La pantalla está estropeada. / consultar resultados de El medidor está defectuoso. glucemia. Póngase en contacto con Accu-Chek Customer Care Service Center al 1-800-858-8072. • Temperaturas extremas. Coloque el medidor en un área con una temperatura...
- Page 122 Mantenimiento del medidor y solución de problemas El medidor está conectado a El medidor no ha podido una computadora y no es sincronizarse con un dispositivo posible realizar una medición móvil. de glucemia o un control del Intente realizar la sincronización funcionamiento.
- Page 123 Mantenimiento del medidor y solución de problemas (El código de error y Err se alternarán en la pantalla.) (El código de error y Err se alternarán en la pantalla.) Se ha producido un error en el medidor o en la tira reactiva. La tira reactiva puede estar Repita la medición de glucemia.
- Page 124 Mantenimiento del medidor y solución de problemas (El código de error y Err se alternarán en la pantalla.) (El código de error y Err se alternarán en la pantalla.) La tira reactiva no ha absorbido suficiente sangre La sangre o la solución de control se ha aplicado o solución de control para realizar la medición de a la tira reactiva antes de que apareciera en la glucemia o el control del funcionamiento o la...
- Page 125 Mantenimiento del medidor y solución de problemas (El código de error y Err se alternarán en la pantalla.) (El código de error y Err se alternarán en la pantalla.) Las pilas pueden estar gastadas. Los ajustes de la hora y de la fecha podrían ser incorrectos.
- Page 126 Puede haber líquido o materiales extraños en la Se ha producido un error electrónico. ranura de la tira reactiva. Póngase en contacto con Accu-Chek Customer Retire la tira reactiva y vuelva a insertarla o Care Service Center al 1-800-858-8072. repita la medición de glucemia o el control del funcionamiento con una tira reactiva nueva.
- Page 127 Datos técnicos Limitaciones del producto Encontrará la información más actualizada sobre las especificaciones y las limitaciones del producto en los prospectos que acompañan a las tiras reactivas y a las soluciones de control. Especificaciones Volumen de sangre Consulte el prospecto de las tiras reactivas. Tipo de muestra Tiempo de medición Intervalo de medición...
- Page 128 Datos técnicos Especificaciones Tipo de medidor El medidor Accu-Chek Guide Me es apropiado para uso continuo. Condiciones para el Consulte el prospecto de la solución de control. almacenamiento de la solución de control Interfaces USB: conector micro B; tecnología Bluetooth de baja energía;...
- Page 129 Datos técnicos Compatibilidad electromagnética – El medidor cumple los requisitos de emisiones electromagnéticas según EN ISO 15197. Como base de los ensayos de inmunidad a descargas electrostáticas se utilizó el estándar básico IEC 61000-4-2. Además, el medidor cumple los requisitos de emisiones electromagnéticas según EN 61326-2-6 / EN 60601-1-2.
- Page 130 Análisis de rendimiento – Consulte el prospecto de las tiras reactivas. Método de medición – Consulte el prospecto de las tiras reactivas. Protocolo de comunicación – El medidor de glucemia Accu-Chek Guide Me posee la certificación Continua Certified. La certificación Continua Certified significa que este producto cumple las normas aplicables IEEE 11073-10417 y que ha sido probado y certificado conforme a las Directrices de diseño...
- Page 131 Roche tiene un firme compromiso con el reciclaje y la sostenibilidad. Cumpla todas las leyes u ordenanzas relativas a la eliminación de objetos punzantes y/o productos contaminados. Póngase en contacto con el departamento local de salud o las autoridades pertinentes para obtener más información sobre la...
- Page 132 Datos técnicos Explicación de los símbolos En el envase, en la placa de características y en las instrucciones de uso del medidor Accu-Chek Guide Me puede que encuentre los siguientes símbolos. Precaución, observe las advertencias de seguridad en las instrucciones de uso del producto.
- Page 133 Tiras reactivas: Tiras reactivas Accu-Chek Guide Soluciones de control: Soluciones de control Accu-Chek Guide Lancetas: 102 lancetas Accu-Chek FastClix (17 cartuchos de 6 lancetas cada uno) Referencias bibliográficas Notificación de salud pública de la FDA: “Use of Fingerstick Devices on More than One Person Poses Risk for Transmitting Bloodborne Pathogens: Initial Communication, (2010).
- Page 134 Datos técnicos...
- Page 135 Esta garantía carece de validez para el funcionamiento de un medidor Accu-Chek Guide Me que haya sido dañado por accidente o alterado, usado indebidamente, manipulado o maltratado en modo alguno. Roche tratará los medidores que presenten daños o abusos de acuerdo con su Póliza de servicio sin garantía descrita en la página siguiente.
- Page 136 Póliza de servicio sin garantía La Póliza de servicio sin garantía de Roche se aplica en caso de que la garantía mencionada arriba no se haya hecho efectiva, sea inaplicable o haya expirado. A su discreción, Roche reemplazará los medidores que se le devuelvan a cambio de un pago en concepto de servicio (el cual no excederá...
- Page 137 La licencia para usar el sistema Accu-Chek Guide Me es necesaria hasta que expire la patente mencionada más arriba con la fecha de expiración más tardía y sólo se concede si el medidor Accu-Chek Guide Me se usa con las tiras reactivas Accu-Chek Guide.
- Page 138 7,322,998 (expira el 3 de marzo de 2020) y 7,785,338 (expira el 5 de enero de 2026). La licencia para usar el sistema Accu-Chek FastClix es necesaria hasta que expire la patente mencionada más arriba con la fecha de expiración más tardía y solo se concede si los cartuchos de lancetas Accu-Chek FastClix se usan con el dispositivo de punción Accu-Chek FastClix.
- Page 139 Índice botón, funciones 7, 10 mantenimiento, medidor 51 medición de glucemia, realizar 20 medición en lugares alternativos 23 cartucho de lancetas, cambiar 16 medidor, limpiar y desinfectar 44 cartucho de lancetas, insertar 14 memoria 34 comunicación inalámbrica mensajes de error 50 desactivar (modo avión) 39 sincronización 37 sincronizar hora 33, 38...
- Page 140 Índice...
- Page 141 Índice...
- Page 142 Índice...
- Page 144 Indianapolis, IN 46256 www.accu-chek.com ACCU-CHEK, ACCU-CHEK GUIDE, ACCU-CHEK GUIDE ME, and FASTCLIX are trademarks of Roche. CONTINUA, the CONTINUA logos and CONTINUA CERTIFIED are trademarks, service marks, or certification marks of the Continua Health Alliance. CONTINUA is a registered trademark in some, but not all, countries in which this product is distributed.
Need help?
Do you have a question about the ACCU-CHEK and is the answer not in the manual?
Questions and answers