Table of Contents
Advertisement
Quick Links
Advertisement
Table of Contents
Troubleshooting

Related Manuals for Roche Accu-Chek Advantage


Summary of Contents for Roche Accu-Chek Advantage
- Page 1 Owner’s Booklet...
- Page 3 Dear ACCU-CHEK System Owner, www.accu-chek.com 1-800-858-8072.
- Page 4 The ACCU-CHEK Advantage System* Your new ACCU-CHEK Advantage meter and accessories work together to measure the amount of sugar (glucose) in your blood to help you and your doctor control your diabetes. The system includes: • ACCU-CHEK Advantage meter •...
- Page 5 ( diagnostic use). It should not be used to diagnose diabetes. • Be sure to use only ACCU-CHEK Comfort Curve test strips or ACCU-CHEK Advantage test strips with the meter. Other test strips may produce inaccurate results. •...
- Page 6 Health-Related Information • Certain substances can interfere with the ACCU-CHEK Advantage blood glucose system and cause falsely high results. For example, if you use peritoneal dialysis solutions containing icodextrin (such as EXTRANEAL), or take certain immunoglobulin therapies that contain maltose (such as Octagam 5%), it will cause inaccurate results.
- Page 7 Special Information for Health Care Providers and Caregivers • Do not use this device to measure blood glucose in people who are experiencing cardiovascular collapse (severe shock) or decreased peripheral blood flow. • Children should be taught how to use the meter and any other medical products appropriately. ACCU-CHEK Customer Care Service Center 1-800-858-8072...
-
Page 8: Table Of Contents
Setting the Beeper ......................13 Setting the Hypoglycemic (Hypo) Indicator ................14 Coding the Meter ........................15 Using Your Test Strips ......................16 Using ACCU-CHEK Comfort Curve Test Strips............17 Using ACCU-CHEK Advantage Test Strips..............17 Chapter 2: Control Testing..................19 Why Run Control Tests......................19 About the Control Solution ....................19 Running a Control Test .......................20... - Page 9 Proper Testing Conditions ....................28 Understanding Your Test Results ..................28 Chapter 4: Using Your Meter’s Memory..............30 Storing Test Results......................30 Viewing Test Results......................30 Downloading Your Meter to a Computer................31 Chapter 5: Maintenance and Troubleshooting ............32 Cleaning Your Meter ......................32 Maintenance and Testing....................33 Cleaning Your Lancet Device ....................33 Screen Messages and Troubleshooting................34 Chapter 6: Technical...
-
Page 10: Chapter 1: Understanding Your New System
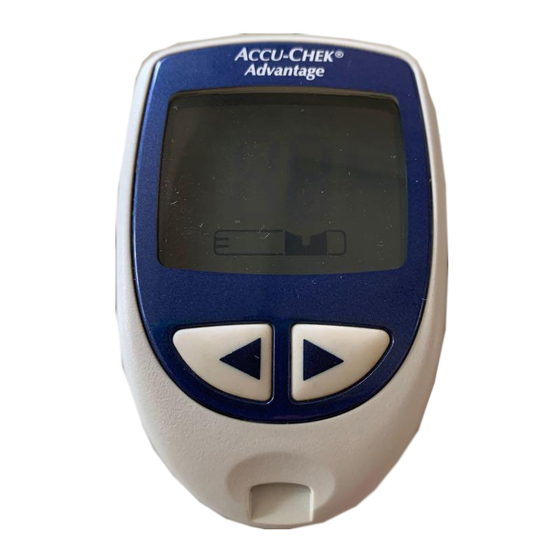
Chapter 1: Understanding Your New System* On/Off Button – Computer Display – Shows blood sugar Press this button to Port turn the meter on or results, messages, and results stored off. in memory. Code Key in Slot – Left and Right Insert code key Test Strip Slot –... - Page 11 Protective Silver-colored bars Cover Yellow Window Test Strip Lancet Test Strip Vial Cap with Comfort Dial Release Button Depth Selection Lancet Device Ejector Plunger...
-
Page 12: Installing (Or Changing) The Battery
Installing (or Changing) the Battery 1. Flip open the battery cover by pushing tab toward arrow. 2. Insert the battery with the plus (+) side up or facing you. 3. Replace the battery cover and snap it closed. Notes: • The meter uses a 3-volt lithium battery. It is best to use a long- lasting lithium battery and to keep an extra package on hand. -
Page 13: Setting The Time And Date
Setting the Time and Date Setting the time and date is important if you use the meter’s memory or connect to a computer. 1. Press and release (On/Off button) to turn on the meter. Wait for the flashing test strip “---”... - Page 14 4. Press and release either (left or right arrow button) to change the hour. 5. Repeat steps 3 and 4 to set the minutes, month, day and year. (The flashing number is the one that can be changed.) 6. Press and hold down finish setup.
-
Page 15: Setting The Beeper
Setting the Beeper When you first get your meter, the beeper is set to “On” (but you can turn it off and not affect your test results in any way). It beeps whenever: • A strip is inserted. • An error occurs while testing. The beeper sounds when an error occurs, even if the •... -
Page 16: Setting The Hypoglycemic (Hypo) Indicator
Setting the Hypoglycemic (Hypo) Indicator You may set the meter to warn you when your results indicate hypoglycemia (low blood sugar) anywhere between 60-80 mg/dL. Before you set the hypoglycemic indicator, ask your healthcare professional to help you decide what level is best for you. New meters have the hypo indicator turned off by default. -
Page 17: Coding The Meter
Coding the Meter ▲ A new code key is included in every box of test strips. Change the code key every time you open a new box of test strips. 1. Remove and throw away the old Notes: code key. •... -
Page 18: Using Your Test Strips
Using Your Test Strips You may use either ACCU-CHEK Comfort Curve or ACCU-CHEK Advantage test strips with this meter. For accurate results, use only these test strips. • Replace the code key and run a control test every time Throw the test strips away. If the “Use By” date is you begin using a new box of test strips. -
Page 19: Using Accu-Chek Comfort Curve Test Strips
– of the yellow window. This owner’s booklet will help you learn to test with ACCU-CHEK Comfort Curve test strips. Using ACCU-CHEK Advantage Test Strips Silver-colored bars Yellow window Touch and hold a drop to the top –... - Page 20 Chapter 1: Understanding Your New System ACCU-CHEK Customer Care Service Center 1-800-858-8072...
-
Page 21: Chapter 2: Control Testing
Chapter 2: Control Testing Why Run Control Tests Running a control test lets you know that the meter and test strips are working properly. You should run a control test when: • You open a new box of test strips •... -
Page 22: Running A Control Test
Running a Control Test For control testing, you’ll need your meter, a test strip, the bottle of control solution, and a napkin or paper towel. 1. Insert a test strip with silver-colored bars into the meter, yellow window facing up. 2. -
Page 23: Understanding Control Test Results
Understanding Control Test Results When a control test result is within the acceptable range, your test strips and meter are working properly. Range (mg/dL) The label on your test strip vial shows the acceptable ranges for Level 1 (LO) 42–72 tests with Level 1 and Level 2 control solutions. -
Page 24: Troubleshooting Checks
Troubleshooting Checks Action 1. Check the expiration dates of the test strips Replace solution or strips that have expired or solution you opened more than three months ago. and control solutions. If either has been open for a while, replace the 2. -
Page 25: Chapter 3: Testing Your Blood Sugar
Chapter 3: Testing Your Blood Sugar Preparing the ACCU-CHEK Softclix Lancet Device 3. Twist off the lancet’s 1. Pull off the cap. 2. Insert a lancet until it clicks. protective cover. Note: You can refer to the First Time Guide or the Quick Reference Guide for a simple testing summary. - Page 26 4. Snap the cap back on after 5. Twist the cap to set the lancet 6. Press the plunger (like a pen) until it lining up the notches. The depth. Start at 2 or 3. For clicks. The release button turns cap easily snaps into tougher skin dial to a higher yellow when the device is ready.
-
Page 27: Running A Blood Sugar Test
Running a Blood Sugar Test Before running your first test, make sure you set up your meter properly and run a control test. See Chapters 1 and 2 for details. 1. Wash and dry your hands. 2. Take one test strip from the test strip vial. Close the test strip vial cap tightly. - Page 28 6. Gently squeeze your fingertip until you get a drop of blood. 7. Touch and hold the blood drop to the edge – not the top – of the yellow window. Make sure the yellow window fills completely. If you still see yellow, apply another drop of blood within 15 seconds or start over with a new test strip.
-
Page 29: Flagging Test Results
Flagging Test Results To help you remember specific events that might have influenced your results, you can add a flag (asterisk) to mark those results. 1. Perform a blood test. 2. While a test result is displayed and the test strip is still in the meter, press and release either . -
Page 30: Proper Testing Conditions
Proper Testing Conditions • The temperature range must be between 57 °F to 104 ºF (14 °C to 40 ºC). At temperatures outside this range, the results are displayed with a thermometer symbol. • Humidity must be below 85% so that moisture doesn’t condense on or inside the meter. •... -
Page 31: Symptoms Of High Or Low Blood Sugar
Symptoms of High or Low Blood Sugar Being aware of the symptoms of high or low blood sugar can help you understand your test results and decide what to do if they seem unusual. Here are the most common symptoms: High blood sugar (hyperglycemia): fatigue, increased appetite or thirst, frequent urination, blurred vision, headache, or general aching. -
Page 32: Chapter 4: Using Your Meter's Memory
Chapter 4: Using Your Meter’s Memory Viewing Test Results Storing Test Results Your meter automatically stores up to 480 test 1. Press and release either (left or right arrow button) to enter the meter’s results, and you can review them at any time. memory. -
Page 33: Downloading Your Meter To A Computer
Notes: ▲ Do not change your therapy based on an individual result recorded in memory. Talk to your doctor before changing therapy based on results in memory. • Results stored in memory will not be lost when you replace the battery, but you will be prompted to verify time and date if previously set. -
Page 34: Chapter 5: Maintenance And Troubleshooting
Chapter 5: Maintenance and Troubleshooting Cleaning Your Meter Caring for your ACCU-CHEK Advantage meter is easy – just keep it free of dust. But if you need to clean it, following these guidelines carefully will help you get the best performance possible: Do Not •... -
Page 35: Maintenance And Testing
Maintenance and Testing Your meter needs little or no maintenance with normal use. It automatically tests its own systems every time you turn it on and lets you know if something is wrong. (See “Screen Messages and Troubleshooting” for error messages and what to do about them.) If you drop the meter or think it’s not giving accurate readings, make sure that your test strips and control solution haven’t expired, then run a control test (see “Control Testing”). -
Page 36: Screen Messages And Troubleshooting
Screen Messages and Troubleshooting ▲ Never make treatment decisions based on an error message. If you have any concerns, please call the ACCU-CHEK Customer Care Service Center at 1-800-858-8072, 24 hours a day, 365 days a year. The meter isn’t coded or the The meter is ready for a drop of code key isn’t all the way in. - Page 37 Battery power is low. Change the Your blood sugar result is below your battery soon. defined hypo (low blood sugar) level. Battery is almost out of power. The meter is being operated outside of Change the battery now. the appropriate temperature range, which is between 57 °F and 104 ºF (14 °C and 40 °C).
- Page 38 This test result was flagged. The code key is faulty or was See “Flagging Test Results.” removed while the meter was on. Turn off the meter and reinsert the code key. If this doesn’t fix the problem, call the ACCU-CHEK Customer Care Service Center at 1-800-858-8072.
- Page 39 The meter has failed its internal Average can not be calculated. electronic checks. Turn the meter No results obtained on meter for off, then on again. If you still see last 7 days. this display, call the ACCU-CHEK Customer Care Service Center at 1-800-858-8072.
-
Page 40: Chapter 6: Technical Information
One 3-volt lithium battery type 2032 (CR 2032, DL 2032 or equivalent) Data port Multiplexed TTL UART Protection class Meter type The ACCU-CHEK Advantage meter is suitable for continuous operation Blood volume Refer to the test strip package insert Measuring range Refer to the test strip package insert... -
Page 41: Product Safety Information
0.80, 0.95, 1.10, 1.25, 1.40, 1.55, 1.70, 1.85, 2.00, 2.15, 2.30 mm Product Safety Information Explanation of Symbols CAUTION 3-volt battery The ACCU-CHEK Advantage meter This product fulfills the has been listed by Underwriter’s requirements of Directive Please refer to safety-related (CR 2032) Laboratories, Inc.‚... - Page 42 Roche Diagnostics will replace it with a new ACCU-CHEK Advantage meter or equivalent product free of charge. The warranty of the replacement meter will expire on the date of the original warranty expiration or 90 days after the shipment of a replacement system, whichever period is longer.
- Page 43 This warranty does not apply to the performance of an ACCU-CHEK Advantage meter that has been damaged by accident or has been altered, misused, tampered with, or abused in any way. Roche Diagnostics will handle meters that show damage or abuse according to its Non-Warranty Service Policy described below.
-
Page 44: Warranty And Service Instructions
CAUTION: A RESTRICTED LICENSE LIMITS USE OF THE ACCU-CHEK ADVANTAGE SYSTEM – READ CAREFULLY THE LIMITATIONS RECITED BELOW. The ACCU-CHEK Advantage system (meter, including the code key, and test strips) and its use are protected by U.S. Patent Nos. 5,508,171; 5,288,636; 5,405,511; 5,366,609; 5,762,770 (applies only to Advantage test strips) and 5,352,351. -
Page 45: Patent Information
If you do not agree to the terms and conditions of the restricted license, you may return, at the place of purchase, the unused ACCU-CHEK Advantage system for a full refund. If you have any questions, please call the ACCU-CHEK Customer Care Service Center at 1-800-858-8072. -
Page 46: Additional Supplies
ACCU-CHEK Comfort Curve test strips Cat. Nos. 2030365, 2030373, 2030381, 3000141 Control Solutions ACCU-CHEK Comfort Curve control solutions Cat. Nos. 2030390, 2030411 ACCU-CHEK Advantage control solutions Cat. Nos. 552, 986, 989 Lancets ACCU-CHEK Softclix lancet device Cat. No. 957 ACCU-CHEK Softclix lancets Cat. -
Page 47: Information For Professional Caregivers
Information for Professional Caregivers ▲ Healthcare Professionals: Follow the infection control procedures appropriate for your facility. References 1. Stedman, TL, 27th Edition, 1999, p. 2082. 2. American Diabetes Association, “Clinical Practice Recommendations 2003.” , Vol. 26, Supplement 1, p. S22. If you need to throw your meter away: The European Union has a requirement aimed at improving waste management practices for certain electronic equipment. -
Page 48: Index
Index control test, running 19–20 limited license, 42 control test, unacceptable logging results, 27 appetite, increased, 29 range, 21–22 low blood sugar, 29 battery, changing, 10 dehydration, 4 maintenance, meter, 32–33 battery, installing, 10 depth, lancet, 24, 39 memory, meter, 30–31 battery, type, 10 diary, 27 meter, coding, 15... - Page 49 28 test results, unusual, 29 test strips, ACCU-CHEK Advantage, 17 test strips, ACCU-CHEK Comfort Curve, 17 thirst, increased, 29 time and date, setting, 11–12 tingling, 29 trembling, 29 troubleshooting, 32–37 warranty, 40– 43 Index 47 47 ACCU-CHEK Customer Care Service Center 1-800-858-8072...
- Page 50 Notes Notes ACCU-CHEK Customer Care Service Center 1-800-858-8072...
- Page 52 ©2010 Roche Diagnostics. All rights reserved. Assembled in U.S.A. Roche Diagnostics 9115 Hague Road Indianapolis, IN 46256 ACCU-CHEK, ADVANTAGE, COMFORT CURVE, and SOFTCLIX are trademarks of Roche. All other product names and trademarks are the property of their respective owners. 03508501005-0310...
Need help?
Do you have a question about the Accu-Chek Advantage and is the answer not in the manual?
Questions and answers