Velux GGL INTEGRA Directions For Use Manual
Hide thumbs
Also See for GGL INTEGRA:
- Quick start manual (4 pages) ,
- User manual (216 pages) ,
- Directions for use manual (50 pages)

Subscribe to Our Youtube Channel
Related Manuals for Velux GGL INTEGRA


Summary of Contents for Velux GGL INTEGRA
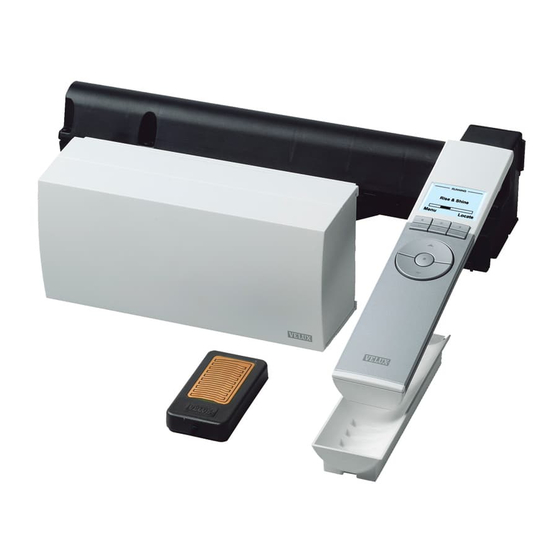
- Page 1 Directions for use GGL INTEGRA / GGU INTEGRA ® ® KMX 100 KMX 200 KLR 100 Read directions for use carefully before operating VELUX, DK-2970 Hørsholm www.VELUX.com 451452-1205...
-
Page 2: Table Of Contents
Contents Timer 30-31 Congratulations on your new VELUX product Access code Keypad lock In order to make the best use of it please read these instructions on Rearranging order 34-35 operation and maintenance. Display light Clearing remote control settings Extending the system with VELUX and... -
Page 3: Important Information
Important information Product Please keep instructions for future reference and hand them over to any new user. • This product has been designed for use with genuine VELUX products. Connection to other products may cause damage or malfunction. Safety ®... -
Page 4: Initial Set-Up
Initial set-up The initial set-up must be completed within --- LANGUAGE --- Dansk 10 minutes so please read items 1-8 before English Français proceeding. Deutsch Choose language: Enter Press to highlight your language. IMPORTANT! Press "Enter" to confirm your choice. In case of one remote control only, all products must be registered in this remote control. -
Page 5: Function Guide
Function guide House The following describes the functions of the No. 1 remote control. Window Selection keys - for activating the menu and confirming the cho- Menu Locate sen menu function. The current function of the key The display tells you which product is being is stated directly above in the display. -
Page 6: Locating And Operating A Product
Locating and operating a product More than one window To be able to operate a product (eg a blind), you first have to locate the product in question in the display. The examples show the easiest way to find the product you want to operate, and have been divided into two groups: one window or more than one window. -
Page 7: Choosing Positions And Luminous Intensity
Locating and operating a product Choosing positions and luminous intensity More than one window A product or a Group of products can be set to travel to a certain position. The example shows how to set a roller shutter to run 50% down. House Locate the product in question, see section No. -
Page 8: Menu Guide
Menu guide Navigating through the menus Guide to the menu functions of the remote control. The example shows how to find the menu item House Room by means of menu choices. No. 1 Additional information about the individual function is provided in Window the relevant section. -
Page 9: Changing Language
Changing language Definition of Room, Group and Zone You can change the display text language. To make it easier to operate especially large sys- tems it is recommended to link each product to a The example shows how to change it. Room and/or a Group. -
Page 10: Creating A Room
Creating a Room House If you have many products, Displays the product chosen. you can collate them in Press "More" to move additional products to HOUSE Rooms to make these easier Room 1. You will return to the list in item 4. Repeat --------- WINDOW --------- No. -
Page 11: Editing A Room
Editing a Room You can edit the Rooms you have created, ie one Displays a list of the individual products within the --- WINDOW --- or more products can be moved from one Room product type in question. No. 1 to another. -
Page 12: Creating A Group
Creating a Group To make it easier to operate products of the same --- ROOM 1 --- Window type simultaneously, you can create a Group. Roller shutter Blind The example shows a Room with four windows, Displays a list of the product types in Room 1. Enter Back each with a window operator. -
Page 13: Naming
Naming You can change the names of House, Rooms, --- RENAME --- Zones, Groups, products and Programs displayed into more personal names. G H I K L M N O Enter the new name using the list of characters. Enter Back The example shows how to change Room 1 into Press... -
Page 14: Recording A Program P1/P2
Recording a Program P1/P2 The program keys P1 and P2 can be used for -- RECORD PROGRAM -- Start recording by pre-setting a series of operating sequences that pressing Enter. Stop recording by can be activated by a single key pressure. pressing P1 or P2 Enter Back... -
Page 15: Activating And Interrupting A Program P1/P2
Activating and interrupting a Program P1/P2 Activating a program Interrupting a program You can activate eight programs at a time. You Icon indicates that a program has been acti- ▸ can still use the various functions of the remote vated. A program in progress can be interrupted control at the same time as one or more programs as follows: House... -
Page 16: Timer
Timer With the timer you can for example close a win- -- SET TIMER -- dow, roll down a sunscreening product or turn off Press to set the desired start position of the Start position 100% frame lights after a pre-set time interval. window when activated via the timer. -
Page 17: Access Code
Access code Keypad lock You can choose a personal access code to protect The keypad can be locked so that products can- the settings under the menu item Settings. The not be operated without unlocking the keypad. House House access code must consist of four digits from 0 to 9. The stop key can still be used. -
Page 18: Rearranging Order
Rearranging order You can benefit by having the products used most Displays a list of the individual products of the -- REARRANGE ORDER -- frequently at the top of the list. This is done by chosen product type. The individual products can No. -
Page 19: Display Light
Display light Clearing remote control settings When clearing the remote control settings, all In standard settings, the light in the display is settings for Rooms, Zones, Groups and Programs turned on when the keypad is activated and is and all personal names are deleted. The products, turned off again after 10 seconds. -
Page 20: Registering A New Product
Registering a new product When a new product has been installed, it can be --- INFORMATION --- New products registered in a remote control already in opera- The display shows that the new product has been registered tion. This new product can be a new INTEGRA registered. -
Page 21: Copying To A Remote Control Not Yet In Operation
1.5 volt) into the remote control as you can copy the settings from one remote control shown. to another. The example shows how to copy from a VELUX remote control A to a VELUX remote control B not --- LANGUAGE --- yet in operation. Dansk English Note: When copying from a VELUX remote con- Français... -
Page 22: Copying To A Remote Control In Operation
Step 4: Remote controls A and B The example shows how to copy from a VELUX remote control A to a VELUX remote control B Copy remote control A to B, see section Copy to a already in operation. -
Page 23: Registering Products From Other Types Of Control Units
Menu Locate Press "Menu". The example shows how to register products from from a one-way VELUX remote control B in a two- way VELUX remote control A. Scroll through the menus: Settings System settings Steps 1 and 2 must be completed within... -
Page 24: Copying Products To Other Types Of Control Units
(B). copied products. The example shows how to copy a roller shutter Locate the product, see section Locating and from a two-way VELUX remote control A to a one- operating a product. way VELUX remote control B. House Note: A one-way VELUX remote control can No. -
Page 25: Security Key
Security key Step 2: Remote control B (and other) Each remote control has an individual security key ensuring that external control units cannot commu- nicate with your system. The example shows how to change the security key in remote control A and in the products reg- istered in A (step 1). -
Page 26: Resetting The System
Resetting the system Step 2: Remote control The whole system, ie remote control and window with electrical products, can be reset to its initial state. To reinstate the connection between remote control and window after reset, please refer to the instructions in section Initial set-up. -
Page 27: Holder For Remote Control
Fitting of holder for remote control The remote control is provided with a wall-mounted If required, the remote control can be fastened holder, which can be fitted anywhere in your with screws to the holder. home. Note: Check that the remote control can operate the relevant products from the proposed position Fit the back section to the wall with the two screws before it is fastened to the holder. -
Page 28: Rain Sensor
If the rain sensor gets wet, the win- fer in your country. For further information, please dow operator will automatically refer to appropriate instructions or contact VELUX. close the window. The mains supply must be switched off when fi tting the... -
Page 29: Manual Operation
Manual operation of the window Closing window in case of power The window may be manually operated (A). If opened manually, it must also be closed manually. failure The chain can be disengaged by Cleaning the pane pressing the release clip on the ventilation fl... -
Page 30: Maintenance
fi lter from the fi lter ever receive treatment at least every two years. rail. (New fi lters are available from VELUX). Surface maintenance: Remove surface treatment (varnish or paint). Ensure surface is clean and dry and apply primer to the timber. -
Page 31: Display Symbols
Display symbols Glossary Adjustment: VELUX electrical decoration and sunscreening prod- Batteries must be changed within 2 weeks (type AA, 1.5 volt). ucts are not adjusted to the window size on delivery. When oper- ated the first time, they will therefore run from bottom to top or from top to bottom of the window without interruption. - Page 32 Product: A VELUX or io-homecontrol product, which can be oper- 3LA A01 and 3LR A01) for VELUX roof windows GGL and GGU and ated via the remote control such as an INTEGRA roof window, a VELUX remote control KLR 100 (3LR A01) roller shutter, a light module etc.
- Page 33 011 3670 468 VELUX Italia p.p.a. 045/6173666 www.VELUX.com IRL: VELUX Company Ltd. 01 816 1620 Directions for use for INTEGRA. Order No. VAS 451452-1205 ©2004, 2005 VELUX Group ® VELUX, the VELUX logo, INTEGRA, io-homecontrol and the io-homecontrol logo are registered trademarks...
Need help?
Do you have a question about the GGL INTEGRA and is the answer not in the manual?
Questions and answers