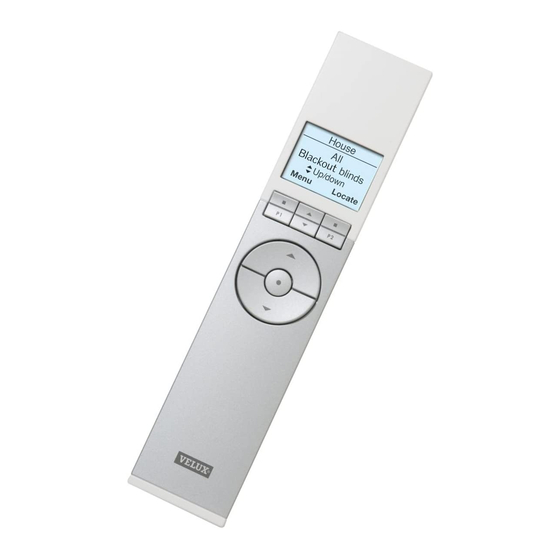
Velux KLR 100 User Manual
Vse/vce
Hide thumbs
Also See for KLR 100:
- Directions for use manual (33 pages) ,
- User manual (111 pages) ,
- User manual (80 pages)

Related Manuals for Velux KLR 100


Summary of Contents for Velux KLR 100
- Page 1 VSE/VCE KLR 100 ENGLISH: User manual ESPAÑOL: Manual del usuario FRANÇAIS : Notice d'utilisation VAS 452169-0509...
- Page 2 2 VELUX...
- Page 3 English User manual 4-73 Español Manual del usuario 74-143 Français Notice d'utilisation 144-212 VELUX 3...
-
Page 4: Table Of Contents
Contents Congratulations on your new VELUX product In order to make the best use of your product please read these instructions on operation and maintenance. Important information / Warnings Getting started Initial set-up Remote control functions 10-11 Operation Locating and operating a product... - Page 5 Resetting and preparing for registration Resetting the remote control Adjusting the opening 64-65 Fitting of holder for remote control 66-67 Use and maintenance Power failure / Mislaid remote control Maintenance Further information Display symbols Display texts Glossary ENGLISH VELUX 5...
-
Page 6: Important Information / Warnings
Therefore, in case of sudden rain, water may enter the room before the skylight is closed. • In case of snow and/or ice, the operation of the skylight may be blocked resulting in damage to the skylight. ENGLISH 6 VELUX... - Page 7 Product • This product has been designed for use with genuine VELUX products. Connection to or use with other products may cause damage, malfunction or injury. • Electrical products must be disposed of in conformity with all local codes, ordinances, rules and regulations for electronic waste and not with house- hold waste.
-
Page 8: Initial Set-Up
"Enter" to confirm your choice. Prepare products for registration. Disconnect the main power supply to the products for 1 minute and then reconnect it. The products can now be registered in the remote control within the next 10 min- utes. ENGLISH 8 VELUX... -
Page 9: Initial Set-Up
Then the information must be copied from this remote control to the other remote controls, see section Using additional activation controls. Note: The opening of the skylight operator must be adjusted if your skylight is positioned within reach, see section Adjusting the opening. ENGLISH VELUX 9... -
Page 10: Remote Control Functions
House Note: The display shows the last product operated. no. 1 The word "Window" is used for both windows and Window skylights. Menu Locate Selection, navigation and program keys Keys for operating the product chosen ENGLISH 10 VELUX... - Page 11 Long key pressure: Product will travel to pre-set position. See section Choosing positions. Stop and status key STOP / STATUS Short key pressure: The product in operation stops or the status is shown. Long key pressure: All products in operation stop. ENGLISH VELUX 11...
-
Page 12: Locating And Operating A Product
The skylight is equipped with a skylight operator and a House roller shade. no. 1 The example shows how to locate and operate the roller Blind shade. Menu Locate Press to find the roller shade (indicated as "Blind"). Press to start operation. ENGLISH 12 VELUX... -
Page 13: More Than One Skylight
The example shows how to locate and open skylight No. 2. Window Menu Locate Press to find skylight No. 2 (indicated as "Window"). Press to open the skylight. Note: You can rearrange the order of the individual products, Groups, Rooms and Zones displayed, see section Rearranging order. ENGLISH VELUX 13... -
Page 14: More Than One Skylight
To operate one of the roller shades, press and high- Enter Back light "Blind". Press "Enter". Blind no. 1 no. 2 no. 3 no. 4 Enter Back Press to highlight roller shade "No. 3". Press "Enter". Press to start operation. ENGLISH 14 VELUX... -
Page 15: Closing The Skylight Automatically
1 Window skylight is closed. Closes in 10 min Menu Locate If you close the skylight earlier than chosen, the function will be cancelled. Note: Registered products can be set to operate auto- matically via Programs. ENGLISH VELUX 15... -
Page 16: Choosing Positions
Some decoration and sunscreening products can be operated in two ways. For instance, a Venetian blind can be drawn up and down and its slats can be tilted. Once the product has been located, choose Tilt or Turn with the navigation keys ENGLISH 16 VELUX... -
Page 17: Disabling Rain Sensor
If the skylight is set to close automatically, the rain sensor will only be disabled until the skylight is closed automatic- ally. Note: It is recommended to set the skylight to close automatically to reduce the risk of water to the interior of the building. ENGLISH VELUX 17... -
Page 18: Menu Guide
Program settings Register product p. 52-53 Enter Back Copy system p. 56-57 security key p. 60-61 Configure p. 49 software version Enter Back PRogRam sEttings Enable p. 31-39 Record delete Rename Rearrange order Enter Back ENGLISH 18 VELUX... -
Page 19: Navigating Through The Menus
You can now proceed with the menu functions under menu item Room. This way of choosing menu items is shown as follows House in the rest of the instructions: no. 1 Window Menu Locate Press "Menu". Scroll through the menus: House settings Room ENGLISH VELUX 19... -
Page 20: Changing Language
The display shows a list of languages. The current lan- guage has been ticked. languagE dansk English Français deutsch Enter Back Press to highlight a new language. Press "Enter" to confirm your choice. inFoRmation sauvegardé Français The display shows that the change has been saved. ENGLISH 20 VELUX... -
Page 21: Room, Group And Zone
Groups created across more Rooms are called Zones. Room 1 Room 2 Definition of Zone A Group created across more Rooms. You can create a Zone consisting of for instance all roller shades on the skylights of the house facing west and south. ENGLISH VELUX 21... -
Page 22: Creating A Room
1 pressing for a short period of time. This will activate no. 2 the product briefly. no. 3 Enter Back Press to highlight the product to be moved to Room 1. Press "Enter" to confirm your choice. ENGLISH 22 VELUX... - Page 23 Room created The display shows that a new Room has been created. Note: Numbers are assigned in the order in which the products are moved to the Room in ques- tion. Room 1 Room 2 ENGLISH VELUX 23...
-
Page 24: Editing A Room
Displays a list of product types in the Room from which the Window product is to be moved. Blind To choose the product type skylight operator, press Enter Back and highlight "Window". Press "Enter" to confirm your choice. ENGLISH 24 VELUX... - Page 25 The display shows that several Rooms have been modified. Groups are edited according to the same principle as Rooms. Note: Numbers are assigned in the order in which the products are moved to the Room in question. ENGLISH VELUX 25...
-
Page 26: Creating A Group
"Enter" to confirm your choice. Room 1 Window Displays a list of the product types in Room 1. Blind To choose the product type skylight operator, press Enter Back highlight "Window". Press "Enter" to confirm your choice. ENGLISH 26 VELUX... - Page 27 Groups are edited according to the same principle as Rooms. group 1 Room 1 Note: When operating Groups a delayed execution of commands might occur. If you want a particular product to respond at once, this product must be operated individu- ally. ENGLISH VELUX 27...
-
Page 28: Naming
Rooms. Enter Back Press to highlight "Room 1". Press "Enter" to confirm your choice. REnamE Room 1 aBCdEFgHi Enter Back Displays a list of characters including the save function , the delete function and the space character ENGLISH 28 VELUX... - Page 29 "Enter" after each character. REnamE save KitCHEn CdEFgHi Save the new name by choosing in the list when the Enter Back last character has been entered. Press "Enter". inFoRmation saved The display shows that the new name has been saved. ENGLISH VELUX 29...
-
Page 30: Programs
P1 to close all skylights in the house and draw all blinds down by 50%. • S ynergy program A pre-defined program for control of exterior sunscreening products optimised for the European countries and based on local conditions. ENGLISH 30 VELUX... -
Page 31: My Program
• Press "Enter" to confirm your choice. Enter Edit • P ress "Edit" to select additional products from the list. Position set position save position Enter Back Press to highlight "Set position". Press "Enter" to confirm your choice. ENGLISH VELUX 31... - Page 32 : 3 0 p m Enter Back Press to set hours. Press "Enter" to confirm your setting. sEt day monday tuesday Wednesday thursday Press to select the day of the week for the skylight Select Back to be opened. Press "Select". ENGLISH 32 VELUX...
- Page 33 Press "Enter" to return to item 13. Cancel recording • P ress to highlight "Save program" to save the Enter Back program as it is. Press "Enter" to save the program. ENGLISH VELUX 33...
- Page 34 Enter Edit Press "Edit" to choose a starting date. Press "Enter" to confirm your setting. sEt datE End date 2008.12.31 End date: Enter Edit Press "Edit" to choose an end date. Press "Enter" to confirm your setting. ENGLISH 34 VELUX...
- Page 35 The enabled programs have been ticked and the disabled programs can be enabled any time you want. Note: For solar products, automatically activated pro- grams may result in a quick discharge of the battery due to frequent operation of the products. ENGLISH VELUX 35...
-
Page 36: Program Under Shortcut P1/P2
The display shows the selected product. • Press "Enter" to confirm your choice. • P ress "Edit" to select additional products from the list. Position set position save position Enter Back Press to highlight "Set position". Press "Enter" to confirm your choice. ENGLISH 36 VELUX... - Page 37 First choose minutes. Choose 0 minutes if you want the skylight to open im- Enter Back mediately. Press "Enter" to change to hours. dElay h 00 min Enter Back Press to set hours. Press "Enter" to confirm your setting. ENGLISH VELUX 37...
- Page 38 The display shows two time setting options. Press to highlight "Delay", ie the time that will pass Enter Back from pressing P1 till the product will be activated. Press "Enter" to confirm your choice. ENGLISH 38 VELUX...
- Page 39 1 "Shortcut 1". dEFgHi Press "Enter" to save the name. Enter Back Follow the instructions in section Naming to change this name. inFoRmation shortcut 1 saved under P1/P2 The display shows that Shortcut 1 has been saved. ENGLISH VELUX 39...
- Page 40 Note: Max time interval between each key pressure: Menu Locate 2 seconds. Otherwise the shortcut program that happens to be highlighted will be activated. sHoRtCut P1 shortcut shortcut shortcut shortcut Start Back Shortcut 3 is highlighted in the display and the program automatically starts. ENGLISH 40 VELUX...
- Page 41 Locate Press to find the shortcut program in progress. sHoRtCut P1 shortcut shortcut shortcut The activated shortcut program has been ticked. shortcut Stop Back Press to highlight the program in question. Press "Stop" to interrupt the program. ENGLISH VELUX 41...
-
Page 42: Time And Date
"Enter" to change to hours. sEt timE Press to set hours. 11: 0 0 a m Press "Enter" to confirm your settings. Enter Back Time is shown automatically when the remote control is in sleep mode. See section Display. ENGLISH 42 VELUX... -
Page 43: Keypad Lock
Locate The keypad has temporarily been unlocked. Menu Locate The keypad will automatically be locked again 20 seconds after it has been used. Note: The keypad lock can be deactivated by choosing "Disable" in item 3. ENGLISH VELUX 43... -
Page 44: Display
"Display light". Press "Enter" to confirm your choice. disPlay ligHt Enter Back Press to highlight "Off". Press "Enter" to confirm your choice. Note: The light in the display can be turned on by choosing "On" in item 4. ENGLISH 44 VELUX... -
Page 45: Sleep Mode
"Enter" to confirm your choice. 03:43 am When the remote control is in sleep mode, time is shown. Note: Choose "Off" in item 4 if you do not want the remote control to go into sleep mode. ENGLISH VELUX 45... -
Page 46: Rearranging Order
Window Blind Displays a list of the product types in Room 2. Press to highlight the product type where the order of Enter Back the individual products is to be rearranged. Press "Enter" to confirm your choice. ENGLISH 46 VELUX... - Page 47 5-7 until the required order of products has been Save More obtained. • Press "Save" to save the rearranged product order. inFoRmation order rearranged The display shows that the order has been rearranged. ENGLISH VELUX 47...
-
Page 48: Access Code
"Save" to confirm and save the code. Every time you now choose Menu, you must enter the ac- cess code before you can proceed. Note: The access code can be cancelled by choosing "Delete" in item 3. ENGLISH 48 VELUX... -
Page 49: Software Version
Software version When addressing technical inquiries to VELUX, you will be asked to provide the version number of the software in the remote control. To find this proceed as follows: Room 1 no. 1 Window Menu Locate Press "Menu". Scroll through the menus:... -
Page 50: Clearing Remote Control Settings
The display asks whether you want to clear all Groups, Rooms/Zones/ Rooms, Zones, Programs and personal names you might Programs/names have created. • Press "Yes" to confirm your choice. • Press "No" to cancel your choice. The remote control settings are cleared. ENGLISH 50 VELUX... - Page 51 ENGLISH VELUX 51...
-
Page 52: Registering New Products
Select the submenu: system settings systEm sEttings Register product Copy system security key Configure Enter Back Press to highlight "Register product". Press "Enter" to confirm your choice. auto sEt-uP Registration is running. This can take up to two minutes. ENGLISH 52 VELUX... - Page 53 Operation can start. Where more than one remote control is used, new prod- ucts can also be operated with these. To do this, register the new products in each remote control by repeating items 2-9 for each of them. ENGLISH VELUX 53...
-
Page 54: Using Additional Activation Controls
How to copy the contents from one remote control to another remote control where the two remote controls have not registered the same products. Note: When copying between two VELUX remote controls, all registered products and personal settings are copied, apart from personal programs that cannot be copied. - Page 55 ENGLISH VELUX 55...
-
Page 56: Copying To A New Remote Control
Select the submenu: system settings systEm sEttings Register product Copy system security key Configure Enter Back Press to highlight "Copy system". Press "Enter" to confirm your choice. Step 2 must now be completed within the next two min- utes. ENGLISH 56 VELUX... - Page 57 "Register" to start registration of each product. Register Info Please disregard the information in the display. The display now indicates that copying is in progress. Remote control B can now operate the same products as remote control A. ENGLISH VELUX 57...
-
Page 58: Copying To A Remote Control In Operation
Register all products in remote control B by choosing: menu system settings Register product Remote control B can now also operate both the products from remote control A and the products it could already operate. After this both remote controls can operate all products. ENGLISH 58 VELUX... - Page 59 A with all personal settings such as Names, Rooms and Groups, you must proceed differently after step 2. First reset remote control B, see section Resetting the remote control. Then copy from remote control A as described in section Copying to a new remote control. ENGLISH VELUX 59...
-
Page 60: Security Key
Change security • P ress "No" to finish if this is the only remote control key in another being changed. remote control • P ress "Yes" if there are other remote controls. Execute step 2 for these. ENGLISH 60 VELUX... -
Page 61: Security Key
KEy Change Receive Press to highlight "Receive". Press "Enter" to confirm your choice. Enter Back The display indicates that the security key is being trans- ferred from remote control A to remote control B. ENGLISH VELUX 61... -
Page 62: Resetting And Preparing For Registration
Therefore the products cannot be operated until they have been registered in a remote control again. To reinstate the connection between product and remote control after reset, please refer to the instructions in section Initial set-up. ENGLISH 62 VELUX... -
Page 63: Resetting The Remote Control
Press "Yes" to confirm that you want to reset the remote control. The remote control has now been reset. To reinstate the connection between remote control and products, please refer to the instructions in section Initial set-up. ENGLISH VELUX 63... -
Page 64: Adjusting The Opening
When the skylight has stopped at the desired opening, press briefly with a pointed object through operator cover hole marked A to accept the new opening setting. The skylight closes. ENGLISH 64 VELUX... - Page 65 Please refer to the instructions in section Initial set-up or Registering new products. Note: The same procedure applies to a change of opening from in-reach to out-of-reach applications. ENGLISH VELUX 65...
-
Page 66: Fitting Of Holder For Remote Control
Hook the front section onto the back section at the top, click it into place at the bottom and fix it with a screw. Place the remote control in the holder. It is secured by means of built-in magnets. ENGLISH 66 VELUX... - Page 67 Ensure that the strap fits into the openings in the sides of the back section. Lock the unit into place at the bottom. Fix the unit with screw at the bottom. ENGLISH VELUX 67...
-
Page 68: Power Failure / Mislaid Remote Control
If the remote control has been mislaid The sash can be closed by inserting a pointed object in the operator cover hole marked A and pressing briefly. Note: A battery backup unit can be con- nected. Please contact VELUX for further information. ENGLISH 68 VELUX... -
Page 69: Maintenance
Cleaning the rain sensor Dirt on the rain sensor may cause operating problems. Therefore, it is recommended to clean the rain sensor with a soft wet cloth once or twice a year or when needed. ENGLISH VELUX 69... -
Page 70: Display Symbols
0 to 100%. A decoration and sunscreening product can be drawn up/ down or opened/closed from 0 to 100%. A name can be saved, see section Naming. Deletion of character, see section Naming. Space character, see section Naming. ENGLISH 70 VELUX... -
Page 71: Display Texts
Manual operation: The skylight has been opened manually. Close the sky- light manually to allow for electrical operation. Operational defect: The product has stopped during operation. Check the product. Reduced power supply: The power supply to the product has been reduced. Limited operation. ENGLISH VELUX 71... -
Page 72: Glossary
Activation control: An object by which you can actively operate an electric- al product by means of pressing one or several buttons/keys. Adjustment: VELUX electrical decoration and sunscreening products are not adjusted to the skylight size on delivery. When operated the first time, they will therefore run from bottom to top of the skylight or vice versa without interruption. - Page 73 ENGLISH VELUX 73...
- Page 74 Contenido Deseamos que disfrute de su nuevo producto VELUX Para hacer el mejor uso de él, lea estas instrucciones de funcionamiento y mantenimiento. Información importante / Advertencias 76-77 Antes de comenzar Ajuste inicial 78-79 Funciones del mando a distancia 80-81...
- Page 75 Ajustar la abertura 134-135 Colocación del soporte para el mando a distancia 136-137 Uso y mantenimiento Falta de corriente / Extravío del mando a distancia Mantenimiento Información adicional Símbolos de la pantalla Textos de la pantalla Terminología ESPAÑOL VELUX 75...
-
Page 76: Información Importante / Advertencias
Por lo tanto, en caso de lluvia repentina, podrá ingresar agua en el ambiente antes de que se cierre el tragaluz. • E n caso de nieve o hielo, el tragaluz puede bloquearse y no funcionar. ESPAÑOL 76 VELUX... - Page 77 Si el cable de alimentación se dañara, deberá ser sustituido por un electri- cista instalador habilitado de acuerdo con la legislación local. • VELUX dispone de repuestos. Facilite el código de la placa de identificación. • Para cualquier consulta técnica, póngase en contacto con VELUX.
-
Page 78: Ajuste Inicial
Presione "Enter" para confirmar. Prepare los productos para el registro. Desconecte la corriente durante un minuto y después vuelva a conectarla. Los productos podrán registrarse en el mando a distancia durante los próximos 10 minutos. ESPAÑOL 78 VELUX... - Page 79 Utilizar controles de activación adicionales. Nota: La abertura del tragaluz para el motor de apertura debe ajustarse si el tragaluz está ubicado al alcance de la mano, véase el apartado Ajustar la abertura. ESPAÑOL VELUX 79...
-
Page 80: Funciones Del Mando A Distancia
Nota: La pantalla muestra el último producto ac- nº 1 cionado. La palabra "Ventana" se utiliza tanto para ventana ventanas como para tragaluces. Menú Localizar Teclas de selección, navegación y programa Teclas para accionamiento del producto elegido ESPAÑOL 80 VELUX... - Page 81 Vea el apartado Escoger posiciones. Tecla de stop y estado STOP / ESTADO Presión breve de tecla: El producto en funcionamiento se detiene o se muestra el estado del producto. Presión prolongada de tecla: Todos los productos en funcionamiento se detienen. ESPAÑOL VELUX 81...
-
Page 82: Localizar Y Manejar Un Producto
Con productos eléctricos adicionales vivienda El tragaluz está equipado con motor de apertura y cortina enrollable. nº 1 Cortina El ejemplo muestra cómo localizar y manejar la cortina. Menú Localizar Presione para encontrar "Cortina". Presione para iniciar el funcionamiento. ESPAÑOL 82 VELUX... -
Page 83: Más De Un Tragaluz
Presione para encontrar tragaluz N° 2 (indicado como Menú Localizar "Ventana"). Presione para abrir el tragaluz. Nota: Es posible modificar el orden de los productos individuales, Grupos, Habitaciones y Zonas mostrados, vea el apartado Ordenar productos. ESPAÑOL VELUX 83... - Page 84 En la pantalla aparece la lista de tipos de productos en el área Vivienda. Aceptar Atrás Presione para seleccionar "Cortina". Presione "Aceptar". CoRtina nº 1 nº 2 nº 3 nº 4 Aceptar Atrás Presione para seleccionar cortina "N° 3". Presione "Aceptar". Presione para iniciar el funcionamiento. ESPAÑOL 84 VELUX...
-
Page 85: Cierre Automático Del Tragaluz
Cerrar en 10 min Menú Localizar Si cierra el tragaluz antes del tiempo seleccionado, la función se cancelará. Nota: Se puede establecer la activación automática de los productos registrados mediante Programas. ESPAÑOL VELUX 85... -
Page 86: Escoger Posiciones
Algunos productos de decoración y protección solar pueden manejarse de dos formas. Por ejemplo, una persiana veneciana se puede subir y bajar y se pueden inclinar las aletas. Cuando el producto esté localizado, seleccione Inclinar o Girar con las teclas de navegación ESPAÑOL 86 VELUX... -
Page 87: Desactivar El Sensor De Lluvia
Si se ha establecido que el tragaluz se cierre automática- mente, el sensor de lluvia estará desactivado solamente hasta que esto ocurra. Nota: Es recomendable establecer que el tragaluz se cierre automáticamente para reducir el riesgo de entrada de agua. ESPAÑOL VELUX 87... -
Page 88: Guía Del Menú
ConFig. sistEma Registro producto p. 122-123 Aceptar Atrás Copia del sistema p. 126-127 Código de seguridad p. 130-131 Configurar p. 119 versión de software Aceptar Atrás aJustEs dE PRogRama activar p. 101-109 grabar Borrar Renombrar ordenar Aceptar Atrás ESPAÑOL 88 VELUX... -
Page 89: Navegar Por Los Menús
Ya puede proceder con el menú de funciones en el apar- tado Habitación. vivienda nº 1 El procedimiento para elegir una función, que se mues- ventana tra en el resto de instrucciones, es el siguiente: Menú Localizar Presione "Menú". Desplazamiento por los menús: Config. Vivienda Habitación ESPAÑOL VELUX 89... -
Page 90: Cambiar Idioma
La pantalla muestra una lista de idiomas. El idioma actual está marcado. idioma dansk Español Français deutsch Aceptar Atrás Presione para seleccionar un nuevo idioma. Presione "Aceptar" para confirmar. inFoRmation sauvegardé Français La pantalla informa que se ha realizado el cambio. ESPAÑOL 90 VELUX... -
Page 91: Habitación, Grupo Y Zona
2 Grupo formado por productos pertenecientes a Habita- ciones diferentes. Puede crear una Zona que consista, p.ej., en todas las cor- tinas enrollables colocadas sobre los tragaluces de la casa mirando al oeste y al sur. ESPAÑOL VELUX 91... -
Page 92: Crear Una Habitación
1 brevemente. Esto activará brevemente el producto. nº 2 nº 3 Presione para seleccionar el producto que desea mover Aceptar Atrás a la Habitación 1. Presione "Aceptar" para confirmar. ESPAÑOL 92 VELUX... - Page 93 Habitación creada La pantalla informa que se ha creado una nueva Habita- ción. Nota: Los números se asignan en el orden en que los productos se mueven a la Habitación en cuestión. Habitación 1 Habitación 2 ESPAÑOL VELUX 93...
-
Page 94: Editar Una Habitación
La pantalla muestra una lista de tipos de producto en la Cortina Habitación desde la que se moverá el producto. Para seleccionar el tipo de producto motor de apertura del Aceptar Atrás tragaluz, presione para seleccionar "Ventana". Presione "Aceptar" para confirmar. ESPAÑOL 94 VELUX... - Page 95 La pantalla informa que se han modificado varias Habita- modificadas ciones. Los Grupos se editan siguiendo el mismo principio que las Habitaciones. Nota: Los números se asignan en el orden en que los pro- ductos se mueven a la Habitación en cuestión. ESPAÑOL VELUX 95...
-
Page 96: Crear Un Grupo
HaBitaCión 1 La pantalla muestra una lista de tipos de producto en la ventana Cortina Habitación 1. Para seleccionar el tipo de producto motor de apertura del Aceptar Atrás tragaluz, presione para seleccionar "Ventana". Presione "Aceptar" para confirmar. ESPAÑOL 96 VELUX... - Page 97 Los Grupos se editan siguiendo el mismo principio que las Habitaciones. grupo 1 Habitación 1 Nota: Cuando se manejan Grupos, puede producirse una demora en la ejecución de las órdenes. Si quiere que un producto funcione de forma inmediata, debe manejarlo individualmente. ESPAÑOL VELUX 97...
-
Page 98: Renombrar
Aceptar Atrás Presione para seleccionar "Habitación 1". Presione "Aceptar" para confirmar. REnomBRaR Habitación 1 aBCdEFgHi Aceptar Atrás Aparece una lista de caracteres que incluyen la función guardar , la función borrar y el espacio en blanco ESPAÑOL 98 VELUX... - Page 99 "Aceptar" después de cada letra. REnomBRaR guardar CoCina CdEFgHi Guarde el nuevo nombre seleccionando en la lista, Aceptar Atrás despues de la última letra. Presione "Aceptar". inFoRmaCión guardado La pantalla informa que el nuevo nombre se ha guar- dado. ESPAÑOL VELUX 99...
-
Page 100: Programas
P1 para cerrar todos los tragalu- ces de la casa y desenrollar las cortinas al 50%. • P rograma de sinergia Un programa predefinido para controlar productos de protección solar exterior optimizado para los países europeos y basado en las condiciones locales. ESPAÑOL 100 VELUX... -
Page 101: Mi Programa
La pantalla muestra el producto elegido. • Presione "Aceptar" para confirmar. Aceptar Editar • P resione "Editar" para seleccionar productos adicio- nales de la lista. PosiCión ajustar posición guardar posición Aceptar Atrás Presione para seleccionar "Ajustar posición". Presione "Aceptar" para confirmar. ESPAÑOL VELUX 101... - Page 102 : 3 0 Aceptar Atrás Presione para seleccionar las horas. Presione "Aceptar" para confirmar. aJustaR día lunes martes miércoles Jueves Presione para seleccionar el día de la semana para la Selecc. Atrás apertura del tragaluz. Presione "Selecc.". ESPAÑOL 102 VELUX...
- Page 103 órdenes para el mismo tragaluz u otros guaRdaR guardar programa productos al programa. añadir funciones Presione "Aceptar" para volver al paso 13. Cancelar grabación • P resione para seleccionar "Guardar programa" para Aceptar Atrás salvarlo tal como está. Presione "Aceptar" para salvarlo. ESPAÑOL VELUX 103...
- Page 104 Fecha de inicio: Aceptar Editar Presione "Editar" para elegir la fecha de inicio. Presione "Aceptar" para confirmar. aJustaR FECHa Fecha fin 31.12.2008 Fecha de fin: Aceptar Editar Presione "Editar" para elegir la fecha final. Presione "Aceptar" para confirmar. ESPAÑOL 104 VELUX...
- Page 105 Nota: en el caso de los productos solares, los programas activados automáticamente pueden acarrear un rápido desgaste de las baterías debido al manejo frecuente de los productos. ESPAÑOL VELUX 105...
-
Page 106: Programa De Cortocircuito P1/P2
La pantalla muestra el producto elegido. • Presione "Aceptar" para confirmar. • P resione "Editar" para seleccionar productos adicio- nales de la lista. PosiCión ajustar posición guardar posición Aceptar Atrás Presione para seleccionar "Ajustar posición". Presione "Aceptar" para confirmar. ESPAÑOL 106 VELUX... - Page 107 Ajuste primero los minutos. Ajuste 0 minutos para que el tragaluz se abra Aceptar Atrás inmediatamente. Presione "Aceptar" para cambiar a horas. REtaRdo h 00 min Aceptar Atrás Presione para seleccionar las horas. Presione "Aceptar" para confirmar. ESPAÑOL VELUX 107...
- Page 108 La pantalla muestra dos opciones de ajustes de tiempo. Retardo Presione para seleccionar "Retardo", esto es, el Hora de inicio tiempo que ha de transcurrir desde que se presione P1 Aceptar Atrás hasta que se active el producto. Presione "Aceptar" para confirmar. ESPAÑOL 108 VELUX...
- Page 109 1". dEFgHi Presione "Aceptar" para utilizar ese nombre. Aceptar Atrás Siga las instrucciones del apartado Renombrar para cambiar el nombre. inFoRmaCión Cortocircuito 1 guardado en La pantalla muestra que el Cortocircuito 1 ha sido guar- P1/P2 dado. ESPAÑOL VELUX 109...
- Page 110 2 segundos. Si se supera, el programa de cortocircuito señalado en la pantalla en ese momento se activará. CoRtoCiRCuito P1 Cortocircuito 1 Cortocircuito 2 Cortocircuito 3 Cortocircuito 4 Iniciar Atrás El Cortocircuito 3 queda seleccionado en la pantalla y el programa se activa automáticamente. ESPAÑOL 110 VELUX...
- Page 111 CoRtoCiRCuito P1 Cortocircuito 1 Cortocircuito 2 El programa de cortocircuito activado aparece marcado en Cortocircuito 3 Cortocircuito 4 la pantalla. Detener Atrás Presione para seleccionar el programa. Presione "Detener" para interrumpir el programa. ESPAÑOL VELUX 111...
-
Page 112: Fecha Y Hora
"Aceptar" para cambiar a horas. aJustaR HoRa Presione para ajustar las horas. 11: 0 0 a m Presione "Aceptar" para confirmar. Aceptar Atrás La hora se muestra automáticamente cuando el mando está en reposo. Vea el apartado Pantalla. ESPAÑOL 112 VELUX... -
Page 113: Bloqueo Del Teclado
El teclado queda desbloqueado temporalmente. Localizar Menú Localizar El teclado volverá a bloquearse automáticamente al cabo de 20 segundos de haber sido utilizado. Nota: El bloqueo del teclado puede cancelarse seleccio- nando "Desactivar" en el paso 3. ESPAÑOL VELUX 113... -
Page 114: Pantalla
Aceptar Atrás Presione para seleccionar "Brillo pantalla". Presione "Aceptar" para confirmar. BRillo Pantalla activar desactivar Aceptar Atrás Presione para seleccionar "Desactivar". Presione "Aceptar" para confirmar. Nota: La pantalla puede iluminarse seleccionando "Activar" en el paso 4. ESPAÑOL 114 VELUX... -
Page 115: Modo En Reposo
"Activar". Presione "Aceptar" para confirmar. 03:43 am La hora se muestra en el mando a distancia cuando está en reposo. Nota: Seleccione "Desactivar" en el paso 4 si no desea que se active el modo en reposo. ESPAÑOL VELUX 115... -
Page 116: Ordenar Productos
"Aceptar" para confirmar. oRdEnaR ventana En la pantalla aparece la lista de tipos de productos que Cortinatoldillo hay en la Habitación 2. Presione para seleccionar el tipo de producto que Aceptar Atrás quiere ordenar. Presione "Aceptar" para confirmar. ESPAÑOL 116 VELUX... - Page 117 5 anterior. Repita los pasos 5-7 hasta haber más productos ordenado todos los productos. Guardar Más • Presione "Guardar" para conservar el orden estable- cido. inFoRmaCión orden cambiado La pantalla indica que el orden se ha cambiado. ESPAÑOL VELUX 117...
-
Page 118: Código De Acceso
Presione "Guardar" para confirmar y guardar el código. Cada vez que entre en el Menú, deberá introducir el código de acceso antes de continuar. Nota: El código de acceso puede anularse eligiendo "Borrar" en el paso 3. ESPAÑOL 118 VELUX... -
Page 119: Versión De Software
Versión de software Cuando realice consultas técnicas a VELUX, se le pedirá que facilite el número de versión de software del mando a distancia. Para encontrarlo proceda como sigue: Habitación 1 nº 1 ventana Menú Localizar Presione "Menú". Desplazamiento por los menús: Config. -
Page 120: Suprimir Configuración Del Mando A Distancia
La pantalla pregunta si quiere suprimir todos los Grupos, Zonas/Programas/ Habitaciones, Zonas, Programas y nombres definidos. nombres Sí • Presione "Sí" para confirmar. • Presione "No" para cancelar su elección. Se ha suprimido la configuración del mando a distancia. ESPAÑOL 120 VELUX... - Page 121 ESPAÑOL VELUX 121...
-
Page 122: Registrar Nuevos Productos
Config. sistema ConFig. sistEma Registro producto Copia del sistema Código de seguridad Configurar Aceptar Atrás Presione para seleccionar "Registro producto". Presione "Aceptar" para confirmar. aJustE automÁtiCo El registro está en curso. La operación puede durar hasta dos minutos. ESPAÑOL 122 VELUX... - Page 123 Cuando se utiliza más de un mando a distancia se pueden manejar también con ellos nuevos productos. Para ello, registre los nuevos productos en cada mando a distancia repitiendo los pasos 2 a 9 para cada uno. ESPAÑOL VELUX 123...
-
Page 124: Utilizar Controles De Activación Adicionales
Nota: Cuando se realiza una copia entre dos mandos a dis- tancia VELUX, se copian todos los productos registrados y las configuraciones personales menos los programas personales que no pueden copiarse. - Page 125 ESPAÑOL VELUX 125...
-
Page 126: Copiar A Nuevo Mando A Distancia
Seleccione el submenú: Config. sistema ConFig. sistEma Registro producto Copia del sistema Código de seguridad Configurar Aceptar Atrás Presione para seleccionar "Copia del sistema". Presione "Aceptar" para confirmar. El paso 2 debe completarse antes de dos minutos. ESPAÑOL 126 VELUX... - Page 127 10 minutos producto. No tenga en cuenta la información de la pan- Registrar Info talla. La pantalla muestra que la copia se está realizando. El mando B ya puede accionar los mismos productos que el mando A. ESPAÑOL VELUX 127...
-
Page 128: Copiar A Otro Mando A Distancia Operativo
Registre todos los productos en el mando B, seleccio- nando: menú Config. sistema Registro producto El mando a distancia B puede accionar ahora tanto los productos del mando A como los que ya podía accionar. Ahora ambos mandos podrán manejar todos los productos del sistema. ESPAÑOL 128 VELUX... - Page 129 Grupos, debe proceder de diferente manera tras el paso 2. Primero reinicie el mando B, vea el apartado Reinicializar el mando a distancia. Después haga una copia del mando A como se describe en el apartado Copiar a nuevo mando a distancia. ESPAÑOL VELUX 129...
-
Page 130: Código De Seguridad
Cambiar código de • P resione "No" para terminar, si sólo tiene un mando. seguridad en otro mando • P resione "Sí" si tiene más mandos. Sí Realice el paso 2 para este mando. ESPAÑOL 130 VELUX... - Page 131 Desplazamiento por los menús: Config. sistema Código de seguridad Código dE sEguRidad Cambiar Recibir Presione para seleccionar "Recibir". Presione "Aceptar" para confirmar. Aceptar Atrás La pantalla muestra que el código de seguridad del mando A está siendo transferido al B. ESPAÑOL VELUX 131...
-
Page 132: Reinicializar Y Preparar Para El Registro
Por lo tanto, los productos no podrán manejarse hasta que se hayan registrado en un mando a distancia de nuevo. Para restaurar la conexión entre el producto y el mando a distancia después de reini- cializar, consulte las instrucciones del apartado Ajuste Inicial. ESPAÑOL 132 VELUX... -
Page 133: Reinicializar El Mando A Distancia
¿desea Presione "Sí" para confirmar que desea reinicializar el continuar? Sí mando a distancia. El mando a distancia se ha reinicializado. Para restaurar la conexión entre el mando y los productos, consulte el apartado Ajuste inicial. ESPAÑOL VELUX 133... -
Page 134: Ajustar La Abertura
A para aceptar la nueva configuración de abertura. El tragaluz se cerrará. ESPAÑOL 134 VELUX... - Page 135 Consulte las instrucciones en el apartado Ajuste inicial o Regis- trar nuevos productos. Nota: El mismo procedimiento se aplica para los cambios de abertura de las aplicaciones ubicadas al alcance de la mano y fuera de alcance. ESPAÑOL VELUX 135...
-
Page 136: Colocación Del Soporte Para El Mando A Distancia
Coloque la base del soporte en la pared, con los dos torni- llos incluidos. Enganche la carcasa frontal en la parte superior de la base, ajústela contra la parte inferior y fíjela con un tornillo. Coloque el mando en el soporte. La sujección se realiza por imanes internos. ESPAÑOL 136 VELUX... - Page 137 Enganche el conjunto en la parte superior de la base. Asegúrese de que los extremos de la brida coincidan con las ranuras laterales de la base. Presione en la parte inferior hasta que quede ajustado. Coloque el tornillo inferior. ESPAÑOL VELUX 137...
-
Page 138: Falta De Corriente / Extravío Del Mando A Distancia
La hoja se puede cerrar insertando un objeto puntiagudo en el orificio de la cubierta del motor indicado con la letra A y presionando brevemente. Nota: Se puede conectar una unidad de batería de refuerzo. Solicite más infor- mación a VELUX. ESPAÑOL 138 VELUX... -
Page 139: Mantenimiento
Limpieza del sensor de lluvia Su funcionamiento puede verse afectado por la suciedad, por ello se recomienda limpiar el sensor de lluvia con un paño suave y húmedo una o dos veces al año o cuando sea necesario. ESPAÑOL VELUX 139... -
Page 140: Símbolos De La Pantalla
Un producto de decoración y de protección solar puede subirse/bajarse o abrirse/cerrarse de 0 a 100%. Guardar un nombre, vea el apartado Renombrar. Borrar un carácter, vea el apartado Renombrar. Espacio en blanco, vea el apartado Renombrar. ESPAÑOL 140 VELUX... -
Page 141: Textos De La Pantalla
Puede desactivar el sensor de lluvia temporalmente y manejar el tragaluz. Nivel de batería bajo: la carga eléctrica de las baterías del mando a distan- cia es baja. Suministro eléctrico reducido: se ha reducido el suministro eléctrico del producto. Manejo limitado. ESPAÑOL VELUX 141... -
Page 142: Terminología
Terminología Ajustes: los productos eléctricos de decoración y protección solar VELUX no vienen ajustados al tamaño del tragaluz. Cuando funcionan por primera vez, se moverán de abajo a arriba del tragaluz o viceversa en forma ininterrum- pida. Después del ajuste, el producto está listo para ser usado. - Page 143 ESPAÑOL VELUX 143...
-
Page 144: Notice D'utilisation
- Créer une Pièce 162-163 - Modifier une Pièce 164-165 - Créer un Groupe 166-167 Nommer les produits 168-169 Programmes 170-181 - Mon programme 171-175 - Programme sous Raccourci P1/P2 176-181 Heure et date Verrouillage du clavier FRANÇAIS 144 VELUX... - Page 145 Réinitialisation et préparation pour enregistrement Réinitialisation de la télécommande Réglage de l'ouverture 204-205 Installation du support de la télécommande 206-207 Utilisation et entretien Panne électrique / Télécommande égarée Entretien Informations supplémentaires Symboles de l'écran Textes affichés à l'écran Lexique FRANÇAIS VELUX 145...
-
Page 146: Informations Importantes / Avertissements
30 secondes. Lorsque le puits de lumière est activé à l'aide de la télécommande ou d'autre commande, la fermeture s'effectuera en dedans d'une minute. Il se peut donc, lors d'une forte averse, qu'un peu d'eau pénètre dans la pièce avant la fermeture complète. • E n cas de neige et/ou de gel, l'ouverture/fermeture du puits de lumière peut être bloquée. FRANÇAIS 146 VELUX... - Page 147 Caractéristiques du produit • C e produit a été conçu pour fonctionner avec des produits de marque VELUX. Toute connexion à des produits d'une autre marque peut endommager le produit ou entraîner une défaillance ou une blessure. • L es produits électriques/électroniques doivent être disposés conformément à la réglementation sur les déchets électroniques en vigueur et ne doivent en aucun cas être jetés aux ordures ménagères.
-
Page 148: Initialisation
Appuyer sur "Enter" pour confirmer votre choix. Préparer les produits pour leur enregistrement. Débranchez l'alimentation réseau pendant 1 minute puis rebranchez-la. Les produits peuvent maintenant être enre- gistrés sur la télécommande dans les 10 minutes suivantes. FRANÇAIS 148 VELUX... - Page 149 Utilisation des commandes supplémentaires. À noter : le réglage de l'ouverture minimale du puits de lumière doit être ajusté lorsque le puits de lumière est installé à portée, voir section Réglage de l’ouverture. FRANÇAIS VELUX 149...
-
Page 150: Fonctions De La Télécommande
À noter : L'écran affiche le dernier produit manœu- n° 1 vré. Le mot "Fenêtre" est utilisé pour les fenêtres Fenêtre et pour les puits de lumière. Menu Identifier Touches de sélection, de navigation et de programme Touches pour manœuvrer le produit choisi FRANÇAIS 150 VELUX... - Page 151 Voir section Choisir une position de manœuvre. Touche stop et d'état STOP / ETAT Brève pression sur la touche : le produit activé s'arrête ou l'état est affiché. Longue pression sur la touche : tous les produits en mou- vement s'arrêtent. FRANÇAIS VELUX 151...
-
Page 152: Identifier Et Manœuvrer Un Produit
Le puits de lumière est équipé d'un moteur d'ouverture et d'un store rideau. maison n° 1 L'exemple vous indique comment identifier et ouvrir le store store. Menu Identifier Appuyer sur pour trouver "Store". Appuyer sur pour l'activer. FRANÇAIS 152 VELUX... -
Page 153: Plusieurs Puits De Lumière
N° 2 Menu Identifier (indiqué "Fenêtre"). Appuyer sur pour ouvrir le puits de lumière. À noter : L'ordre des produits individuels, Groupes, Pièces ou Zones illustrés peut être modifié, voir section Changer l'ordre des produits. FRANÇAIS VELUX 153... - Page 154 Maison. Valider Retour Appuyer sur pour sélectionner "Store". Appuyer sur "Valider". stoRE n° 1 n° 2 n° 3 n° 4 Valider Retour Appuyer sur pour sélectionner le store "N° 3". Appuyer sur "Valider". Appuyer sur pour l'activer. FRANÇAIS 154 VELUX...
-
Page 155: Refermeture Automatique Du Puits De Lumière
10 min Menu Identifier Si vous fermez le puits de lumière plus tôt que le temps choisi, la fonction sera annulée. À noter : les produits enregistrés peuvent être manœu- vrés automatiquement via la fonction Programmes. FRANÇAIS VELUX 155... -
Page 156: Choisir Une Position De Manœuvre
être manœuvrés de deux façons. Par exemple un store vénitien peut être remonté ou descendu et ses lamelles peuvent être orientées. Une fois que le produit a été localisé, choisir Incliner ou Tourner avec les touches de navigation FRANÇAIS 156 VELUX... -
Page 157: Désactivation Du Détecteur De Pluie
À noter : Il est recommandé de régler le puits de lumière en fermeture automatique pour réduire le risque d'infiltra- tion d'eau. FRANÇAIS VELUX 157... -
Page 158: Présentation Des Menus De La Télécommande
Création programme Enregistrer produit p. 192-193 Valider Retour Copier système p. 196-197 Code de sécurité p. 200-201 Configurer version de logiciel p. 189 Valider Retour CRéation PRogRammE activer Enregistrer p. 171-179 supprimer Renommer Changer ordre Valider Retour FRANÇAIS 158 VELUX... -
Page 159: Naviguer Dans Les Menus
La marche à suivre pour choisir les fonctions dans les menus est indiquée de la manière suivante dans la suite maison des instructions : n° 1 Fenêtre Menu Identifier Appuyer sur "Menu". Naviguer dans les menus : Réglages maison Pièce FRANÇAIS VELUX 159... -
Page 160: Changer La Langue
L'écran indique une liste de langues. La langue utilisée a été cochée. languE dansk English Français deutsch Valider Retour Appuyer sur pour sélectionner une nouvelle langue. Appuyer sur "Valider" pour confirmer votre choix. inFoRmation saved English L'écran indique que le changement a été enregistré. FRANÇAIS 160 VELUX... -
Page 161: Pièce, Groupe Et Zone
Pièce 2 Définir une Zone Groupes constitués de produits appartenant à plusieurs Pièces. Vous pouvez créer par exemple une Zone comprenant tous les stores rideaux des puits de lumière de la maison orientés à l'ouest et au sud. FRANÇAIS VELUX 161... -
Page 162: Créer Une Pièce
FEnêtRE n° 1 actionnera le produit un court instant. n° 2 n° 3 Appuyer sur pour trouver le produit électrique qui doit Retour Valider être placé dans la Pièce 1. Appuyer sur "Valider" pour confirmer votre choix. FRANÇAIS 162 VELUX... - Page 163 Pièce créée L'écran indique qu'une nouvelle Pièce a été créée. À noter : les numéros sont assi- gnés dans l'ordre ou les produits sont déplacés à la Pièce en ques- tion. Pièce 1 Pièce 2 FRANÇAIS VELUX 163...
-
Page 164: Modifier Une Pièce
à transférer apparais- Fenêtre store sent à l'écran. Pour choisir le type de produit moteur du puits de lumière, Valider Retour appuyer sur pour sélectionner "Fenêtre". Appuyer sur "Valider" pour confirmer votre choix. FRANÇAIS 164 VELUX... - Page 165 L'écran indique que plusieurs Pièces ont été modifiées. Les Groupes sont modifiés selon le même principe que les Pièces. À noter : les numéros sont assignés dans l'ordre ou les produits sont déplacés à la Pièce en question. FRANÇAIS VELUX 165...
-
Page 166: Créer Un Groupe
La liste des types de produits de la Pièce 1 s'affiche. Pour choisir le type de produit moteur du puits de lumière, Valider Retour appuyer sur pour sélectionner "Fenêtre". Appuyer sur "Valider" pour confirmer votre choix. FRANÇAIS 166 VELUX... - Page 167 Pièces. groupe 1 Pièce 1 À noter : Lors de la manœuvre d'un Groupe, un décalage peut se produire lors de l'activation des commandes. Si vous voulez commander un produit en particulier, celui-ci doit être actionné individuellement. FRANÇAIS VELUX 167...
-
Page 168: Nommer Les Produits
Appuyer sur pour sélectionner "Pièce 1". Appuyer sur "Valider" pour confirmer votre choix. REnommER Pièce 1 aBCdEFgHi La liste des caractères s'affiche ainsi que la fonction de Valider Retour sauvegarde , la fonction suppression et la fonction "espace" FRANÇAIS 168 VELUX... - Page 169 REnommER sauvegarder CuisinE CdEFgHi Sauvegarder le nouveau nom en sélectionnant dans Valider Retour la liste après avoir entré le dernier caractère. Appuyer sur "Valider". inFoRmation sauvegardé L'écran indique que le nouveau nom a été sauvegardé. FRANÇAIS VELUX 169...
-
Page 170: Programmes
50%. • P rogramme synergie Un programme prédéfini pour le contrôle des produits de protection solaire optimisé pour les pays d'Europe et basé sur les conditions climatiques locales. FRANÇAIS 170 VELUX... -
Page 171: Mon Programme
"Valider" pour confirmer votre choix. Valider Modifier • A ppuyer sur "Modifier" pour sélectionner d'autres produits de la liste. Position Réglage position sauv. position Valider Retour Appuyer sur pour sélectionner "Réglage position". Appuyer sur "Valider" pour confirmer votre choix. FRANÇAIS VELUX 171... - Page 172 Appuyer sur pour choisir l'heure. Appuyer sur "Valider" pour confirmer votre réglage. RéglagE du JouR lundi mardi mercredi Jeudi Appuyer sur pour choisir le jour de la semaine Sélect. Retour d'ouverture du puits de lumière. Appuyer sur "Sélect.". FRANÇAIS 172 VELUX...
- Page 173 Appuyer sur "Valider" pour revenir à l'étape 13. sauv. programme ajout fonctions • A ppuyer sur pour sélectionner "Sauv. programme" abandon enregist. pour mémoriser ainsi le programme. Valider Retour Appuyer sur "Valider" pour sauvegarder le pro- gramme. FRANÇAIS VELUX 173...
- Page 174 Modifier départ. Appuyer sur "Valider" pour confirmer le réglage. RéglagE datE Date de fin 31.12.2008 Date de fin : Modifier Valider Appuyer sur "Modifier" pour choisir une date de fin. Appuyer sur "Valider" pour confirmer le réglage. FRANÇAIS 174 VELUX...
- Page 175 être activés à tout moment. À noter : Pour les produits solaires, les programmes déclenchés automatiquement peuvent entraîner une décharge rapide de la batterie due à des manœuvres fréquentes des produits. FRANÇAIS VELUX 175...
-
Page 176: Programme Sous Raccourci P1/P2
• Appuyer sur "Valider" pour confirmer votre choix. • A ppuyer sur "Modifier" pour sélectionner d'autres produits de la liste. Position Réglage position sauv. position Valider Retour Appuyer sur pour suréclairer "Réglage position". Appuyer sur "Valider" pour confirmer votre choix. FRANÇAIS 176 VELUX... - Page 177 Valider Retour souhaitez l'ouverture immédiate du puits de lumière. Appuyer sur "Valider" pour régler ensuite les heures. délai h 00 min Valider Retour Appuyer sur pour choisir le nombre d'heures. Appuyer sur "Valider" pour confirmer votre choix. FRANÇAIS VELUX 177...
- Page 178 Horaire de départ Appuyer sur pour sélectionner "Délai", c'est à dire le laps de temps à partir de la pression sur P1 jusqu'à ce Valider Retour que le produit soit activé. Appuyer sur "Valider" pour confirmer votre choix. FRANÇAIS 178 VELUX...
- Page 179 Appuyer sur "Valider" pour sauvegarder le nom. Valider Retour Suivre les instructions de la section Nommer les produits pour changer ce nom. inFoRmation Raccourci 1 sauvegardé dans P1/P2 L'écran montre que le Raccourci 1 a été sauvegardé. FRANÇAIS VELUX 179...
- Page 180 Menu Identifier Sinon le programme raccourci sélectionné à ce moment s'exécute. RaCCouRCi P1 Raccourci 1 Raccourci 2 Raccourci 3 Raccourci 4 Début Retour Raccourci 3 s'affiche à l'écran et démarre automatique- ment. FRANÇAIS 180 VELUX...
- Page 181 RaCCouRCi P1 Raccourci 1 Raccourci 2 Le programme raccourci en cours a été coché à l'écran. Raccourci 3 Raccourci 4 Appuyer sur pour sélectionner le programme en ques- Stop Retour tion. Appuyer sur "Stop" pour interrompre le programme. FRANÇAIS VELUX 181...
-
Page 182: Heure Et Date
"Valider" pour régler ensuite l'heure. RéglagE HEuRE Appuyer sur pour régler l'heure. 11: 0 0 a m Appuyer sur "Valider" pour confirmer vos réglages. Valider Retour L'heure est affichée automatiquement quand la télécom- mande est en mode veille. Voir section Écran. FRANÇAIS 182 VELUX... -
Page 183: Verrouillage Du Clavier
Menu Identifier Le clavier va se verrouiller automatiquement au bout de 20 secondes après la fin de son utilisation. À noter : Le verrouillage automatique du clavier peut être annulé en appuyant sur "Désactivé" à l'étape 3. FRANÇAIS VELUX 183... -
Page 184: Écran
"Valider” pour confirmer votre choix. luminosité éCRan activé désactivé Valider Retour Appuyer sur pour sélectionner "Désactivé". Appuyer sur "Valider” pour confirmer votre choix. À noter : La luminosité de l'écran peut être activée de nouveau en choisissant "Activé" à l'étape 4. FRANÇAIS 184 VELUX... -
Page 185: Mode Veille
"Valider" pour confirmer votre choix. 03:43 am Quand la télécommande est en mode veille l'heure s'affiche. À noter : Choisir "Désactivé" à l'étape 4 si vous ne voulez pas que la télécommande se mette en mode veille. FRANÇAIS VELUX 185... -
Page 186: Changer L'ordre Des Produits
CHangER oRdRE Fenêtre store La liste des produits se trouvant dans la Pièce 2 s'affiche. Appuyer sur pour sélectionner le type de produit dont Valider Retour vous souhaitez changer l'ordre. Appuyer sur "Valider" pour confirmer votre choix. FRANÇAIS 186 VELUX... - Page 187 étapes 5 à 7 jusqu'à ce que l'ordre des produits ou continuer souhaité soit obtenu. Sauv. Ajouter • A ppuyer sur "Sauvegarder" pour sauvegarder le nouvel ordre des produits. inFoRmation Changement ordre terminé L'écran indique que l'ordre a été changé. FRANÇAIS VELUX 187...
-
Page 188: Code D'accès
Chaque fois que vous choisirez Menu, vous devrez saisir le code d'accès avant de pouvoir utiliser la télécommande. À noter : Le code d'accès peut être supprimé en choisis- sant "Supprimer" à l'étape 3. FRANÇAIS 188 VELUX... -
Page 189: Version De Logiciel
Version de logiciel Lors de questions techniques auprès de VELUX, on vous demandera le numéro de version de logiciel de la télécom- mande. Pour l'obtenir, procédez comme suit : Pièce 1 n° 1 Fenêtre Menu Identifier Appuyer sur "Menu". Naviguer dans les menus : Réglages système... -
Page 190: Supprimer Les Réglages De La Télécommande
Groupes, Pièces, Zones, Programmes et Pièces/Zones/Pro- noms personnalisés que vous aviez créés. grammes/noms • Appuyer sur "Oui" pour confirmer votre choix. • Appuyer sur "Non" pour annuler votre choix. Les réglages de la télécommande sont supprimés. FRANÇAIS 190 VELUX... - Page 191 FRANÇAIS VELUX 191...
-
Page 192: Enregistrer Des Nouveaux Produits
Sélectionner le sous-menu : Réglages système RéglagEs systèmE Enregistrer prod. Copier système Code sécurité Configurer Valider Retour Appuyer sur pour sélectionner "Enregistrer produit". Appuyer sur "Valider" pour confirmer votre choix. RECHERCHE auto L'enregistrement s'effectue. Cela peut prendre jusqu'à deux minutes. FRANÇAIS 192 VELUX... - Page 193 Lorsque plus d'une télécommande est utilisée, les nou- veaux produits peuvent aussi être manœuvrés avec ces autres télécommandes. Pour pouvoir le faire, enregistrer les nouveaux produits dans chaque télécommande en reprenant les étapes 2 à 9 pour chacune d'entre elles. FRANÇAIS VELUX 193...
-
Page 194: Utiliser Des Commandes Supplémentaires
Comment copier le contenu d'une télécommande sur une autre télécommande où les deux télécommandes n'ont pas enregistré les mêmes produits. À noter : lors de copie entre deux télécommandes VELUX, tous les produits enregistrés et leurs paramètres propres sont copiés, seuls les programmes personnels ne peuvent être copiés. - Page 195 FRANÇAIS VELUX 195...
-
Page 196: Copier Sur Une Nouvelle Télécommande
Réglages système RéglagEs systèmE Enregistrer prod. Copier système Code sécurité Configurer Valider Retour Appuyer sur pour sélectionner "Copier système". Appuyer sur "Valider" pour confirmer votre choix. La phase 2 doit maintenant être réalisée dans les deux minutes suivantes. FRANÇAIS 196 VELUX... - Page 197 10 minutes l'enregistrement de chaque produit. Ne pas tenir compte Enregist. Info des indications affichées à l'écran. L'écran indique que la copie est en cours. La télécommande B peut maintenant manœuvrer les mêmes produits que la télécommande A. FRANÇAIS VELUX 197...
-
Page 198: Copier Sur Une Télécommande Opérante
: menu Réglages système Enregistrer prod. La télécommande B peut maintenant manœuvrer à la fois les produits de la télécommande A et les produits qu'elle manœuvrait déjà. Après cela les deux télécommandes peuvent manœuvrer tous les produits. FRANÇAIS 198 VELUX... - Page 199 Noms, Pièces et Groupes, vous devez procéder différem- ment après la phase 2. Réinitialiser d'abord la télécom- mande B, voir section Réinitialisation de la télécommande. Puis copier à partir de la télécommande A comme décrit dans la section Copier sur une nouvelle télécommande. FRANÇAIS VELUX 199...
-
Page 200: Code De Sécurité
CHangER • A ppuyer sur "Non" pour terminer l'opération. Changer code de • A ppuyer sur "Oui" si vous souhaitez modifier le code sécurité d'une autre de sécurité d'autres télécommandes. télécommande Exécuter la phase 2 pour cela. FRANÇAIS 200 VELUX... - Page 201 Code de sécurité CodE dE séCuRité Changer Appuyer sur pour sélectionner "Recevoir". Recevoir Appuyer sur "Valider" pour confirmer votre choix. Valider Retour L'écran indique que le code de sécurité est en train d'être transféré sur la télécommande B. FRANÇAIS VELUX 201...
-
Page 202: Réinitialisation Et Préparation Pour Enregistrement
Les produits ne peuvent donc plus être actionnés jusqu'à leur enre- gistrement à nouveau dans une télécommande. Pour rétablir la liaison entre le produit et une télécommande après réinitialisation, se référer aux instructions de la section Initialisation. FRANÇAIS 202 VELUX... -
Page 203: Réinitialisation De La Télécommande
Appuyer sur "Oui" pour confirmer que vous voulez Continuer ? réinitialiser la télécommande. La télécommande a été réinitialisée. Pour rétablir la con- nexion entre la télécommande et les produits, se référer aux instructions de la section Initialisation. FRANÇAIS VELUX 203... -
Page 204: Réglage De L'ouverture
Lorsque le puits de lumière s'arrête selon le degré d'ouverture requis, appuyez brièvement dans l'ouverture indiquée A sur le couvercle du moteur pour confirmer l'option de réglage. Le puits de lumière se referme. FRANÇAIS 204 VELUX... - Page 205 à nouveau. Veuillez vous référer à la section Initialisa- tion ou Enregistrer des nouveaux produits. À noter : Cette même procédure s'applique pour ef- fectuer une modification de réglage d'ouverture pour une installation à portée ou hors de portée. FRANÇAIS VELUX 205...
-
Page 206: Installation Du Support De La Télécommande
Fixer l'arrière du support sur le mur à l'aide des deux vis fournies. Accrocher le haut du support de la télécommande sur son socle, le clipper en partie basse et le fixer à l'aide de la vis fournie. Placer la télécommande sur son support. Elle est fixée grâce aux aimants internes. FRANÇAIS 206 VELUX... - Page 207 Assurez-vous que la bande s'insère bien dans les logements sur les côtés de l'arrière du support. La clipper. Fixer l'ensemble en partie basse à l'aide de la vis fournie. FRANÇAIS VELUX 207...
-
Page 208: Panne Électrique / Télécommande Égarée
Le volet peut être fermé manuellement en insérant un objet pointu dans l'ouverture indiquée A sur le couvercle du moteur et en appuyant brièvement. À noter : Une batterie de secours peut être raccordée. Contactez VELUX pour plus d'information. FRANÇAIS 208 VELUX... -
Page 209: Entretien
De la saleté sur le détecteur de pluie peut entraîner des problèmes de fonctionnement. Il est donc recommandé de nettoyer le détecteur de pluie avec un chiffon doux et humide une ou deux fois par an lorsque nécessaire. FRANÇAIS VELUX 209... -
Page 210: Symboles De L'écran
être monté/descendu ou ouvert/fermé de 0 à 100%. Un nom peut être sauvegardé, se référer à la section Nom- mer les produits. Suppression caractère, se référer à la section Nommer les produits. Espace, se référer à la section Nommer les produits. FRANÇAIS 210 VELUX... -
Page 211: Textes Affichés À L'écran
électrique. Verrouillé : un objet inconnu gêne la manœuvre du produit. Retirer l'objet pour retrouver une manœuvre normale. Défaut de fonctionnement : le produit s'est arrêté durant l'opération. Véri- fier le produit. FRANÇAIS VELUX 211... -
Page 212: Lexique
Lexique Ajustement : les équipements électriques VELUX ne sont pas ajustés à la dimension du puits de lumière à la livraison. Lors de la première manœuvre, ils seront actionnés de haut en bas ou de bas en haut sans interruption. Après cet ajustement, le produit est prêt pour l'utilisation. - Page 213 FRANÇAIS VELUX 213...
- Page 214 FRANÇAIS 214 VELUX...
- Page 215 FRANÇAIS VELUX 215...
- Page 216 USA: VELUX America Inc. 1-800-88-VELUX CDN: VELUX Canada Inc. 1 800 88-VELUX (888-3589) www.velux.com...
Need help?
Do you have a question about the KLR 100 and is the answer not in the manual?
Questions and answers