Table of Contents
Advertisement
Quick Links
Gigaset Communications GmbH
Frankenstr. 2a, D-46395 Bocholt
Manufactured by Gigaset Communications GmbH
under trademark license of Siemens AG.
As of 1 Oct. 2011 Gigaset products bearing the
trademark 'Siemens' will exclusively use the trademark 'Gigaset' .
© Gigaset Communications GmbH 2010
All rights reserved. Subject to availability.
www.gigaset.com
E500
GIGASET. INSPIRING CONVERSATION.
Advertisement
Table of Contents

Related Manuals for Siemens Gigaset E500


Summary of Contents for Siemens Gigaset E500
- Page 1 Manufactured by Gigaset Communications GmbH under trademark license of Siemens AG. As of 1 Oct. 2011 Gigaset products bearing the trademark 'Siemens' will exclusively use the trademark 'Gigaset' . © Gigaset Communications GmbH 2010 All rights reserved. Subject to availability.
-
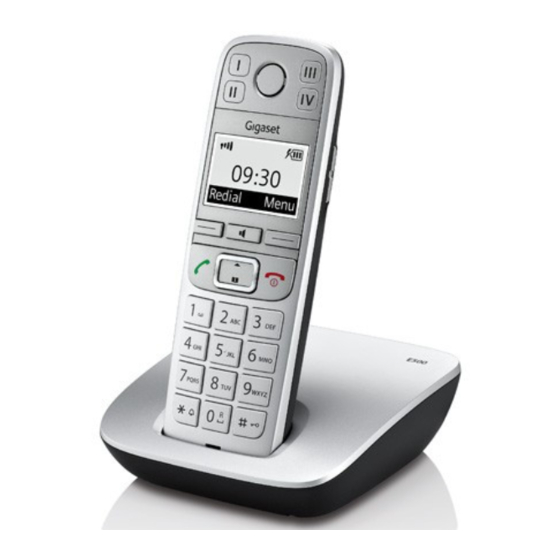
Page 2: Gigaset E500 - Your Reliable Companion
Gigaset E500 – Your reliable companion Gigaset E500 – Your reliable companion This phone has the benefits of an ergonomic design, easy-to-use keys and a clear display with large font. It is also impressively robust and has first-class sound quality in handsfree mode as well as a long operating time. -
Page 3: Overview Of Handset
Overview of handset Overview of handset 1 Direct dialling key I (¢ page 31) 2 Direct dialling keys II to IV (¢ page 31) 3 Display in idle status (¢ page 19) 4 Display keys (¢ page 4) 5 Talk key Accept a call, start dialling 6 Control key (¢... -
Page 4: Icons And Keys
Icons and keys Icons and keys Understanding the display icons The display depends on the phone's settings and operating status. Signal strength i (¢ page 39) ¼ or Eco Mode+ (¢ page 39) Ringer switched off (¢ page 45) Keypad locked (¢ page 22) Battery charging (¢... -
Page 5: Main Menu Icons
Icons and keys Other display icons Action failed Action complete ‰ À Information Alarm call (¢ page 40) Ð Ø Ú Please wait... Ò Main menu icons  Directory Directory  á Missed Calls Alarm clock Back Ì Answer Machine Ï... -
Page 6: Using The Control Key
Icons and keys Û New missed calls or new messages on the network mail- box (¢ page 36). Delete key: delete character by character/word by word Delete from right to left. Go back one menu level or cancel operation. Back Mute the microphone (¢... -
Page 7: Table Of Contents
Contents Gigaset E500 – Your reliable companion ..... 1 Overview of handset ........2 Base overview . - Page 8 Contents Using the directory, direct dialling keys and lists ... . 29 Directory ........... . . 30 Direct dialling keys ;...
- Page 9 Contents Customer Service & Assistance ......49 Questions and answers ........50 Authorisation .
-
Page 10: Following Safety Precautions
Following safety precautions Following safety precautions Warning Read the safety precautions and the user guide before use. Explain their content and the potential hazards associated with using the telephone to your children. Use only the power adapter supplied, as indicated on the underside of the base. -
Page 11: First Steps
First steps First steps First step: checking package contents One Gigaset E500 base One Gigaset handset Two batteries One battery cover One belt clip One power adapter for the base One phone cord One user guide... -
Page 12: Second Step: Setting Up The Base And Charger
First steps If you have pur- chased a model with multiple hand- sets, the package should contain two batteries, a battery cover and a charger with power adapter for each additional handset. Second step: setting up the base and charger The base and charger are designed for use in dry rooms in a temper- ature range of +5°C to +45°C. -
Page 13: Third Step: Connecting The Base
First steps Third step: connecting the base ¤ First, connect the tel- ephone jack insert the cables into the cable ducts. ¤ Then connect the power adapter 1. Warning u The power adapter must always be connected, as the phone will not operate without a mains connection. -
Page 14: Setting Up The Handset For Use
First steps Setting up the handset for use The display is protected by a plastic film. Please remove the protective film! Inserting the battery and closing the battery cover Warning Use only rechargeable batteries (¢ page 54) recommended by Gigaset Communications GmbH, as this could otherwise result in significant health risks and personal injury. -
Page 15: Attaching The Belt Clip
First steps Attaching the belt clip The handset has notches on each side to attach the belt clip. ¤ To attach — press the belt clip onto the back of the handset so that the protrusions on the belt clip engage with the notches. ¤... - Page 16 First steps ¤ After charging, remove the handset from the base and only replace it when the batteries are fully discharged. Please note u The handset is already registered with the base. If you have purchased a model with multiple handsets, all handsets will already be registered with the base.
-
Page 17: Changing The Display Language
First steps Changing the display language Change the display language if you do not understand the language currently set. Menu ¤ Press the right-hand display key. ¤ Press keys 5and4 slowly one after the other. The display for setting languages English appears. -
Page 18: Setting The Date And Time
First steps Setting the date and time Set the date and time so that the correct date and time can be assigned to incoming calls, and so that the alarm clock can be used. Menu ¤ Press the key below §Menu§... - Page 19 First steps ¤ The input field opens. The active Enter Date: line is marked [...]. [01.04.2010] Enter the day, month and year as an 8-digit number via the Back keypad e.g., Q1Q4 2Q1Q for 1 April 2010. To correct errors: press up or down on the control key to swap between fields.
-
Page 20: Display In Idle Status
First steps Display in idle status Once the phone is registered and the time set, the idle status is shown as in this example. Screen display u Reception between the base and the Ð handset: 07:30 – Good to poor: Ð i Ñ ¦ –... -
Page 21: What Would You Like To Do Next
What would you like to do next? What would you like to do next? Now that you have successfully set up your Gigaset, you can imme- diately start calling – or you can adapt it to your personal require- ments. Use the following guide to quickly locate the most important functions. -
Page 22: Using The Phone
Using the phone Using the phone Menu guidance Your telephone's functions are accessed via a menu consisting of several levels (menu overview ¢ page 25). Main menu (first menu level) ¤ When the handset is in idle status, press the display key §Menu§... -
Page 23: Using Keys On The Keypad
Using the phone Reverting to idle status From any point in the menu: Ð ¤ Press and hold the end call key a or 07:30 ¤ Do not press any key: after 2 minutes, the display will automatically revert to Redial Menu idle status. -
Page 24: Understanding The Operating Steps
Understanding the operating steps Understanding the operating steps An example of a procedure is as follows: ¤ q Settings ¤ ¤ q System ¤ §Menu§ §OK§ §OK§ ¤ q Eco Mode+ ¤ §OK§ (³ = on) This means you should proceed as follows: Please note Scroll upwards if you wish to select one of the last entries in a menu level with numerous entries. - Page 25 Understanding the operating steps System: System ... the menu entry System appears on the screen. ¤ §OK§ Back §OK§ Press the key below on the display screen to open the sub- menu. ¤ q: Press up or down on the control key until ...
-
Page 26: Menu Tree
Menu tree Menu tree §Menu§ If you press the display key in idle status, a list appears with menu entries. You can scroll through the list by pressing q. Â Directory á Missed Calls Alarm clock Ì Answer Machine Ï Settings Some of these menu entries contain submenus. - Page 27 Menu tree ¢ page 41 Registering Register Handset ¢ page 41 De-register Handset ¢ page 43 Telephony Auto Answer ¢ page 42 Listening In ¢ page 37 Preselect ¢ page 46 Music on Hold ¢ page 46 System Reset Handset ¢...
-
Page 28: Making Calls
Making calls Making calls If the handset is in the base and the Auto Answer function is activated (¢ page 43), the handset will accept When the display backlight is a call automatically when you lift it switched off, pressing any key will out of the base. -
Page 29: Notes On Calling Line Display (Clip)
Making calls The following is displayed in place of Is your telephone connected via a the number: PABX/gateway? u Extern. Call, if no number is trans- You can establish this by checking mitted. for an additional device connected u Withheld, if the caller has with- between your telephone and house connection, e.g., a PABX, gateway held Calling Line Identification. -
Page 30: Handsfree Operation
Using the directory, direct dialling keys and lists Handsfree operation Muting In handsfree mode, you activate the You can deactivate your handset's loudspeaker so that you can hear microphone during a call. the caller without having to hold the §Mute§ Press the display key to handset to your ear. -
Page 31: Directory
Using the directory, direct dialling keys and lists Directory Order of directory entries The directory entries are sorted in You can store numbers and the asso- alphabetical order. Spaces and dig- ciated names in the directory. In its take first priority. The sort order is idle status, open the directory using the s key or via the menu: as follows:... -
Page 32: Direct Dialling Keys To
Using the directory, direct dialling keys and lists Managing directory entries Prerequisites: u The sending and receiving hand- Select an entry. sets must both be registered to Editing entries the same base. ¤ q Edit Entry ¤ u The other handset and the base §Menu§... - Page 33 Using the directory, direct dialling keys and lists Assigning a function to direct Changing the function of the dialling keys direct dialling keys ¤ q Settings ¤ §Menu§ §OK§ Prerequisite: The direct dialling key ¤ q Direct Dial Keys ¤ in question has not already been §OK§...
-
Page 34: Making Internal Calls
Using the directory, direct dialling keys and lists Making internal calls Making an internal call To make the internal call, press the Internal calls are free calls between key on the handset that is labelled handsets that you have registered to with the internal call while the the same base. -
Page 35: Using The Redial List
Using the directory, direct dialling keys and lists Transferring a call to another Using the redial list handset/internal consultation The redial list contains the ten num- You are in conversation with an bers last dialled with the handset external participant. (max. -
Page 36: Missed Calls List
Using the directory, direct dialling keys and lists u Number of caller Missed calls list You can add the number of the Prerequisite: CLIP (¢ page 27) caller to the directory (¢ page 31). Your telephone saves the last 20 missed calls. -
Page 37: Calling Up Lists With New Messages
Automatic network provider preselection Calling up lists with new Please note New calls on the network mailbox messages are only displayed correctly if your network provider transmits this If there are new messages in a list, ’ information (see user guide for use the display key to call up: your provider's network mailbox). - Page 38 Automatic network provider preselection Storing preselection numbers Temporarily cancelling ¤ q Settings ¤ preselection §Menu§ §OK§ c (press and hold) ¤ ¤ q Telephony ¤ §Menu§ §OK§ ¤ q Preselect ¤ ¤ Preselect off ¤ §OK§ §OK§ ¤ q Preselect Number ¤ §OK§...
-
Page 39: Using The Network Mailbox
Using the network mailbox Using the network Please note Enter the network mailbox phone mailbox number into your directory along with the designation "Net AM"; The network mailbox is the answer- the display and the call list will ing machine in your provider's tele- then show this designation. -
Page 40: Eco Dect
ECO DECT ECO DECT Switching off radiation u Eco Mode+ You are helping to protect the envi- When you activate Eco Mode+ ronment with your Gigaset. the radiation (DECT transmission power) of base and handset is Reduced energy consumption switched off automatically and only turns on when calls are Your telephone has a power-saving made. -
Page 41: Using The Handset As An Alarm Clock
Using the handset as an alarm clock Using the handset as an Please note u When using Eco Mode+ you alarm clock can ensure that the range of the base is sufficient by press- ing the talk key c. You hear Activating/deactivating the alarm clock the ring tone if the base can be... -
Page 42: Using Multiple Handsets
2) On the base ¤ Press and hold the registration/ Registering a Gigaset handset manually on the Gigaset E500 paging key on the base (¢ page 2) for You must register the handset man- approx. 3 seconds. -
Page 43: Locating A Handset ("Paging")
Using multiple handsets Locating a handset Listening in to an ("Paging") external call You can locate your handset using You want to listen in to an existing the base. external call. ¤ Briefly press the registration/ Prerequisite: The Listening In func- paging key on the base tion must be activated. -
Page 44: Handset Settings
Handset settings Handset settings Changing the display contrast You can change the settings on your handset to suit your individual You can set the display contrast to 9 requirements. levels. ¤ q Settings ¤ §Menu§ §OK§ ¤ q Display ¤ Changing the display §OK§... -
Page 45: Changing Ringers
Handset settings Setting the volume during a call: Setting the ringer melody ç Press up (louder) or down Set different ringer melodies for (quieter) on the side keys external calls, internal calls and the (¢ page 2). alarm clock. The setting is saved auto- For external calls you can also spec- matically after 3 seconds. -
Page 46: Advisory/Warning Tones
Handset settings Anon. Calls Silent ¤ §OK§ Advisory/warning tones You can set your handset so that it Your handset uses advisory tones to doesn't ring for calls where tell you about different activities Calling Line Identification has and statuses. The following tones been withheld (not answering can be activated and deactivated machine). -
Page 47: Restoring The Handset Default Settings
Base settings Activating/deactivating battery Base settings low beep ¤ q Settings ¤ The base settings are made using a §§Menu§ §OK§ ¤ q Audio/Visual Signals ¤ registered handset. §OK§ ¤ q Battery Low Activating/deactivating ¤ §OK§ (³= on) music on hold ¤... -
Page 48: Protecting Against Unauthorised Access
Base settings Protecting against Resetting the base to the unauthorised access default settings Protect the system settings of the When the settings are restored: u Date and time are retained base with a system PIN known only u Handsets are still registered to yourself. -
Page 49: Operating The Base On The Pabx
Operating the base on the PABX Operating the base on Setting recall ¤ P#Q5#12 §Menu§ the PABX ¤ Enter digits for recall: Q = 80 ms; 1 = 100 ms; The following settings are only nec- 2 = 120 ms; I = 400 ms; essary if your PABX requires them;... -
Page 50: Customer Service & Assistance
Customer Service & Assistance Customer Service & Assistance You have questions? As a Gigaset customer, you can take advantage of our comprehensive service offerings. You can find help quickly in this User Manual and in the service pages of our Gigaset online portal. Please register your phone right after purchase on www.gigaset.com/gr/service thus enabling us to provide you even with better service in case of questions... -
Page 51: Questions And Answers
Customer Service & Assistance Questions and answers Handset does not ring. The ringer is switched off. If you have any questions about the ¤ Activate the ringer (¢ page 45). use of your phone you can contact You cannot hear a ringer/dialling us 24/7 at tone from the fixed line network. -
Page 52: Authorisation
Customer Service & Assistance Guarantee Certificate You hear an error tone when key- ing an input. Without prejudice to any claim the Action has failed/invalid input. user (customer) may have in relation ¤ Repeat the process. to the dealer, the customer shall be Watch the display and refer to the granted a manufacturer's Guarantee user guide if necessary. - Page 53 Customer Service & Assistance u The purchase receipt, together However, the claims for damages with the date of purchase, shall be related to violation of conven- required as evidence for invoking tional obligations shall be limited the Guarantee. Claims under the to predictable damages, repre- Guarantee must be submitted sentative of such conventions, as...
-
Page 54: Protecting Our Environment
Protecting our environment Protecting our Ecological energy consumption environment The use of ECO DECT (¢ page 39) saves energy and makes an active contribution towards protecting the Our environmental mission environment. statement Disposal We, Gigaset Communications GmbH, bear social responsibility Batteries should not be disposed of and are actively committed to a bet- in general household waste. -
Page 55: Appendix
Appendix Appendix Specifications Batteries Care Technology: Nickel-metal-hydride Wipe the unit with a damp cloth or (NiMH) an antistatic cloth. Do not use sol- Size: AAA (Micro, HR03) vents or microfibre cloths. Voltage: 1.2 V Never use a dry cloth. This can cause Capacity: 550 - 1000 mAh static. - Page 56 Appendix General specifications Operating time for 1.5 hrs of calls per day (hours) DECT standard Supported - Without Eco GAP standard Supported Mode+ - With Eco No. of channels 60 duplex Mode+ channels Charging time in 5.5 6.5 7.5 Radio frequency 1880–1900 MHz base (hours) range...
-
Page 57: Writing And Editing Names
Appendix Pin connections on the Setting upper/lower case or telephone jack digits Repeatedly press the hash key # to change the text input mode. 1 unused 2 unused 123 Writing digits Abc Upper case * 5 unused abc Lower case 6 unused * First letter in capitals, all others in lower case... - Page 58 Appendix Standard characters Greek 1x 2x 3x 4x 5x 6x 7x 8x 9x 10x 11x 12x 13x 14x 15x 1x 2x 3x 4x 5x 6x 7x 8x 9x 10x 11x 12x 13x 1 £ $ ¥ ¤ 1 £ $ a b c 2 ä...
-
Page 59: Accessories
Accessories Accessories Upgrade your Gigaset to a cordless PABX. Gigaset E500H handset u Extra loud voice playback u Handsfree operation with brilliant voice quality u Hearing aid compatible (HAC) u High-contrast, large b/w display u Battery charge status and reception signal indicator u Large font for outstanding legibility u Enlargeable digit display (Jumbo font) u Green illuminated handsfree key... -
Page 60: Mounting The E500 Base On The Wall
Mounting the E500 base on the wall Mounting the E500 base on the wall 37 mm Approx. 4 mm Mounting the charger on the wall 21 mm Approx. 3.5 mm... -
Page 61: Index
Index Index Access protection ....47 Call Accessories ......58 accepting . -
Page 62: Direct Dialling
Index Dialling mode ..... . . 48 Direct dialling Handset saving/changing key assignment . 32 activating/deactivating ... 22 storing numbers . -
Page 63: Message Key
Index Medical equipment ....9 Menu Key 1 (fast access to network end tone ......45 mailbox) . -
Page 64: Restoring Default Settings
Index Playing back Setting up message (answering machine) ..38 base ....... 11 Power adapter .
Need help?
Do you have a question about the Gigaset E500 and is the answer not in the manual?
Questions and answers