Table of Contents
Advertisement
Quick Links
Advertisement
Table of Contents

Related Manuals for Energic Plus AR-D


Summary of Contents for Energic Plus AR-D
-
Page 1: Battery Charger
BATTERY CHARGER BATTERY CHARGER AR-D AR-D USER'S MANUAL USER'S MANUAL... - Page 2 (THIS PAGE WAS INTENTIONALLY LEFT BLANK)
-
Page 3: Table Of Contents
TABLE OF CONTENTS · ..........................3 · ..........................3 · ..........................3 · ..........................3 · ..........................3 · ..........................3 · ..........................3 · 1. Introduction....................4 · RESPONSIBILITY DISCLAIMER..................4 · 2. Safety instructions and warnings.............5 · GENERAL........................5 · SHOCK PREVENTION....................5 · BURN AND BODILY INJURY PREVENTION...............6 ·... -
Page 4: Introduction
RESPONSIBILITY DISCLAIMER The manufacturer of the Energic plus RLD battery charger will not be responsible for damages and/or injuries caused by the charger in these situations: The charger is not installed properly by a qualified electrician;... -
Page 5: Safety Instructions And Warnings
Measure voltage on capacitors and, if there is any voltage reading, wait 5 minutes before to proceed. Keep inside parts clean and dry. Dirt and/or moisture can cause insulation failure. This failure can result in high voltage at the charger output. Page 5 of 23 OWM-AR-D-[]... -
Page 6: Burn And Bodily Injury Prevention
In case of acid in the eyes, flush very well with clean water and obtain professional medical attention immediately. EQUIPMENT WARNING LABELS Inspect all precautionary labels on the equipment. Order and replace all labels that cannot be easily read. Page 6 of 23 OWM-AR-D-[]... -
Page 7: Description
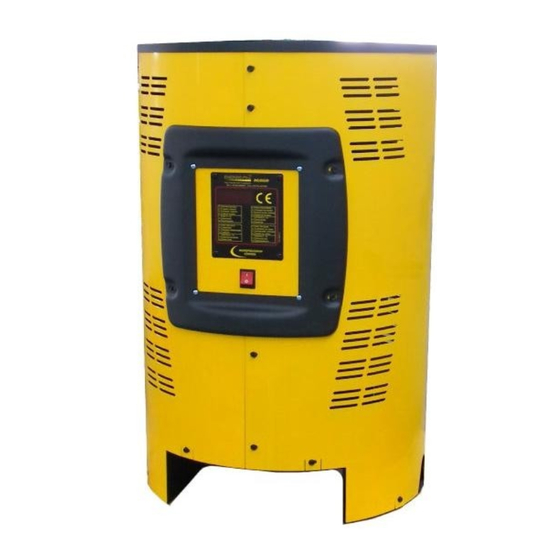
Battery Charger RLD User's Manual Description Energic plus RLD battery chargers have been designed to charge lead-acid batteries. These units can convert the AC input voltage to a DC voltage at the correct level, in order to charge the battery cells. - Page 8 Inside of the charger, there are the following devices, not available to the user: Power contactor; • Power transformer; • Rectifier; • Microprocessor controlled electronic board; • Output fuse; • Plugs for input voltage selection; • Plugs for input voltage adjustment. • Page 8 of 23 OWM-AR-D-[]...
-
Page 9: Installation
WARNING ! The charger can be installed by qualified personnel only! To avoid the risk of injuries, the user is not allowed to open the cabinet. Always refer to qualified electricians for installation and service operations. Page 9 of 23 OWM-AR-D-[]... - Page 10 Before to install the charger: Check that the charger input voltage (V) is identical to your AC power supply voltage. Check that the charger max input power (KVA) is available from your AC power supply. Page 10 of 23 OWM-AR-D-[]...
-
Page 11: Internal View Of The Charger, Cabinet A
The BOARD FOR INPUT VOLTAGE SELECTION is present only in chargers with 3x 220 / 380 Vac input, and it's NOT present in chargers with 3x440 Vac input. The PLUGS FOR INPUT VOLTAGE ADJUSTMENT are present in all the chargers. Page 11 of 23 OWM-AR-D-[]... - Page 12 PROCEDURE: Check that the charger is disconnected from AC input and battery; • Open the cabinet and move the three wires (WHITE) in position 220V or 380V; • Close the cabinet. • Page 12 of 23 OWM-AR-D-[]...
- Page 13 INPUT VOLTAGE ADJUSTMENT. PROCEDURE: Check that the charger is disconnected • from AC input and battery; Open the cabinet and move the wires A, B, • C to the desired position. Close the cabinet. • Page 13 of 23 OWM-AR-D-[]...
- Page 14 Close the cabinet; • With disconnect switch on AC input power line on position “OFF” or “OPEN”, connect the • power cable coming from the charger to the switch and, then, install the fuses in the switch. Page 14 of 23 OWM-AR-D-[]...
-
Page 15: Operation
Check that all the ventilation slots are not obstructed to assure proper air flow; • Make sure that the charger is installed as instructed in this manual and in accordance with • any applicable national or local norm. Page 15 of 23 OWM-AR-D-[]... -
Page 16: Battery Connection, Voltage Check And Autostart
BATTERY CONNECTION, VOLTAGE CHECK AND AUTOSTART CAUTION ! ENERGIC Plus RLD chargers are programmed to do a complete cycle of charge automatically, however it’s always recommended to survey the operations, especially when the battery is connected to the charger for more than 12 hours. - Page 17 Battery Charger RLD User's Manual (HOURS) . (MINUTE DECADES) h Examples: Time of charge 3h 30minutes: Displayed 3.3h Time of charge 7h 50minutes: Displayed 7.5h Page 17 of 23 OWM-AR-D-[]...
- Page 18 Wa models. WoWa charge curve When the battery reaches the gassing voltage, the charge continues for one half of the time needed to reach the gassing voltage, with a minimum total time of 30 minutes. Page 18 of 23 OWM-AR-D-[]...
-
Page 19: Automatic Data Saving
ARCING AND BURNING OF CONNECTORS OR BATTERY EXPLOSION MAY RESULT! AUTOMATIC CHARGE TERMINATION: • When the charge has been normally completed, the charger turns off automatically. The display shows the flashing message “End”. At this point, it's possible to disconnect the battery. Page 19 of 23 OWM-AR-D-[]... -
Page 20: Equalization
15 hours interval between each charge. During the interval between each equalization charge, the display will show the scrolling message: “End”: When the equalization chargers are in progress, the display will show the message“F1”, followed by the current value: Page 20 of 23 OWM-AR-D-[]... -
Page 21: Maintenance
If the battery is in ideal condition (no self-discharge) the refresh charge will never be activated. If the battery is in bad condition (self-discharge is significant), the refresh charge will be often activated and the battery will be kept charged without problems. Page 21 of 23 OWM-AR-D-[]... -
Page 22: Trouble Shooting
Remove objects which may obstruct slots. Charger Wrong AC input settings. Adjust AC input settings to higher voltage. smells hot Bad or loose power wirings. Check and thighten all power wirings. Transformer burned. Replace transformer. Page 22 of 23 OWM-AR-D-[]... - Page 23 Adjust AC input settings to higher voltage. Battery power demand too high. Consider purchasing bigger Ah battery. Battery temperature Increase cool down time before/after Insufficient cool down time. too high. charging. Automatic stop doesn't work. Check and replace board and/or contactor. Page 23 of 23 OWM-AR-D-[]...
Need help?
Do you have a question about the AR-D and is the answer not in the manual?
Questions and answers