Table of Contents
Advertisement
Advertisement
Table of Contents

Related Manuals for Avermedia EB1104 NET


Summary of Contents for Avermedia EB1104 NET
- Page 1 ® AVerMedia EB1104 NET Real-time Security DVR Operation Manual...
-
Page 3: Fcc Notice
COPYRIGHT © 2005 by AVerMedia TECHNOLOGIES, Inc. All rights reserved. No part of this publication may be reproduced, transmitted, transcribed, stored in a retrieval system, or translated into any language in any form by any means without the written permission of AVerMedia TECHNOLOGIES, Inc. - Page 4 WARNING TO REDUCE RISK OF FIRE OR ELECTRIC SHOCK, DO NOT EXPOSE THIS APPLIANCE TO RAIN OR MOISTURE CAUTION IF THERE IS ANY DAMAGE, SHORTAGE OR IMAPPROPRIATE ITEM IN THE PACKAGE, PLEASE CONTACT WITH YOUR LOCAL DEALER. WARRANTY VOID FOR ANY UNAUTHORIZED PRODUCT MODIFICATION.
-
Page 5: Table Of Contents
Table of Contents Chapter 1 Introduction ..................3 Features and Specifications ............... 3 Package Content..................5 Front Panel ....................6 Back Panel....................7 Setting Up the DVR Unit ................8 1.5.1 Installing Hard Drives................8 1.5.2 Installing a Removable Hard Drive Case in a PC (Optional)....13 1.5.3 Connecting Devices................ - Page 6 3.8.1 OVERWRITE ENABLED ..............35 3.8.2 MASTER HDD SIZE and MASTER HDD USED ......... 35 3.8.3 MASTER HDD FORMAT ..............35 3.8.4 SLAVE HDD SIZE and SLAVE HDD USED......... 35 3.8.5 SLAVE HDD FORMAT................. 35 SENSOR SETUP ..................36 3.9.1 SENSOR RECORD TIME ..............
-
Page 7: Chapter 1 Introduction
Internet is available. Surveillance, digital recording and playback are controlled through the front panel buttons. Users can connect EB1104 NET to a PC to trace back video files, and even save image as both BMP and AVI files. With the On-Screen-Display (OSD) menu, you can customize video recording settings, sensor and alarm settings, password protection, hard drive recycling, and more. - Page 8 • 1 audio input and 1 audio output • VGA output for LCD monitor display • Front panel buttons and OSD control • Motion-JPEG video compression • Default factory setting to NTSC or PAL • Supports 2 hard drives (not included) •...
-
Page 9: Package Content
1.2 Package Content ® AVerMedia EB1104NET Unit Remote Control & Batteries (Optional) Power Cord (*The power cord may vary according to the local electricity system.) Power Adaptor DVR accessories (including 4 screws and 1 Ω hook) Quick Install Guide USB Cable... -
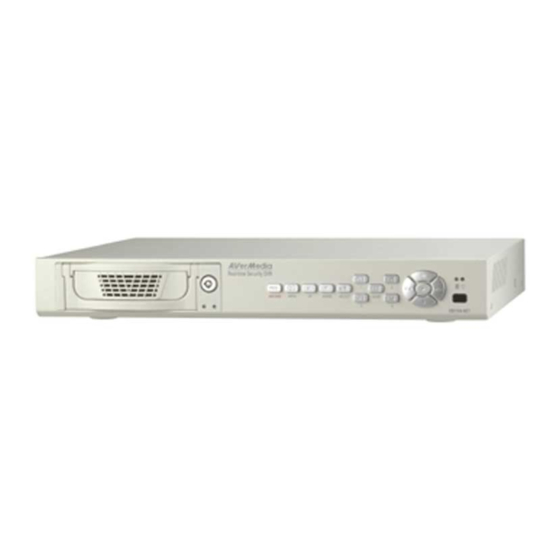
Page 10: Front Panel
1.3 Front Panel REC : Start video recording. MENU : Open/Close the OSD main menu or subsequent submenus. : Go up one item. : Go down one item. SELECT : (a) Cycle through various options in a selected menu item. (b) Open a submenu (a) Display Channel 1 in full-screen. -
Page 11: Back Panel
CAUTION BEFORE REMOVING THE REMOVABLE OR INTERNAL HARD DISK, POWER OFF THE DVR UNIT FIRST. 17. Removable Hard disk LED 18. Removable Power LED 19. Internal Hard Disk LED 20. DVR Power LED 21. USB2.0 Socket 1.4 Back Panel LAN Socket: Connect a PC and DVR with a RJ-45 cable to allow remote real-time surveillance for both intranet and Internet. -
Page 12: Setting Up The Dvr Unit
Hard disks of the same brand are recommended when you install the hard disks in the DVR. A hard disk compatibility issue may occur due to different hard disk models. For more information of the recommended hard disk list, please go to http://www.avermedia.com/nvd/hardware-recom.htm... - Page 13 Follow the steps to install hard disks inside DVR. The DVR provides a flexible choice to fix either the master hard disk or the slave hard disk inside the DVR. 1. Loosen screws. 2. Remote the upper cover backward and lift the cover.
- Page 14 5. Connect the gray IDE cable connector to the hard disk IDE slot, and then connect the power connect to the hard disk power slot. 6. Tighten the 4 screws to fix the hard disk. 7. Tighten the screws. 8. Unlock the removable hard disk drawer before you pull out the removable drawer.
- Page 15 14. Lock the drawer before you start to use EB1104 NET DVR system. 15. Power on the unit to see the LED indicators on the front side of the removable hard disk holder. If the LED indicators light up, you may use the hard disk.
- Page 16 In the situation you want to remove the hard disk from the removable hard disk drawer, power off the DVR. Unlock the removable hard disk drawer first. The following chapters will describe the hard disk in a removable hard disk drawer as HDD A and the other hard disk inside DVR unit as HDD B to differentiate the hard disks in the following content.
-
Page 17: Installing A Removable Hard Drive Case In A Pc (Optional)
1.5.2 Installing a Removable Hard Drive Case in a PC (Optional) For users who purchase an optional hard drive case, please follow the steps to install the case in a PC. Power off your PC and remove the cover of your PC. Remove a front cover and free a 5 1/4”... -
Page 18: Basic Devices
1.5.3.1 Basic Devices • Cameras Connect the video output of each video camera or composite video source to the CH1 ~ CH4 connectors. • VGA monitor Connect a VGA monitor to the VGA OUT connector of the DVR unit to use as a display for video surveillance and playback. - Page 19 Terminal 9 : Connect to the positive (+) wire of the alarm device Terminal 10 : Connect to the ground (-) wire of the alarm device • Desktop/Laptop computer Connect EB1104 NET DVR and PC with the USB cable in the package before you execute the playback application.
-
Page 20: Chapter 2 Operating The Dvr Unit
Chapter 2 Operating the DVR Unit 2.1 First Time Use Connecting the DVR unit to a power outlet automatically turns on its power. When you install new hard disks in your DVR, the system will detect hard disks status and show “HDD FORMAT SELECT(YES) /MENU(NO)”. -
Page 21: Surveillance Screen
Sometimes the system has trouble detecting the hard disks, it shows “Turn off and on the DVR” on the screen. Turn off and on the DVR Follow the instruction to unplug DVR. Reboot and the system will show the normal first time use screen. After you format the hard drive(s), please enter the default password before you enter the main menu. -
Page 22: Setting The Video Quality
in QUAD mode can only be played back in QUAD mode. EACH mode QUAD mode Use the following front panel buttons to select the desired video camera to display in full screen: CH1: Camera 1 CH2: Camera 2 CH3: Camera 3 CH4: Camera 4 Note: The recording mode can be selected in the OSD main menu. -
Page 23: Video Recording And Playback
to move the cursor to the video quality item you want to change and click change the value. Repeat the same steps until you finish all settings. Click to exit the setting screen. When you are under the Quad Mode, you can change the video value setting for all cameras at the same time. -
Page 24: Playing Back The Recorded Video
Press the button. During recording, the screen shows the following: EACH (T) 2005 /04 /18 17 : 20 : 25 MASTER Here is a simple description of the screen item. Screen Items Description Recording status Display mode Recording hard disk. “M”... - Page 25 If you want to switch to the other hard drive or search for a range of video recordings, press . The ">" arrowhead cursor will then move up to the top of the screen. Press button to switch between the MASTER and SLAVE drives. Press to move down to the recording date and time entries.
- Page 26 To fast forward through the video, press . To fast reverse, press 10 Press to pause playback, or press ▓ to stop playback.
-
Page 27: Chapter 3 Setup Menu
Chapter 3 Setup Menu MAIN MENU > CAMERA SELECT 1234 RECORD SCHEDULE RECORD SELECT 1234 RECORD MODE EACH RECORD FRAMERATE + T T T S S S S S T T T T M M M M T T T T T + VIDEO QUALITY NORMAL RECORD SCHEDULE... -
Page 28: Camera Select
1 Press button to display the OSD main menu. MAIN MENU > CAMERA SELECT 1234 RECORD SELECT 1234 RECORD MODE EACH RECORD FRAMERATE VIDEO QUALITY NORMAL RECORD SCHEDULE SUBMENU HARD DRIVE SETUP SENSOR SETUP LANGUAGE SETUP NETWORK SETUP PRESS (< , >), THEN(SELECT) PRESS (MENU) TO EXIT 2 Press to move up or down through the items in the menu. -
Page 29: Record Select
CH1: Camera 1 CH2: Camera 2 CH3: Camera 3 CH4: Camera 4 You can also press to cycle through different camera display combinations. For instance: (1 2 3 4) : Switch on all camera displays. (1 - - 4) : Switch on camera display 1 and 4 only. (- 2 3 -) : Switch on camera display 2 and 3 only. -
Page 30: Record Frame Rate
804hrs *The data size may vary depending on the complexity of video scenes. * For more information about the recording time, please visit: http://www.avermedia.com/nvd/recording%20hour(EN0903).htm 3.6 RECORD SCHEDULE By default, the DVR unit is customized for continuous 24-hour video recording. If... - Page 31 you prefer to record video only at certain time schedules within a day, you can choose specific recording hours. If the DVR unit is connected to sensor devices, you can also customize the unit to initiate video recording only when the sensors detect an event.
-
Page 32: Sub Menu
3.7 SUB MENU The SUB MENU allows you to enable password setup, change the password, system date and time, VGA display settings, motion setup, auto record setup, auto scan setup, audio record and mute setting. SUB MENU > PASSWORD CHANGE TIME SET VGA SETUP MOTION SETUP... -
Page 33: Time Set
Note: You will be prompted to enter the password when you attempt to format the hard drive(s) in the HARD DRIVE SETUP menu. 3.7.2 TIME SET TIME 2004/01/10 15:30:25 PRESS (< , >), THEN(SELECT) PRESS (MENU) TO EXIT To change the system date and time: Press to move through the "YYYY/MM/DD"... -
Page 34: Motion Setup
3.7.4 MOTION SETUP MOTION SETUP >MOTION CAMERA _ _ _ _ MOTION SENSITIVITY MOTION RECORD TIME PRESS (< , >), THEN(SELECT) PRESS (MENU) TO EXIT To change MOTION CAMERA, 1. Press to move the arrowhead cursor to MOTION CAMERA in the menu. -
Page 35: Auto Record
TIME in the menu. Press repeatedly to cycle through the numbers. The time setting ranges from 5 to 30 seconds. Stop pressing the button when reach the desired numbers. 3.7.5 AUTO RECORD SUB MENU PASSWORD CHANGE TIME SET VGA SETUP MOTION SETUP >... -
Page 36: Auto Scan
3.7.6 AUTO SCAN SUB MENU PASSWORD CHANGE TIME SET VGA SETUP MOTION SETUP AUTO RECORD > AUTO SCAN PASSWORD SETUP AUDIO RECORD AUDIO MUTE PRESS (< , >), THEN(SELECT) PRESS (MENU) TO EXIT AUTO SCAN cycles the videos of each camera when the system is in EACH MODE. -
Page 37: Audio Record
system from someone who intends to interrupt the recording or change the settings. The default setting for the PASSWORD SETUP is NO. Please move the arrow cursor to PASSWORD SETUP and press to adjust the setting to YES, and press to return to MAIN MENU. -
Page 38: Audio Mute
3.7.9 AUDIO MUTE SUB MENU PASSWORD CHANGE TIME SET VGA SETUP MOTION SETUP AUTO RECORD AUTO SCAN PASSWORD SETUP AUDIO RECORD > AUDIO MUTE PRESS (< , >), THEN(SELECT) PRESS (MENU) TO EXIT When the DVR is connected to the speaker, it will transmit the audio of a microphone. -
Page 39: Hard Drive Setup
3.8 HARD DRIVE SETUP HARD DRIVE SETUP > OVERWRITE ENABLED MASTER HDD SIZE 80072MB MASTER HDD USED 16014MB 20% MASTER HDD FORMAT SLAVE HDD SIZE SLAVE HDD USED SLAVE HDD FORMAT PRESS (< , >), THEN(SELECT) PRESS (MENU) TO EXIT 3.8.1 OVERWRITE ENABLED This allows old video recordings on the hard drive(s) to be automatically... -
Page 40: Sensor Setup
3.9 SENSOR SETUP SENSOR SETUP > SENSOR RECORD TIME ALARM OUT TIME CHANNEL-1 TYPE:NORMAL-CLOSE CHANNEL-2 TYPE:NORMAL-OPEN CHANNEL-3 NOT INSTALLED CHANNEL-4 NOT INSTALLED PRESS (< , >), THEN(SELECT) PRESS (MENU) TO EXIT 3.9.1 SENSOR RECORD TIME This determines the duration of sensor recording (in minutes) in the event that t he sensor devices detect an event. -
Page 41: Langeuage Setup
3.10 LANGEUAGE SETUP > ENGLISH JAPANESE FRENCH SPANISH POLISH Move the cursor to LANGUAGE SETUP and press on MAIN MENU, you will see a language list. Select a proper language and click to return to MAIN MENU. The language on the screen will turn to your assigned language. 3.11 NETWORK SETUP Please select Network setting on the main menu. -
Page 42: Submask
When the system will appear an upper arrow below the digit, click select a proper digit. Press to return to NETWORK MENU when you finish entering IP address. Please use a fixed IP when you set up the IP ADDRESS. 3.11.4 SUBMASK Move the cursor to SUBMASK and press to enter the SUBMASK. -
Page 43: Chapter 4 Connect To A Pc
Chapter 4 Connect to a PC EB1104 NET provides a convenient tool to trace back the recorded surveillance video, catch specific images and save as AVI files. With the Playback Application, users can play back the surveillance video, catch images and backup all recorded images easily . - Page 44 Follow the instructions to install the driver: Insert the CD driver into CD-ROM’s plate. Click Install USB Playback Application to install the system. Note: The application supports Windows 2000/XP only. You will see the screen on the right side. Click Next. Follow the steps to finish the installation.
-
Page 45: Operating Eb-Dvr Playback Application
Click Finish to complete the installation. 4.2 Operating EB-DVR Playback Application Click to run the application. Select the hard disk and then select a proper video system according to your local video system. Click OK. When you install 2 hard disks in the DVR, the master hard disk will be prior to the slave hard disk. - Page 46 Time Slider: Drag the slider right or left to fast search an event. Mute: Click the button to enable audio. When the audio is enabled, the button turns Volume Slider: Drag the volume slider right to volume up the audio ;drag the slider left to volume down the audio.
-
Page 47: Channel Selection
14. Event List: Display all the recorded events stored in hard disks. 15. Transform to AVI: Record an appointed video and save it as an AVI file. 16. Print: Print the current display. 17. Snapshot: Save the present screen as a BMP file. 18. - Page 48 Record Mode Start Time End Time When you decide which event to play, click to display the video or click to display a recorded dynamic event reversely. Click to search the appointed video. Users can select the forward search mode fast play at 2X, 4X, 8X or 16X speed.
-
Page 49: Snapshot
Click to see a forward static play. To see a backward static display, click Click to pause the playing. 4.2.3 Snapshot Click to save the desired screen as a BMP file. Users can keep a full-screen snapshot or a quad screen snapshot. This service allows to keep static images. - Page 50 dealers for server IP. 3. The system will show a security dialog screen, click Yes to continue. 4. Enter your DVR IP and password. Click OK to continue. 5. The remote center screen may vary due to the DVR server quantities. For ONE DVR server users, you will see a 4-CH screen, as the lower-left picture shows.
-
Page 51: Status Of Functional Buttons And Icons
4.3.1 Status of Functional Buttons and Icons The following table illustrates the status of 4-CH remote center functional buttons. Function Button Color Description Connect to the This service is available. Dark gray network The connection is ON Yellow This service is disabled. Light gray DVR State Control This service is available. - Page 52 Disabled Light gray Rewind Forward Available. Dark Gray Rewind Forward Yellow Disabled Light gray Fast Forward Available. Dark Gray Fast Forward Yellow Disabled Light gray Stop Available. Dark Gray Stop Yellow Disabled Light gray Auto Frame Rate This service is available. Dark Gray Tune This service is disabled.
- Page 53 The following table illustrates the status of Dual DVR remote center functional buttons. Function Button Color Description Connect to the This service is available. network White The connection is ON Yellow This service is disabled. Gray DVR State Control This service is available. White Show DVR State Control dialog Yellow...
-
Page 54: Using The 4-Ch Remote Center
Record Yellow Disabled Light gray Rewind Forward Rewind Forward Dark gray Pause Yellow Disabled Light gray Fast Forward Available. Dark gray Fast Forward Yellow Disabled Light gray Stop Available. Dark gray Stop Yellow Disabled Light gray Full Screen This service is available. Gray Click this button to switch to Full Yellow... - Page 55 : Click to connect or disconnect EB1104 NET server.The button turns yellow when it is connected to the network. The system will show the following Client Connection Manager screen. Enter DVR server’s IP and password. Click OK to connect to DVR.
- Page 56 Settings\user\Desktop\stream_files” (The storage path may vary according to the real user name.) Stop: Stop the playback or recording. Pause: Click the button to pause the DVR video playback. Rewind Forward: Fast reverse during playback. Play: Playback the video of the camera that is connected to the DVR. For details, check 4.5.2 Playback DVR Events Files from Remote Center.
-
Page 57: Using Dual Dvr Remote Center
Play: Playback the video of the camera that is connected to the DVR. Fast Forward: Fast forward during playback. 4.5 Using Dual DVR Remote Center When you install 2 DVR severs and connect to the dual DVR remote center, you will see the following screen. - Page 58 1. Connect /Disconnect : Click to connect to DVR1 server from a remote client. The button turns yellow when it is connected to the network. The system will show the following Client Connection Manager screen. Enter DVR1 server’s IP and password. Click OK to connect to DVR1.
- Page 59 . Drag the volume slider up/down to volume up/down the audio when the audio is enabled. 7. Local Record and Stop buttons : EB1104 NET DVR provides a local recording function to facilitate a remote user to monitor remotely and record channels on the client PC. Click to start recording.
- Page 60 Record: Click the button to record the camera that connected to DVR. The default file storage path will be “C:\Documents and Settings\user\Desktop\stream_files” (The storage path may vary according to the real user name.) Stop: Stop the playback or recording. Pause: Click the button to pause the DVR video playback. Rewind Forward: Fast reverse during playback.
- Page 61 When you connect to a DVR from a remote client via network, please don’t connect your DVR and PC with a USB cable. 2. DVR State Control : Click to set DVR2 settings when DVR2 is under viewing mode. You can see the DVR Record Mode and Hard Disk Information on the upper-right corner.
- Page 62 7. Local Record and Stop buttons : EB1104 NET DVR provides a local recording function to facilitate a remote user to monitor remotely and record channels on the client PC. Click to start recording.
- Page 63 For details, check 4.5.2 Playback DVR Events Files from Remote Center Fast Forward: Fast forward during playback. Group 3: Local playback buttons on the lower screen 1. Full screen :If you wish to see a larger screen when watching the channels, click to switch to a full screen.
-
Page 64: Setting Dvr Control From Remote Center
4.5.1 Setting DVR Control from Remote Center EB1104 NET facilitates you to change the settings anytime anywhere via Internet. When you monitor the cameras from a remote client, you can click to modify all settings as the DVR is under viewing mode. -
Page 65: Playback Dvr Events Files From Remote Center
5. Audio Record: DVR supports one audio record for one camera. Select ON or OFF from the drop-down list. 6. Audio Mute: Select ON or OFF from the drop-down list. When the DVR is connected to the PC speaker, it will transmit the audio of a microphone. When DVR is in preview or record mode, you can either turn on the AUDIO MUTE if you don’t want to listen to the audio. -
Page 66: Local Recording
4.5.3 Local Recording EB1104 NET DVR provides a local recording function to facilitate a remote user to monitor remotely and record channels on the client PC. Whether you are under a 4-CH remote center or a dual DVR remote center, please click the recording button in the following pictures to record. -
Page 67: Local Playback Recording Files
4-CH remote center Dual DVR remote center When it is recording, the button turn yellow .To stop recording, click When you click different buttons to operate local recording files under a 4-CH remote center, you will find the upper icons change. For details, check 4.3.1 Status of Functional Buttons and Icons. - Page 68 For Dual DVR remote center users, click to switch to a full screen. Click the right mouse button to return to a normal display.
-
Page 69: Warranty Notice
D. Any other cause which does not relate to a product defect. 3. Cartons, cases, batteries, cabinets, tapes, or accessories used with product. 4. AVerMedia does not warrant that this product will meet your requirements; it is your responsibility to determine the suitability of this product for your purpose.
Need help?
Do you have a question about the EB1104 NET and is the answer not in the manual?
Questions and answers