
Related Manuals for Brinkmann ALL IN ONE


Summary of Contents for Brinkmann ALL IN ONE
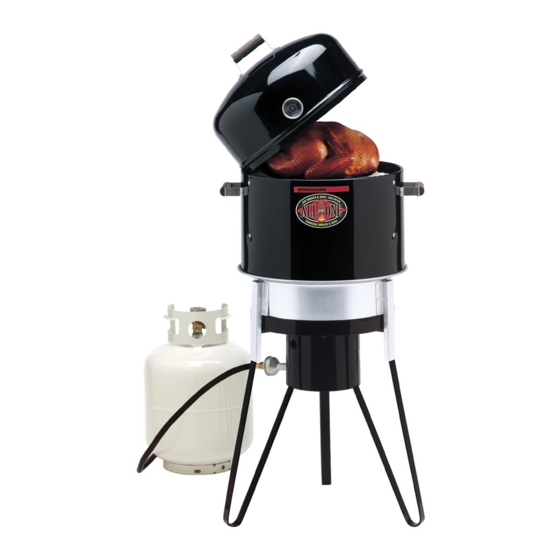
- Page 1 OWNER’S MANUAL ASSEMBLY AND OPERATING INSTRUCTIONS WARNING READ AND FOLLOW ALL WARNINGS AND INSTRUCTIONS IN THIS MANUAL TO AVOID PERSONAL INJURY OR PROPERTY DAMAGE.
- Page 2 IMPORTANT SAFETY WARNINGS WE WANT YOU TO ASSEMBLE AND USE YOUR COOKER AS SAFELY AS POSSIBLE. THE PURPOSE OF THIS SAFETY ALERT SYMBOL IS TO ATTRACT YOUR ATTENTION TO POSSIBLE HAZARDS AS YOU ASSEMBLE AND USE YOUR SMOKER. WHEN YOU SEE THE SAFETY ALERT SYMBOL, PAY CLOSE ATTENTION TO THE INFORMATION WHICH FOLLOWS! THE WARNINGS BELOW APPLY TO ALL USES OF THE ALL-IN-ONE.
-
Page 3: Parts List
ASSEMBLY INSTRUCTIONS READ ALL SAFETY WARNINGS & ASSEMBLY INSTRUCTIONS CAREFULLY BEFORE ASSEMBLING OR OPERATING YOUR COOKER. FOR MISSING PARTS, PLEASE CALL CUSTOMER SERVICE AT 1-800-527-0717. (Proof of purchase will be required.) Inspect contents of the box to ensure all parts are included and undamaged. - Page 4 STEP 1: Remove nut from bottom of burner assembly. Support Strap STEP 2: Position the stand upside down as shown. Burner Assembly STEP 3: Place burner assembly inside stand with threaded bolt protruding through support Stand strap as shown. STEP 4: Thread nut onto bolt and securely tighten.
- Page 5 STEP 7: a. Attach wooden handle halves to metal brackets using 8-32 x w" screws and nuts as illustrated. b. Attach two handle assemblies to side of smoker body using 10-24 x s" screws and square nuts as illustrated. c. Attach the three lower support brackets (V clips) to inside of smoker body through the three 4"...
- Page 6 STEP 9: a. Attach handle on top of dome lid using 10-24 x s" screws and square nuts. b. Install heat indicator in dome lid by aligning tabs on heat indicator with slots in the opening on front of dome lid. Insert and turn 4 revolution until the word “IDEAL”...
-
Page 7: Gas Leak Testing
GAS LEAK TESTING THE GAS LEAK TESTING PROCEDURE MUST BE PERFORMED EVERY TIME THE TANK IS CONNECTED TO COOKER. WARNING • This cooker is designed to operate on propane gas only. It will not operate on natural gas. • Gas leak testing must be performed outdoors in a well ventilated area. •... - Page 8 GAS OPERATING INSTRUCTIONS LP GAS – PROPANE THESE WARNINGS MUST BE FOLLOWED WHENEVER USING PROPANE. FOLLOW THESE WARNINGS IN ADDITION TO THE WARNINGS LISTED ON PAGE 1 OF THIS MANUAL. WARNING • This outdoor gas cooker is designed for propane gas supply. Only cylinders marked “Propane” should be used. The cylinder should be marked in accordance with the specifications for LP cylinders of the U.S.
-
Page 9: Gas Smoking
GAS SMOKING READ ALL WARNINGS ON PAGE 1 AND 7 BEFORE PROCEEDING Before first use and after cleaning, apply a light coat of vegetable oil or vegetable cooking spray to the interior surface of the dome lid, smoker body, cooking grills and water pan. This simple process will help reduce interior rusting. - Page 10 8. Place the empty water pan inside smoker body on the lower support brackets. Position water pan so rim is resting securely on notched out 1" step of all three support brackets. 9. Place the smoker body on the base pan, making sure the water pan is still in position.
- Page 11 GAS GRILLING READ ALL WARNINGS ON PAGE 1 AND 7 BEFORE PROCEEDING Before first use and after cleaning, apply a light coat of vegetable oil or vegetable cooking spray to the interior surface of the dome lid, smoker body, cooking grills and water pan. This simple process will help reduce interior rusting.
- Page 12 GAS BOILING/FRYING READ ALL WARNINGS ON PAGE 1 AND 7 BEFORE PROCEEDING 1. Remove dome lid, smoker body and base pan from cooker and set aside. 2. Follow Steps 4, 5 and 6 of “Gas Smoking” section. 3. Fill metal cookware with desired amount of water or oil. Never fill pot more than half way to allow room for addition of food and to avoid boil-over of hot liquids.
- Page 13 CHARCOAL OPERATING INSTRUCTIONS CHARCOAL SMOKER & GRILL THESE WARNINGS MUST BE FOLLOWED WHENEVER USING PROPANE. FOLLOW THESE WARNINGS IN ADDITION TO THE WARNINGS LISTED ON PAGE 1 OF THIS MANUAL. WARNING • Do not use gasoline, kerosene or alcohol for lighting charcoal. Use of any of these or similar products will cause an explosion possibly leading to severe bodily injury.
-
Page 14: Charcoal Smoking
CHARCOAL SMOKING READ ALL WARNINGS ON PAGE 1 AND 12 BEFORE PROCEEDING 1. Remove dome lid, smoker body and base pan from cooker and set the cooker Before first use and after cleaning, apply a aside. light coat of vegetable oil or vegetable cooking spray to the interior surface of the 2. - Page 15 CHARCOAL GRILLING READ ALL WARNINGS ON PAGE 1 AND 12 BEFORE PROCEEDING Before first use and after cleaning, apply a light coat of vegetable oil or vegetable cooking spray to the interior surface of the dome lid, smoker body, cooking grills and water pan. This simple process will help reduce interior rusting.
- Page 16 Flavoring Wood • To obtain your favorite smoke flavor, experiment by using chunks, sticks or chips of flavor producing wood such as hickory, pecan, apple, cherry, or mesquite. Most fruit or nut tree wood may be used for smoke flavoring. Do not use resin- ous woods such as pine as it will produce an unpleasant taste.
- Page 17 1. Check the water level in water pan if the complete cooking process will Adding Water take longer than 3 hours. A low water level can be detected by listening During Cooking for the sound of water simmering. 2. Lift the dome lid off the smoker body. Tilt the dome lid toward you to allow heat and steam to escape away from your face.
- Page 18 AFTER-USE SAFETY WARNING • Always allow the cooker and all components to cool completely before handling. • Never leave coals and ashes in smoker/grill unattended. • Before cooker can be left unattended, remaining coals and ashes must be removed from smoker/grill. Use caution to protect yourself and property.
- Page 19 ACCESSORIES Boiling Pot with Strainer Basket The Art of Smoke Cooking Cookbook These professional-quality boiling pots with lids and Contains 40 exciting yet simple recipes using the strainer baskets are the number one choice of indoor and delicious technique of smoke cooking. Beautifully outdoor chefs.
-
Page 20: One Year Limited Warranty
ONE YEAR LIMITED WARRANTY For one year from date of purchase, The Brinkmann Corporation warrants the All-In-One against defects due to workmanship or materials to the original purchaser. The Brinkmann Corporation’s obligations under this warranty are limited to the following guidelines: •...
Need help?
Do you have a question about the ALL IN ONE and is the answer not in the manual?
Questions and answers