Table of Contents
Advertisement
Quick Links
Download this manual
See also:
Owner's Manual
Advertisement
Table of Contents

Related Manuals for Grizzly H7583


Summary of Contents for Grizzly H7583
-
Page 1: Instruction Manual
TENONING JIG MODEL H7583 INSTRUCTION MANUAL COPYRIGHT © MAY, 2005 BY GRIZZLY INDUSTRIAL, INC. REVISED DECEMBER, 2007 (JB) WARNING: NO PORTION OF THIS MANUAL MAY BE REPRODUCED IN ANY SHAPE OR FORM WITHOUT THE WRITTEN APPROVAL OF GRIZZLY INDUSTRIAL, INC. - Page 2 Some dust created by power sanding, sawing, grind- ing, drilling, and other construction activities contains chemicals known to the State of California to cause cancer, birth defects or other reproductive harm. Some examples of these chemicals are: • Lead from lead-based paints. •...
-
Page 3: Table Of Contents
Inventory ... 7 Clean Up ... 8 Table Saw Preparation ... 8 Jig Setup for a Right-Tilt Table Saw ... 9 Jig Setup for a Left-Tilt Table Saw ... 10 Guide Bar Adjustment ... 11 Work Support Plate ... 11 Adjustment ... -
Page 4: Introduction
INTRODUCTION Foreword We are proud to offer the Model H7583 Tenoning Jig. This machine is part of a growing Grizzly fam- ily of fine woodworking machinery. When used according to the guidelines set forth in this manu- al, you can expect years of trouble-free, enjoyable operation and proof of Grizzly’s commitment to... -
Page 5: Identification
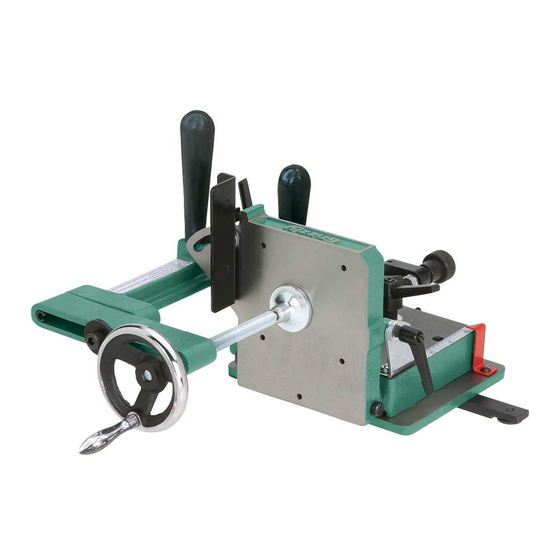
H7583 Tenoning Jig... -
Page 6: Section 1: Safety
Wear protective hair covering to con- tain long hair and wear non-slip footwear. 6. NEVER OPERATE MACHINERY WHEN TIRED, OR UNDER THE INFLUENCE OF OPERATING DRUGS OR ALCOHOL. Be mentally alert at all times when running machinery. OPERATING MACHINERY. H7583 Tenoning Jig... - Page 7 Follow instructions for lubricating and changing accessories. 16. MAKE SURE GUARDS ARE IN PLACE AND WORK CORRECTLY BEFORE USING MACHINERY. H7583 Tenoning Jig 17. REMOVE WRENCHES. Make a habit of checking for keys and adjusting wrenches before turn- ing machinery ON.
-
Page 8: Safety Instructions For The Tenoning Jig
NEVER hold the jig with only one hand. Like all machines there is danger associ- ated with the Model H7583. Accidents are frequently caused by lack of familiarity or failure to pay attention. Use this machine with respect and caution to lessen the pos- sibility of operator injury. -
Page 9: Section 2: Set Up
Wear safety glasses dur- ing the entire set up pro- cess! Unpacking The Model H7583 was carefully packed when it left our warehouse. If you discover the machine is damaged after you have signed for delivery, please immediately call Customer Service at (570) 546-9663 for advice. -
Page 10: Table Saw Preparation
Failure to do this may result in serious personal injury. The Model H7583 Tenoning Jig is made to oper- ate in a ⁄ " x ⁄ " miter T-slot. If the tenoning jig operates on a worn or mis-adjusted saw, tenon- ing results will be poor. -
Page 11: Jig Setup For A Right-Tilt Table Saw
The guide bar is initially in position on the jig for jig use on a right-tilting table saw. If you need to use the jig on a left-tilting table saw, go to Jig Setup for a Left-Tilt Table Saw on Page 10. -
Page 12: Jig Setup For A Left-Tilt Table Saw
In this procedure you will partially dissemble the tenoning jig and reassemble it for use on a left-tilt- ing table saw. To set up the jig for a left tilt table saw: Insert the jig guide bar into the miter slot in the table-saw table. -
Page 13: Guide Bar Adjustment
Figure 8. Miter slot guide bar. -11- H7583 Tenoning Jig... -
Page 14: Work Support Plate
⁄ " away from the edge of the saw blade. Then set the positive stop so the work support plate can be quickly returned to this posi- tion after cutting various thicknesses. MAKE SURE the blade clearance is adjusted... -
Page 15: Back Stop
12. Tighten the jam nut and make sure the work support plate stops an ⁄ " away from the edge of the saw blade. 13. Loosen the pointer screw and reposition the pointer to “0” on the scale. H7583 Tenoning Jig ⁄ " out of -13-... -
Page 16: Section 3: Operations
WE STRONGLY RECOMMEND that you read books, trade magazines, or get formal training before beginning any proj- ects. Regardless of the content in this sec- tion, Grizzly Industrial will not be held liable for accidents caused by lack of training. -14- Overview... -
Page 17: Basic Tenon Cutting
Plane a wood base stop to the thickness of the tenoning jig base, and mount it to the front of the table saw as shown in Figure 17. The base stop prevents cut off pieces getting trapped between the saw blade and the work support plate. - Page 18 Slide the jig up next to the saw blade, and use the major and micro adjustments (Figure 21) to line up the layout lines on the workpiece with the saw blade.
- Page 19 Power up the saw, and make the remain- ing cosmetic cheek cuts the same way as in Steps 3 & 4, unplug and turn OFF the saw (see Figure 24). Note: For cosmetic cheek cuts, merely rotate the workpiece 180º...
- Page 20 In this procedure you will complete the tenon by using the table saw fence, a stop block clamped to the fence, the saw miter gauge, and the base stop. ALWAYS use a cross-cut saw blade when making tenon shoulder cuts.
-
Page 21: Section 4: Maintenance
Any other unsafe condition. H7583 Tenoning Jig Cleaning Cleaning the Model H7583 is relatively easy. Vacuum excess wood chips and sawdust, and wipe off the remaining dust with a dry cloth. If any resin has built up, use a resin dissolving cleaner to remove it. -
Page 22: Parts List And Breakdown
Parts List and Breakdown -20- H7583 Tenoning Jig... -
Page 23: Parts List
PH7583032 BASE PSBS05M BUTTON HD CAP SCR M6-1 X 20 PH7583034 GUIDE BAR 34-1 PH7583034-1 PILOT SET SCREW M5-.8 X 16 34-2 PH7583034-2 PLATE H7583 Tenoning Jig Parts List PART # 34-3 PH7583034-3 PH7583007 PSB64M PSB61M PLW06M PH7583038 PH7583039 PH7583040... -
Page 24: Warranty And Returns
WARRANTY AND RETURNS Grizzly Industrial, Inc. warrants every product it sells for a period of 1 year to the original purchaser from the date of purchase. This warranty does not apply to defects due directly or indirectly to misuse, abuse, negligence, accidents, repairs or alterations or lack of maintenance. -
Page 25: Warranty Card
Do you think your machine represents a good value? Would you recommend Grizzly Industrial to a friend? Would you allow us to use your name as a reference for Grizzly customers in your area? Note: We never use names more than 3 times. - Page 26 FOLD ALONG DOTTED LINE FOLD ALONG DOTTED LINE Send a Grizzly Catalog to a friend: GRIZZLY INDUSTRIAL, INC. P.O. BOX 2069 BELLINGHAM, WA 98227-2069 Name_______________________________ Street_______________________________ City______________State______Zip______ TAPE ALONG EDGES--PLEASE DO NOT STAPLE Place Stamp Here...
- Page 28 Buy Direct and Save with Grizzly Visit Our Website Today And Discover Why • • • – Trusted, Proven and a Great Value! ® Grizzly Is The Industry Leader! ® SECURE ORDERING ORDERS SHIPPED WITHIN 24 HOURS E-MAIL RESPONSE WITHIN ONE HOUR...
Need help?
Do you have a question about the H7583 and is the answer not in the manual?
Questions and answers