Table of Contents
Advertisement
Quick Links
For questions or help with this product contact Tech Support at (570) 546-9663 or techsupport@grizzly.com
The following change was recently made since the owner's manual was printed:
•
Section for Adjusting Stop has been added.
Aside from this information, all other content in the owner's manual applies and MUST be read and under-
stood for your own safety. IMPORTANT: Keep this update with the owner's manual for future reference.
For questions or help, contact our Tech Support at (570) 546-9663 or techsupport@grizzly.com.
Adjusting Stop
The work stop should be adjusted to support the
workpiece for both straight and taper cuts. Loosen
the stop screws, adjust the stop as far out as the
operation allows to provide as much workpiece
support as possible (see Figure 1), then tighten
the screws to secure.
Figure 1. Location of stop screws.
The stop MUST be adjusted so it will not contact
the blade during the cut. To check for interference
with the stop, draw a cut line on the workpiece
that traces the path of the blade, as shown in
Figure 2, then proceed with the operation.
WARNING: NO PORTION OF THIS MANUAL MAY BE REPRODUCED IN ANY SHAPE
OR FORM WITHOUT THE WRITTEN APPROVAL OF GRIZZLY INDUSTRIAL, INC.
READ THIS FIRST
x 2
Stop
COPYRIGHT © JULY, 2024 BY GRIZZLY INDUSTRIAL, INC.
#CS23290 PRINTED IN TAIWAN
Model T33989
***IMPORTANT UPDATE***
For Machines Mfd. Since 11/23
and Owner's Manual Printed 01/24
Cut Line
Stop
Figure 2. Stop adjusted away from cut line to
prevent interference with blade.
If stop contacts blade during operation,
stop can become a dangerous projectile or
cause kickback. If stop cannot be adjusted
to support workpiece without contacting
blade, do not proceed with operation.
Use different workpiece support method
or modify angle settings so stop will not
contact blade or blade guard.
Advertisement
Table of Contents

Related Manuals for Grizzly T33989


Summary of Contents for Grizzly T33989
- Page 1 ***IMPORTANT UPDATE*** For Machines Mfd. Since 11/23 and Owner's Manual Printed 01/24 For questions or help with this product contact Tech Support at (570) 546-9663 or techsupport@grizzly.com The following change was recently made since the owner's manual was printed: •...
- Page 2 (For models manufactured since 11/23) COPYRIGHT © JANUARY, 2024 BY GRIZZLY INDUSTRIAL, INC. WARNING: NO PORTION OF THIS MANUAL MAY BE REPRODUCED IN ANY SHAPE OR FORM WITHOUT THE WRITTEN APPROVAL OF GRIZZLY INDUSTRIAL, INC. #CS22986 PRINTED IN TAIWAN V1.01.24...
- Page 3 This manual provides critical safety instructions on the proper setup, operation, maintenance, and service of this machine/tool. Save this document, refer to it often, and use it to instruct other operators. Failure to read, understand and follow the instructions in this manual may result in fire or serious personal injury—including amputation, electrocution, or death.
-
Page 4: Table Of Contents
Table of Contents INTRODUCTION ..........................2 Contact Info ..........................2 Specifications ..........................2 Manual Accuracy .........................2 SECTION 1: SAFETY ........................3 Safety Instructions for Machinery ....................3 Additional Safety for Taper/Straight Line Jigs ................5 SECTION 2: SETUP ......................... 6 Needed for Setup ........................6 Unpacking ...........................6 Inventory ............................7 Assembly .............................8... -
Page 5: Introduction
Maximum Stock Width ......5-3/4 in. Taper Angle ......... 0–12 deg. Fence Length ..........32 in. Fence Width ..........2-1/2 in. Fence Height ..........1 in. Construction Base ........Laminated MDF Fence ........Laminated MDF Miter Bar ........Aluminum Model T33989 (Mfd. Since 11/23) -
Page 6: Section 1: Safety
Never operate under the influence of drugs or injury or blindness from flying particles. Everyday alcohol, when tired, or when distracted. eyeglasses are NOT approved safety glasses. Model T33989 (Mfd. Since 11/23) - Page 7 EXPERIENCING DIFFICULTIES. If at any time debris. Make sure they are properly installed, you experience difficulties performing the intend- undamaged, and working correctly BEFORE ed operation, stop using the machine! Contact our operating machine. Technical Support at (570) 546-9663. Model T33989 (Mfd. Since 11/23)
-
Page 8: Additional Safety For Taper/Straight Line Jigs
When rip cutting is complete, always saws that do not meet these requirements or are install miter bar on jig before performing taper cut. adjusted incorrectly may cause an increased risk of kickback and operator injury. Model T33989 (Mfd. Since 11/23) -
Page 9: Section 2: Setup
IMPORTANT: Save all packaging materials until trim jig base with table saw. you are completely satisfied with the equipment and have resolved any issues between Grizzly or the shipping agent. You MUST have the original packaging to file a freight claim. It is also extremely helpful if you need to return your equipment later. -
Page 10: Inventory
If you cannot find an item on this list, care- fully check around/inside the machine and packaging materials. Often, these items get lost in packaging materials while unpack- ing or they are pre-installed at the factory. Figure 1. Loose inventory. Model T33989 (Mfd. Since 11/23) -
Page 11: Assembly
Thread (9) 10-32 slotted set screws into miter bar (see Figure 4). Miter Bar Miter Bar Jig Base Figure 4. Installing slotted set screws in miter bar. Figure 6. Attaching miter bar to jig base (right mounting hole setup shown). Model T33989 (Mfd. Since 11/23) - Page 12 Blade these hazards if your setup requires you to trim jig base with table saw. 16. Connect table saw to power and turn saw Figure 8. Checking blade clearance. Model T33989 (Mfd. Since 11/23)
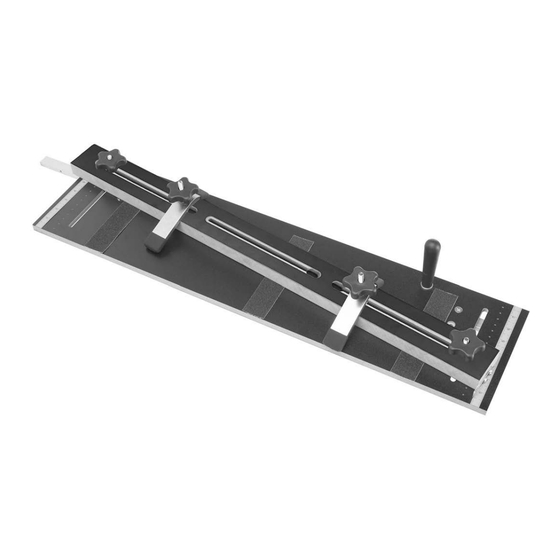
- Page 13 (1 of 2) Grip Strip (1 of 3) Stop Mounting Tapered Screw Hole Knob (1 of 3) Figure 11. Scales and grip strips affixed to jig. Figure 13. Attaching fence to jig base. -10- Model T33989 (Mfd. Since 11/23)
-
Page 14: Section 3: Operations
DISCONNECT TABLE SAW FROM POWER! ects. Regardless of the content in this sec- tion, Grizzly Industrial will not be held liable Loosen (2) fence knobs (see Figure 14). for accidents caused by lack of training. -
Page 15: Cutting Tapers
Use the following steps to complete a basic taper of the fence with hole #4, there is a difference of cut using the Model T33989. 3 holes between them, so the jig will produce a 3° taper (see Figure 15). - Page 16 13. Turn OFF saw and allow blade to come to If kickback occurs, hold-down clamps will complete stop before removing cut-off piece prevent or slow down kickback. or bringing jig back to start position. -13- Model T33989 (Mfd. Since 11/23)
-
Page 17: Cutting Straight Lines
Place jig against table saw rip fence (see Figure 23). Straight Lines Use the following steps to cut a basic straight line (or "rip") using the Model T33989. To cut a straight line: DISCONNECT TABLE SAW FROM POWER! Remove jig from table saw and install table Fence saw rip fence. - Page 18 If workpiece cannot be secured with hold- pleting any taper cuts with jig. down clamps, use different hold-down method or DO NOT cut workpiece on jig. If kickback occurs, hold-down clamps will prevent or slow down kickback. -15- Model T33989 (Mfd. Since 11/23)
-
Page 19: Section 4: Accessories
11 ⁄ " To reduce this risk, only install accessories between blade arbor and rear table edge. recommended for this machine by Grizzly. NOTICE Refer to our website or latest catalog for additional recommended accessories. T32428—37" Bear Roll Outfeed System... -
Page 20: Section 5: Maintenance
Protecting To reduce risk of shock or accidental startup, always disconnect machine from Cleaning the Model T33989 is relatively easy. power before adjustments, After use, vacuum excess wood chips and saw- maintenance, or service. dust, and wipe off the remaining dust with a dry cloth. -
Page 21: Section 6: Service
2. Using jig and rip fence at the same time when 2. Never use rip fence with jig together when cutting a taper cutting. taper. 3. Jig not set up to cut wide end of taper first. 3. Set up jig to cut wide end of taper first. -18- Model T33989 (Mfd. Since 11/23) -
Page 22: Section 7: Parts
SECTION 7: PARTS We do our best to stock replacement parts when possible, but we cannot guarantee that all parts shown are available for purchase. Call (800) 523-4777 or visit www.grizzly.com/parts to check for availability. Main -19- BUY PARTS ONLINE AT GRIZZLY.COM! Model T33989 (Mfd. -
Page 23: Main Parts List
T-BOLT 5/16-18 X 2-1/2 PT33989017 GRIP STRIP ADHESIVE PT33989009 T-BOLT 5/16-18 X 3-1/2 PT33989018 SET SCREW 10-32 X 5/8 SLOTTED NYLON -20- BUY PARTS ONLINE AT GRIZZLY.COM! Model T33989 (Mfd. Since 11/23) Scan QR code to visit our Parts Store. -
Page 24: Warranty & Returns
WARRANTY & RETURNS Grizzly Industrial, Inc. warrants every product it sells for a period of 1 year to the original purchaser from the date of purchase. This warranty does not apply to defects due directly or indirectly to misuse, abuse, negligence, accidents, repairs or alterations or lack of maintenance. This is Grizzly’s sole written warranty...
Need help?
Do you have a question about the T33989 and is the answer not in the manual?
Questions and answers