Table of Contents
Advertisement
Quick Links
Download this manual
See also:
User Manual
Advertisement
Table of Contents

Related Manuals for Intellinet 550260


Summary of Contents for Intellinet 550260
- Page 1 HIGH SPEED DOME INDOOR/OUTDOOR NETWORK CAMERA USER MANUAL MODEL 550260/550277 INT-550260/550277-UM-0207-01...
-
Page 2: Table Of Contents
CONTENTS section page 1. Introduction ...............3 2. Web Browser Setup ............5 3. Configuration ..............6 Live View Screen ..............6 Administrator Tools ..............9 Basic ................9 User Accounts ..............15 Event Configuration ............17 Advanced ..............22 Maintenance ..............23 Support .................25 4. Firmware Upgrade ............25 5. -
Page 3: Introduction
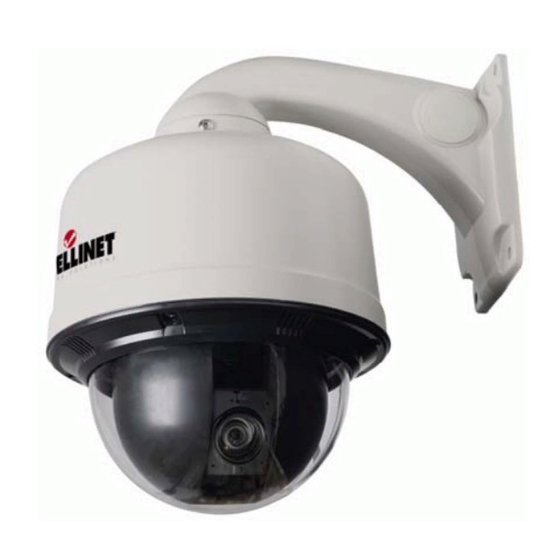
Thank you for purchasing the INTELLINET NETWORK SOLUTIONS High ™ Speed Dome Indoor/Outdoor Network Camera, Model 550260 (NTSC) or Model 550277 (PAL). The ideal solution for your demanding security surveillance and remote monitoring applications, the High Speed Dome Indoor/Outdoor Network Camera can be used for day or night viewing, and comes in a rugged tamper-proof enclosure for protection against dust and heavy jets of water, complete with a heater and blower to keep it within proper operating temperatures. -
Page 4: Legal Considerations
Legal Considerations Camera surveillance can be prohibited by laws that vary from country to country. Check your local laws before using this product for surveillance purposes. This product includes one MPEG-4 decoder license. To purchase further licenses, contact your reseller. Electromagnetic Compatibility (EMC) This equipment generates, uses and can radiate radio frequency energy. -
Page 5: Web Browser Setup
2. WEB BROWSER SETUP This section explains how to monitor the High Speed Dome Network Camera image. Homepage Login 1. Activate the Web browser on the computer and enter the IP address of the camera (the default address is 192.168.1.221) to display the camera’s Login page. 2. -
Page 6: Configuration
• If you are using Internet Explorer — From the Tools menu of Internet Explorer, go to Internet Options, then Advanced. Check “JIT complier for virtual machine enabled (required restart).” Then restart Internet Explorer. • If you are going to install Netscape — Install Java during Netscape installation, following the installation instructions. - Page 7 Frame/data rate Live image area Number of connected users Access to Administrator Tools Recording/Snapshot These buttons activate the recording of streaming video (DivX) or still images (BMP) AVI Recording Click “Recording” to start recording. Enter the filename and specify the destination of the video file.
- Page 8 Panning and Tilting (PTZ) You can pan and tilt the camera using the eight directional arrow buttons. First, click to stop moving the camera. Click whichever arrow button indicates the direction you want to aim the camera. Hold down the mouse button to move the direction of the camera continuously.
-
Page 9: Administrator Tools
Tour If you have programmed a sequence of PTZ presets, you can turn on the “guard tour” by clicking on this button. When the Tour mode is active, the camera will continuously move from one position to the next and loop through the programmed presets. - Page 10 Device Name Enter the device name for the camera. The camera shows up in your network under this name. The name also shows up in your DHCP server log, should you decide to set the network address to “Dynamic IP Address” (see below). Network Address The IP address of the camera can be set automatically via DHCP —...
- Page 11 Web, Video, Upgrade and PTZ Server Port Configuration Enter the port number for each server port within a limit. Normally, it is not necessary to make any changes to the port settings. Service Configuration The camera can send you an email whenever the IP address of the camera changes (e.g., when you have set up a dynamic IP address for the camera).
- Page 12 ID/Password: Enter your DYNDNS user ID and password. These are the same values needed to log in to your personal account on dyndns.org. Camera URL: Enter the dynamic DNS host address you have registered; e.g., mycamera.dyndns.org. Status: The camera displays the status of the DYNDNS update. Click ”Save”...
- Page 13 Image Size, Image Quality, Image Rotation Image size: Select the image resolution from the drop-down list. (See Specifications for NTSC (Model 550260) and PAL (Model 550277) resolution options.) Image frame: This is the frame rate (fps = frames per second, or images per second).
- Page 14 Image rotation: This lets you flip the image in your Web browser. NOTE: This setting does not have any effect on videos transmitted via FTP or email. VBR/CBR: In MPEG4 compression mode, you can select either VBR or CBR. Variable bitrate (VBR) varies the amount of output data per time segment. VBR allows a higher bitrate (and, therefore, more storage space) to be allocated to the more complex segments of media files while less space is allocated to less complex segments.
-
Page 15: User Accounts
Preset Setting 1. Use the PTZ controls below the image to move the camera to the desired position. 2. In the “Select preset no.” field, choose from the drop-down list ([home] to [P19]). 3. Fill in the “Enter preset name” field (e.g., “door”) and click “Save >>.” The new preset appears in the list box to the right. - Page 16 Administrator The administrator has full control over all camera settings. Administrator Fill in the fields as shown below to establish the administrator access requirements. Admin ID: Enter an admin ID (default = “admin”) between four and 10 characters (letters or numerals). Old password: Enter the previous password (if applicable;...
-
Page 17: Event Configuration
browser Live View screen. PTZ: Allows controlling the camera movement via the PTZ controls. Click ”Save” to submit the General User settings to the camera. VENT ONFIGURATION This section describes how to configure the camera’s alarm handling. The camera can be configured to perform different actions when a defined type of event occurs. - Page 18 FTP server. FTP Server: Enter the IP address or domain name of the FTP server. Do not put “ftp://” in front of the IP address or domain name. (“ftp.intellinet-network.com” would be correct; “ftp://ftp.intellinet-network.com” would be incorrect.) FTP Server Port: Enter the FTP server port number.
- Page 19 is to perform certain actions. Triggering enabled: Check this box to enable the event trigger configuration. Trigger Source A triggered event can be activated by four different types of events. Motion Detection: Check to activate and set the time schedule for this type of event.
- Page 20 Select the suffix to add the video file name: There are four suffixes that can be added to the video filename. If you click all, the video file name will be EVENT_192.168.0.75_2006_08_14_13_20_44_MD_000 (file name_IP address_date and time_trigger source_file sequence number). Action resulting from event triggering –...
- Page 21 motion detection function: 1. Click “Show me motion area” below the live image; the block zone appears as an overlay on the live image. 2. Click to activate/ deactivate individual motion detection blocks or click “Set all” to set the motion area as the entire image.
-
Page 22: Advanced
Input port action The input port option can be used to connect external alarm devices or sensors to the camera to trigger an action. There are two types of sensors on the market: Some open a circuit in case of an alarm, while others close a circuit. -
Page 23: Maintenance
Time stamp overlay: If this option is activated, the date and time stamp is visible on the Web browser live view, but not in any images transmitted via email or FTP. While you can activate both of these options, it is not recommended. Frame rate and bitrate overlay: If this option is activated, the current frame rate and bitrate are displayed on the Web browser live view. - Page 24 Save all the parameters and user-defined scripts to a backup file Click “Export” to create a dump of the entire configuration and save it on your local hard drive. If you want to restore the configuration later, perform the next step. Use a saved backup file to return the camera to a previous configuration Click “Browse”...
-
Page 25: Support
Get Help These are the Web addresses of various information sources. Product Info This is the Web address of Intellinet Network Solutions. 4. FIRMWARE UPGRADE New firmware versions become available from time to time, adding new features and addressing compatibility problems. If you experience technical difficulties with your product, check the Web site http://www.networkipcamera.com... - Page 26 Using the Camera Manager Utility 1. Start the Camera Manager utility/program from the enclosed CD. Camera Manager finds and lists all High Speed Dome Network Cameras on your network. 2. Select the camera you want to upgrade from the list. 3.
-
Page 27: Troubleshooting
5. TROUBLESHOOTING PINGing Your IP Address By sending a packet to the specified address and waiting for a reply, the PING (Packet Internet Groper) program can determine whether a specific IP address is accessible. It also provides a particularly useful method for confirming any addressing conflicts with your camera on the network. - Page 28 Problem Possible Cause Remedial Actions Can’t set the IP The IP address is If you receive Relay from<IP address>: address. being used by bytes = 32; time=10ms, the IP address (continued) may already be in use by another another device. (continued) device on your network.
- Page 29 Problem Possible Cause Remedial Actions Video/image isn’t Slow Isolate any factors — such as heavy right. performance. network traffic, many users with access (continued) to the unit, low-performing clients, use of features such as Event Setting or Image Rotation — that can slow the camera’s performance, then change settings or conditions to minimize the effect.
-
Page 30: Appendix
Problem Possible Cause Remedial Actions The pan, tilt, zoom, Wait a moment, then access the camera Multiple users focus, click to center are operating again. and preset features the camera do not work. simultaneously. (Continued) The range limit has Confirm that the end display is been reached. -
Page 31: Schematic Diagrams
SCHEMATIC DIAGRAMS To use the terminal block, you should disassemble the camera. Refer to the quick installation guide for disassembly instructions. TERMINAL BLOCK DYNAMIC DNS Your Internet service provider (ISP) provides you with at least one IP address which you use to connect to the Internet. The address you get may be static, meaning it never changes, or dynamic, meaning it’s likely to change periodically. -
Page 32: Glossary
usually provided for free by the service. Check the service’s Web page for further information, terms and conditions. How to Use a DynDNS DDNS Server 1. Go to the DynDNS homepage (www.dyndns.org). 2. Click “Sign Up Now”; then create an account (unless you already have one). 3. -
Page 33: Specifications
JPEG — A standard image format, used widely for photographs. Also known as JPG. LAN — Local Area Network: a data communications network that is geographically limited (typically to a 1 km radius), allowing easy interconnection of terminals, microprocessors and computers within adjacent buildings. MPEG-4 —... - Page 34 Image Sensor and Lens Specifications • 1/4” SONY Super HAD CCD sensor • Total pixels: 410k, 811 (H) x 508 (V) • Horizontal resolution, more than 540 TV lines • S/N ratio: more than 50 dB • Video output: 1.0 Vp-p (75 Ohms, composite) •...
- Page 35 NOTES...
- Page 36 Are you completely satisfied with this product? Please contact your INTELLINET NETWORK SOLUTIONS dealer ™ with comments or questions. Copyright © INTELLINET NETWORK SOLUTIONS All products mentioned are trademarks or registered trademarks of their respective owners.
Need help?
Do you have a question about the 550260 and is the answer not in the manual?
Questions and answers