
Related Manuals for Intellinet 550260


Summary of Contents for Intellinet 550260
-
Page 1: User Manual
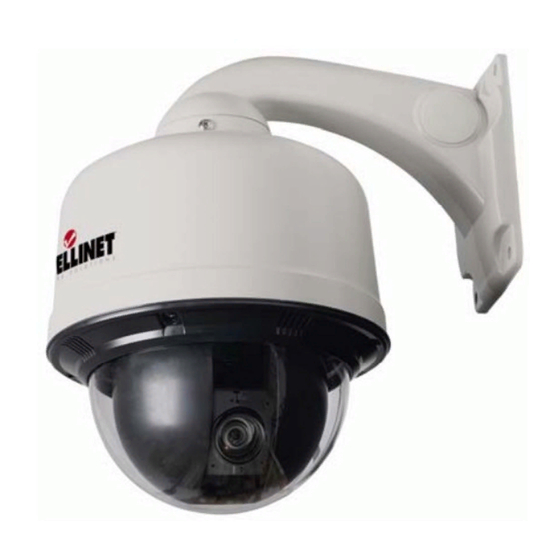
PRO SERIES High-Speed Dome Camera Network Speed Dome Camera USER MANUAL Model 550260 (NTSC, 30x) Model 550277 (PAL, 30x) Model 550437 (NTSC, 10x) Model 550451 (PAL, 10x) INT-PSNC-UM-0207-02... - Page 2 Thank you for purchasing this INTELLINET NETWORK SOLUTIONS™ Pro Series High-Speed Dome Network Camera. This user manual includes instructions for using and managing the camera on your network. Networking experience will be helpful when setting up and using this product. Updated versions of this document will be posted to www.networkipcamera.com as they become available.
-
Page 3: Table Of Contents
TABLE OF CONTENTS PRODUCT OVERVIEW Key Features Package Contents OPERATING THE HIGH-SPEED DOME CAMERA ONNECTING TO THE CAMERA Java Applet Viewer ActiveX viewer MAIN LIVE VIEW PAGE ECTION ONFIGURING THE PEED OME CAMERA VERVIEW OF THE DMINISTRATOR OOLS Network Dynamic DNS Date and Time Video PTZ Control... - Page 4 Support HELP Product Info FIRMWARE UPGRADE PROCEDURE Using the Web browser interface Using the Camera Manager program SIMPLE MULTI VIEWER Overview Minimum System Requirements Installation Procedure Simple Multi Viewer User Interface Video Player APPENDIX Troubleshooting PINGing your IP Address Symptoms, Possible Causes and Remedial Actions Terminal Block Schematic Diagram Dynamic DNS Registration...
-
Page 5: Product Overview
0.6 lux, and black and white video in dark conditions with very little light. As with all true domes, the INTELLINET NETWORK SOLUTIONS High-Speed Dome camera can execute a continuous 360-degree pan and 90-degree tilt to cover... -
Page 6: Key Features
Key Features High-Speed panning and tilting of 360 degrees per second Powerful optical zoom of 30x or 10x, depending on model 360 degrees endless panning Integrated motion detection with FTP and E-mail upload of AVI and JPEG files Privacy Masking functionality with up to 16 different zones, depending on model Simultaneous MPEG4 and Motion-JPEG Dual-Mode streaming SNMP support Day/Night functionality... -
Page 7: Operating The High-Speed Dome Camera
Operating the High-Speed Dome Camera This section explains how to monitor the image from the camera using the Web browser. Connecting to the camera Start the Web browser on the computer and type the IP address of the camera (default: 192.168.1.221). The Log in page of Network Speed Dome Camera is displayed. -
Page 8: Java Applet Viewer
Access Methods You can select one of the following two viewers. Java Applet Viewer The Java applet viewer operates on Internet Explorer or Netscape. It displays the main viewer page using Java. With this viewer, you can use all the functions provided with this software The Frame rate is lower than for the other viewers If the viewer does not operate correctly, install or activate Java as follows. -
Page 9: Main Live View Page
Main Live View Page After you log in, the live view page is displayed. This section briefly explains the functions of the controls on the main viewer page. Live View Page Camera Name & Location Live image Section Frame rate / Data rate # Connected Users Menu Section... -
Page 10: Menu Section
Menu Section Recording / Snapshot These buttons activate recording of streaming video (DivX) or still images (BMP). AVI Recording Click the record button to start recording Type the file name and specify the destination of the video file and click "save". The recording now begins. The camera creates a new file once every 10 minutes until you press the record button again or until your computer runs out of disk space. - Page 11 Zoom In / Out Control the zoom factor of the image. Focus In / Out Click to adjust the focus manually. By default, the Auto Focus option is enabled, but you can manually take control of the focus. When you move the camera to a different position with the arrow buttons, the auto focus mode is automatically re-engaged.
-
Page 12: Configuring The High-Speed Dome Camera
Configuring the High-Speed Dome camera This section describes how to configure the Network Speed Dome Camera and is intended for the product Administrator, who has unrestricted access to all Setup tools. Overview of the Administrator Tools The table below provides an overview of the Administration tools: Basic Network, Dynamic DNS, Date and Time, Video, PTZ Setup User Account... -
Page 13: Network
Network All network-related settings can be defined here. Device Name Enter a device name for the camera. The camera shows up in your network under this name. The name also shows up in your DHCP Server log, should you decide to set the Network Address to "Dynamic IP Address"... -
Page 14: Dynamic Dns
Dynamic DNS Your Internet Service Provider (ISP) provides you with one public IP address. The address you get may be static, meaning it never changes, or dynamic, meaning it’s likely to change periodically. Just how often it changes, depends on your ISP. If your IP Address changes periodically, you want to use the DDNS Service (free service offered a www.dyndns.org) to obtain a static address for your dynamic IP. -
Page 15: Date And Time
Date and Time Current Camera Time Displays current date and time information based on the settings below. Time Configuration (x) Set Manually You can enter yyyy-mm-dd (year-month-day) for date and hh:mm:ss (hours:minutes:seconds) for time. Manual time configuration is required if the camera is unable to make a connection to an NTP server, perhaps because the camera has no access to the Internet and no local NTP Server is present. -
Page 16: Video
Video All video-related settings can be configured on the page below. Dual Mode Streaming When this is activated, the camera will send out MPEG4 video and Motion-JPEG video at the same time. This can be useful if you want to utilize a third-party video surveillance solution which uses Motion-JPEG and at the same time want to benefit of the MPEG4 compression for your Web browser based access. - Page 17 Image Size, Image Quality, Image Rotation Image Size: Select the image resolution from the drop-down list. Possible values are: 720x480, 640x480, 720x240, 640x240, 352x240 and 320x240. Frame Rate: FPS stands for frames per second, or images per second. To conserve bandwidth, you may lower the overall maximum frame rate of the live video.
- Page 18 Highest Bit Rate/Quality -> highest network bandwidth usage: The effects of compression are minimal at the best image quality settings. The bandwidth usage of the camera at this setting can be up to 10 Mbps. De-Interlace Interlaced video is composed of two fields that are captured at different moments in time. When displayed on a typical computer screen, interlaced video frames will exhibit motion artifacts when both fields are combined and displayed at the same moment (today's computer screens are progressive scan monitors which display the image line by line from top to bottom without interlacing).
- Page 19 NOTE: De-interlacing is only active for ActiveX / MS Internet Explorer. Java does not support it. Color Control You can adjust the Brightness, Contrast, Saturation and Hue settings of the live image. Normally it is not necessary to change these values as the camera automatically adjusts for changing light conditions. Direct Image Access This URL allows a direct connection to the internal JPEG image of the camera.
-
Page 20: Ptz Control
PTZ Control This screen allows you to store up to 20 presets and to create a guard tour (sequence of steps automatically performed by the camera). Preset setting Follow the steps below. 1. Use the PTZ controls below the image to move the camera to the desired position. 2. -
Page 21: User Accounts
User Accounts This section describes how to set the ID and password of the Administrator and regular camera users. Administrator The administrator has full control over all camera settings. Admin ID Type an Admin ID (default = "admin") between 4 and 10 characters. Old password Type an Old password (default = "admin") between 4 and 10 characters. -
Page 22: General User
General User Set up regular users and define access rights to the Alarm In/Out relay and PTZ control. ID: Enter the user name of the account. Password: Enter the password for this user account. Confirm: Repeat the password for this user account. All users have the ability to view the live image. -
Page 23: Event Configuration
Event Configuration This section describes how to configure the NETWORK SPEED DOME Camera's alarm handling. The camera can be configured to perform different actions when a defined type of event occurs. Event Server E-mail and FTP Server settings. SMTP (email) to send captured images/video Check Enabled to activate the SMTP (Simple Mail Transfer Protocol) service of the camera, which allows the camera to send you short AVI videos to your e-mail address. - Page 24 FTP Server Port: Enter the FTP Server port number. The default is 21, which is true for most FTP Servers. User name: Enter the FTP user name. Password: Enter the FTP password. Upload path: Enter the upload path to save the captured image / video data. When is it required? Whenever you want to upload the images to a subfolder of your FTP User's Home (Root) Directory.
- Page 25 Event Setting An Event setting is as set of parameters describing how and when the Speed Dome Camera is to perform certain actions. Triggering enabled. Check this option to enable the Event Trigger Configuration. Trigger Source A Triggered event can be activated by four different types of events. Motion Detection Check to activate and set the time schedule for this type of event.
- Page 26 Upload Format Select AVI VIDEO to receive a video file and JPEG IMAGE to receive a sequence of JPEG still images. Video/image file name Specify the filename of the video/image the camera captures. Select the suffix to add to the video file name There are four suffixes to add to the video file name.
-
Page 27: Trigger Condition
Trigger Condition You can configure the trigger condition including, motion detection, input port action and timer condition. Motion detection Motion detection is used to generate an alarm whenever movement occurs in the video image. A total of 5 levels can be configured. - Page 28 Show me detection When you click on this button, the camera highlights all areas in which motion occurs. You can use this function to adjust the sensitivity. See the sample image below. The person moving through the image is detected and the detection is indicated by highlighting the corresponding grid blocks.
-
Page 29: Advanced
Advanced This section is used for layout options and camera security. Layout Camera Name and Location Display Here you can specify the camera name (max. 15 characters) and the location (max. 30 characters). The option "Change HTML title" allows you to change the appearance of the camera in search engines such as Google. -
Page 30: Security & Snmp
Security & SNMP IP filtering use: Deny Activate the IP Filtering function of the camera. This is a "deny" list, meaning that all IP Addresses you specify will be disallowed access to the camera. IP filtering list You can define up to 10 ranges of IP addresses for which you want to deny access to the High-Speed Dome Camera. - Page 31 Shutter Speed: This parameter controls the length of time (in sec.) the shutter stays open. The default value is "Auto". In this mode, the camera controls the shutter speed automatically. You can set the shutter speed to a fixed value. 1/120 stands for 1/120 sec. and 1/30000 stands for 1/30000 sec. The shorter the shutter speed, the less light that can reach the CCD image sensor at a given time.
-
Page 32: Privacy Zone (2008 And Newer Models Only)
Privacy Zone (2008 and newer models only) The INTELLINET NETWORK SOLUTIONS High-Speed Dome cameras support privacy masking. This is a technology which allows you to "censor" or black out certain areas in the image. Depending on the camera model, you can define between 4 and 16 privacy zones. Privacy masking is an important feature to protect the privacy rights of individuals. -
Page 33: Maintenance
Maintenance System Initialization This page contains a set of tools to perform certain operations. Restart If the camera is not behaving correctly, you can remotely reboot the camera using this option. No camera settings are overwritten during this operation. The entire restart process takes 30 seconds. Restore All camera settings are being set back to factory default values –... -
Page 34: Info. And Upgrade
Info. and Upgrade Information See the system information for the INTELLINET NETWORK SOLUTIONS High-Speed Dome Camera. Upgrade Firmware This function lets you install a new firmware on the High Speed Dome Network Camera. Updated versions can be found at http://www.networkipcamera.com. -
Page 35: Firmware Upgrade Procedure
Firmware Upgrade Procedure New firmware versions become available from time to time, adding new features and addressing compatibility problems. If you experience technical difficulties with your product, you should check the Web site www.networkipcamera.com to find out if a new firmware version is available. Download the firmware to your computer's desktop and uncompress the ZIP file. -
Page 36: Using The Camera Manager Program
Using the Camera Manager program Start the camera manager program from the program CD. Camera Manager finds all High Speed Dome Network Cameras on your network. 1. Select the camera from the list. 2. Enter user ID and password administrator account. 3. -
Page 37: Simple Multi Viewer
Overview Simple Multi Viewer (SMV) is a software application which allows monitoring, controlling and recording of up to four INTELLINET NETWORK SOLUTIONS High-Speed Dome cameras. SMV supports several methods to control the movement of the speed dome: 1. Using the SMV user interface: Use the arrow keys and zoom/focus controls. -
Page 38: Minimum System Requirements
Minimum System Requirements Hardware Intel Pentium 4 with 2 GHz processor CD-drive 512 MB RAM Hard Disk: 10 MB available space for installation NTFS file system XGA (1024 x 768) or higher resolution monitor 100 Mbps Ethernet with a static IP address System Microsoft Vista, Microsoft Windows XP professional SP2, 2000 (SP4) 2003 Server (SP1), Internet Explorer Version 6.0 or later, DirectX 9.0c or later (for MPEG2/4) -
Page 39: Simple Multi Viewer User Interface
Simple Multi Viewer User Interface Interface Functions Recording and Snapshot These buttons activate the recording of streaming video (Divx) or still images (BMP). Click “Rec. AVI” to start the recording. Enter the filename and then click “OK.” The camera creates a new file once every 10 minutes, until “Recording” is clicked again or until your computer runs out of disk space. - Page 40 PTZ control You can pan and tilt the camera using the eight directional arrow buttons. Click and hold the arrow button which indicates the direction you want to aim the camera. Adjust the Movement Speed Control the speed of the movement with the slider below the arrows. Left position = slowest, right position = fastest.
-
Page 41: Video Player
Video Player Click “Video Player” to play the recorded video image or execute “SMV player” on your PC. SMV Player.lnk Video Storage Path Browse Click on "Browse" to define the location of the videos. This location is the video player's location. It does not control the location of the recording, which is defined under Storage Location. -
Page 42: Appendix
Appendix Troubleshooting This appendix provides useful information to help you resolve any difficulty you might have with your camera. Symptoms, possible causes and remedial actions are provided within a quick reference table. PINGing your IP Address By sending a packet to the specified address and waiting for a reply, the PING (Packet Internet Groper) can determine whether a specific IP address is accessible;... - Page 43 new IP address and reinstall the unit. If you receive: Request timed out – this means that the IP address is available for use with your camera. In this case, check all cabling and reinstall the unit. Cannot log in If the camera has been configured to use HTTPS, check that the protocol in the URL used to access the unit is correct.
- Page 44 Faulty installation Check all cables, plugs, contacts and connections. Wrong IP address Check the IP address (with an IP utility). No image Faulty data Check data transmission with the ping transmission within command. the LAN Firewall protection Check the Internet firewall with your system administrator.
-
Page 45: Terminal Block
Terminal Block This section describes the pin out provided by the connection module consisting of: 1 digital output I digital input RS-485 R/TX Pin NO. 1 The input/output is used in applications for event triggering, time-lapse recording, alarm notification via e-mail, picture storage to FTP locations. - Input –... -
Page 46: Schematic Diagram
Schematic Diagram You should disassemble the speed dome network camera to use terminal block. Refer to the installation guide how to disassemble the speed dome network camera. TERMINAL BLOCK [Description of network board]... -
Page 47: Dynamic Dns Registration
Dynamic DNS Registration Your Internet Service Provider (ISP) provides you with one IP address which you use to connect to the Internet. The address you get may be static, meaning it never changes, or dynamic, meaning it’s likely to change periodically. Just how often it changes depends on your ISP. A dynamic IP address complicates remote access since you may not know what your current WAN IP address is when you want to access your network over the Internet. -
Page 48: Technical Specifications
Technical Specifications High Speed Dome Indoor/Outdoor Network Camera (550277) MPEG4, CCD, Day/Night, Temperature Controlled, PAL Standards • IEEE 802.3 (10Base-T Ethernet) • IEEE 802.3u (100Base-TX Fast Ethernet) • IP66 (Ingress Protection) General • Supported image resolutions: 720 x 576, 640 x 576, 720 x 288, 640 x 288, 352 x 288, 176 x 144 •... - Page 49 High Speed Dome Indoor/Outdoor Network Camera (550260) MPEG4, CCD, Day/Night, Temperature Controlled, NTSC Standards • IEEE 802.3 (10Base-T Ethernet) • IEEE 802.3u (100Base-TX Fast Ethernet) • IP66 (Ingress Protection) General • Supported image resolutions: 720 x 480, 640 x 480, 720 x 240, 640 x 240, 352 x 240, 320 x 240 •...
- Page 50 Mini High-Speed Dome Camera (550451) MPEG4/M-JPEG, CCD, Day/Night, Audio, PAL Standards • IEEE 802.3 (10Base-T Ethernet) • IEEE 802.3u (100Base-TX Fast Ethernet) General • Supported image resolutions: 720 x 576, 640 x 576, 720 x 288, 640 x 288, 352 x 288, 176 x 144 •...
- Page 51 Mini High-Speed Dome Camera (550437) MPEG4/M-JPEG, CCD, Day/Night, Audio, NTSC Standards • IEEE 802.3 (10Base-T Ethernet) • IEEE 802.3u (100Base-TX Fast Ethernet) General • Supported image resolutions: 720 x 480, 640 x 480, 720 x 240, 640 x 240, 352 x 240, 320 x 240 •...
- Page 52 INTELLINET NETWORK SOLUTIONS™ offers a complete line of active and passive networking products. Ask your local computer dealer for more information or visit www.intellinet-network.com Copyright © INTELLINET NETWORK SOLUTIONS All products mentioned are trademarks or registered trademarks of their respective owners.
Need help?
Do you have a question about the 550260 and is the answer not in the manual?
Questions and answers