Advertisement
Quick Links
Advertisement

Related Manuals for SignaMax 065-7532


Summary of Contents for SignaMax 065-7532
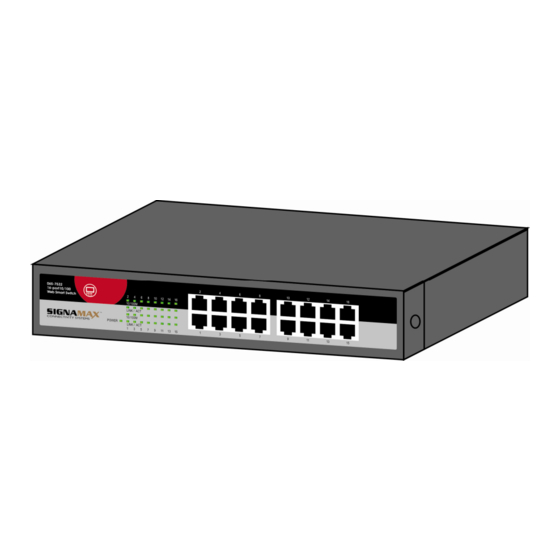
- Page 1 16 Port Nway Fast Ethernet Web Smart Switch 065-7532 Model User‘s Guide...
- Page 2 CE Warning This is a Class B product. In a domestic environment, this product may cause radio interference in which case the user may be required to take adequate measures. SIGNAMAX LLC • www.signamax.eu...
- Page 3 The compact rigid desktop size was specifically designed for small to medium workgroups. 065-7532 switch can be installed where space is limited; moreover, it provides smooth network migration and easy upgrade to network capacity.
-
Page 4: Package Contents
Package Contents Before you start to install this switch, please verify your package that contains the following items: One 065-7532 Fast Ethernet Switch One Power Cord One CD with User’s Manual Note: If any of these items is found missing or damaged, please contact your local supplier for replacement. - Page 5 No. Of LED Power Power on Power 10/100M Port is on the 16 (1~16) 100M status Port is on the 10M 16 (1~16) status LINK/ACT. 10/100Mbps port 16 (1~16) for connection Flashing 10/100Mbps for 16 (1~16) data activating SIGNAMAX LLC • www.signamax.eu...
- Page 6 It is simple and friendly to up-link to another switch without crossover cable. PC/Other devices to 065-7532 Fast Ethernet Switch Via a twisted pair cable straight through, 065-7532 switch can be connected to PCs, servers and other network devices. SIGNAMAX LLC • www.signamax.eu...
- Page 7 100BaseTX Cat. 5 UTP/STP Per Port: LINK/ACT, LED Indicators 10/100M Per Unit: Power Power Requirement 100~240V/AC, 50~60Hz Power Consumption 9.2 Watts (Max) 266 × 160 × 44 mm Dimensions (L x W x H) Weight 1.40 kg SIGNAMAX LLC • www.signamax.eu...
- Page 8 Web Smart Switch Configure Please follow the steps to configure this Web Smart switch. Step 1: Use a twisted pair cable to connect this switch to your PC. Step 2: Set your PC’s IP to 192.168.2.xx. SIGNAMAX LLC • www.signamax.eu...
- Page 9 Open the web browser (like IE…), and go to 192.168.2.1 site, and then you will see the login screen. Key in the user ID and the password to pass the authentication, IP: 192.168.2.1 ID: admin Password: admin After the authentication procedure, the home page shows up. SIGNAMAX LLC • www.signamax.eu...
- Page 10 Step 4: On the following home page, select the configuration by clicking the icon. It includes, - Administrator - Port Management - VLAN Setting - QoS Setting - Port Security - Logout SIGNAMAX LLC • www.signamax.eu...
- Page 11 You can change the user name and the password, and click “Update” to confirm the new change. After that, you can reset this switch by power off and then power on to take the new user name and the password effectively. SIGNAMAX LLC • www.signamax.eu...
- Page 12 “Update” to confirm the new change, and then the message will show “Setting Process OK!!”, After that, you should reset this switch by power off and then power on it to complete the new change. SIGNAMAX LLC • www.signamax.eu...
- Page 13 Administrator: System Status It shows this switch MAC address, and you can select “Back to the last display” or “Logout” when the time’s out. SIGNAMAX LLC • www.signamax.eu...
- Page 14 Administrator: Load Default Setting to EEPROM You can click “Load” to load the new factory default setting, and then reset the switch by power off and then power on to take it effectively. Administrator: Firmware Update SIGNAMAX LLC • www.signamax.eu...
- Page 15 Port Management: Port Control Configuration Select the “Port No.” which you want to configure the mode below, “Capability” - Auto-Nego. or force on 100M or 10M mode “Duplex” - you can select the port is full/half-duplex or enable/disable this port. SIGNAMAX LLC • www.signamax.eu...
- Page 16 Port mirroring is used to mirror traffic from the source port to a destination port for analysis. Select the destination port from port 1 to port 16, and select the source port by click the checking box of the port. SIGNAMAX LLC • www.signamax.eu...
- Page 17 “TX Rate” is meant you can set the maximum transmission rate of this selected port choose full speed 128K/256K/512K/1M/2M/4M/8M speed. “RX Rate” is meant you can set the maximum receiving rate of this selected port choose full speed 128K/256K/512K/1M/2M/4M/8M speed. SIGNAMAX LLC • www.signamax.eu...
- Page 18 Port Management: Broadcast Storm Control You can enable or disable the broadcast storm protection feature by clicking “Update”. VLAN Setting: Group VLAN Setting SIGNAMAX LLC • www.signamax.eu...
- Page 19 VLAN group. VLAN Setting: Multi to 1 Setting This is a special design for easily setting the switch VLAN into “VLAN Per Port“. After this setting, all ports can only connect to the destination port. SIGNAMAX LLC • www.signamax.eu...
- Page 20 Set up port trunk groups, and click the port number you want to include it into the same group. There are two groups to choose, and the maximum of ports for one group is 4. QoS Setting: Priority Mode SIGNAMAX LLC • www.signamax.eu...
- Page 21 Click the priority mode you want, there are three priority modes to choose. QoS Setting: Class of Service Configuration You can select the class of service for each port. MAC Address Configuration: MAC Address Configuration SIGNAMAX LLC • www.signamax.eu...
- Page 22 Select the port number which you want to enable/disable the MAC address. For the filtering function of the port, please click ”Update” to take the setting effectively. Logout: You can click “Logout” to logout. SIGNAMAX LLC • www.signamax.eu...
Need help?
Do you have a question about the 065-7532 and is the answer not in the manual?
Questions and answers