
Related Manuals for NTI unimux-dvi(a)-xhd


Summary of Contents for NTI unimux-dvi(a)-xhd
- Page 1 UNIMUX Series UNIMUX-DVI(A)-xHD USB DVI KVM Switch Installation and Operation Manual MAN005 Rev Date 12/13/2013...
-
Page 2: Typographic Conventions
TRADEMARK UNIMUX is a trademark of Network Technologies Inc in the U.S. and other countries COPYRIGHT Copyright © 2000, 2013 by Network Technologies Inc. All rights reserved. No part of this publication may be reproduced, stored in a retrieval system, or transmitted, in any form or by any means, electronic, mechanical, photocopying, recording, or otherwise, without the prior written consent of Network Technologies Inc, 1275 Danner Drive, Aurora, Ohio 44202. -
Page 3: Table Of Contents
Baud Rate ................................13 Unit Address and Loop Back ..........................13 Command Protocol ..............................15 NTI Switch Control Program For Windows 9X, NT, 2000, XP, Vista, and 7 ............. 16 SerTest- RS232 Interface Test Program ........................16 Main Options................................16 KEYBOARD FEATURES .............................. - Page 4 Figure 16- Rear View of UNIMUX-DVIA-8HD ....................... 20...
-
Page 5: Introduction
NTI UNIMUX SERIES USB KVM SWITCH INTRODUCTION The UNIMUX-DVI-xHD 4,8,16 or 32-Port USB DVI KVM switch (UNIMUX) allows access to up to thirty two (32) Windows, MAC, or SUN USB CPUs from one USB keyboard and mouse and a DVI video-enabled monitor. Internal microprocessor circuitry allows all USB CPUs to be booted simultaneously without keyboard error. -
Page 6: Materials
• An SA-xx-MM cable with 3.5mm stereo plug on each end for each audio source to be connected (models with audio support only) SA-xx-MM cables are available from NTI in 3,6,10 and 15 foot lengths where: xx is the length of the cable in feet... -
Page 7: Definitions
NTI UNIMUX SERIES USB KVM SWITCH DEFINITIONS • A USB device that contains multiple endpoints each representing input devices that cannot be separated USB Composite (i.e. a keyboard with a built-in mouse) Device • A USB device that allows one or more USB input devices to plug in to the USB. The hub has exactly one... -
Page 8: Features And Functions
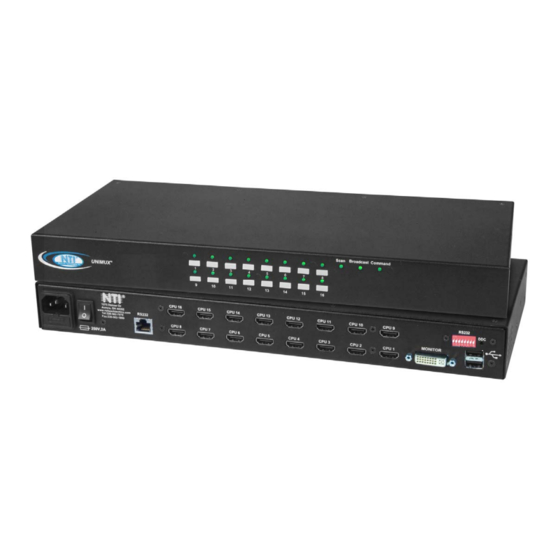
NTI UNIMUX SERIES USB KVM SWITCH Front View of UNIMUX-DVI-16HD Broadcast Command Scan UNIMUX Network Technologies Inc Rear View of UNIMUX-DVI-16HD RS232 CPU 16 CPU 15 CPU 14 CPU 13 CPU 12 CPU 11 CPU 10 CPU 9 1275 Danner Dr Aurora, OH 44202 www.networktechinc.com... -
Page 9: Rackmounting Instructions
RACKMOUNTING INSTRUCTIONS This NTI switch was designed to be mounted to a rack or to sit on a desktop. It includes rackmount ears to make attachment to a rack easy, and rubber feet to be applied to the bottom of the case if it will instead sit on a flat surface. -
Page 10: Installation
NTI UNIMUX SERIES USB KVM SWITCH INSTALLATION It is not necessary to turn the CPUs or monitors OFF during this installation. Connect a DVI-to-DVI cable (should have come with the monitor) from a DVI monitor to the “MONTOR” connector on the rear of the UNIMUX (See Fig. -
Page 11: Figure 5- Connect Each Cpu
Connect each CPU to the USB switch using a USB-DHEXT-xx-MM (xx=3, 6, 10, or 15 foot) cable for each video and input device connection – REQUIRED (not supplied). (See Fig. 5 below.) Cables are available from NTI. Rear View of UNIMUX-DVI-16HD... -
Page 12: Rs232 Connection
NTI UNIMUX SERIES USB KVM SWITCH RS232 Connection If the RS232 is going to be used, connect one end of the CAT5 patch cable (supplied) to the port labeled “RS232” on the rear of the UNIMUX. Plug the other end of the CAT5 cable into either the RJ45-to-DB9 or RJ45-to-DB25 adapter supplied, and connect the adapter to the RS232 port on the control terminal. -
Page 13: Power-Up Sequence
NTI UNIMUX SERIES USB KVM SWITCH Power-Up Sequence For optimum performance and communication of DDC information between the monitor and CPU, we recommend powering up the system as described below: Power-up the monitor. Note: Make sure your monitor is in digital DVI mode (not analog DVI) for video to be viewed. -
Page 14: Using The Unimux Dvi Kvm Switch
NTI UNIMUX SERIES USB KVM SWITCH USING THE UNIMUX DVI KVM SWITCH Once the UNIMUX is properly connected, the UNIMUX will enable a connection to be made between the CPUs attached to its VIDEO and CPU ports and the monitor and input devices attached to the MONITOR and USB Device ports. The LEDs on the control panel of the UNIMUX will illuminate depending on which port (and corresponding CPU) is being connected to the monitor and input devices. -
Page 15: Scan Mode
NTI UNIMUX SERIES USB KVM SWITCH (0-9) (0-9) Selects a specific (Pxx would be P01, P02, etc.) port Configure port to connect To a MAC CPU Configure port to connect To a WINDOWS or SUN FYI: The user must exit Command Mode to type to a CPU. -
Page 16: Select Country Code
NTI UNIMUX SERIES USB KVM SWITCH Select Country Code It is possible to configure the UNIMUX to emulate a specific international Sun keyboard regardless of what actual keyboard is connected. This is recommended when the CPU needs the layout code (i.e. a SUN CPU) and the keyboard doesn't have an explicit layout code (i.e. -
Page 17: Rs232 Control
RS232 enables the UNIMUX to be remotely controlled via RS232. To control the UNIMUX via RS232 the user has three options: • write a program that runs on a PC using the Command Protocol (page 15) • use the NTI Switch Control Program (page 16) provided on the CD • use the SerTest program (page 16) provided on the CD... -
Page 18: Figure 11- Rs232 Connection With Matrix-Y-1 Cable
Note: Switch 4 on the RS232 DIP switch is not used. In order to connect multiple switches (up to 15) with RS232 connections to the same CPU, an NTI Matrix-Y-1 cable must be used. Connect the Matrix-Y-1 cable between the RJ45-to-DB9 serial adapter (provided with the RS232 option) and the CPU as shown in Fig. -
Page 19: Command Protocol
Programs that send one character at a time (such as HyperTerminal) cannot be used to control the UNIMUX. Alternatively, the user may use the NTI Switch Control Program or SerTest to control the UNIMUX via RS232 (see page 16). -
Page 20: Nti Switch Control Program For Windows 9X, Nt, 2000, Xp, Vista, And 7
Locate the Setup.exe in the directory the program was downloaded to and double-click on it Follow the instructions on the screen Note: In order to use the NTI Switch Control Program to control the UNIMUX, the UNIMUX RS232 port must be set at a baud rate of 9600 bps (see page 13). - Page 21 NTI UNIMUX SERIES USB KVM SWITCH Change Volume for Audio Output/User (not applicable to this model) - change Audio port output volume Read Connection for Output/User - read what input is connected to the specified output Read Connection for Audio Output/User (not applicable to this model)
-
Page 22: Keyboard Features
NTI UNIMUX SERIES USB KVM SWITCH KEYBOARD FEATURES The keyboard configuration of each CPU is saved in the UNIMUX. For example, if the CPU attached to Port 2 had CAPS LOCK and NUM LOCK selected the last time that CPU was accessed, then they will automatically be set when that CPU is accessed again. -
Page 23: International Sun Keyboards
NTI UNIMUX SERIES USB KVM SWITCH Backspace Lock Enter Caps Lock Shift Shift Enter Ctrl Ctrl Typical 101 Keyboard Print Scroll Screen Lock Pause SysRq Break Backspace Lock Enter Caps Lock Shift Shift Enter Ctrl Ctrl Windows Logo Key Application Key... -
Page 24: Ddc
NTI UNIMUX SERIES USB KVM SWITCH The UNIMUX is designed to transfer DDC information from the monitor to the CPU so that the CPU is able to update EDID data about the monitor it connects to. DDC information is downloaded from the attached monitor and stored in the UNIMUX when the UNIMUX is first power-ON (monitor must be ON first), or by pressing the “DDC”... -
Page 25: Troubleshooting
NTI UNIMUX SERIES USB KVM SWITCH TROUBLESHOOTING PROBLEM: Keyboard Errors SOLUTION: Check cable connections on each CPU and the switch. PROBLEM: No Video • Check cable connections on each CPU and the switch. Verify that keyboard and video connect from each SOLUTION: CPU to matching ports. -
Page 26: Index
NTI UNIMUX SERIES USB KVM SWITCH INDEX addressing, 13 Keyboard control, 10 Audio support, 20 keyboard features, 18 Autostatus, 15 keyboard translation, 18 limitations, 9 baud rate, 13 MAC mice and trackballs, 12 Broadcast mode, 11 materials supplied, 2 Command mode, 10...
Need help?
Do you have a question about the unimux-dvi(a)-xhd and is the answer not in the manual?
Questions and answers