
Subscribe to Our Youtube Channel
Related Manuals for NTI UNIMUX-nXm-UHD


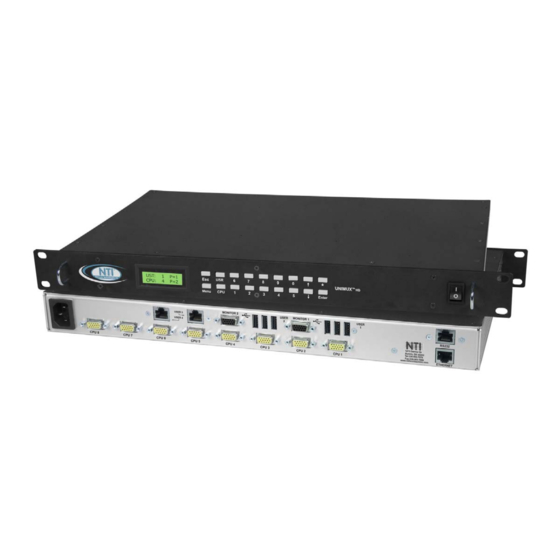
Summary of Contents for NTI UNIMUX-nXm-UHD
- Page 1 UNIMUX Series UNIMUX-nXm-UHD High Density VGA USB KVM Matrix Switch Installation and Operation Manual MAN076 Rev 4/7/14...
-
Page 2: Typographic Conventions
TRADEMARK UNIMUX is a trademark of Network Technologies Inc in the U.S. and other countries. COPYRIGHT Copyright © 2002, 2014 by Network Technologies Inc. All rights reserved. No part of this publication may be reproduced, stored in a retrieval system, or transmitted, in any form or by any means, electronic, mechanical, photocopying, recording, or otherwise, without the prior written consent of Network Technologies Inc, 1275 Danner Drive, Aurora, Ohio 44202. -
Page 3: Table Of Contents
Ethernet Connection ............................13 Remote CPU Access ............................14 No-Video Models ............................. 15 Limitations................................ 16 USING THE NTI UNIMUX USB KVM SWITCH ....................17 Basic Operation ............................... 17 Keypad Control ..............................17 OSD CONTROL ..............................18 Guidelines for Navigating OSD Menus......................18 Security Option .............................. - Page 4 Edit User Account ............................29 User Access Control ............................. 30 Change Administrator Password ........................30 Display Usage............................... 31 Ethernet Configuration..........................31 Idle Timeout ..............................31 OSD Blank Timeout ............................32 Alternate Command Hot Key ........................32 Reset Port names ............................32 Select Keyboard Language ..........................
- Page 5 Operating Cascaded Switches ........................53 SUN RAY SUPPORT ............................53 REMOTE USER SUPPORT VIA CAT5 ......................54 Command Mode .............................. 54 Video Quality Adjustment ..........................54 Extended Video Resolution ..........................54 FIRMWARE UPGRADE PROCEDURE......................55 Requirements ..............................55 Preparation For Upgrade ..........................56 Upgrade Procedures............................
- Page 6 Figure 23- Port information- system structure........................25 Figure 24- User login screen..............................26 Figure 25- Administrator's main menu ..........................26 Figure 26- User Login screen with ............................27 Figure 27- Administration Mode Menu ..........................27 Figure 28- System Configuration menu ..........................28 Figure 29- Port Configuration menu............................
-
Page 7: Introduction
INTRODUCTION The NTI UNIMUX-nXm-UHD is a High Density USB VGA KVM Matrix Switch, (n= number of users, m= number of CPUs). It allows up to four users, each with USB user devices and monitor, to communicate directly with any WINDOWS, MAC and/or SUN USB CPU (up to 32) connected to the switch. -
Page 8: Ordering Information
ORDERING INFORMATION The UNIMUX-nXm-UHD switch is built to a specific size ranging from 2 or 4 users and 8 to 32 CPUs. The switch is built at the factory based on the specified size ordered. The switch has USB inputs and outputs that support all platforms and are configured with interface cables (see cable section-page 61). -
Page 9: Materials
NTI UNIMUX MULTI-USER KVM SWITCH MATERIALS Materials Supplied: • NTI UNIMUX-nXm-UHD Multi-user USB KVM Switch • IEC Power cord- country specific • 4-#10-32 x 3/4" pan head screws and #10-32 cage nuts (server cabinet mounting hardware) • CD with pdf file of this manual and RS232 control software •... -
Page 10: Features And Functions
NTI UNIMUX MULTI-USER KVM SWITCH Front View of UNIMUX-4X8-UHD UNIMUX Netw ork Technologies Inc Enter Menu Rear View of UNIMUX-4X8-UHD AC INPUT RS232 100-240VAC USER 2 USER 1 USER 4 USER 3 1275 Danner Dr ETHERNET Aurora, OH 44202 Tel:330-562-7070 Fax:330-562-1999 www.networktechinc.com... -
Page 11: Additional Features
NTI UNIMUX MULTI-USER KVM SWITCH Additional Features • A single CPU can be used by one or shared by several users. • Any USB type user device can control any USB CPU (Windows, MAC, and SUN platforms). • Power cycle circuit control allows the UNIMUX switch to be powered OFF, then ON, at any time without affecting the attached CPUs. -
Page 12: Rack Mounting Instructions
This NTI switch was designed to be directly mounted in a rack and includes a mounting flange to make attachment easy. Install 4 cage nuts (supplied) to the rack in locations that line up with the holes (or slots) in the mounting flange on the NTI switch. -
Page 13: Installation
NTI UNIMUX MULTI-USER KVM SWITCH INSTALLATION It is not necessary to turn OFF power to CPUs or monitors during this installation unless RS232 is going to be connected. All cables, except for the RS232 cables, may be hot plugged. If using RS232 Control see RS232 section on page 38 for more information. -
Page 14: Figure 4- Install User Devices (Mouse And Keyboard)
1 or 2 NTI USB2-AA-5M Active USB 5 Meter Extensions (see Figure 5)- purchased separately. Using USB- C5-LC you can extend device cables up to 150 feet. Contact your NTI salesperson for more details by calling (800) 742- 8324 (800-RGB-TECH) or (330) 562-7070 or visit our website at http://www.networktechinc.com. -
Page 15: Figure 6- Connect Each Cpu Using A Hdusbvext-Xx-Mm Cable
NTI UNIMUX MULTI-USER KVM SWITCH 3. For each CPU: • Connect a USB type A cable end of a HDUSBVEXT-xx-MM cable to a USB type A female user device port on a CPU. (For models without video support, this would be a HDUSB-xx-MM cable. ) •... - Page 16 NTI UNIMUX MULTI-USER KVM SWITCH 4. Power-up • Plug the UNIMUX switch into an AC power outlet. • Turn ON power to the UNIMUX switch, the LCD should illuminate. • Turn ON power to any or all CPUs connected to the UNIMUX switch (if they aren't ON already).
-
Page 17: Rs232 Connection
NTI UNIMUX MULTI-USER KVM SWITCH RS232 Connection If RS232 control will be used, connect one end of the CAT5 patch cable (supplied) to the port labeled “RS232” on the rear of the UNIMUX. Plug the other end of the CAT5 cable into the RJ45-to-DB9 adapter supplied and connect the adapter to the RS232 port on the control terminal. -
Page 18: Figure 10- Connect Monitor And Devices To St-C5Usbv-R-300
NTI UNIMUX MULTI-USER KVM SWITCH 1. Position the ST-C5USBV-R-300 such that the CAT5 cable, the monitor cable, the keyboard and mouse, and the AC adapter power connector can each reach the ST-C5USBV-R-300 comfortably. 2. Connect the monitor cable to the 15HD female VIDEO port on the ST-C5USBV-R-300. (See Figure 10) 3. -
Page 19: Ethernet Connection
NTI UNIMUX MULTI-USER KVM SWITCH Ethernet Connection If the Telnet Interface (page 44) will be used, an Ethernet connection to the Local Area Network (LAN) must be made using CAT5 cable with RJ45 connectors attached. Wiring between connectors should be straight through (pin 1 to pin 1, pin 2 to pin 2, etc..) Connect a CAT5 cable between the connector labeled "ETHERNET"... -
Page 20: Remote Cpu Access
NTI UNIMUX MULTI-USER KVM SWITCH Remote CPU Access In order to have access to a User port from anywhere either over a network or through a serial connection via a PSTN, an INTERMUX-KVMUIP can be installed to one of the USERx ports. This will provide user control over any of the CPUs connected to the UNIMUX switch. -
Page 21: No-Video Models
31.) Cables are available from NTI having only the 15HD high density connector at one end and USB Type A male connector at the other end (HDUSB-x-MM where x = 3 or 6 feet). -
Page 22: Limitations
NTI UNIMUX MULTI-USER KVM SWITCH Limitations Only one type of non-HID (Human Interface Device) can be connected at a time (device other than keyboard or mouse) A USB hub (single or multi-port) can be used provided only USB input devices are plugged into it... -
Page 23: Using The Nti Unimux Usb Kvm Switch
NTI UNIMUX MULTI-USER KVM SWITCH USING THE NTI UNIMUX USB KVM SWITCH Basic Operation The UNIMUX switch enables a user or several users to access any CPU at any time. A CPU can be shared so that more than one user can use a CPU and work on the same project – each from their own console. Resolution is 2048x1536 with no degradation –... -
Page 24: Osd Control
NTI UNIMUX MULTI-USER KVM SWITCH OSD CONTROL (Not available on models without video support) OSD superimposes a menu system on the user’s video screen with a list of all connected CPUs. OSD allows CPUs to be named (with up to 12 character names). OSD then allows selection of CPUs by that name. Connected CPUs can be listed by name or by port number. -
Page 25: Initial Startup
NTI UNIMUX MULTI-USER KVM SWITCH Initial startup When the UNIMUX is first powered ON, a splash screen similar to the following will appear: Press any key and the UNIMUX will connect you to the first CPU port with a connected CPU that is powered ON. -
Page 26: Figure 16- Command Mode Main Menu-User
NTI UNIMUX MULTI-USER KVM SWITCH An arrow to the left of a port number in the list indicates the port the user is currently connected to. From left to right, the columns display the following: • Port Number User • Port Name •... -
Page 27: Settings
NTI UNIMUX MULTI-USER KVM SWITCH Function Keystroke Enter Find Mode, add a character to search string and select the CPU’s name that matches best. Type any alphabetical or numeric character (A-Z, 0-9) Note: use is not case sensitive Switch to selected port... -
Page 28: Osd Settings
NTI UNIMUX MULTI-USER KVM SWITCH OSD Settings The OSD Settings screen enables the user to adjust the height of the OSD screen on the monitor and the position of it. The position can be adjusted both horizontally, as well as vertically. -
Page 29: Scan Mode
NTI UNIMUX MULTI-USER KVM SWITCH Scan Mode Using Scan Mode, the user can automatically switch from one CPU to another in predetermined configurable time intervals. The CPU ports to be scanned are easily selected provided the user has access to them. At initial startup, the user as access to all CPU ports by default. -
Page 30: Broadcast Mode
NTI UNIMUX MULTI-USER KVM SWITCH Broadcast Mode To activate or deactivate Broadcast Mode press <Ctrl> + <B> from the Command Mode menu. The text shown in the menu (Figure 17) will toggle between “BCast=N” and “BCast=Y”, each time the <Ctrl> + <B> keys are pressed. When “BCast=Y” is shown, Broadcast Mode is active. -
Page 31: F3- Display Information
NTI UNIMUX MULTI-USER KVM SWITCH F3- Display Information To display information about a selected port, pressing the <F3> key from within the Command Mode main menu will cause a window to open (see below). The window will show the name of the port and its position in the system structure, level by level. -
Page 32: Security
Once the password is setup, if it is lost or forgotten the administrator will have to contact NTI for assistance on clearing the password and set it up again. The administrator can setup each of the users and the limitations of their use of the individual CPUs using the administration menus. -
Page 33: User Login
NTI UNIMUX MULTI-USER KVM SWITCH User Login User Login Mode requires a user to login with a user name and password from the list created by the administrator. The user will only be able to login if security is enabled. -
Page 34: System Configuration
Note: If a port is configured as connected to a non-MAC CPU, but is in fact connected to a MAC CPU, the mouse will still work as a generic mouse. No special functions provided by software drivers will be available. Note: MAC mode must be enabled on any CPU ports that are connected to a CPU through an NTI ST-C5USBV extender. Function... -
Page 35: User Configuration
NTI UNIMUX MULTI-USER KVM SWITCH User Configuration To enter the User Configuration menu: press <U> from the Administration menu. The User Configuration menu can only be accessed when the administrator is logged-in. The User Configuration screen lists the users configured to access the UNIMUX. Up to 63 users can be assigned access. -
Page 36: User Access Control
The Admin Password menu (see Figure 33) enables the administrator to change his password. Two edit fields are available, one for password, the other for verify password. The password can be up to 15 characters in length. Note: The default password for the administrator is “nti”. Function Keystroke... -
Page 37: Display Usage
Change the Gateway Change the port number Exit and return to previous menu Network settings can also be changed using the NTI Discovery Tool. See page 48. Figure 35- Ethernet Configuration If the Ethernet feature is not present in the UNIMUX, the message “Ethernet Card Not Present” will appear at the bottom of this menu in Figure 35. -
Page 38: Osd Blank Timeout
NTI UNIMUX MULTI-USER KVM SWITCH OSD Blank Timeout The OSD Blank Timeout is the amount of time that any operator (administrator, or user) can be idle while in Command Mode before the OSD menu will disappear. The time period can be set to any value from 000 to 255 minutes. A value of 000 will disable it. -
Page 39: Select Keyboard Language
NTI UNIMUX MULTI-USER KVM SWITCH Select Keyboard Language To enter the Select Language menu, press K from the System Configuration menu described on page 28. Only the administrator has the Select Language menu option. The Select Language menu enables the administrator to select a specific keyboard language (country code) to be used. -
Page 40: Serial Baud Rate
NTI UNIMUX MULTI-USER KVM SWITCH If Security is disabled for the port the user is connected to, and the user attempts to login to Command Mode with the command key, the login screen will include the instruction “Press F1 to Autologin”. -
Page 41: Serial Address
NTI UNIMUX MULTI-USER KVM SWITCH Serial Address To allow multiple UNIMUXs to be controlled from a single control terminal, the RS232 control interface is designed to allow "daisy chaining" up to 15 units. Each unit must be assigned a unique address. -
Page 42: Keyboard Mapping
NTI UNIMUX MULTI-USER KVM SWITCH Keyboard Mapping The keyboard configuration of each CPU is saved in the UNIMUX switch. For example, if the CPU attached to Port 4 had CAPS LOCK and NUM LOCK selected the last time that CPU was accessed, then they will automatically be set when that CPU is accessed again. -
Page 43: Figure 44- Keyboard Layouts
NTI UNIMUX MULTI-USER KVM SWITCH Backspace Lock Enter Caps Lock Shift Shift Enter Ctrl Ctrl Typical 101 Keyboard Print Scroll Screen Pause Lock SysRq Break Backspace Lock Enter Caps Lock Shift Shift Enter Ctrl Ctrl Windows Logo Key Application Key... -
Page 44: Rs232 Control
To allow multiple units to be controlled from a single host port, the RS232 control interface is designed to allow "daisy chaining" up to 15 units using an NTI Matrix-Y-1 cable. Connect the Matrix-Y-1 cable between the RJ45-to-DB9 serial adapter (provided with the RS232 option) and the CPU as shown in Figure 45. -
Page 45: Figure 45- Rs232 Connection With Matrix-Y-1 Cable
Matrix-Y-1 Serial Port Note: The maximum combined RJ45 RJ45 RJ45 RS232 cable length between the TO DB9 TO DB9 TO DB9 CPU and any NTI switch cannot SERIAL SERIAL SERIAL exceed 15 feet. ADAPTER ADAPTER ADAPTER CAT5 CABLE CAT5 CABLE... -
Page 46: Rs232 Command Protocol
NTI UNIMUX MULTI-USER KVM SWITCH RS232 Command Protocol Host controller commands supported by the unit are defined below. RS232 Command Protocol Quick Reference Legend: (All numbers must be two digits) SW : Switch (01-15) Save Into Memory Bank (00-09) BR :... -
Page 47: Autostatus
Locate the Setup.exe in the directory the program was downloaded to and double-click on it Follow the instructions on the screen Note: In order to use the NTI Matrix Switcher’s Control Program to control the UNIMUX, the UNIMUX RS232 port must be set at a baud rate of 9600 bps (see page 38). -
Page 48: Sertest- Rs232 Interface Test Program
NTI UNIMUX MULTI-USER KVM SWITCH SerTest- RS232 Interface Test Program This software allows a user to test the functions of an NTI server switch, matrix switch or Multi-user/Multi-platform switch RS232 interface. The program SERTEST along with the Matrix Switcher's Control Program (page 41) is installed from the CD packaged with this switch. -
Page 49: Rmtest-Rs232 Interface Test Program
This software also allows a user to test the functions of an NTI server switch, matrix switch or Multi-user/Multi-platform switch RS232 interface. The RMTEST program is automatically loaded when installing the Matrix Switcher’s Control Program as described on page 41. The RMTEST program, located in the NTI program group, generates a main menu with the 3 selections described below: MAIN OPTIONS 1. -
Page 50: Telnet Interface
NTI UNIMUX MULTI-USER KVM SWITCH TELNET INTERFACE The UNIMUX can be controlled via Telnet interface by connecting to the UNIMUX through port 2005 (configurable-page 31). The Telnet Interface enables the user to control the switch using a telnet client through an Ethernet connection. The telnet server listens on port 2005. -
Page 51: Command Detail
NTI UNIMUX MULTI-USER KVM SWITCH Command Detail RU-Read Unit Size Command: Byte 1 Byte2 Byte3 ‘R’ ‘U’ <CR> (0x52) (0x55) (0x0D) Response: Byte 1 Byte 2 Byte 3 Byte 4 Byte 5 Byte 6 Byte 7 Byte 8 Byte 9 ‘r’... -
Page 52: Ca- Connect All Output Ports To Input Port
NTI UNIMUX MULTI-USER KVM SWITCH CA- Connect All Output Ports to Input Port Command: Byte 1 Byte 2 Byte 3 Byte 4 Byte 5 Byte 6 ‘C’ ‘A’ Space Input – 1st digit Input - 2nd digit <CR> (0x43) (0x41) (0x20) (0x30…0x32) -
Page 53: Sx- Examine Connections
NTI UNIMUX MULTI-USER KVM SWITCH SX- Examine connections Command: Byte 1 Byte 2 Byte 3 ‘S’ ‘X’ <CR> (0x53) (0x58) (0x0D) Response: Multiple lines, one line for each output: Byte 1 Byte 2 Byte 3 Byte 4 Byte 5 Byte 6... -
Page 54: Rp- Refresh Communication With Cpu Usb Port
NTI UNIMUX MULTI-USER KVM SWITCH RP- Refresh Communication with CPU USB Port Command: Byte 1 Byte 2 Byte 3 Byte 4 Byte 5 Byte 6 ‘R’ ‘P’ Space Input –1st digit Input –2nd digit <CR> (0x52) (0x50) (0x20) (0x30…0x32) (0x30…0x39) -
Page 55: Device Discovery Tool
DEVICE DISCOVERY TOOL In order to easily locate NTI Devices on a network, the NTI Device Discovery Tool may be used. A link to the Discovery Tool is provided on the web page that appears when you insert the instruction manual CD provided into your CD ROM drive. Either click on the link or browse the CD to locate the NTIDiscover.jar file. -
Page 56: Cascading
NTI UNIMUX MULTI-USER KVM SWITCH CASCADING The UNIMUX USB Matrix switch can be expanded to access up to 512 CPUs by cascading multiple units together. All downstream switches are referred to as "slaves" in a cascaded system. The only additional hardware required to cascade switches is a set of device and monitor cables for each “SLAVE UNIT”... -
Page 57: Cable Connections
NTI UNIMUX MULTI-USER KVM SWITCH USER 1 USER 2 USER 3 USER 4 Users 1-4 have access to all CPUs USER PORT USER PORT USER PORT USER PORT UNIMUX-1X4 UNIMUX-1X4 UNIMUX-1X4 UNIMUX-1X4 MASTER MASTER MASTER MASTER CPU PORTS CPU PORTS... -
Page 58: Figure 50- Cascaded High Density Switch Cable Connections
NTI UNIMUX MULTI-USER KVM SWITCH REAR VIEW OF MASTER UNIMUX-4X8-UHDU AC INPUT RS232 100-240VAC USER 4 USER 3 USER 2 USER 1 1275 Danner Dr Aurora, OH 44202 Tel:330-562-7070 Fax:330-562-1999 www.networktechinc.com CPU 8 CPU 7 CPU 6 CPU 5 CPU 4... -
Page 59: Operating Cascaded Switches
NTI UNIMUX MULTI-USER KVM SWITCH Operating Cascaded Switches Immediately after powering-ON the Master switch, the following splash screen will display on the monitor: All the downstream switches should be powered ON before pressing any key. If there are USB extenders connected, they should also be powered ON. -
Page 60: Remote User Support Via Cat5
NTI UNIMUX MULTI-USER KVM SWITCH REMOTE USER SUPPORT VIA CAT5 If the UNIMUX includes support for remotely locating users using CAT5 cable and an ST-C5USBV-R-300 extender (page 11), the user can be up to 300 feet away and still have full control over the UNIMUX. From the display and devices connected to the ST- C5USBV-R-300 the user can configure the UNIMUX, control which CPU the user has a connection to (as previously described in this manual), and adjust the video quality of the extended signal. -
Page 61: Firmware Upgrade Procedure
This procedure describes how to upgrade the firmware in this UNIMUX switch. If you are not certain whether this UNIMUX has the most up-to-date firmware available, see page 60 for instruction on how to determine what version the UNIMUX has. versions of firmware can be downloaded from the NTI firmware download website at http://www.networktechinc.com/download/d-srvsw-usbvst-uhd.html. -
Page 62: Preparation For Upgrade
NTI UNIMUX MULTI-USER KVM SWITCH Preparation For Upgrade 1. With the power to the UNIMUX OFF, connect the computer to the UNIMX as shown in the figure below. Rear View of UNIMUX-4X8-UHD AC INPUT RS232 100-240VAC USER 2 USER 1... -
Page 63: Upgrade Procedures
NTI UNIMUX MULTI-USER KVM SWITCH Upgrade Procedures Start the Bootloader In the HyperTerminal window on the attached computer, press and hold the <Tab> key and power ON the UNIMUX. The following message (or one similar) will be displayed on the screen: UNIMUX-HD-NxM Bootloader Revision: 1.2... -
Page 64: Update The User Controller Firmware
NTI UNIMUX MULTI-USER KVM SWITCH Update the User Controller Firmware Note: The User Controller Firmware update only needs to be done once, whether the UNIMUX switch is a single-user, or a multi-user model. The user controller firmware comes as a file in binary format and has the extension .bin. (i.e. filename.bin). To upgrade the user controller to this file, press <u>... -
Page 65: Update The Vendor Specific Port Controller Firmware
NTI UNIMUX MULTI-USER KVM SWITCH To program only one device (CPU port), the corresponding port number must be typed (two-digit number, zero leading, number between 01 and the last CPU port number, depending on switch size. To program all devices, just press <a>). -
Page 66: Read The Checksum Of Hid Or Vendor Specific Port Controller Firmware
The device ID and the checksum will be displayed in the following format: Device ID: 0x001E Device Checksum: 0x3AB1 The checksums for all revisions of UNIMUX firmware can be found on the NTI download webpage at http://www.networktechinc.com/download/d-srvsw-usbvst-uhd.html. To exit from the bootloader, press <x>. -
Page 67: Safety Statements
Servicing NTI products are not intended to be serviced in the field and contain no user-serviceable parts. In the event repair is needed, all servicing must be performed by factory trained and authorized service personnel. -
Page 68: Troubleshooting
CPU connected. SPECIFICATIONS Video Connectors female 15HD-black Video Resolution 1900 x 1200 (max.) Video Support SVGA, XGA, VGA, most DVI monitors (when used with NTI DVIF-15HDM adapter) Video Bandwidth 150 Mhz USER Keyboard/Mouse female USB Type A connectors Mouse and Keyboard... -
Page 69: Index
NTI UNIMUX MULTI-USER KVM SWITCH INDEX Alternate command hot key, 32 navigating OSD menus, 18 Password and User Name, 26 Apple Mouse, 36 port configuration, 28 autologin, 34 Autostatus, 41 remote user, 54 baud rate, 34, 38 reset port names, 32, 34, 35...
Need help?
Do you have a question about the UNIMUX-nXm-UHD and is the answer not in the manual?
Questions and answers