Lantronix XPort AR Integration Manual
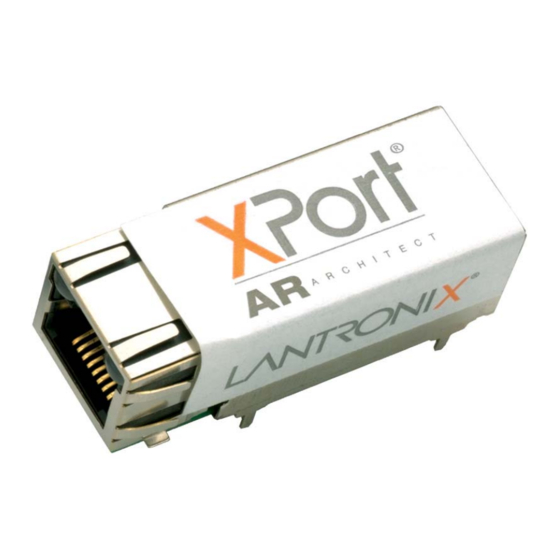
Xport ar embedded device server
Hide thumbs
Also See for XPort AR:
- User manual (142 pages) ,
- User manual (137 pages) ,
- User manual (99 pages)
Table of Contents
Advertisement
Quick Links
Download this manual
See also:
User Manual
Advertisement
Table of Contents

Subscribe to Our Youtube Channel
Related Manuals for Lantronix XPort AR


Summary of Contents for Lantronix XPort AR
- Page 1 XPort AR Integration Guide Part Number 900-406 Revision H October 2011...
-
Page 2: Copyright And Trademarks
Copyright and Trademark © 2011 Lantronix. All rights reserved. No part of the contents of this book may be transmitted or reproduced in any form or by any means without the written permission of Lantronix. Printed in the United States of America. -
Page 3: Revision History
May 2011 Updated figures 2-1, 2-6, 2-7 and 2-8. June 2011 Updated figures 2-7 and 2-8. October 2011 Updated security information. For the latest revision of this product document, please check our online documentation at www.lantronix.com/support/documentation. XPort AR Integration Guide... -
Page 4: Table Of Contents
About the Integration Guide _______________________________________________ 7 Additional Documentation _________________________________________________ 7 2: Description and Specifications The XPort AR __________________________________________________________ 8 XPort AR Block Diagram __________________________________________________ 9 PCB Interface __________________________________________________________ 9 Standard Pins (Evaluation Board XP300200K-01) __________________________ 9 PoE Pins __________________________________________________________ 10... -
Page 5: List Of Figures
Compliance Information _________________________________________________ 29 Warranty _____________________________________________________________ 29 List of Figures Figure 2-1. Side View of the XPort AR _______________________________________ 8 Figure 2-2. XPort AR Block Diagram ________________________________________ 9 Figure 2-3. XPort AR LEDs _______________________________________________ 12 Figure 2-4. Front View ___________________________________________________ 12 Figure 2-5. -
Page 6: List Of Tables
Table 2-1. Standard Interface Signals ______________________________________ 10 Table 2-2. PoE Interface Signals __________________________________________ 10 Table 2-3. Ethernet Interface Signals ______________________________________ 11 Table 2-4. XPort AR LED Functions ________________________________________ 12 Table 2-5. Technical Specifications ________________________________________ 16 Table 3-1. JP1 Connections ______________________________________________ 20 Table 3-2. -
Page 7: 1: Introduction
XPort AR User Guide Provides information needed to configure, use, and update the XPort firmware. XPort AR Command Reference Lists and explains XPort AR command line and XML commands. Com Port Redirector User Guide Provides information on using the Windows-based utility to create a virtual com port. -
Page 8: 2: Description And Specifications
Reset circuit. +1.8V regulator. Ethernet LEDs. The XPort AR requires +3.3-volt power and is designed to operate over an industrial temperature range (see technical data). Figure 2-1. Side View of the XPort AR XPort AR Integration Guide... -
Page 9: Xport Ar Block Diagram
Standard Pins (Evaluation Board XP300200K-01) The XPort AR has 26 electrical pins. There are 20 pins that form two rows of ten. These 20 pins form the standard interface between the XPort AR and the circuit in which it is installed. -
Page 10: Poe Pins
Reserved PoE Pins XPort AR is PoE-ready; it allows a fully compliant PoE circuit to be implemented that uses the Ethernet signals entering the XPort AR’s RJ-45 jack. When the XPort AR’s RJ-45 jack is connected to a PoE compliant switch, pins 21, 22, 25, and 26 pass through the necessary Ethernet signals to allow a PoE powered-device circuit to negotiate and receive power from the switch. -
Page 11: Ethernet Interface
The XPort AR reset pin is an input-only pin and connects to an 811-type reset IC. Internal to the 811 is a 20k pull-up. This is the only influence the XPort AR has on the reset pin. This input is intended for a push-button switch type manual reset. If no external reset control is desired, leave this pin floating. -
Page 12: Dimensions
Activity LED Right Side Color Meaning Color Meaning No Link No Activity Amber 10 Mbps Amber Half Duplex Green 100 Mbps Green Full Duplex Dimensions The XPort AR dimensions are shown in the following illustrations: Figure 2-4. Front View XPort AR Integration Guide... -
Page 13: Figure 2-5. Bottom View
2: Description and Specifications Figure 2-5. Bottom View Figure 2-6. Side View XPort AR Integration Guide... -
Page 14: Recommended Pcb Layout
Figure 2-7. PCB Layout (Top View) XPort Compatibility The XPort AR is designed for the PCB layout to accommodate either an XPort AR or the original Lantronix XPort. To accomplish this, a few extra holes are required. The hole pattern and mounting dimensions for this combination XPort/XPort AR footprint are shown in... -
Page 15: Product Information Label
The product information label contains important information about your specific unit, such as its product ID (name), bar code, part number, serial number, and Ethernet (MAC) address. Figure 2-9. Product Label MAC Address Part Number Revision Serial Number XPort AR Integration Guide... -
Page 16: Technical Specifications
2: Description and Specifications Technical Specifications Table 2-5. Technical Specifications Category Description Lantronix DSTni-EX 186 CPU with 256 kB zero wait state SRAM, 512 kB flash, 16 kB boot ROM 2 KB EEPROM Memory 1 MB 70ns SRAM ... -
Page 17: 3: Evaluation Kit
The XPort AR Evaluation Board provides many features for evaluating the Lantronix XPort AR embedded device server. These features allow both quick start-up for immediate interaction with the XPort AR and its operating system, as well as a prototyping area and easy access to all signals for evaluating advanced features. -
Page 18: Evaluation Board Major Components
Turret available for scope probe alligator clip connection to signal ground. XPort AR Footprint: ♦ Accommodates both XPort AR and the original XPort (without sockets). Evaluation Board Major Components Figure 3-1. Evaluation Board Figure 3-2. Evaluation Board (Diagram) XPort AR Integration Guide... -
Page 19: Major Components
Reset Switch The reset switch grounds the reset pin on the XPort AR. The XPort AR reset pin is an input- only pin and connects to an 811-type reset IC. Internal to the 811 is a 20k pull-up and is the only influence the XPort AR has on the reset pin. -
Page 20: Jp2: Led Header
When a switch is in the center position, it is off. This allows a 1K pull- up resistor to create a high on the corresponding pin. When a switch is turned on, it connects the corresponding pin to ground. Each switch has a latched-on down position and a momentary-on up position XPort AR Integration Guide... -
Page 21: Jp4: Pull-Up Header
Disconnect Jumpers JP6: Disconnect Jumper Header This header provides jumper positions to connect the XPort AR to the RS-232 Port A transceiver when an RS-232 serial interface is desired. Install any number/combination of these jumpers, depending on which RS-232 signals are required and which XPort AR signals are to perform functions other than RS-232 related. -
Page 22: Jp7: Disconnect Jumper Header
DSR and DCD on port B. This jumper has two positions: 1-2 or 2-3. In the 1-2 position, it connects the XPort AR signal CP11 to the DSR output for Port B. In the 2-3 position, it connects the XPort AR signal CP11 to the DCD output for Port B. This choice is made based on whether the serial interface intends to use DSR or DCD. -
Page 23: Leds
LED1 – LED4: Signal Monitoring LEDs These LEDs are used to monitor the state of selected XPort AR signals. A signal selected for monitoring is connected to an LED by placing a jumper wire between the signal’s pin in header JP1 and an LED control pin in header JP2. -
Page 24: Rs-232 Serial Interfaces
All XPort AR serial interface signal pins, except 9 and 12, are CPs that can be optionally set for functions other than their RS-232 function. The jumpers in JP6, JP7, and JP8 determine whether or not the XPort AR pins are connected to the RS-232 transceivers. When using RS-232, the signals used must have their associated jumper installed in JP6, JP7, and JP8. -
Page 25: Poe Socket
Chassis ground on the evaluation board is found at the four mounting holes, the D- connector shells, and the XPort AR shell. Schematic The XPort AR evaluation board schematic shows the relationships of all of the previously described components. XPort AR Integration Guide... -
Page 26: Figure 3-3. Evaluation Board Schematic
3: Evaluation Kit Figure 3-3. Evaluation Board Schematic XPort AR Integration Guide... - Page 27 3: Evaluation Kit Evaluation Board (continued) XPort AR Integration Guide...
-
Page 28: Board Layout
LED6 Port A Rx Activity Monitor LED, Yellow 3.3VDC Power Jack LED7 Port B Tx Activity Monitor LED, Green XPort AR Signal Access Header LED8 Port B Rx Activity Monitor LED, Yellow Signal Monitor LED Header LED9 Power LED, Blue... -
Page 29: A: Compliance And Warranty Information
Voltage Dips and Interrupts EN61000-4-11: 1994 Manufacturer’s Contact: Lantronix 167 Technology Drive, Irvine, CA 92618 USA Phone: 949-453-3990 Fax: 949-450-7249 Warranty For details on the Lantronix warranty replacement policy, please go to our Web site at www.lantronix.com/support/warranty. XPort AR Integration Guide...
Need help?
Do you have a question about the XPort AR and is the answer not in the manual?
Questions and answers