Table of Contents
Advertisement
SERIAL NUMBER/
:
INSTALLATION DATE/
:
INSTALLATION TECHNICIAN/
PLACE OF PURCHASE/
:
ALPINE ELECTRONICS, INC.
Tokyo office: 1-1-8 Nishi Gotanda,
Shinagawa-ku, Tokyo 141, Japan
Tel.: (03) 3494-1101
ALPINE ELECTRONICS OF AMERICA, INC.
19145 Gramercy Place, Torrance,
California 90501, U.S.A.
Tel.: 1-800-ALPINE-1 (1-800-257-4631)
ALPINE ELECTRONICS OF CANADA, INC.
Suite 203, 7300 Warden Ave. Markham,
Ontario L3R 9Z6, Canada
Tel.: 1-800-ALPINE-1 (1-800-257-4631)
ALPINE ELECTRONICS OF AUSTRALIA PTY. LTD.
6-8 Fiveways Boulevarde Keysborough,
Victoria 3173, Australia
Tel.: (03) 769-0000
ALPINE ELECTRONICS GmbH
Brandenburger Strasse 2-6 D-40880 Ratingen,
Tel.: 02102-45 50
ALPINE ITALIA S.p.A.
Via C. Colombo 8, 20090 Trezzano Sul
Naviglio MI, Italy
Tel.: 02-48 40 16 24
ALPINE ELECTRONICS FRANCE S.A.R.L.
(RCS PONTOISE B 338 101 280)
98, Rue De La Belle Etoile, Z.I. Paris Nord Il
B.P. 50016 F-95945, Roissy,
Charles De Gaulle Cedex, France
Tel.: 01-48 63 89 89
ALPINE ELECTRONICS OF U.K., LTD.
13 Tanners Drive, Blakelands,
Milton Keynes MK14 5BU, U.K.
Tel.: 01908-61 15 56
ALPINE ELECTRONICS DE ESPAÑA, S.A.
Portal De Gamarra 36, Pabellón 32
01013 Vitoria (Alava)-Apdo. 133, Spain
Tel.: 34-45-283588
Yamagata Printing CO.,
Ltd.
Designed by ALPINE Japan
2-6-34, Takashima,
Printed in Japan (Y)
Nishi-ku, Yokohama,
68P91508W30-O
Kanagawa, Japan
R
:
Germany
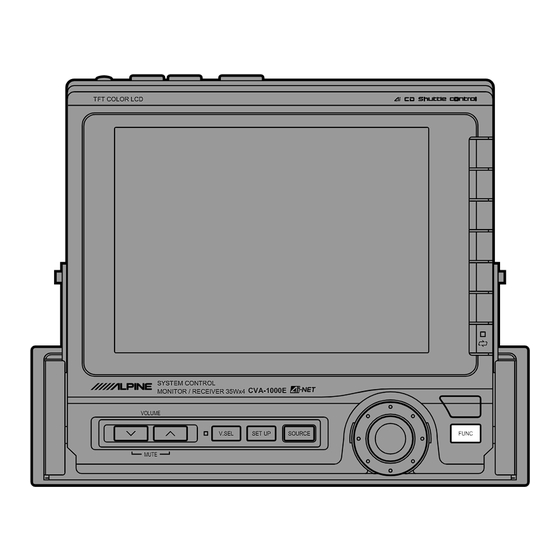
CVA-1000E
System Control Monitor/Receiver
OWNER'S MANUAL (page 2 – page 93)
Please read this manual to maximize your enjoy-
ment of the outstanding performance and feature
capabilities of the equipment, then retain the
manual for future reference.
####
####
####
####
TFT COLOR LCD
SYSTEM CONTROL
MONITOR / RECEIVER 35Wx4
CVA-1000E
VOLUME
V.SEL
SET UP
SOURCE
MUTE
35W 4
R
FUNC
Advertisement
Table of Contents

Related Manuals for Alpine CVA-1000E


Summary of Contents for Alpine CVA-1000E
- Page 1 ALPINE ELECTRONICS OF CANADA, INC. Suite 203, 7300 Warden Ave. Markham, Ontario L3R 9Z6, Canada CVA-1000E Tel.: 1-800-ALPINE-1 (1-800-257-4631) ALPINE ELECTRONICS OF AUSTRALIA PTY. LTD. 6-8 Fiveways Boulevarde Keysborough, System Control Monitor/Receiver Victoria 3173, Australia Tel.: (03) 769-0000 ALPINE ELECTRONICS GmbH Brandenburger Strasse 2-6 D-40880 Ratingen, OWNER'S MANUAL (page 2 –...
- Page 2 English Precautions WARNING The exclamation point within an DO NOT DISASSEMBLE OR ALTER equilateral triangle and "WARNING" Attempts to disassemble or alter may are intended to alert the user to the lead to an accident, fire and/or electric presence of important operating shock.
- Page 3 English Precautions CAUTION DO NOT RAISE THE VOLUME EXCES- The exclamation point within an equilateral triangle and "CAUTION" SIVELY are intended to alert the user to the Keep the volume at a level where you presence of important operating can still hear outside noises while instructions.
- Page 4 This ensures the focus of the driver's attention will be on the road and not on the CVA-1000E. This has been done for the safety of the driver and passengers. Whenever reference to the SET UP...
-
Page 5: Table Of Contents
English Contents Page 2 ..............Precautions Basic Operation 7 ............. Using Face Cover 7 ............Initial System Start-Up 8 ............Raising the Monitor 8 ............Lowering the Monitor 9 ..........Turning Power On and Off 10 ........ Adjusting the Monitor Viewing Angle 11 .......... -
Page 6: Precautions
Also have your vehicle's voltage regulator checked. Maintenance If you have problems, do not attempt to repair the unit yourself. Return it to your Alpine dealer or the nearest Alpine Service Station for servicing. Installation Location Make sure the CVA-1000E monitor/receiver will... -
Page 7: Basic Operation
Basic Operation Using Face Cover An anti-theft face cover is provided with the CVA-1000E. Put the face cover onto the CVA-1000E when you leave the vehicle. Be sure to remove the anti-theft face cover when you drive. Initial System Start-up Immediately after installing or applying power to the unit, it should be initialized. -
Page 8: Raising The Monitor
English Basic Operation Raising the Monitor Press the OPEN/CLOSE button. The unit beeps 3 times and raises the monitor automatically. Notes: If the monitor touches an obstacle while being raised, the unit will beep for 2 seconds and stop raising the monitor immediately. -
Page 9: Turning Power On And Off
If an SPST switch (sold separately) is added, place it in the OFF position when you leave the vehicle. Place the SPST switch in the ON position first when you turn on the CVA-1000E. For connecting the SPST switch, refer to the Installation manual. -
Page 10: Adjusting The Monitor Viewing Angle
English Basic Operation Adjusting the Monitor Viewing Angle The monitor's angle can be adjusted for easier viewing. Press the ANGLE buttons to adjust the monitor's angle so the screen will be in the best viewing position. Each press of the buttons produces a beep and changes the screen angle by 1 step. -
Page 11: Adjusting The Volume Level
English Basic Operation Adjusting the Volume Level Press the VOLUME button until the desired sound level is obtained. A bar graph appears in the display while changing the volume. After 3 seconds, a number indicating the volume level will replace the bar graph. Note: You can adjust the volume level with the monitor closed by pressing the button on the front panel. -
Page 12: Adjusting Bass
English Basic Operation Adjusting Bass Note: When an Ai-NET compatible equalizer is connected, the bass menu will not appear on the screen. In this case, adjust bass sound using the equalizer. Press the SET UP button. The Set Up screen appears. SET UP BBEP BEEP... -
Page 13: Adjusting Treble
When the adjustment has been completed, press the rotary switch. Note: If two Alpine Channel Dividers are connected, the menu "BASS/TREBLE" in the display changes to "BASS1/ TREBLE1," and when the NEXT (0/) button is pressed it changes to "BASS2/TREBLE2."... -
Page 14: Adjusting Balance/Fader
English Basic Operation Adjusting Balance/Fader (Left and Right channels/ Front and Rear speakers) Display the Audio cont. screen by referring to Steps 1 and 2 for Adjusting Bass on page 12. Press the F5 (BALANCE) or F6 (FADER) LOUDNESS button to select the BALANCE or FADER mode respectively. -
Page 15: Turning Loudness On Or Off
English Basic Operation Turning Loudness On or The loudness on mode introduces a moderate boost of the very low and high frequencies to compensate for the human ear's characteristic at low listening levels. Note: When an equalizer is connected, the Loudness menu will not appear on the screen. -
Page 16: Turning Non-Fading Preout (N.f.p.)
English Basic Operation Turning Non-Fading Preout (N.F.P .) On or Off When the N.F.P. mode is turned on, the Pre- Output will not be affected by the fader. This is ideal for driving a subwoofer amplifier. Note: When an equalizer is connected, the N.F.P. -
Page 17: Adjusting Brightness Of Picture
English Basic Operation Adjusting Brightness of Picture Press the SOURCE button. The menu screen appears. Note: Pressing the SOURCE button while driving (Parking Brake OFF) will cause the audio source to change immediately. The SOURCE Selection menu will not SOURCE appear. - Page 18 English Basic Operation Press the F2 (BRIGHT) button. BACKGND The Brightness adjustment mode will be BRIGHT activated and the DN/RTN/UP menu appears. TINT COLOR Turn the rotary switch clockwise or counterclockwise for the desired brightness. When the adjustment has been completed, press the rotary switch.
-
Page 19: Adjusting Tint Of Picture
English Basic Operation Adjusting Tint of Picture Tint adjustment can be made in the AUX 1 or AUX 2 mode only. Activate the AUX 1 or AUX 2 mode by referring to Steps 1 and 2 for "Adjusting Brightness of Picture."... -
Page 20: Adjusting Color Of Picture
English Basic Operation Adjusting Color of Pic- ture Color adjustment can be made in the AUX 1 or AUX 2 mode. Activate the AUX 1 or AUX 2 mode by referring to Steps 1 and 2 for "Adjusting Brightness of Picture."... -
Page 21: Radio Operation
English Radio Operation Manual Tuning Press the SOURCE button. The Menu screen appears. Note: Pressing the SOURCE button while SOURCE driving (Parking Brake OFF) will cause the audio source to change immediately. The SOURCE Selection menu will not appear. Press the SOURCE button repeatedly until you are in the RADIO mode. -
Page 22: Automatic Seek Tuning
English Radio Operation Automatic Seek Tuning For this auto tuning, you can select 2 signal reception sensitivities: DX (Distance) mode (with DX indicator ON); Both strong and weak stations will be tuned Local mode (with DX indicator OFF); Only strong stations will be tuned in. Select the desired radio band following Steps 1 through 3 of Manual Tuning on the previous FUNC... -
Page 23: Manual Storing Of Station Presets
English Radio Operation Manual Storing of Station Presets A total of 24 stations can be stored in the preset memory (6 stations for each band; FM1, FM2, AM and D.A.P.). Tune in a desired radio station you wish to store in the preset memory by manual or automatic FUNC seek tuning. -
Page 24: Automatic Memory Of Station Presets
English Radio Operation Automatic Memory of Station Presets The tuner can automatically seek and store 6 strong stations in the selected band in order of signal strength. Select the desired radio band following Steps 1 through 3 of Manual Tuning on the previous FUNC page. -
Page 25: Storing Into Direct Access Preset (D.a.p.) Band
English Radio Operation Storing into Direct Ac- cess Preset (D.A.P.) Band Any combination of AM or FM radio stations (up to 6 stations) can be manually preset onto the D.A.P. band. Activate the radio mode. Press the FUNC button. FUNC Press the NEXT (0/) button. -
Page 26: Scanning Preset Stations
English Radio Operation Scanning Preset Stations You can scan the preset stations in memory on each band. When the P.SCAN (Preset Scan) mode is activated, the tuner plays 10 seconds of each preset station. Note: If you have driven to an area where some of your presets are no longer receivable, the Preset Scan function will no longer stop on them. -
Page 27: Mono/Stereo Switching
English Radio Operation Mono/Stereo Switching Use the Mono (monaural) mode to reduce the noise level of noisy stereo broadcast due to weak signal. Press the FUNC button in the radio mode. FUNC Note: "STEREO" indicator appears when a stereo station is tuned in. Press the NEXT (0/) button. -
Page 28: Tuning In Preset Stations Using Function
English Radio Operation Tuning In Preset Stations Using Function Buttons (F1 through F6) Select the desired radio band (FM1, FM2, AM or D.A.P.). 87.5 90.1 Note: To activate the D.A.P. band, press F4 98.1 (D.A.P) button. FM 106.1 FM 108.0 Press the Function button that has your desired 87.5 radio station in memory. -
Page 29: Cassette Player Operation
Press the SOURCE button repeatedly until you are in the cassette player mode. Turn the rotary switch on the CVA-1000E to select the TAPE menu, then press the rotary switch. The display changes to the tape player control screen. - Page 30 English English Cassette Player Operation Fast-Forward/Fast-Re- wind/Program Change/ Pause/Play Press the F1 (FF) button to fast forward the tape. Press the F2 (REW) button to quickly rewind TAPE the tape. MODE To stop fast forwarding or quick rewinding, PLAY METAL PROG press the F1 (FF) button or F2 (REW) button REPEAT...
- Page 31 English English Cassette Player Operation Program Sensor Skip This feature allows you to go to the beginning of a desired program (selection). Turn the rotary switch counterclockwise once during the tape play to return to the beginning of the current selection. If you wish to return to the beginning of a selection further back, repeatedly turn the rotary switch until the desired selection is reached.
-
Page 32: Blank Skip
English English Cassette Player Operation Repeat Play of a Selection Press the F4 (REPEAT) button to play back repeatedly the current selection being played. TAPE MODE To stop the repeat play, press the F4 (RE- PLAY PEAT) button. METAL PROG REPEAT Note: Repeat play in the cassette tape mode DOLBY NR... -
Page 33: Cd Shuttle Operation
CD Shuttle Operation Controlling CD Shuttle (Optional) If an optional Alpine CD Shuttle (3-Disc, 6-Disc or 12-Disc) is connected to the CVA-1000E, the CD Shuttle can be controlled from the CVA- 1000E. This manual describes operation assuming that an Alpine 6-Disc CD Shuttle is connected to the CVA-1000E. -
Page 34: Fast Forward And Backward
English CD Shuttle Operation Play/Pause Press the FUNC button in the CD Shuttle mode. The contents of the Function Guide screen FUNC changes. Press the rotary switch in the CD Shuttle mode to start or pause CD play. Each press toggles between the play and pause modes. -
Page 35: Music Sensor Skip
English CD Shuttle Operation Music Sensor Skip This feature allows you to go to the beginning of a track. Turn the rotary switch counterclockwise once during the CD Shuttle play to return to the beginning of the current track. If you wish to return to the beginning of a track further back, repeatedly turn the rotary switch until the desired track is reached. -
Page 36: Function Buttons
English CD Shuttle Operation Selecting Discs Using Function Buttons (F1 through F6) Press the Function buttons (F1 through F3 for 3-disc Shuttle and F1 through F6 for 6-disc Shuttle) to select the desired disc loaded in the DISC 1 CD Shuttle. The disc number selected is shown DISC 2 on the display. -
Page 37: Track Scan
English CD Shuttle Operation Track Scan In the Track Scan mode, the CD Shuttle plays the first 10 seconds of each track on the disc. Press the NEXT (0/) button in the CD Shuttle mode. The contents of the Function Guide screen changes. - Page 38 English CD Shuttle Operation Repeat Play on Single Track or Entire Disc Press the FUNC button while the track that you want to play repeatedly is playing. FUNC Press the F5 (REPEAT) button. Each press changes the mode menu. When the REPEAT menu is selected, the track will be repeatedly played until the repeat mode is cancelled.
- Page 39 English CD Shuttle Operation M.I.X. (Random) Play In the M.I.X. mode, the tracks on the disc will be played back in a random sequence. Press the FUNC button in the CD Shuttle mode. FUNC Press the F6 (M.I.X.) button. Each press changes the mode menu.
- Page 40 Press the SOURCE button repeatedly until you are in the CD Shuttle mode. Turn the rotary switch on the CVA-1000E and select "CHG" from the menu. Press the rotary switch. The display changes to the CD Shuttle control screen.
- Page 41 35 Note: If the selected player/changer is not connected, the display shows "NO- CHG." Press the SOURCE button on the CVA-1000E to deactivate the CD Shuttle selection mode. SOURCE Press the AUDIO SEL button on the Remote Control to select other audio sources.
- Page 42 English Audio Processor Operation Factory (Maker's) Equali- zation Preset Selection If an optional Alpine Audio Processor is connected to the CVA-1000E, the Audio Processor can be controlled from the CVA-1000E. "Audio Processor Operation" section is described assuming that Alpine ERA-G320 (sold separately) is connected to the CVA- 1000E.
-
Page 43: Audio Processor Operation
English Audio Processor Operation Personal (Private) Equal- izer Characteristic Curves You can create your own equalizer characteris- tic curves. The following is the procedure. Display the EQ cont. screen as described in PRIVATE1 Steps 1 and 2 on the previous page. PRIVATE2 Press the Function button to select the desired PRIVATE3... - Page 44 English Audio Processor Operation Memorizing Characteris- tic Curves Display the EQ cont. screen. Equalizer CONT. PRIVATE1 Select one of the factory Characteristic Curves PSET PRIVATE2 PRESET No or make your own (personal) characteristic FREQ LEVEL PRIVATE3 curve. Then, press and hold any one of the PRIVATE4 Function buttons (F1 through F6) for at least 2 PRIVATE5...
- Page 45 English Audio Processor Operation Recalling Memorized Characteristic Curves Using Function Buttons (F1 – F6) Display the EQ cont. screen. PRIVATE1 Press the Function button that has your desired PRIVATE2 characteristic curve. PRIVATE3 PRIVATE4 PRIVATE5 PRIVATE6 RETURN Recalling Memorized Characteristic Curves Using P.UP/P.DOWN Buttons Display the EQ cont.
- Page 46 English Audio Processor Operation Switching Between Factory (Maker's) and Personal (Private) Characteristic Curves Display the EQ cont. screen. Press the FUNC button. FUNC Press the F5 (MAKER'S) button to activate the Factory characteristic curves. The display shows the Factory curves. Press the F6 (PRIVATE) button to activate the Personal characteristic curves.
- Page 47 English Audio Processor Operation Factory (Maker's) Sur- round Mode Preset Se- lection Using Function Buttons (F1 – F6) Six surround modes are preset at the factory. Press the SET UP button. The Set Up screen appears. SET UP Note: The Parking Brake must be ON to access the SET UP screen.
- Page 48 English Audio Processor Operation Factory (Maker's) Sur- round Mode Preset Se- lection Using P .UP/ P.DOWN Buttons Press the SET UP button to display the Set Up screen. SET UP Turn the rotary switch and select the SURR. cont. menu, then press the rotary switch to display the SURR cont.
-
Page 49: Delay Time
English Audio Processor Operation Adjusting Surround Levels and Surround Delay Time You can adjust the surround sound levels and surround delay time to suit to your preference. Display the SURR cont. screen and press the FUNC button. The contents of the Function Guide screen will FUNC change. -
Page 50: Selecting Bbe Mode
English Audio Processor Operation Selecting BBE Mode The BBE (Barcus Berry Electronics) Surround Processor is designed to return the natural balance of harmonic time alignment, which disappears when the sound signal is amplified and reproduced by loudspeakers. The result of this processing is crisp, clean sound with tighter transients and sharper imaging. -
Page 51: Customizing Bbe Mode
English Audio Processor Operation Customizing BBE Mode This function is operative only when an audio processor equipped with the BBE adjustment feature is connected. Display the EQ cont. screen and press the BBE1 Function button (F1-F3) which has the BBE BBE2 mode you wish to adjust. -
Page 52: Selecting Listening Position
English Audio Processor Operation Selecting Listening Position You can select the listening position for optimum sound field depending on the number of passengers in the vehicle. Press the SET UP button. The Set Up screen appears. SET UP Turn the rotary switch and select the LPS cont. menu. -
Page 53: Adjusting Listening Position
English Audio Processor Operation Adjusting Listening Position Display the LPS cont. screen and select the listening position you wish to adjust by referring to "Selecting Listening Position." Press the FUNC button. FUNC The contents of the Function Guide screen is changed. - Page 54 English Audio Processor Operation Recalling Listening Position Memorized Display the LPS cont. screen. Press the FUNC button. The contents of the Function Guide screen FUNC changes. Press the F3 (P.UP) button or F4 (P.DOWN) button to select the desired listening position in FR/RR memory.
-
Page 55: Adjustment Of Time Correction Value
English Audio Processor Operation Adjustment of Time Correction Value Press the SET UP button. The Set Up screen appears. SET UP Turn the rotary switch and select the "T-CR" menu. Press the rotary switch. The display changes to the T-CR cont. (Time- Correction Control) screen. - Page 56 English Audio Processor Operation Memorizing Time- Correction Value Adjust the Time-Correction value as described in the previous procedure. PRESET 1 Press and hold any one of the Function buttons PRESET 2 (F1-F6) for at least 2 seconds. PRESET 3 The preset indicators in the display will blink for PRESET 4 5 seconds.
- Page 57 English Audio Processor Operation Recalling Memorized Time-Correction Values Using Function Buttons (F1 through F6) Press the Function button (F1-F6) that has your desired Time-Correction value memorized. PRESET 1 PRESET 2 PRESET 3 PRESET 4 PRESET 5 PRESET 6 Recalling Memorized Time-Correction Values Using P.UP/P.DOWN Buttons...
- Page 58 English Audio Processor Operation Turning Defeat Mode On or Off Use the Defeat On mode, when you want to bypass the BBE/surround circuits in order to output the BBE/surround signals directly and to have flat equalizer settings simultaneously. Press the SET UP button. The Set Up screen appears.
-
Page 59: Adjusting Subwoofer Level
English Audio Processor Operation Adjusting Subwoofer Level This function is operative only when an audio processor equipped with the subwoofer level adjustment feature is connect. Press the SET UP button. The Set Up screen appears. SET UP Turn the rotary switch and select the "Subw cont."... - Page 60 English Audio Processor Operation Switching Phase of Subwoofer This function is operative only when an audio processor equipped with the Phase switching feature is connected. Display the Subw cont. screen. Press the F2 (PHASE) button. Each press of OUTPUT PHASE this button switches between the 0 degree LEVEL phase and 180 degrees phase.
- Page 61 Audio Processor Operation Adjusting Cross-Over (X-Over) Point of 2-Way Divider If optional Alpine Channel Divider(s) are connected, you can control the Divider(s) from the CVA-1000E. Use this procedure when one or two 2-way- system channel dividers are connected. Press the SET UP button.
- Page 62 English Audio Processor Operation Select the frequency range you want to adjust. When the F1 (X-OVER) button is pressed once, the display shows the adjustment value of the crossover point. Each press changes the frequency ranges as follows: Divider CONT. X-OVER/ PSET LEVEL/...
-
Page 63: Adjusting Levels
English Audio Processor Operation Adjusting Levels Display the DIV. cont. screen. Press the FUNC button. The contents of the Function Guide screen FUNC changes. Select the frequency range you want to adjust. When the F2 (LEVEL) button is pressed once, the display shows the adjustment value of the level. -
Page 64: Speaker System
English Audio Processor Operation Adjusting Time - Correction for 2-Way Speaker System Use this procedure to adjust the sound time difference between the speakers. Display the DIV. cont. screen. Press the FUNC button. The contents of the Function Guide screen FUNC changes. - Page 65 English Audio Processor Operation Adjusting Cross-Over (X-Over) Point of 3-way Divider Use this procedure when one or two 3-way- system channel dividers are connected. Press the SET UP button. SET UP The Set Up screen appears. Turn the rotary switch and select the DIV. cont. menu.
- Page 66 English Audio Processor Operation Turn the rotary switch to adjust to your desired cross-over point. To adjust other frequency ranges, follow Steps 2 to 4 above. When the adjustments have been completed, press the rotary switch. The display returns to the Set Up screen.
- Page 67 English Audio Processor Operation Adjusting Levels of Fre- quency Ranges Display the DIV. cont. screen and press the FUNC button. The contents of the Function Guide screen FUNC changes. Select the frequency range you want to adjust. When the F2 (LEVEL) button is pressed once, Divider CONT.
- Page 68 English Audio Processor Operation Adjusting Time- Correction for 3-way Speaker System Use this procedure to adjust the sound time difference between the speakers. Display the DIV. cont. screen. Press the FUNC button. The contents of the Function Guide screen FUNC changes.
-
Page 69: Memorizing Divider Settings
English Audio Processor Operation Memorizing Divider Settings You can store your settings of the divider(s) in memory when you have adjusted. Display the DIV. cont. screen. Divider PRESET 1 PSET Press and hold one of the Function buttons F1 PRESET 2 Custom through F4 for at least 2 seconds. - Page 70 English Audio Processor Operation Recalling Memorized Divider Settings Using Function Buttons (F1-F4) Display the DIV. cont. screen. Divider PRESET 1 Press the Function button (F1-F4) that has your PSET PRESET 2 PRESET No desired divider setting. STEP PRESET 3 PRESET 4 3-WAY vol.
- Page 71 English Audio Processor Operation Switching Front and Rear Speakers Using NEXT 0/) Button You can switch the Front and Rear Speakers only when 2 channel dividers are connected. Display the DIV. cont. screen. Press the NEXT (0/) button. Each press switches between the Front and Rear speakers/indicators.
-
Page 72: Auxiliary Source Operation
English Auxiliary Source Operation Playing Auxiliary Sources (Optional) This feature permits you to play auxiliary sources such as TV and VCR. Press the SOURCE button. The menu screen appears. Note: Pressing the SOURCE button while SOURCE driving (Parking Brake OFF) will cause the audio source to change immedi- ately. -
Page 73: Selecting Ntsc Or Pal System
English Selecting NTSC or PAL System Switching Between NTSC and PAL Systems Press the SET UP button. The Set Up screen appears. SET UP Turn the rotary switch and select the System cont. menu. Press the rotary switch. The display changes to the System cont. (System Control) screen. -
Page 74: Other Useful Features
English Other Useful Features Titling Radio Stations/CDs You can title radio stations (up to 18 AM/FM stations) or CDs (the number of CDs you can title varies depending on models). This manual explains how to title radio stations. Activate the radio mode. Press the FUNC button. - Page 75 87.5 MHz previous digit, press the F3 (BACK) button. WRITE TITLE INPUT MODE Pressing the F2 (NEXT) button moves to the DELETE ALPINE!! next character. RETURN vol. 27 Pressing the F6 (RETURN) button returns to & the step 3 display above.
- Page 76 MONO P.SCAN 4 TITLE 5 DAP Select the title you want to delete and press the ALPINE!! corresponding Function button (F1-F6). Company The display changes to the Title Input screen 123456 and the first digit position to be input blinks.
- Page 77 English Other Useful Features Displaying Current Time Press the SET UP button. The Set Up screen appears. SET UP Turn the rotary switch and select the System cont. menu. Press the rotary switch. The display changes to the System cont. (System Control) screen.
- Page 78 English Other Useful Features Resetting Time Display the System cont. screen and press the F4 (HOUR) button. BEEP SPE-ANA CLK DISP HOUR MINUTE RESET Turn the rotary switch clockwise or counterclockwise to adjust the hours upward or downward respectively. Press the F5 (MINUTE) button. BEEP SPE-ANA CLK DISP...
-
Page 79: Displaying Spectrum Analyzer
Displaying Spectrum Analyzer If an audio processor equipped with the spectrum analyzer function is connected to the CVA-1000E, you can see the spectrum analyzer screen. Display the System cont. screen and press the F2 (SPE-ANA) button. You can select one of BEEP two color patterns. - Page 80 English Other Useful Features Simultaneous Operation of Audio and Video Sources With this feature, you can change the video source while you are listening to the current audio source. Press the V.SEL (Video Select) button when an V.SEL audio source is playing. Each press selects the video sources and changes the display as follows: AUX1 Screen...
- Page 81 English Other Useful Features Changing Background Screen You can choose one of 4 background screens preset at the factory. They are the stone grain, sky, wood grain and gradation screens. Press the SET UP button. The Set Up screen appears. SET UP Turn the rotary switch and select the Visual cont.
- Page 82 Press the F4 (DEMO) button. BEEP The unit starts the demonstration automatically. SPE-ANA CLK DISP Note: The demonstration for the units not DEMO connected to the CVA-1000E will not be performed. To end the demonstration, press the rotary switch.
-
Page 83: Remote Control
English Remote Control (RUE-4160 supplied with CVA-1000E) Controls and Indicators/ Basic Operation 1 PWR Button Press to turn the power on/off. 2 ENTER Button 3 VISUAL SEL Button 4 AUDIO SEL Button Press to select the audio source. 5 MUTE Button... -
Page 84: Radio Mode
English Remote Control (RUE-4160 supplied with CVA-1000E) Radio Mode 1 SEEK UP/DOWN operation 2 Preset Select (UP/DOWN) Press the button to select a preset No. 3 Press the button, and the band will change. 4 A-position CD/3D/6D BAND AUDIO VISUAL PROG A.PROC... - Page 85 English Remote Control (RUE-4160 supplied with CVA-1000E) CD Shuttle Mode 1 Press the button to advance to the beginning of the next track. 2 Disc Select (UP/DOWN) Press the button to select a disc No. 3 Press the button to go back to the beginning of the current track.
- Page 86 English Remote Control (RUE-4160 supplied with CVA-1000E) Replacing battery Applicable battery: Use two "AAA" sized dry batteries. Opening the battery cover. Push and slide the cover in the arrow direction, and the cover will be removed. Replacing the battery. Remove the old batteries. Insert new ones matching the (+) and (–) polarities as shown in...
-
Page 87: In Case Of Difficulty
If you encounter a problem, please review the items in the following checklist. This guide will help you isolate the problem if the unit is at fault. Otherwise, make sure the rest of your system is properly connected or consult your authorized Alpine dealer. Common Modes... - Page 88 English English In Case of Difficulty Common Modes Cause and Solution Symptom Screen not displayed. Brightness control is set at the minimum position. – Adjust the Brightness control. Temperature in the vehicle is too low. – Increase the vehicle's interior temperature to operation temperature range.
- Page 89 English English In Case of Difficulty Radio Mode Symptom Cause and Solution Unable to receive stations. No antenna or open connection in cable. – Make sure the antenna is properly connected; replace the antenna or cable if necessary. Unable to tune stations in the seek mode. You are in a weak signal area.
- Page 90 English English In Case of Difficulty Indication for CD Shuttle Indication Cause and Solution ERROR-H Temperature in the vehicle is too high. – Allow the vehicle's interior temperature to cool. The indicator will disappear when the temperature returns to within operation range.
-
Page 91: Specifications
English English Specifications MONITOR SECTION Screen Size ..........................5.6" LCD Type ....................Transparent type TN LCD Operation System ....................TFT active matrix Number of Picture Elements ..............224,640 pcs. (960 234) Illumination System ............U-shaped cold cathode fluorescent tube FM TUNER SECTION Tuning Range ...................... -
Page 92: Specifications
English English Specifications GENERAL Power Requirement ..............14.4 V DC (11–15 V (allowable)) Maximum Power Output* ......................35 W Output Voltage ....................1000 mV/10 k ohms Maximum Pre-Output Voltage ................... 2 V/10k Ohms Bass ........................±15 dB at 30 Hz Treble ........................ - Page 93 English Note...
- Page 94 !"# ! " # $ % & ' ( ) * !"#$ !"#$%& !"#$%&'()*+, !"#$ %&'()*+,- !"#$%&'( !"#$%&'()*+, !"#$% &'()*+, !" !"#$%&'(()*+ !"#$%&'( !" !"#$%&'() !"#$% &'()*+,- !" !"#$%&'()*+, !"#$%&'()*+, !"#$%&'() !"#$%&'()*+, !"#$%&'() !"#$%&'()*+,'- !"#$%!&'%()*+, !"#$%& !"#$%&'()*+, !"#$%&'()*+, !"#$%&'()*+,-...
- Page 95 !"# !"#$%&'()*+ !"#$% !"#$%& !"#$%&'()*+, !"#$ %&'()*+,- !"#$%&'( !" !"#$%&'()*+,-. !"#$%&'()*+, !"#$ !"#$% !"#$%&'( !"#$%&'()*+, !" !"#$%&'( !"#$%&'( !"#$%&'()*+ !"#$%&'()*+,-. !"#$%&'()*+(, !"#$%&'()*+ !"#$%&'()*+, !"#$%&'()*+,'- !"#$%&'( !"#$%& !"# $ !"#$%&'()*+, !"#$%&'()*+, !"#$%&'()*+,-. !"#$% &'()*+ !"#$%&'...
- Page 96 !"# !"#$%&'( !"#$%&'()*+ !"#$%&'( !"#$%&'()*+,-. !" #$%&'()*+,- !"#$%&'()*+, !"#$%&'()* !"#$% !"#$%&'()*+,-. !"#$%& !"#$%&'&()*+, !"#$%#$&' !"#$%&'() !"#$%&"#'( !"#$%&'() !"#$%&'()*+ !"#$%&'( !"#$%&' ! " # $ % ! & !"#$ !" !"#$%&'()* ! " # $ % ! " # !"#$%&'()* !"#$ !"#$% !"#$%&'()*+,...
- Page 97 !"# !"#$ !" !" !" !"!# !"# !"#$%& !" !"#$%& !"# !" !"# !"# !"# !"#$% !"#$% ! "#$ !"# !"# $% !"# !"#$ !"#$% !"#$ !"#$% !"#$% !"#$% !"#$ !"...
- Page 98 !"# TFT COLOR LCD !"#$%&'()*+,-./0 !" !" SYSTEM CONTROL MONITOR / RECEIVER 35Wx4 CVA-1000E VOLUME V.SEL SET UP SOURCE FUNC MUTE !" !"#$%&'()*+!"#,- !"#$%&!'() !"#$ !"#$%&'()*+,-./)01 !"#$%&'()*+,() !"#$%&'()*+,-. !"#$%&' !"# !" !"#$%&'()*+ !"#$ !"#$%&'()* !"# !"#$% !"#$%&' !" !"#$%&'()*+,-./0 !"#$%&'()*+...
- Page 99 !"#$%& !"#$%&'()*++, !"#$%&'()*+,-./0 !"#$ !"#$%&'()*+,-%#$ !"# !"#$%&'()*+,- !"#$%&'()*+,-./*01 !"#...
- Page 100 !" = lmbkL`ilpb= !"=P= !"#$%&'() !"#$%&'()*+,-. !"#$%=O= !"#$% !"#$%&'()* !"#$ = lmbkL`ilpb= OPEN / CLOSE !"#$%&'()*#$%+ !"#$%&'() !"#$ !"#$%& !"#$%&'()*+,- !"#$%&'()*+,- !"# !"#$%&' !"#$%&'()*+ !" = lmbkL`ilpb= !"=P= !"#$%&'() !"#$%&'()*+,-. !"#$%=O= !"#$% !"#$%&'() OPEN / CLOSE !=lmbkL`ilpb= !"#$...
- Page 101 !" !"#$%&'( !"#$%&'( DISCOVER THE FUTURE OF MOBILE MEDIA CVA-1000E !"#$%&'() !"#$%&' !"!#$%&'()*+,- !"#$%&'()*+,(- !"#$%& !"#$%&'! !" !"#$%&'()*+,-. !"#$ !"#$%&' !"#$%&' ()*+ !"# !"#$% !" !"# !"#$%&'()
- Page 102 !"!# !"#$%&'()*+,!"# !"#$%& !"#$%&'()#* ! " !"#"$%&!'()*+,()*+ !"#$%& !"#$%&'()*+,-. !"#$%&'( !" !"#$% !"#$%&'()*+, !"#$%&'()*+,- !"#$%&'()*+,- ! "# $%&'()*+, !" !"#...
- Page 103 !"# !"#$ =slirjb= !" !"#$%&'()*+ !"#$%&'()*+,-. !"#$%&'()*&+,-. !"#$%& !"#$%&'()*+,-./ !"# !"#$ !"#$%&'()=...
- Page 104 !"#$%&' !"#$%&'( !"# !"# SET UP !"#$%& BBEP BEEP !"#$%&'()*+,- SPE-ANA SPE-ANA CLK DISP. CLK DISP. EQUALIZER Pops SET UP SURROUND Stadium !"#$% DEMO B B E Custom L P S Front–L !"#$%&'%()*+,-. TIME CORR. Custom SUB WOOFER !"#$% vol. 0 LPS T–CR SubW.
- Page 105 !"#$%&' !"#$%& !"#$% !"#$% !"#$%&'()*+, LOUDNESS "#$%& BASS TREBLE BALANCE FADER !" #$%&&'()*+,- !"#$%&'()*+" !"#$%&'()*+,- !"#$ !"# !"#$ !"#$%&'( ! " # $ !"#$%&'()*...
- Page 106 !"#$%&'() !"#$%&'( !"#$%&' !"#$ !!" !"##$%&'()* LOUDNESS BASS ! "#$ TREBLE ! "#$%&'() BALANCE FADER RETURN !" #$%&&'()*+,- !"#$% &'() !"#$%&'()*+,-./0 !" !"#$%&'()
- Page 107 !" !"#$%&'()*+,-./01 !"#$%&'()*+,-.,/0 !"#$%&'()*+,-./ !"#$%&'()* !" !"#$%&' !"#$% !!"#$%& LOUDNESS !" #$%&'()*+,-./ BASS TREBLE BALANCE FADER RETURN...
- Page 108 !"#$%& !"#$%&'()*+ !"#$%&'()*+,-./0 ! " # $ % & ' ( ) * + , - !" !"#$%& !"#$% !"#$%& SET UP !"#$%& !"# !"#$%& !!"#$%&' 1 OUTPUT !" #$%&'()*+,-.
- Page 109 !"# !"#$%&' SOURCE !"#$% !"#$%&'()*!+",- !" !"#$%&'() !"#$ !" !"# !" !"#$%&'()'*+, !"#$%&'( !" !"#$%& !"#$%&'()* !"#$% !"#$%&'( SET UP !"#$%&'()*+,-./0 !"#$ !"#$%&'...
- Page 110 !!"# = cO _ofdeq !"#$%&'()*+,-.=akL BACKGND BRIGHT oqkLrm= TINT COLOR !" #$%&&'()*+,- !"#$%&'()*+...
- Page 111 !" !" !"# !"#$%&'()*+ !" !"#$% SET UP !"#$%&'()*+,- !"#$% !"#$%&' !!"# !"#$%&'()*+,- BACKGND !" BRIGHT TINT COLOR !"#$%&'()*+% !""#$%&'()*+,-...
- Page 112 !"# !"#$ !"#$%&'()*+ !" !"#$% SET UP !"#$%&'()*+,- !"#$% !"#$%&' !!"# !"#$%&'()* BACKGND "#$%&'( BRIGHT TINT COLOR !"#$%&'()*+, !"#$%&'()*+,-./...
- Page 113 !"# !"#$% SOURCE !"#$%& !"#$%&'() * !" !" !"#$% ! " # $ % & ' ( ) * + , - !"# !"#$% !"#$%& !"#$%&'()* !"#$%&'()*+,*-./ !"#$%&'()* +, ! "#$%&' !"# FUNC !"#$ !"#$%& !"#$!%&' ! "#$%&'()*+,-. P.UP !" P.DOWN A.MEMO...
- Page 114 !"# !"# !"#$%&'()*+,-./0 !"# !"#$%& !" #$!%&'()* !" !"#$ !"#$%&' !"#$%&'()*+ !"#$%&'() FUNC !" ! "#$ !"#$%&'() !"#$%&' ! "# ! "# !" !"# P.UP P.DOWN A.MEMO !"##$%&'()$*+,- !"#$% !"#$%&'()*+! !"#$%&'()*+,-$#- .
- Page 115 !"# !"#$% !"#$% & !" #$ !"#!$%&'&()*(+,* !" FUNC ! "# !"#$% !"#$%& 87.5 90.1 98.1 FM 106.1 FM 108.0 87.5 !"#$%&'()*+ !"#$%&' !"#$%&'!()*+,-./ 87.5 !"#$ 90.1 98.1 FM 106.1 FM 108.0 87.5 !"#$%& !"#$ !"#$%&'()*+,- !"#$%&'()*+,- !"#$%&' ()*+!,...
- Page 116 !"# !"#$% !"#$%&'()*+,-./0 !"#$% !"#$%&'()* !"#$% FUNC !"#$%&'()*+ !"#$%&'()*+,-./0 !"#$%&' !"#$%&'()*+,-#- !" !"#$%&'()*+,-. P.UP !"#$%&'()*+,-. P.DOWN !"#$%&'()*&'+, A.MEMO !"#$% Band...
- Page 117 !"# ! "#$ !"#$%&'( !"#$%& !"#$%&'( FUNC !"#$%&' !"#$%& !"# !"#$%&' !"#$%&'()*+, MONO P.SCAN !"# !" 4 TITLE !"#$%&'()*+, 5 DAP !" !"# !"#$% !"#...
- Page 118 !"# !"# !"#$%&'()*&+,-. !"#$%&'( )*#+,- !"# !"#$% !"#$%&'()*+,-./ !"#$%&'()*+,)-. !"#$%&'() !" !"#$%&'()*+,-. !"#$%&'()*+,-. !"#$%&'( FUNC ! "# !"#$%&' MONO !"#$%&'()* P.SCAN !"#$%&'()*+,- 4 TITLE !"#$ 5 DAP...
- Page 119 !"# !"# $% !"#$%&'()! !"#$%&'( )*+, !"#$%& FUNC !"#$%&'()*+,-./ !"#$%&'% !"#$%&'() !"#$%&'()*+,-. MONO !"#$%&'()*+,- P.SCAN 4 TITLE 5 DAP...
- Page 120 !"# !"# !"#$%&'( 87.5 90.1 !"#$ 98.1 FM 106.1 FM 108.0 !"# $%&'()*+,- . 87.5 !"#$%& !"#$ FUNC !" !"#$%&'()*+, P.UP P.DOWN A.MEMO Band...
- Page 121 English !"#$ Operation !"#$%&'( !"#$ !"#$ !"#$%&' !" !"#$%&'()* !"#$%&' SOURCE !"#$%& !"#$%&'() !" !"#$ !"#$%& !"#$%&' !"#$%&'()* !"#$%&'()* !"#$%#$&'( !"#$%& !"#$%&' TAPE ! "#$%&'()*+, MODE PLAY !"#$%&'()*+,-./ METAL PROG REPEAT DOLBY NR B.SKIP vol. 0 !"#$%&'(")*+, !"# !"#$%&'()*+,-./ !"#$%&'())!*+,-...
- Page 122 English !"#$ Operation ! " !#$%& !" !"#$% !"#$% !"#$!%#&'()*+, TAPE !"# MODE !" # PLAY METAL PROG REPEAT DOLBY NR B.SKIP vol. 0 !"#$%&'!"()*+,-./ TAPE MODE PLAY METAL PROG REPEAT DOLBY NR B.SKIP vol. 0 !"#$%&'()*+,-. ! !"#$%&'()*+,-./...
- Page 123 English !"#$ Operation !"# !"#$%&'()*+,-./0 !"#$%&'()*+,-+./ !"#$%&'()*+ , !"#$%&'%()*+,-./ !"#$%&'()*+ !"#$%#&'()*+,-.$ !"# !"#$%&'(&)*+,-./ !"#$%&'()*+,...
- Page 124 English !"#$ Operation !"#$% !!"#$ !"#$% TAPE !"#$%&'() MODE PLAY METAL PROG REPEAT !"#$%&'()*+*&'" DOLBY NR !"# B.SKIP vol. 0 !"#$%&'()*+ !"# !"#$%& FUNC !"##$% !"#$ !"#$ TAPE !"#$%&'()*+ MODE PLAY METAL PROG REPEAT DOLBY NR B.SKIP vol. 0...
- Page 125 !"#$% !" !" !"#$ !"# !"# !"#$% !" "#$ !"# !"# !" !"#$%&'()*+ SOURCE !"#$%&' !"#$%& !"#$%&'() *!+,- !"#$%&'( !" !" !"#$%&' !"#$%&'()* !"# !"#$%&...
- Page 126 !"#$% !" !"#$%&' !"#$%&'()* FUNC !"#$%&'()$*+, !" !"#$%&'( !"#$%& !"# !"#$%&' !"#$%&'()* FUNC !"#$ !"#$%&'()*+,-. DISC UP DISC DN REPEAT M.I.X.
- Page 127 !"#$% !"# !"#$%&'()*+, !"#$%&'()*+,-./ !"#$%&'()*+,-!. !"#$%&'()&'*+,-. !"#$%&'()*+, !"#$%&'()*+,-./ !"#$%&'()*+,!- !"#$ %&#$'()*+,-./ !"#$%...
- Page 128 !"#$% !"# ! "# !" !" !"#$ !"#$%& !"#$%&' DISC 1 !"#$%&'!()*+, DISC 2 !" DISC 3 !" !" #$%&' DISC 4 !"#$%&' PLAYING !"# $ DISC 6 !"#$%&' !"#$%&'()* FUNC !"#$%&'( !"#$% !"#$%!&'() DISC UP DISC DN REPEAT M.I.X.
- Page 129 !"#$% !"#$%& !"#$%& !"#$%& !"#$%&' !"#$%&'()* !"#$ !"#$%&'()* SCAN !"#$%&'()*+,- TITLE...
- Page 130 !"#$% !"#$%&'() !"#$%&'#()*+,-. FUNC !!"# !"#$%&'() !"#$%&'( !"#$%&'( !"# !"#$ !"#$%&'() !"#$%&'()*+,- DISC UP !"#$%&'() DISC DN !"# REPEAT M.I.X.
- Page 131 !"#$% !"#$% !"#$%&'()*+, !" !"#$%&' FUNC ! "#$% !"#$ !"#$%&'() !"#$%& !"# !"#$ !"#$%&'()*+,-./0 !"#$%&'("#&'()*+ DISC UP !"#$%& !"#$%&'( DISC DN !"#$%&'()*+,-.#/01 REPEAT !"# M.I.X. !"# !"# !"#$ !"#...
- Page 132 !"#$% !"# !" !" !"# !"#$%& !"' ( CD/3D/6D !"#$%&'( BAND AUDIO VISUAL PROG !"#$%&'()*+,- !"#$ A.PROC DEFEAT MUTE SELECT !" "#$ SOURCE !"#$%& !"#$% !"#$%&'( !" !" !"#$%&'() !"#$%& !"# !"#$%& !" !"#$% !"#$ AUDIO...
- Page 133 !"#$% !"#$ !"#$%& !"# 2 !"#$ !"#$ 6D CHG-2 CHANGER1 ! " !"#$%& TITLE CHANGER2 !" ABCDEFGH DISC TRACK CHANGER3 !"#$%&'()* + 07|20’45” CHANGER4 CHANGER5 !"#$%&'()*+,-./ CHANGER6 !"# vol. 35 !" !" !"#$%& SOURCE !"#$ !"# !"# AUDIO...
- Page 134 !"#$% !"# !"# !"# !"#$% !"#$%&' !"#$%&' !"#$% !"#$% !" !"#$%&'()*+,-.*/01 !"#$%&' !"# !" !"#$%&'( SET UP BBEP BEEP SPE-ANA SPE-ANA !" !"#$ CLK DISP. SET UP CLK DISP. EQUALIZER Pops SURROUND Stadium DEMO B B E Custom !"#$%&'()*+,-./ L P S Front–L TIME CORR.
- Page 135 !"#$% ! "#$% !"#$%&'()*+,-./ !"#$%&' PRIVATE1 !"#$%& PRIVATE2 PRIVATE3 !" #$%&'($)*+,-. PRIVATE4 PRIVATE5 PRIVATE6 RETURN !"#$%&'()* FUNC !"# !"#$ !"#$%& !"#$ P.UP !"!#$%&' P.DOWN MAKER'S PRIVATE !" #$%&&'()*+,- !"#$% !"#$%&'()* !"#$%&'()*+ !"#$%&'(...
- Page 136 !"#$% !"# !"#$%& Equalizer CONT. PRIVATE1 !"#$%&'()*+,-)*. PSET PRIVATE2 PRESET No !"#$%&%'()* !"# FREQ LEVEL PRIVATE3 !"#$ PRIVATE4 !"#$% !"#$%&'( PRIVATE5 140 310 800 5K 11K PRIVATE6 vol. 0 RETURN !"#$%#$& !"#$%&'()*+,-./0 !"#$% PRIVATE1 !"#$%&'()*+ PRIVATE2 !"#$%&'()* PRIVATE3 PRIVATE4 PRIVATE5 PRIVATE6...
- Page 137 !"#$% !" !"#$ !"#$%& PRIVATE1 !"#$%&'()*+, - PRIVATE2 PRIVATE3 PRIVATE4 PRIVATE5 PRIVATE6 RETURN !"#$ FUNC !" !"#$ P.UP P.DOWN MAKER'S PRIVATE...
- Page 138 !"#$% !"!#$%&'( !" !"#$%& FUNC !!"#$%& • !"#$%&'() !!"#$%&' • !" "#$% !" P.UP !"#$%&'()*+ P.DOWN !"#$ MAKER'S PRIVATE...
- Page 139 !"#$% !" !"#$%&'( !" !"# !"#$%&'( SET UP !" !"#$ !"#$%&'()*+,-./ !" !"#$% !"#$%& !"# !"#$ !"#$%&'()*+,-./ !"#$%&'()*+ !"#$%&'()*+,-# !"#$%& ' NORMAL STAD. LIVE CHURCH DANCE HALL !"#$%&'()*+,-. !"#$%&'(...
- Page 140 !"#$% = mKrmLmK= altk= ! "#$%&'( !"#$%&'( =pbq=rm= SET UP !"#$%&= proo= ÅçåíK !"#$%&'()*+,-./0=proo ÅçåíK= =crk`= !"#$%&'()* FUNC !" =cP=EmK=rmF= =cQ=EmK=altkF= !"#$% TIME LEVEL P.UP P.DOWN...
- Page 141 !"#$% !"#$% !"& !"#$%&'()*+,-./0 !"#$ !" !"#$%&'()*+ FUNC !"#$ TIME !"#$ ! "# LEVEL P.UP P.DOWN !" #$%&&'()*+,- !"#$% &'() !"#$%&'()*+,-./ !"#$%&'()* +,-. !"#$%&'()*+,- !"#$%&'()*...
- Page 142 !"#$% !"# !"#$%&'()*+,- !"#$%&'()*+,-.)/01 !"#$%&'()*+, !"#$%&'()*+'(, !"#$ %&'()* !"#$%& SET UP !"#$% !"# !"#$% !"# !"#$%&'!( BBE1 BBE2 !"#$%&'%( BBE3 BBE OFF !"#$% !"#$ L-LEVEL H-LEVEL...
- Page 143 !"#$% ! "#$%&'( !" !"#$%&'( !"#$%&'()* BBE1 !"# !"#$ BBE2 BBE3 BBE OFF L-LEVEL H-LEVEL !"#$% BBE1 !"#$ BBE2 !" BBE3 BBE OFF L-LEVEL H-LEVEL !"#$%&'()*+ !"#$ %&'()*+,-+# CONT. BBE1 !" !"#$% PSET BBE2 Custom HIGH BBE3 BBE OFF L-LEVEL H-LEVEL vol.
- Page 144 !"#$% !"#$ !"#$%&'()*+,-./0 !"#$%&'( SET UP !"#$%& !" !"# !"#$%&'()*+ !"#$%&'()* FRONT FRONT-L FRONT-R !"#$%&'()*+,- !"#$%&'(...
- Page 145 !"#$% !"# !"#$%&'()* !"#$% &'(!# !" !"#$%&'()* FUNC !"#$% !"#$ !"#$%&' !"#$ !"# !"!#$ FR/RR !"#$%&'()* LT/RT !"!#$ P.UP P.DOWN !"#$%&'()*+, !"#$% &' ()*+, !"#$%&'()*+,- !"#$%&'(...
- Page 146 !"#$% !"#$%&' !"#$%&' =imp=ÅçåíK =crk`= !"#$%&'()* FUNC =cP=EmK=rmF= =cQ=EmK=altkF= !"#$%&'$() FR/RR LT/RT P.UP P.DOWN...
- Page 147 !"#$% !"#$ !"#$%&'( SET UP !"#$%&' !" !" !"#$%& !" !"#$%& !"#$%&'()* FUNC ! " # $ % & ' ( ) * + !"#$% !"# P.UP P.DOWN !" #$%&&'()*+,- !"#$%&'()*+,-./' Time Cor. CONT. PSET Custom STEP Fr/Right 0.3 ms P.UP P.DOWN vol.
- Page 148 !"#$% !"#$ !"#$%&'()*+,- ! " !"#$%& PRESET 1 PRESET 2 !"#$% &'()* PRESET 3 PRESET 4 PRESET 5 PRESET 6 !"#$%&' !"#$%& PRESET 1 !"#$%&'()*+ PRESET 2 !"#$%&'()!*+,-. PRESET 3 !"#$%&'()*+,-./01 PRESET 4 PRESET 5 PRESET 6...
- Page 149 !"#$% !"# !"#$%& !"#$%&'()*+,-%./ PRESET 1 PRESET 2 PRESET 3 PRESET 4 PRESET 5 PRESET 6 !"#$%& FUNC !"#$%&'()*+ P.UP P.DOWN...
- Page 150 !"#$% !"#$%& !"# !"#$%&' !"#$%&'()*+,-. !"#$%&'( !"#$%&'( SET UP !"#$%&' !"# !"#$%& !" !"#$%&'( ! "#$%&'()*+,&'( DEFEAT !"#$ BALANCE FADER...
- Page 151 !"#$% !"#$%&'( !"#$%&'()*+,-./0 !"#$%&'()*+,-. !"#$%&'( SET UP !"#$%&' !"#$%&' !"#$%& !" !!"# !" !"#$% OUTPUT !"#$%& PHASE LEVEL !!"# !"#$% !"# OUTPUT PHASE LEVEL !"#$ !"%&&'()*+ !" #$%&'()*+...
- Page 152 !"#$% !"#$%&'( !"#$%&'()*+,- !"#$%&'() !"#$%&'( !!"# OUTPUT !"# !"#$% PHASE LEVEL...
- Page 153 !"#$% !"#$ !"#$%& !" !"# !"#$% !"#$%# !"#$%&' !"# !"#$%&'( SET UP !"#$%&' !"#$ !"#$%&' !" Divider PRESET 1 PSET PRESET 2 Custom STEP PRESET 3 PRESET 4 2-WAY vol. 35 RETURN Divider CONT. X-OVER/ !"#$%&'()* PSET LEVEL/ Custom STEP T-CR/ FUNC P.UP...
- Page 154 !"#$% !"#$%&'() !" !"#$% !"#$%&' ! "#$%&'()* +,- !"#$%&'() Divider CONT. X-OVER/ PSET LEVEL/ Custom STEP T-CR/ 31.5 Hz P.UP !"#$%&'( P.DOWN 31.5 R 400 vol. 35 !"#$%&'()*+,-./ !"!#$%&'() !" #$%&&'()*+,- !"#!$%&' !"#$%&'()*+,- !"#$%&'()
- Page 155 !"#$% !"#$%& =afsK=ÅçåíK =crk`= !"#$%&'()*+ FUNC !"#$%&'() !"= cO= EibsbiF= !"#$% !"#$% ! "#$%&'()* +,- !"#$%&'() Divider CONT. X-OVER/ PSET L-Low R-Low F-High/L LEVEL/ Custom R-High/R R-High/L F-High/R STEP T-CR/ F-High/R -12 dB P.UP !"#$%&'( P.DOWN L-Low R-Low L-High R-High vol.
- Page 156 !"#$% !"#$%& !"#$%&'()&*+, !"#$%& =afsK=ÅçåíK =crk`= !"#$%&'()* FUNC !"#$%&'() !"= cP= EqJ`oF= !"#$%& !"#$%&' = qJ`o ! "#$%&'()* +,-. Divider CONT. X-OVER/ PSET !"#$%&'() LEVEL/ Custom STEP T-CR/ i J i ç ï o J i ç ï c J e á Ö Ü L i F-High/R 30 ms P.UP...
- Page 157 !"#$% !" !"#$%# !"#$%& !" #$% SET UP !"#$%&'( !"#$%& !" !" !"#$ !" Divider PRESET 1 PSET PRESET 2 Custom STEP PRESET 3 PRESET 4 3-WAY vol. 35 RETURN !"#$%&'( Divider CONT. X-OVER/ PSET LEVEL/ Custom STEP FUNC T-CR/ P.UP P.DOWN 3-WAY...
- Page 158 !"#$% !"#$%&'()*+,-. !"#$%&'()*+,-./= O= !"# !"#$%&'()*+, !"#$%&'(...
- Page 159 !"#$% !"#$%&' !"#$%&'() = afsK= ÅçåíK crk`= !"#$%&'()* FUNC !"#$%&'() !"=cO !"#$%&"#'()*+, EibsbiF= Divider CONT. X-OVER/ ! "#$%&'()* +,- PSET LEVEL/ Custom i J i ç ï o J i ç ï i J j á Ç STEP T-CR/ L-High -12 dB o J e á...
- Page 160 !"#$% !"#$%& !"#$%&'()&*+, !"#$%& =afsK=ÅçåíK =crk`= !"#$%&'()* FUNC !"#$%&'() !"= cP !"##$% qJ`o !"#$ !=qJ`o= Divider CONT. X-OVER/ ! "#$%&'()* +,-. PSET LEVEL/ Custom i J i ç ï o J i ç ï i J j á Ç STEP T-CR/ L-High 30 ms...
- Page 161 !"#$% !"#$ !" #$%&'()*+,-./ !" !"#$%& Divider PRESET 1 ! " !"#$% PSET PRESET 2 Custom STEP PRESET 3 !"#$ PRESET 4 3-WAY vol. 35 RETURN !"#$% !"#$%&'( !"#$%&'()*+ Divider PRESET 1 PSET !"#$%&' !"#$% PRESET 2 PRESET No STEP PRESET 3 PRESET 4 3-WAY...
- Page 162 !"#$% !" !"#$% !"#$%& Divider PRESET 1 ! " # $ % & ' ( ) * + , PSET PRESET 2 PRESET No STEP PRESET 3 PRESET 4 3-WAY vol. 35 RETURN !"#$%& FUNC !" Divider CONT. X-OVER/ !"#$%&'()*+ PSET LEVEL/ PRESET No...
- Page 163 !"#$% =kbuq 0/ !" !"#=O= !"#$%&'() !"#$ !"#$%& = afsK= ÅçåíK ! "#$%&' kbuq !"#$%&'()*+,- !"#$%&' !"#=O= !"#$%&'() !"# =afsK=ÅçåíK= =crk`= !"#$%&'()* FUNC !""#$ =cS cêLoê Divider CONT. X-OVER/ ! "#$%&'()*+,-./ PSET LEVEL/ PRESET No !"#$% STEP T-CR/ P.UP P.DOWN 3-WAY Fr/Rr vol.
- Page 164 !"#$% !"#$%&'() !"#$%&'()*+,-./, !"# !"#$ !"#$%&' !"#$%& SOURCE !"#$% !"#$%&' !" !"#$% !"#$%&'()*+,-. !"# !" !"#$%&'()*+,-...
- Page 165 !"# SET UP !"#$%&'( !"#$%& !" !"#$%& !" !" !"# !"# !"#$% !" #$%& AUX-1 !" AUX-2...
- Page 166 !"#$ !"#!$% !"#$%&'( !"#$ !"#$ !"# "#$%&'() !"#$ !"#$%&'()* FUNC " !"#$% !"#$%&'()*+,-./ !"# !"#$%& !""#$ !"#$%&'()*+ MONO P.SCAN 4 TITLE 5 DAP !"#$%&'()*+$,-(. FM-1 87.5 STATION 90.1 87.5 !"#$%&'()*%&+,-. PSET FREQ 98.1 !"#$ 87.5 MHz FM 106.1 TITLE INPUT MODE FM 108.0 Select PreSet No.
- Page 167 !"#$ !"#$ FM-1 A/a/1/& !"#$%& STATION NEXT 87.5 !"#$%&'() PSET FREQ BACK !"#$%&' 87.5 MHz WRITE !!"#$%& TITLE INPUT MODE DELETE ALPINE!! !" RETURN vol. 27 & !"#$%&'( !"#$%& &'( A/a/1/& !"#$%&'()*+,- NEXT BACK !" !"# !"# WRITE !"# !"#$%&'()*...
- Page 168 !"#$ !"#$%& "#$%&'() !"#$%&'( !"#$%&'()* FUNC !!"# MONO P.SCAN 4 TITLE 5 DAP !"#$%&'()*#+,'- ALPINE!! Company !"#$%&'()*+,-./0 123456 ABCDEFGH FM 107.9 87.5 !!"# A/a/1/& !"#$% NEXT BACK WRITE DELETE RETURN !"#$%&'()*+,-./0 !" !"#$%&'() !"#$%& '()*...
- Page 169 !"#$ !"#$ !"# =pbq=rm= SET UP !"#$%&'( !"#$%&=póëíÉã=ÅçåíK !" !"#$%& !"=póëíÉã=ÅçåíK= !"##$% = cP `ih= afpm !"#$ BEEP SPE-ANA !"#$%&'()*+,-./ CLK DISP !"#$%&'()*+,-.( HOUR !"#$% MINUTE RESET...
- Page 170 !"#$ !"#$%&'( !!"# BEEP SPE-ANA CLK DISP HOUR MINUTE RESET !" #$%&&'()*+,- !"#$ !!"# BEEP SPE-ANA CLK DISP HOUR MINUTE RESET !" #$%&&'()*+,- !"#$ !"#$%&&'()*+,- !"#$%&'( !" !"#$%&' !"#$% !"#$%&...
- Page 171 !"#$ !"#$ !"#$%&'()*+,-%./ !"# !"#$%&' !"#$%&'() !"#$$%& !"#$%&' BEEP ! "#$%&'( )*+ SPE-ANA CLK DISP HOUR MINUTE RESET !" !"#$ !"#$%&'( !"#$%& !"#$%&'()*+,-./0 !"#$%&'()*+,-./01 !"#$%&'( !!"# ! "#$%& BEEP !"# !" SPE-ANA !"#$%&'( !"# CLK DISP !"#$% &'()*+,-./0 HOUR MINUTE RESET...
- Page 172 !"#$ !"#$%#&'( !"#$%&'(')*+,-./ !"#$%&'() !"#$%&'() V.SEL ! "#$%&'()*+,-./ !"#$%&'()*+,-./0 — !"#$ !"#$%&'()*+,-./0 — !"#$!% !"# !"# !"#$%&'()*+,-. • !"#$% !"#$%&'()*+,-. • !"#$%&'()* !"#$%&'()*+,-. • !"#$%&'()*+,-.
- Page 173 !"#$ !"# !"#$ !"#$%& !"#$%&'(&)*$%+ !"#$%& SET UP !"#$% !" !!"# ! "# !"#$%&'() BACKGND BRIGHT TINT COLOR...
- Page 174 !"#$ !"#$%&'( SET UP !"#$%& !" !!"# !"#$%&'( BEEP SPE-ANA !"#$%&'()* CLK DISP DEMO !"#$ !"#$%&'()*+,-./0...
- Page 175 !"#$%&'() !"# !"#$%&'() !"# !"#$% !"#$% !"#$%&'() !"# !"#$%&'()*+,- CD/3D/6D !"#$%& BAND AUDIO VISUAL PROG !"#$%&'() A.PROC DEFEAT !" " MUTE !" SELECT !"#$%&'()*+, !"#$%& !"#$%& !"# " REMOTE CONTROL UNIT RUE-4160 !"#...
- Page 176 !" !"#$%&' !" !"#$%&' !"#$%&'() !"# CD/3D/6D BAND AUDIO VISUAL PROG A.PROC DEFEAT MUTE SELECT !"#!$%& !"#$%& !"#$%&'()*+ ,"- !"#$%&'()#* !"#$%&'( CD/3D/6D BAND AUDIO VISUAL !"# PROG A.PROC DEFEAT MUTE SELECT...
- Page 177 !"#$ !"# $%&'() !"#$%& !"#$%&'()*+,- !"#$%&'()*+ CD/3D/6D !"#$%& BAND AUDIO VISUAL PROG !"# A.PROC DEFEAT MUTE SELECT !"#$%&'()* !"#$%&'()*+, !"#$%&'()*+ !", CD/3D/6D !"# BAND AUDIO VISUAL PROG A.PROC DEFEAT !"#$%&'()*+,-. MUTE !"#$%&'( SELECT...
- Page 178 !"# $% !" !"#$%&'() !"#$%&'!" !"# !"# $"%& !" !"#$%&'()*+,-./...
- Page 179 !" !"#$%&'()**+,-./0123 !"#$%&'()* !"#$%&'()* !"# !"#$ !"#$%&' !"#$$% !"#$"#%&'()*+,-. !"#$%%&'()*+,-./ !"#$%& !"#$%&'() !"# !"#$%&'()* !" !"#$%&'() !"#$%&'(# !" !" # $%&'()*+,-. "#$ !"#$% !"# $% !"#$%& '(...
- Page 180 !" !"#$ !"# !"#$%&'()*+ !"# !"#$% !"#$%&'()*+,-$%. !"#$%&'()* +,-. !"#$%& '( !"#$% !"#$%&'( !"#$%&' !"#$%& !"#$%& !"#G !"#$%&'( !"#$%& !" !"#$% &' !"#$%&'()*+,-./01&23)*+45678...
- Page 181 !" !" !"#$ !"#$ !"#$%&' !"#$%&' !"#$% !"#$%&'() !"#$%&' !"#$%&'=au= !"#$%&'()*+,-./01 !"# !"#$%&'()*+, !-. !"#$%&# !"#$%&' !"#$%&' !"#$% !"# !" !"#$ !"# !"#$%&' !"#$%& !"#$%&'()*+, !"#$%&' !"#$%&'()*+,-./0...
- Page 182 !" !"#$% !"#$ !"#$% !"#$%& !"#$%&'( )*+,-. !"# !"#$% !"#$%&'()#*+$%, !"# !"#$% !" !"#$%& !"#$%& !"#$%&"'()*+,- !"#$%&'() !"#$%&' !"#$ !"#$ % !"#$%&'()* !"#$ !"#$ !"#$%& '(! !"#$%&'# !"#$%& !"#$ !"#$%&! !"# !" !"...
- Page 183 !" !" !"#$%& !"#$ !" !"#$% !"#$ !" !" !" !"#$%...
- Page 184 !"# !"#$ !"#$ !"#$ !"#$%&'( !"#$%&'( !"#$%&'()*+,-./01 !"# !"#$%&'()*+,-./...
Need help?
Do you have a question about the CVA-1000E and is the answer not in the manual?
Questions and answers