Table of Contents
Advertisement
Quick Links
Advertisement
Table of Contents

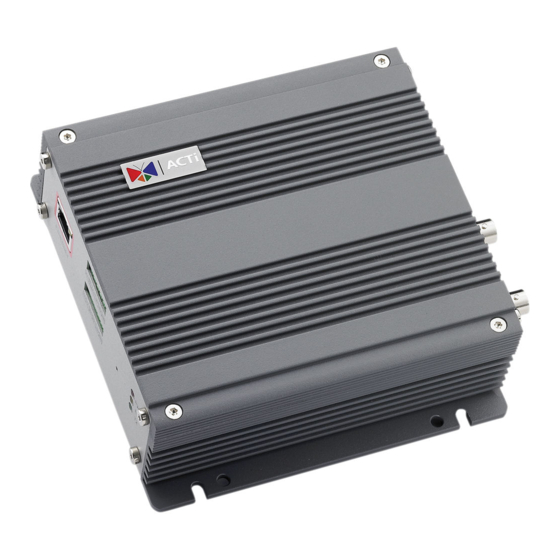
Summary of Contents for ACTi TCD-2500
- Page 1 TCD-2500 H.264 1Ch Video Server Hardware User’s Manual (DC 12V) Ver. 2010/1/5...
-
Page 2: Table Of Contents
TCD-2500 Hardware User’s Manual Table of Contents Precautions Introduction Package Contents ................4 Features and Benefits ............... 5 Safety Instructions ................7 Physical description ................9 Installation Procedure ..............13 Basic Connections ................14 Product Specification ..............15 Accessing Device If you have DHCP server / router in your network: ...... -
Page 3: Precautions
TCD-2500 Hardware User’s Manual 0. Precautions Read these instructions You should read all the safety and operating instructions before using this product. Heed all warnings You must adhere to all the warnings on the product and in the instruction manual. Failure to follow the safety instruction given may directly endanger people, cause damage to the system or to other equipment. -
Page 4: Introduction
TCD-2500 Hardware User’s Manual 1. Introduction Package Contents TCD-2500 Power Adaptor Product CD Accessory Warranty Card www.acti.com... -
Page 5: Features And Benefits
TCD-2500 Hardware User’s Manual Features and Benefits This is a cutting-edge digital video surveillance device. It can compress and transmit real time images with outstanding image quality through a standard TCP/IP network. This device is your best choice to build an intelligent IP surveillance system. - Page 6 TCD-2500 Hardware User’s Manual Digital Time Code Embedded The “Digital Time Code Embedded” function records video time in the video stream. Therefore, each image frame is marked with its original recording time. It is very useful when users want to find the video at an exact time or between a certain time intervals.
-
Page 7: Safety Instructions
TCD-2500 Hardware User’s Manual Safety Instructions Don’t use the power supply with other voltages This device is likely to be damaged or damage other equipments / personnel, if you use a power supply with different voltage than the one included with this device. All warranty of this product will be voided in the situations above. - Page 8 TCD-2500 Hardware User’s Manual this manual. Adjust only those controls that are covered by the instruction manual, as an improper adjustment of other controls may result in damage, and will often require extensive work by a qualified technician to restore the video product to its normal operation.
-
Page 9: Physical Description
TCD-2500 Hardware User’s Manual Physical description 1) Video Input / Output The IP device allows one analog input and output of composite signals with BNC connectors. 2) Audio Input / Output The IP device supports audio input and output with earphone jack 3) Dip Switch for Serial Port Configuration The same terminal connections can be used for different protocols. - Page 10 TCD-2500 Hardware User’s Manual 4) Ethernet Port The IP device connects to the Ethernet via a standard RJ45 connector. Supporting NWAY, this IP device can auto detect the speed of local network segment (10Base-T/100Base-TX Ethernet). 5) Terminal Blocks pin 1-6 The IP device supports two alarm input and one configurable relay output.
- Page 11 TCD-2500 Hardware User’s Manual 6) Terminal Blocks pin 7-12 These pins are used for serial port connections. DESCRIPTION NAME RS-485 RS-422 RS-232 Power Input (DC +12V) Ground Pin of Power Input & RS-232 7) Reset Button Step 1: Switch off IP device by disconnecting the power cable Step 2: Press and continue to hold the Reset Button (with a sharp tipped object, like a pen.)
- Page 12 TCD-2500 Hardware User’s Manual 9) Serial Port LED LED will light up when serial port is active 10) Power LED Indicator The LED indicator lights up once the power is turned up. It will light up again when the device is fully booted up.
-
Page 13: Installation Procedure
TCD-2500 Hardware User’s Manual Installation Procedure The video server can be mounted onto a wall by using the accessories provided. www.acti.com... -
Page 14: Basic Connections
TCD-2500 Hardware User’s Manual Basic Connections Follow the procedures below to connect the IP device to the respective apparatuses. 1) Connect an analog monitor to IP device video out (BNC connector) 2) Connect the power adaptor to IP device 3) Connect IP device’s Ethernet port to Network switch (via RJ45 connectors). -
Page 15: Product Specification
TCD-2500 Hardware User’s Manual Product Specification TCD-2500 H.264/ MPEG-4 SP/ MJPEG simultaneous dual streams selectable Compression Full D1 (720x480 in NTSC, 720x576 in PAL) Picture Resolution CIF (352x240 in NTSC, 352x288 in PAL) Video QCIF (160x112 in NTSC, 176x144 in PAL) -
Page 16: Accessing Device
TCD-2500 Hardware User’s Manual 2. Accessing Device If you have DHCP server / router in your network: Many network server / routers are able to automatically provide IP addresses through DHCP. If you are using such a network, just plug in your computer and IP device into the network and your IP device will acquire network address by itself. - Page 17 TCD-2500 Hardware User’s Manual Please set the settings as below. IP address: 192.168. 0.xxx Subnet mask: 255.255.255. (NOTE: xxx should be a number from 1 to 254 except 100, which is used by the IP device. Please also...
- Page 18 TCD-2500 Hardware User’s Manual If you are using a single device, this is enough to access the device. If you are using multiple devices, you need to change the current device to another unused IP address, so that when the next device is connected to the network, no two devices use the same IP.
- Page 19 TCD-2500 Hardware User’s Manual 10. Click “Apply” 11. Please go to Maintain -> Save & Reboot, and click ”Apply”. Internet Explorer will close after a few seconds. This is normal. 12. Wait for 30 seconds, and open IE again to connect to the IP.
- Page 20 TCD-2500 Hardware User’s Manual www.acti.com...


Need help?
Do you have a question about the TCD-2500 and is the answer not in the manual?
Questions and answers