Sign In
Upload
Download
Table of Contents
Contents
Add to my manuals
Delete from my manuals
Share
URL of this page:
HTML Link:
Bookmark this page
Add
Manual will be automatically added to "My Manuals"
Print this page
×
Bookmark added
×
Added to my manuals
Manuals
Brands
EFD Manuals
Dispenser
1500XL
Operating manual
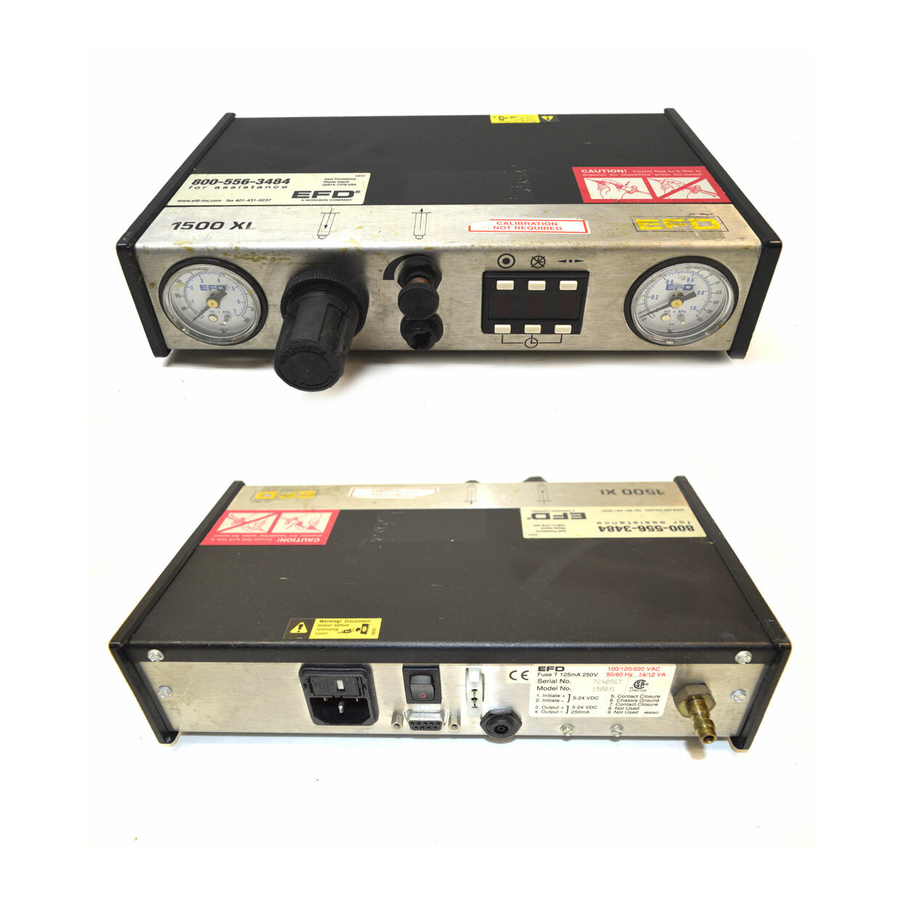
EFD 1500XL Operating Manual
1500 series dispenser
Hide thumbs
1
2
Table Of Contents
3
4
5
6
7
8
9
10
11
12
13
14
15
16
17
18
19
20
21
22
23
24
25
26
27
28
29
30
31
32
page
of
32
Go
/
32
Contents
Table of Contents
Bookmarks
Table of Contents
Table of Contents
Getting Started
Specifications
First Steps
Microprocessor Control
How to Use the Display and Control Pad
1500 XL - Setup & Use
Hookup
Setup for Testing
Hookup
Hookup
1500 DV - Setup & Use
Setup for Testing
Hookup
1500 D - Setup & Use
Setup for Testing
Testing the Dispensers
Making Timed Deposits of Medium to Thick Fluids
Changing Deposit Size and Drawing Stripes
Programming Deposit Size
How to Use the Vacuum Control
Making Timed Deposits of Watery-Thin Fluids
ULTRA Dispensing System
Loading the Barrel Reservoirs
1500 DV Schematic & Parts
1500 XL and 1500D Schematics & Parts
How the 1500 Series Dispensers Work
Ten Year No-Fault Warranty
Advertisement
Quick Links
1
Specifications
2
Getting Started
3
Hookup
4
How the 1500 Series Dispensers Work
Download this manual
Operating Guide
1500 Series Dispenser
1500XL
1500XL-15
1500XL-CA
1500DV-15
1500D
•
•
•
•
®
US & Canada: 800-556-3484
In the UK: 0800 585733
In Mexico: 001-800-556-3484
A NORDSON COMPANY
Table of
Contents
Previous
Page
Next
Page
1
2
3
4
5
Advertisement
Table of Contents
Need help?
Do you have a question about the 1500XL and is the answer not in the manual?
Ask a question
Questions and answers
Related Manuals for EFD 1500XL
Dispenser EFD 1000XL Operating Manual
1000 series dispensers (28 pages)
Dispenser EFD 1000D Operating Manual
1000 series dispensers (28 pages)
Dispenser EFD 1500D Operating Manual
1500 series dispenser (32 pages)
Dispenser EFD UltraSaver 1200 User Manual
Ultrasaver (4 pages)
Dispenser EFD Nordson v051806 Catalog
Ultra dispensing system catalog (20 pages)
Dispenser EFD Ultra 1400 User Manual
Ultra 1400 series (24 pages)
Dispenser EFD 2000XL Operating Manual
2000xl series digital dispensers (28 pages)
Dispenser EFD 800 Operating Manual
(16 pages)
Dispenser EFD Ultra 870 User Manual
(20 pages)
Dispenser EFD 900 Operating Manual
900 series dispenser (20 pages)
Dispenser EFD Ultra 2400 User Manual
Ultra 2400 series dispensing workstation (28 pages)
Dispenser EFD ULTIMUS V User Manual
High precision dispenser (48 pages)
Dispenser EFD Ultra 325TT User Manual
Ultra tt automation series (79 pages)
Dispenser EFD Ultra 2400 Quick Start Manual
Ultra 2400 series dispensing workstations (4 pages)
Dispenser EFD HP7X User Manual
Fluid dispenser (4 pages)
Dispenser EFD HP4X User Manual
Fluid dispenser (2 pages)
This manual is also suitable for:
1500xl-ca
1500dv-15
1500d
1500xl-15
Table of Contents
Save PDF
Print
Rename the bookmark
Delete bookmark?
Delete from my manuals?
Login
Sign In
OR
Sign in with Facebook
Sign in with Google
Upload manual
Upload from disk
Upload from URL


Need help?
Do you have a question about the 1500XL and is the answer not in the manual?
Questions and answers