Advertisement
Table of Contents
Model No. GGBE1774.0
Serial No.
Write the serial number in the
space above for future reference.
Serial Number Decal
QUESTIONS?
As a manufacturer, we are com-
mitted to providing complete
customer satisfaction. If you
have questions, or if a part is
damaged or missing, PLEASE
CONTACT OUR CUSTOMER
SERVICE DEPARTMENT
DIRECTLY.
CALL TOLL-FREE:
1-877-776-4777
Mon.–Fri., 6 a.m.–6 p.m. MST
ON THE WEB:
www.goldsgympowerflex.com
CAUTION
Read all precautions and instruc-
tions in this manual before using
this equipment. Save this manual
for future reference.
USER'S MANUAL
Advertisement
Table of Contents

Related Manuals for Gold's Gym GGBE1774.0


Summary of Contents for Gold's Gym GGBE1774.0
- Page 1 Model No. GGBE1774.0 Serial No. Write the serial number in the space above for future reference. Serial Number Decal QUESTIONS? As a manufacturer, we are com- mitted to providing complete customer satisfaction. If you have questions, or if a part is...
-
Page 2: Table Of Contents
Apply the decal in the location shown. Keep hands and fingers clear of this area. GOLD'S GYM is a registered trademark of Gold's Gym International, Inc. This product is manufactured and distributed under license from Gold's Gym International, Inc. -
Page 3: Important Precautions
IMPORTANT PRECAUTIONS WARNING: To reduce the risk of serious injury, read the following important precautions before using the exercise rack. 1. Read all instructions in this manual warnings on the exercise rack before using the exercise rack. Use the exercise rack only as described in this manual. -
Page 4: Before You Begin
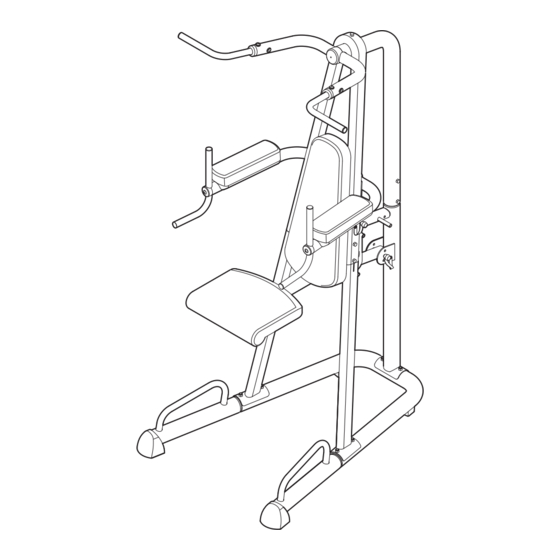
BEFORE YOU BEGIN Thank you for selecting the versatile GOLD’S GYM POWER SERIES GT 2000 exercise rack. The exercise rack offers a selection of exercise stations designed to develop every major muscle group of the body. Whether your goal is to tone your body, build dramatic muscle size and strength, or improve your cardiovas- cular system, the exercise rack will help you to achieve the specific results you want. -
Page 5: Assembly
ASSEMBLY Make Things Easier for Yourself Everything in this manual is designed to ensure that the exercise rack can be assembled suc- cessfully by anyone. However, it is important to realize that the versatile exercise rack has many parts and that the assembly process will take time. - Page 6 2. Attach the Upright Base (3) to the Base (1) with the indicated M10 x 87mm Bolts (47) and two M10 Nylon Locknuts (44). Do not tighten the Locknuts yet. 3. Attach the Upright (4) to the Upright Base (3) with two M10 x 87mm Bolts (47) and two M10 Nylon Locknuts (44).
- Page 7 4. Attach the Left Leg (6) to the Base (1) with the indicated M10 x 90mm Bolts (46) and two M10 Nylon Locknuts (44). Do not tighten the Locknuts yet. Repeat this step with the Right Leg (7). 5. Slide the Backrest Frame (8) onto the Left and Right Legs (6, 7) and over the Upright (4) as shown.
- Page 8 6. Attach the Support Frame (15) to the Upright Base (3) with an M10 x 62mm Bolt (24) and an M10 Nylon Locknut (44). Do not tighten the Locknuts yet. Attach the Support Frame (15) and the Left and Right Legs (6, 7) to the Backrest Frame (8) with four M10 x 53mm Bolts (30) and four M10 Nylon Locknuts (44).
- Page 9 9. Attach the Knee Pad (21) to Pad Frame (10) with two M6 x 70mm Screws (35) and two M6 Washers (36). 10. Attach the Pivot Arm (9) to the Upright Base (3) with the Pin (18). Make sure the Pin is inserted all the way through the Upright Base and Pivot Arm.
- Page 10 12. Hold the Dip Arm (11) behind the Backrest Frame (8) as shown. Attach the Dip Arm to the Backrest Frame with two M10 x 100mm Bolts (43) and two M10 Nylon Locknuts (44). Do not overtighten the Locknuts; the Dip Arm must be able to pivot easily.
- Page 11 15. Attach a Pin (18) to the Backrest Frame (8) with an M4 x 25mm Screw (45). Insert the Pin (18) into the Backrest Frame (8). 16. Attach the Backrest (22) to the Backrest Frame (8) with an M6 x 38mm Screw (29) and an M6 Washer (36).
-
Page 12: Adjustments
ADJUSTMENTS This section explains how to adjust the exercise rack. See the EXERCISE GUIDELINES on page 14 for impor- tant information about how to get the most benefit from your exercise program. Also, refer to the accompanying exercise guide to see the correct form for each exercise. Make sure all parts are properly tightened each time the exercise rack is used. - Page 13 USING THE RESISTANCE BANDS To add resistance to the Pivot Arm (9), slide a Resistance Band (19 or 14) onto the tubes on the Pivot Arm and the Support Frame (15). Store Resistance Bands (19 or 14) on the storage tube when they are not being used.
-
Page 14: Exercise Guidelines
EXERCISE GUIDELINES THE FOUR BASIC TYPES OF WORKOUTS Muscle Building To increase the size and strength of your muscles, push them close to their maximum capacity. Your mus- cles will adapt and grow as you progressively increase the intensity of your exercise. You can adjust the inten- sity level of an individual exercise in two ways: •... -
Page 15: Cooling Down
Rest for a short period of time after each set. The ideal resting periods are: • Rest for three minutes after each set for a muscle building workout. • Rest for one minute after each set for a toning work- out. -
Page 16: Part Identification Chart
PART IDENTIFICATION CHART See the drawings below to identify small parts used in assembly. The number in parentheses by each drawing is the key number of the part, from the PART LIST in the center of this manual. Note: Some small parts may have been pre-attached. - Page 17 PART LIST—Model No. GGBE1774.0 Key No. Qty. Description Base Base Handle Upright Base Upright Top Frame Left Leg Right Leg Backrest Frame Pivot Arm Pad Frame Dip Arm Dip Handle Pull-up Handle 25-pound Resistance Band Support Frame Base Cap Base Pad...
- Page 18 EXPLODED DRAWING A—Model No. GGBE1774.0 R0505A...
- Page 19 EXPLODED DRAWING B—Model No. GGBE1774.0 R0505A...
-
Page 20: Ordering Replacement Parts
To order replacement parts, see the front cover of this manual. To help us assist you, please be prepared to give the following information: 1. the MODEL NUMBER of the product (GGBE1774.0) 2. the NAME of the product (GOLD’S GYM POWER SERIES GT 2000 exercise rack) 3.
Need help?
Do you have a question about the GGBE1774.0 and is the answer not in the manual?
Questions and answers