Table of Contents
Advertisement
Quick Links
Advertisement
Table of Contents

Related Manuals for Becker TRAFFIC ASSIST PRO 7929


Summary of Contents for Becker TRAFFIC ASSIST PRO 7929
- Page 1 Operating instructions...
-
Page 2: Table Of Contents
Index Attaching the Traffic Assist Pro The Traffic Assist Pro Overview Traffic Assist Pro Connecting the telephone mute Maintenance and care function Navigation Battery quality declaration Basic information about the Music Display quality declaration touch screen Pictures Start-up Unpacking the Traffic Assist Pro Operation SD-Card Calibration... - Page 3 Index Navigation menu: Navigation The Speedkey Navigational mode Destination selection window The Home adress key What is navigation? Destination: Selecting a country The TMC button Selecting navigation Destination: select address The Smart Speller button Aids for navigation and start The Factory settings key Rapid access Voice selection Navigation menu: Status...
- Page 4 Closing the MP3-Player Calling up language selection purpose whatsoever without the express Turn the page Pictures mode written consent of HARMAN/BECKER Selecting the language Selecting pictures display Automotive Systems GmbH. Cancelling the language selection Picture viewer ©...
-
Page 5: Safety Information
!Safety information • The unit may only be operated if the traffic situation allows for this and if you are absolutely certain that you yourself, your fellow passengers or other road users will not be put at risk, encumbered or disturbed by this. The rules of applicable road traffic acts must be observed at all times. - Page 6 Dispose of defective units and the rechargeable battery according to the applicable legal requirements. • No warranty is granted in the case of improper use. These safety instructions also apply to genuine BECKER original accessories.
-
Page 7: The Traffic Assist Pro
The Traffic Assist Pro Navigation Music Thanks to GPS = Global Positioning Thanks to the integrated MP3-Player, The Traffic Assist Pro is a powerful System, you no longer need to spend you can listen to your favourite tracks PND (Personal Navigation Device) for hours searching through road atlases. -
Page 8: Unpacking The Traffic Assist Pro
The unit can also The Traffic Assist Pro consists of the to ensure that it is complete and in the be sent directly to Harman/Becker in its basic unit Traffic Assist Pro and the ac- correct condition (see also page 12). -
Page 9: Traffic Assist Pro – Basic Unit
Traffic Assist Pro – Basic unit Battery Note: The basic unit consists of a complete When the replaceable battery is flat, it Using USB memory sticks to play MP3 electronic unit, a folding antenna for can be recharged by connecting the files display images... -
Page 10: Accessories
Accessories Information about Note: documentation The integrated GPS antenna is not mains charger suitable for use in vehicles with anti- This power supply allows connection of Quick start guide glare windows (metalised thermo-glass the Traffic Assist Pro to a mains outlet. The Quick Start Guide is designed to or metal foil, indicated by the window Requirements for power supply:... -
Page 11: Registration
You can register online on the Becker correctly in accordance homepage (www.becker.de). with national regulations for electrical / electronic devices. Depending on the The “Registration”... -
Page 12: Overview Traffic Assist Pro
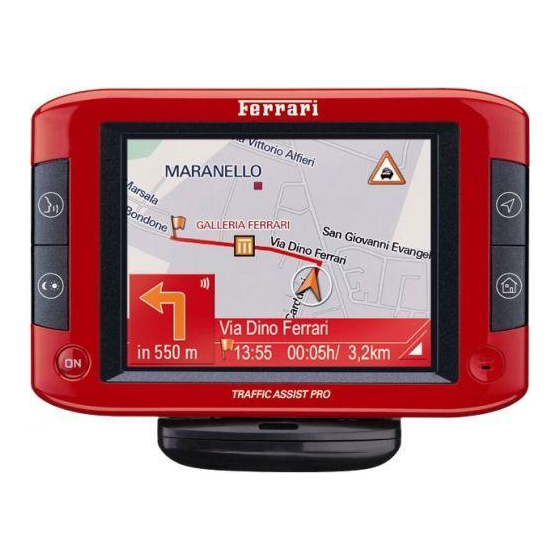
Overview Traffic Assist Pro Overview Traffic Assist Pro Delivery contents 1 Unit holder 2 TMC antenna 3 USB connecting cable 4 SD memory card (with navigation data) 5 Traffic Assist Pro – PND (Personal Navigation Device) 6 mains charger 100-240V for power supply from the pu- blic mains grid 7 car adapter (12-36V) - Page 13 Overview Traffic Assist Pro 4001 6 Fast access button map display (See "Change to map Front of the unit with control and display elements 1 Touch screen button display" on page 35) Press = Activates the respective button command 7 Fast access button Go home (See "Navigation menu: 2 Fast access button speech command (See "Saving a Home"...
- Page 14 Overview Traffic Assist Pro 4003 Back of the unit 1 Opening for speaker 2 GPS antenna (folding) 3 Socket for external antenna (external antenna not inclu- ded in scope of delivery)
- Page 15 Overview Traffic Assist Pro 4006 4005 Left side of unit 1 SD memory card slot 2 3.5 mm socket for headphones (headphones not inclu- ded in scope of delivery) Right side of unit 3 USB port for data carrier containing MP3 files or images 4 Connection for external power supply...
- Page 16 Overview Traffic Assist Pro 4002 Base of unit 1 Reset button 2 PC connection interface 3 Battery compartment cover 4 Screw for battery compartment cover...
-
Page 17: Maintenance And Care
General operations • "Protect your mobile navigation sys- • Never use corrosive or aggressive che- Maintenance and care tem from water and moisture. If your micals, cleaning solutions or aggressi- The unit is maintenance-free. unit is exposed to moisture, switch it ve detergents for cleaning. -
Page 18: Battery Quality Declaration
Please contact your authorised dealer. Use only genuine BECKER ori- SD-Card Note: ginal spare parts. The card supplied with the unit has a... -
Page 19: Inserting The Sd Memory Card
General operations Inserting the SD memory card Ejecting the SD memory card The card slot ejects the card so that you 10129 can pull it out with two fingers. Gently push the SD memory card all the way into the card slot against the tension of the spring. -
Page 20: Power Supply
General operations Power supply Via the public mains grid Via the vehicle battery (cigarette lighter socket) Note: Danger of Death! Connect the power supply via the First always switch off the Traffic Assist Make sure that your hands are not damp vehicle battery and the car adapter Pro before connecting up or removing and that the mains section is dry. -
Page 21: Via The Tmc Receiver
General operations Antenna Note: Note: If the engine is switched off, using If the engine is switched off, using GPS antenna the vehicle's power supply through the the vehicle's power supply through the The folding GPS antenna is fitted to the cigarette lighter will slowly drain cigarette lighter will slowly drain housing. -
Page 22: Switching The Traffic Assist Pro On/Off
General operations Switching on Switching off Note: Press the BACK button. You can switch the unit off at any time. only functions The unit is switched on. The following If necessary, new destinations should combination with a power supply from prompt appears on the touch screen: first be saved. -
Page 23: Unit Bracket
General operations Unit bracket Fitting the unit bracket The unit bracket can be secured directly The unit holder on the Traffic Assist Pro to the inside of the windscreen or to the attached directly dashboard. windshield or the instrument panel of your vehicle (see also page 23). -
Page 24: On The Windscreen
General operations On the windscreen On the dashboard Moving the unit holder If the dashboard is too far away from An adapter plate is provided for moun- The bracket can be swivelled both the driver, the unit bracket can be ting on the dashboard. -
Page 25: Horizontal Movements
General operations Horizontal movements Attaching the Traffic Assist Connecting the telephone mute Loosen the fastening screws (5) far function enough to be able to swivel the bracket The unit holder is fitted with a bracket. You can connect your Traffic Assist Pro (2) from left to right without exerting Carefully position the Traffic Assist with TMC to your car radio using the... -
Page 26: Basic Information About The Touch Screen
General operations Basic information about the Calibration Entries made with the entry If the touch screen starts responding im- menu touch screen precisely and e.g. buttons have to Some applications require entries to be The Traffic Assist Pro is fitted with a be touched off-centre in order to be actu- made via the entry menu. -
Page 27: Entering Characters
General operations Entering characters Note: Characters are entered by pressing the 6007 If necessary, you can switch off the keys in the central area. smart speller in the navigation settings. It should also be noted that in southern 6007 countries (e.g. Italy), the "prefix" (e.g. via Gran Mundo) needs to be entered afterwards (e.g. -
Page 28: Special Characters And Umlauts
General operations Special characters and umlauts Deleting characters Special characters and umlauts do not To delete the last character, use the back 5004 have to used when entering the names of key. towns and streets. The Traffic Assist Pro 6007 will change entries from AE, OE and UE if necessary. -
Page 29: The Back Key
General operations The back key More maps Transferring files The back key is integrated in the bottom The SD memory card is supplied with Files can be transferred indirectly via the left hand corner of the casing. the map set already installed. SD memory card or directly via the USB interface. -
Page 30: Transferring Via The Usb Interface
General operations Transferring via the USB Transferring maps Transferring music and images The installation software from the DVD Files can be transferred via a card reader interface should be used for the transfer. This in- or the USB connection to a PC. The Traffic Assist Pro can be connected volves the following stages: directly to a personal computer via the... -
Page 31: Faults
General operations Faults If unit faults relating to the operating system occur, messages to this effect will be displayed. These should be ack- nowledged. If the activated function cannot then be executed, the Traffic As- sist Pro must be restarted using the reset button. -
Page 32: Navigational Mode
Navigational mode !Safety information Navigational mode your height above sea level can be What is navigation? calculated if signals are received from The term "navigation" (lat. navigare = to five or more satellites. travel by sea) is generally understood to •... -
Page 33: Selecting Navigation
Navigational mode Selecting navigation Navigation menu Rapid access If necessary, the navigation menu can be Navigational mode is called up from the Rapid access allows you to select called up from rapid access, e.g. to enter main menu. from the key functions to quickly start a new destination not yet provided. -
Page 34: The List Of Destinations
Navigational mode The list of destinations Icons used Operating rapid access The list of destinations displays all the The following icons are used in the list destinations available for quick selection of destinations. Starting using an existing destination line-by-line. Each line is split into two Destinations already in the destinations Icon Meaning... -
Page 35: Displaying Or Editing Destination
Navigational mode Displaying or editing destination Change to map display Displaying current position Each destination in the destinations me- You can change to map display from ra- You can have your current position dis- mory can be displayed or edited. pid access using the following key. -
Page 36: Thenavigation Menu
Navigational mode TheNavigation menu Structure of the navigation Status The quality of the GPS reception menu If you do not want to select a destination determines accuracy quickly or if the planned destination is navigation process. Press the Status Navigation not yet available in the destinations me- The Enter destination key is pressed for button to display the current GPS... -
Page 37: Navigation Menu: Navigation
Navigational mode The selection list appears. Navigation menu: Navigation Destination selection window A destination can be specified in the fol- A selection window for specifying the lowing ways from the selection window. destination is opened from the Navigation 6003 menu by pressing the Navigation key. The various stages and options are de- scribed below. -
Page 38: Destination: Select Address And Start
Navigational mode You can also: Destination: select address and start Selecting a town/city You can enter the exact destination The destination town can be specified by • display the destination on the map address in the address entry screen. entering the name or the post code. The •... - Page 39 Navigational mode Traffic Assist Pro rules out all impossib- Using the list of towns Note: le combinations of letters and only acti- If you have already entered some of the If necessary, you can switch off the vates those letter boxes which will letters of the town you want, you can use smart speller in the navigation settings.
- Page 40 Navigational mode Using the list of streets Selecting the Intersection Options for the drive profile You can set your drive profile in the Op- If you have already entered some of the After you have entered the destination tions settings window. The setting made letters of the street you want, you can city and street, you can use the junction use the List function to display all the...
-
Page 41: Voice Selection
Navigational mode If you do not wish to make a voice re- Saving a destination Short route With this option, the The Save button opens a window that cording, press the button shortest route is calcula- allows you to spell the destination using ted in terms of kilomet- the letter menu (the entry menu allows Voice selection... -
Page 42: Stopping Navigation
Navigational mode Starting navigation Stopping navigation Destination: Points of interest select The Start button can be used to start navi- There are three ways in which you can Points of interest, or POI for short (Point gation straight away. All the data entered stop directions to the destination. -
Page 43: Point Of Interest: Nearby
Navigational mode From the All categories box, select a The search area selection window Point of interest: nationwide Touch the Nationwide button. appears. main category (e.g. car hire). Only those points of interest currently near- by are displayed. Touch the box next to this and select a 6011 6055 sub-category (e.g. -
Page 44: Point Of Interest: In A Town
Navigational mode Touch the Point of interest key to go to You will find information about scrol- Destination: selecting from the map ling in lists in the "Scrolling through the the entry menu. If the destination required cannot yet lists" on page 27 chapter. Select the point of interest you want or can no longer be found in the destina- tions memory, the Select on map button... -
Page 45: Navigation Menu: Route Planning
Navigational mode Gently press the screen surface until When directions to the destination is ac- Navigation menu: Route plan- tive, the Interim destination button a circle of dots is drawn around the ning destination requested. The destination is also still available. You can use this The Route planning window gives you is recorded. -
Page 46: Route List
Navigational mode Press the BACK button to return to the Route list Using a route Routes already stored in the system are route list. The following buttons are available: selected from the route list. Selecting a route Meaning Press the button with the name of the Press a route to select it. -
Page 47: The New Route Button
Navigational mode Once all the entries have been made in The New route button The Edit key You can create a new route by pressing the route planning window, save the Existing routes can be changed in the the New route button. destination data by pressing the OK Edit menu. -
Page 48: The Calculate Key
Navigational mode The route is calculated. A window The Calculate key Navigation menu: Settings A planned route can also be calculated displays the progress of the calculation. The settings of relevance to the navigati- without GPS reception so that you can Once the calculation is complete, the to- on functions can be found in the Settings get an overview of the journey. -
Page 49: The Route Info Key
Navigational mode Structure The Signpost info button Info about Displays ETA, distance You can use the Signpost info button to Various buttons are available in the set- main destina- remaining, time until ar- ting menu: choose whether or not to display infor- tion rival at the main desti- mation relating to signs that you should... -
Page 50: The Routing Options Button
Navigational mode The Routing options button The Volume key Short route With this option, the You can edit your driving profile in the Use the Volume configuration window shortest route is calcula- Routing options settings window. Any to set the volume of all voice prompts ted in terms of kilomet- settings modified here have an affect on every time the Traffic Assists is started. -
Page 51: The Map Info Key
Navigational mode The Map info key The Automode key 3D autozoom Decide whether You can perform the following settings You can choose the following settings in you wish to work with in the Map info configuration window. the Automode configuration window: Autozoom or No auto- zoom as the default set- ting while navigating in... -
Page 52: The Time Zone Key
Navigational mode The Time Zone key The Route planning key 2D display Decide whether You can select the time zone relevant for Use the Route planning configuration want your location in the Time Zone settings window to specify whether or not you face North or In route window. -
Page 53: The Format Key
Navigational mode The Warning outside The Format key The Speedkey Warning out- built-up areas button in- Using the Format configuration win- In the Speed settings window, you can side built-up dow, you can specify which units of decide whether to display speed limits areas dicates the speed limit measurement to use for time and dis-... -
Page 54: The Home Adress Key
Navigational mode Press the Set button. The Home adress key Important! Enter your Home adress to navigate au- The address is copied and displayed in Some of the information contained in tomatically from any location to your the Home adress window. the map material may be inaccurate due home. -
Page 55: The Tmc Button
Navigational mode The TMC button The Smart Speller button The Factory settings key You can adjust the following settings in The Smart Speller allows you to enter You can use the Factory settings confi- the TMC settings window: towns, roads or other destinations that guration window to cancel all new set- you are searching for more quickly using tings and reset the system to the factory... -
Page 56: Navigation Menu: Status
Navigational mode Navigation menu: Status Navigation menu: Load map Navigation menu: Home The Status menu shows the number of The Load map menu shows the map that If you have entered a home address, satellite signals picked up, your current is currently loaded. -
Page 57: What Is Dynamic Route Guidance
Navigational mode What is dynamic route Displaying TMC messages on Note: the map guidance? As the traffic announcements are trans- Current TMC messages are displayed on mitted by radio stations, we cannot as- Dynamic route guidance calculates the the map in graphic form. Sections of the sume responsibility for the complete- route, while taking into account current route where there are problems with... -
Page 58: Using Tmc
Navigational mode Press the arrow buttons to the left and Using TMC Station selection right of the announcement number to You can select a TMC station in three Once you have connected the TMC browse through traffic different ways: automatically or via the antenna, your Traffic Assist Pro will announcements. -
Page 59: Consideration When Calculating Routes
Navigational mode Taking announcements into Manual recalculation Changing status If a traffic announcement affects your You can set the function to act upon or consideration when calculating route, window with detailed ignore an announcement at any time. routes information on the traffic announcement Press the icon on the map display Your Traffic Assist Pro can take traffic... -
Page 60: Map Display
Navigational mode Map display Map layout Map display with driving guidance The map layout varies according to the You can call the map display from various current mode of operation of the Traffic applications using the miniature map Assists. 6029 icon. -
Page 61: Map Display With Toolbar
Navigational mode Information appears in the bottom left The following function keys appear in Map display with toolbar corner of the preview area. Press the following key to activate the the toolbar: toolbar. Press again to deactivate the Icon Meaning toolbar. -
Page 62: Using The Map Display
Navigational mode Press the preview area while route The control bar disappears after a few Using the map display guidance is active. seconds without you having to press any The volume is displayed. The last an- more buttons. Repeating the last announcement nouncement is also repeated. -
Page 63: Zooming And The Map (Toolbar)
Navigational mode Zooming and the map (toolbar) Position and display mode (toolbar) 6041 You can gradually zoom in and out of You can select a number of different the map display using the zoom keys in functions with the position key while the top two corners of the touchscreen. -
Page 64: Change Display (Toolbar)
Navigational mode To activate move mode, select the key Point northwards (toolbar) Use the compass key to orient the map with the hand icon. on the touchscreen towards the north. Press on your chosen point in the map and move this point in the direction re- Press the TMC announcement button. - Page 65 Navigational mode Block road Mute mode The following options are available. The driving directions The voice prompt for planned by the Traffic driving manoeuvres can Selection Meaning Assist Pro may be hin- be activated or deactiva- Main menu Terminates driving dered by unanticipated ted.
-
Page 66: Position Information (Toolbar)
Navigational mode Position information (toolbar) You can call up the information window if you require information on a particular 6012 point on the map display. If information has been stored, this window shows the address of the particular point on the map and offers a number of functions so Make the settings as required. -
Page 67: Music Operations
Music operations Music operations Selecting music playback The MP3 player Music playback is called up from the The MP3 player can access and play 7001 main menu. MP3 files saved on a SD memory card or memory stick. 3001 Note: In the upper section of the MP3-Players Please refer to "Transferring music and the title of the piece of music currently... -
Page 68: Operating The Mp3-Players
Music operations Operating the MP3-Players Play Pause Playback can be paused at any time and Various key panels are arranged around The pieces of music starting from the then continued. the track line to simplify operations. track displayed in the track line are play- ed when the following key is pressed. -
Page 69: Folder Overview
Music operations Folder overview Opening the next folder Setting volume All the music folders saved on the Pressing the following button opens the A volume bar indicates the current volu- memory card are listed next to the folder next folder containing MP3 files and me in relation to the overall volume. -
Page 70: Closing The Mp3-Player
Music operations 7003 Note: Using USB memory sticks (for MP3s) may interfere with the GPS signal. Closing the MP3-Player Press the BACK button to exit the MP3 menu. Note: Bear in mind that music will continue to play when you exit the MP3 menu. Press the pause icon to stop music play- back (See “Pause”... -
Page 71: Pictures Mode
Pictures mode Pictures mode Selecting pictures display Picture viewer Operating the Picture Viewers Various key panels are arranged around The pictures display is called up from Images (JPG) saved on an SD card or the picture display to simplify opera- the main menu. -
Page 72: Slideshow
Pictures mode Slideshow Full screen Folder viewing mode During the slideshow, all pictures from In full screen mode, the current picture is Under the picture displayed in the Pictu- the current folder level are automatically enlarged to fill the entire touch screen. re Viewer, the picture's folder level is displayed one after another. -
Page 73: Operating Folder Viewing Mode
Pictures mode Operating folder viewing mode Changing folder levels Press to change to the uppermost 8015 folder level. All subfolders containing Subfolders image files are displayed here. All folders containing image files are in- Press the appropriate button to display a cluded in the folder overview. -
Page 74: Settings
Settings Settings Selecting the settings Operation The individual menu points You can pre-select various basic settings Selection possibilities Energy for all applications of the Traffic Assist The desired selection is chosen by push- Your Traffic Assist Pro may be operated Pro. -
Page 75: Ending The Status Display
Settings Brightness Calibration The following button allows switching If the touch-screen reacts incorrectly 9021 between the maximum and minimum to the touching of the screen in specific brightness of the screen. areas, calibration is required. The calibration procedure ends auto- matically once all items are pressed. -
Page 76: Language
Settings Language Turn the page Sounds 7006 These buttons allow page turn- The text of the touch-screen images can The following button allows you to ing in the direction shown by the arrow be displayed in various languages. switch on or off the acknowledgement through the pages of the list. -
Page 77: Information
Pro is displayed using the following buttons. 9023 Push the button Information. The information display appears. 9018 Please note particularly the product des- ignation and the details of the software version. Always quote these details in the event of queries with Harman/Becker service department. -
Page 78: Specialist Words
Specialist words ates its actual current position in terms vides good picture quality despite com- ((Estimated Time of Arrival) of geographical length and width. In or- pression, compression stages are se- der to determine the position, signals lectable. It is the most common format The estimated time of arrival at the des- from at least three satellites are required, for representation and exchange of pic-... - Page 79 Specialist words Stylus A stylus is an input pointer which is used for the operation of touch-screens, mobile phones or PDAs. The stylus consists basically of a plastic pointer with a softer plastic core. The sleeve is hard and can be gripped and the softer core emerges at the tip and is designed to touch the screen as softly as possible (i.e.
-
Page 80: Keywords
Keywords Keywords Destinations memory ... .34 changing ....34 Adjusting the volume ..55 HDOP . - Page 81 Keywords Main menu ....26 Operating folder viewing mode ..73 Safety information ... 5 Map data .
- Page 82 Keywords Time format ....53 Time of arrival ....49 Time zone .
-
Page 83: Technical Data
Technical Data Technical Data • AC Adapter: • Dimensions: 100 - 240 Volt (W x H x D) in mm 137 x 88 x 19,5 5 Ampere • Weight: 50 - 60 Hz 272 grams • Output Voltage: • Processor: 5Volt 400 MHz Processor CISC-architecture •... -
Page 84: Fact Sheet
FACT SHEET In accordance with current EU guidelines, this unit can be operated by any person. This unit conforms with the currently applicable European and harmonised national standards. The marking of the unit gives you the guarantee that the electromagnetic compatibility specification applicable to the unit is maintained.
Need help?
Do you have a question about the TRAFFIC ASSIST PRO 7929 and is the answer not in the manual?
Questions and answers