Becker MAP PILOT Operating Manual
Hide thumbs
Also See for MAP PILOT:
- Instructions for use manual (62 pages) ,
- Operating manual (59 pages) ,
- Instructions for use manual (60 pages)
Table of Contents
Advertisement
Quick Links
Advertisement
Table of Contents

Related Manuals for Becker MAP PILOT


Summary of Contents for Becker MAP PILOT
- Page 1 Becker® MAP PILOT Operating guide EN_ECE_V2.5_A...
-
Page 2: Table Of Contents
Main menu POI nearby/POI near destination Safety instructions > D POI near address Using the input menu The Becker® MAP PILOT > GB Entering a POI directly Entering characters Usage Selecting a destination from the map Selecting from a list Unpacking the Becker®... - Page 3 POIs on the map Systems GmbH. All technical data, draw- > CZ Speed limits ings etc. are protected by copyright law. Driver alerts © Copyright 20121, HARMAN/ > H TMC settings BECKER Automotive Systems GmbH > RUS All rights reserved.
-
Page 4: D Safety Instructions
>>> SAFETY INSTRUCTIONS Safety instructions > D Safety instructions > GB • Operation of the unit is permitted only if traffic conditions are suitable and you are absolutely sure that you, your passengers or other motorists are not endangered, obstructed or inconvenienced. >... -
Page 5: The Becker® Map Pilot
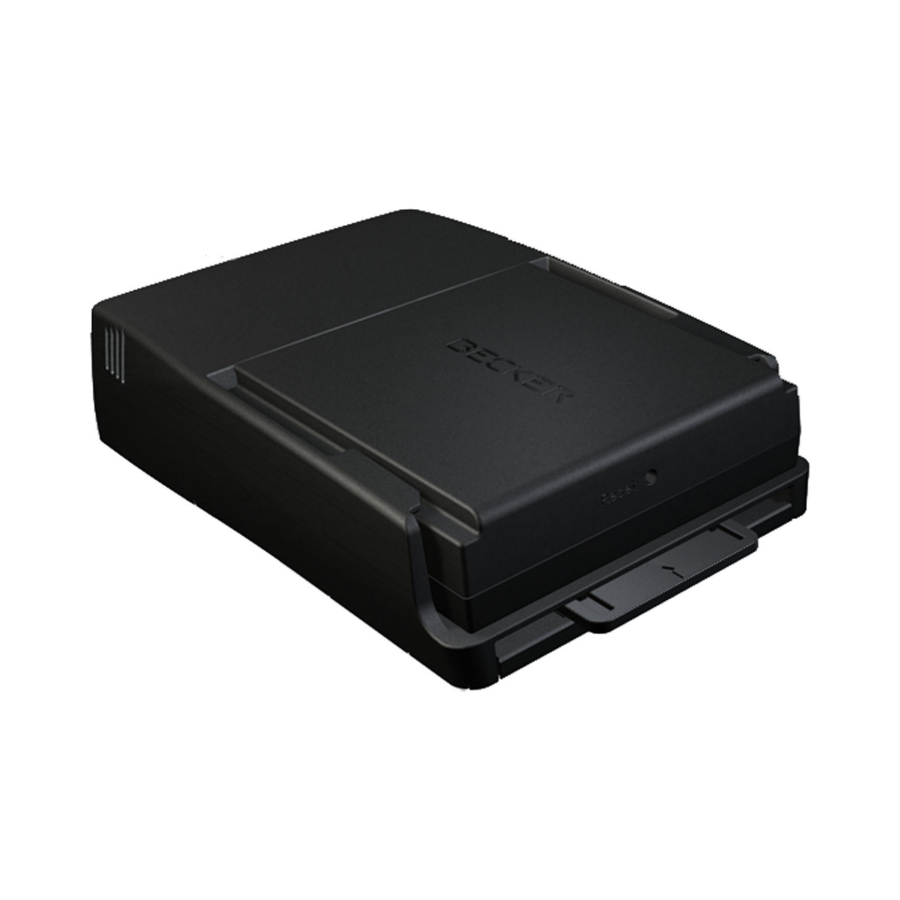
> GB PILOT Mercedes-Benz vehicles. The Becker® > F MAP PILOT can be used with the op- Note: tional equipment "Pre-fitting for Becker® > I Your Becker® MAP PILOT is delivered MAP PILOT" and "Becker® MAP in stable packaging. -
Page 6: Complaints
USB connecting cable > D Please check first on You can connect the Becker® MAP The Becker® MAP PILOT consists of the www.beckermappilot.com (FAQs, soft- PILOT to a standard personal computer basic Becker® MAP PILOT unit and the > GB ware updates) for possible solutions. -
Page 7: Registration
You can register your product using our software service. We will then inform you > GB of any new updates and other news. > F You can register online on the Becker > I homepage www.beckermappilot.com. > E Repairs > P The unit must not be opened in the event >... -
Page 8: General Operation
>>> GENERAL OPERATION Maintenance and care Your unit was designed and manufactured • Do not store your unit in cold environ- General operation with great care and should be treated with ments. During operation, when the > D The unit is maintenance-free. equal care. -
Page 9: Battery Quality Declaration
>>> Battery quality declaration Commissioning > D The capacity of the rechargeable battery in Once the Becker® MAP PILOT has been your Becker® MAP PILOT decreases unpacked and checked to ensure it is free > GB with every charging/discharging cycle. -
Page 10: Power Supply
Unit holder When inserting the Becker® MAP PILOT make sure that it is pushed in un- > D Your Becker® MAP PILOT has an inte- The Becker® MAP PILOT is inserted in til it stops. grated rechargeable battery. The battery is the holder in the vehicle’s glove compart-... -
Page 11: Pl Memory Card
To select a menu item, you must first turn the rotary control/push button to high- > D Your Becker® MAP PILOT has a slot for The Becker® MAP PILOT is operated light the item and then press the rotary an SD memory card. This slot is used for using a number of the controls of the in- >... -
Page 12: Delete Function
The top menu level is the main menu. > I You can start the various functions of your > E Becker® MAP PILOT from the main menu. > P > NL To cancel route guidance, push the rotary >... -
Page 13: Using The Input Menu
> E When a navigation destination is entered, > P The characters input using the input the Becker® MAP PILOT compares the menu are displayed in the top line of text. > NL data with the stored data. The middle section is used for character >... -
Page 14: Selecting A Character Set/Special Characters
> Remove, as described under “Unit holder” on page 10, the Becker® MAP > E PILOT from the holder. > P > Wait a while and insert the Becker® > Select to display the special charac- MAP PILOT again. > NL ters available for the entered character >... -
Page 15: Map Pilot
After a short time, the Becker® MAP > FIN then displays the message "Your unit is MAP PILOT, you will need the USB ca- PILOT is displayed as a removable storage now ready to use". ble provided as well as a computer that medium on the computer. -
Page 16: Navigation Mode
> P With the Becker® MAP PILOT, the lo- system. For safety reasons, route guidance is given cation is determined by the GPS receiver. predominantly in spoken form. This is •... -
Page 17: Using Last Destinations
NAVIGATION MODE >>> Last destinations Using last destinations Note: > D Up to 200 of the most recent destinations In the last destinations, the most recent Starting with existing destination are automatically stored in the destina- destinations and stored destinations are The destinations available in the last des- >... -
Page 18: Home Address
>>> NAVIGATION MODE Home address Option Meaning Option Meaning When you select with the rotary > D Home The destination is delet- Delete entry The data for the destina- Show details control/push button you will be asked to ed from the last destina- tion is displayed. -
Page 19: Structure Of The Destination Input
NAVIGATION MODE >>> Destination input Entering an address • Enter point of interest Points of interest such as airports and > Select from the destina- > D Enter address You can enter a destination in a number of ferry ports, restaurants, hotels, petrol tion input menu. -
Page 20: Selecting A Country
If you do not wish to accept the sug- gestion simply select the subsequent let- > I ters of the desired city. > E The Becker® MAP PILOT excludes all The following settings can be made in the impossible letter combinations and postal address input menu: > P codes and activates only those letters and •... - Page 21 > GB you can switch to the list before this by The Becker® MAP PILOT excludes all to further limit the choice. pushing the rotary control/push button impossible letter combinations and acti- Note: >...
- Page 22 >>> NAVIGATION MODE Selecting a house number Displaying the route After a short time, the alternative routes After entering the destination city and Once the address has been entered, the ad- will be displayed. > D street, you can enter a house number so as dress input menu allows the route to the >...
- Page 23 NAVIGATION MODE >>> Showing the destination on the map Starting route guidance > In the address input menu, push the ro- > In the address input menu, select > D Start tary control/push button to the right. to start route guidance. guidance >...
-
Page 24: Entering An Address Using Speech
>>> NAVIGATION MODE If the route guidance is already running Entering an address using speech and a stopover has already been entered You can start address entry using speech > D you will be asked whether the new desti- from the address input menu by selecting >... -
Page 25: Points Of Interest
If your entry was not unique or the ing addresses is displayed after a short time • a point of interest nearby, Becker® MAP PILOT was not able to with your entry filled in. > FIN • a point of interest near an address,... -
Page 26: Poi Nearby/Poi Near Destination
>>> NAVIGATION MODE POI nearby/POI near destination If you have selected the category, any Note: > In the POI menu, select points of interest belonging to relevant > D POI nearby Push the rotary control/push button to a POI nearby. category and available within the area in the right for further control options. -
Page 27: Entering A Poi Directly
“POI nearby/POI near > S Note: destination” on page 26. The Becker® MAP PILOT displays in a Turn the rotary control/push button to > N list all the points of interest corresponding change the scale of the map display. -
Page 28: Coordinate Entry
>>> NAVIGATION MODE Coordinate entry Depending on the position of the cross- Where possible, an address matching the hair pointer, a list of potential destina- coordinates will be displayed. > D You can also enter your destination using tions, an address or geocoordinates is dis- geographical coordinates. -
Page 29: Route Planning
NAVIGATION MODE >>> Route planning Note: Note: The route planning menu allows you to > D If no routes have yet been stored, the You can also select a stage in the route create and select individual routes. To do route menu is empty. -
Page 30: Creating A New Route
>>> NAVIGATION MODE • Creating a new route Editing a route Route list Displays a list of the individual stages. > Select from the route > Select the route you wish to edit. > D Create new route menu. > Highlight the stage that you wish to ed- •... -
Page 31: Traffic Announcements
Once you have connected the Becker® > D using TMC As the traffic announcements are trans- MAP PILOT to the unit holder, your mitted by radio stations, we cannot as- > GB Your Becker® MAP PILOT can receive Becker® MAP PILOT will receive up-to-... -
Page 32: Reading A Message
You will see the corresponding street on routes The message display appears. the map. > P Your Becker® MAP PILOT can take traf- Note: Note: fic announcements into consideration > NL when calculating a route. You have the... -
Page 33: Manual Recalculation
> S display. system information. If Becker® MAP PILOT determines that > N > Select the desired route. a sensible detour is possible after you have > FIN... -
Page 34: Calling Up The Map Display
>>> NAVIGATION MODE Calling up the map display Structure of the map display Map display with route guidance > D The map display is called up automatical- The structure depends on the settings Note: ly when you start route guidance. made in “Map display”... -
Page 35: Split Screen With Route Guidance
NAVIGATION MODE >>> Current road Split screen with route guidance > D Traffic lane recommendation (only appears on some multi-lane roads; > GB green arrows = recommended lanes) > F The next manoeuvre is displayed as an ar- Note: row, with the distance to the next ma- >... -
Page 36: Route Guidance With Arrow Display
>>> NAVIGATION MODE Using the map display received Note: Display of TMC status > D Following the traffic lane recommenda- Map zooming Driver alerts tions allows you to perform the next driv- > GB If the Autozoom function is enabled as de- Speed limit on the road currently be- ing manoeuvre without changing lanes. -
Page 37: Map Toolbox
NAVIGATION MODE >>> Map Toolbox Route Once you've entered the desired stopover, the new route is calculated. > D Note: You can set preferences for navigation, the The entered stopover is indicated on the map display style, and the route in the The following functions are only >... -
Page 38: Poi (Points Of Interest) On Your Route
>>> NAVIGATION MODE like to be redirected around the traffic POI (Points of Interest) on your route Set categories obstacle. View the description in “Traffic During navigation, you can view POIs > Select > D More... announcements using TMC” on page 31. that lie on your route. -
Page 39: Set Route Options
NAVIGATION MODE >>> Nearby/all POIs Set route options. Display Entire route. > Select You can adjust route options (route You can view the entire route to the > D More... selection etc.) during the destination destination on the map. You can also see >... -
Page 40: Block A Route Section
> GB select select that should not be driven. From Becker® Route list Options > Select MAP PILOT, a detour calculation will be Simulation > F The route is simulated at four times the attempted. usual speed. > I Note:... -
Page 41: Skip Destination
Otherwise, > Press the turn & press controller to kilometres and the expected trip time is > S the Becker® MAP PILOT will try to confirm the end point. displayed. direct you to the current destination. -
Page 42: Stop Destination Navigation
>>> NAVIGATION MODE Stop destination navigation. Map display • Route list Displays a list of the individual stages. > D You can stop an active destination You can select to view the Map Display in • navigation. 3D or 2D, split-screen 3D or 2D, or with Options >... -
Page 43: Displaying Position
NAVIGATION MODE >>> > With the 3D display, by selecting Displaying position You can save the actual position of the last you can select whether you targets by selecting You can display your current position and > D Objects Save would like to see 3D attractions ( ) or By Selecting... -
Page 44: Repeat Announcement
>>> NAVIGATION MODE Repeat announcement GPS reception information is displayed by selecting > D During navigation, you can pull up the GPS-Info current announcement or have the > GB previous one repeated. > In the map toolbox, select Repeat > F >... -
Page 45: Settings
• mileage is calculated tak- System settings the estimated journey times. > TR Basic settings relating to the Becker® ing into consideration > Select in the route guid- Route options MAP PILOT further parameters such >... -
Page 46: Realistic Intersection Displays
>>> SETTINGS > Select Signposts whether you would like his- Option Meaning torical traffic data to be included in the > D When this function is enabled, you will With this option, the Short route calculation. receive information (if available) at mo- shortest route in terms of >... -
Page 47: Announcements
SETTINGS >>> Announcements Map settings You can select whether street names are > D The map settings contain the settings that announced, short or detailed turn-off are relevant to the map display. > GB information is provided, or whether > In the settings menu, select updated arrival times are announced. -
Page 48: Pois On The Map
>>> SETTINGS After selecting you can specify Advanced whether all POI symbols or only a set of > D POI symbols selected by you are to be dis- > GB played on the map. > F Speed limits > I You can select whether speed limits are >... -
Page 49: Driver Alerts
SETTINGS >>> Driver alerts TMC settings You can have signs displayed, e.g. for > D You can make settings for the reception dangerous curves or steep gradients, and processing of TMC traffic announce- > GB provided this information is stored in the ments. -
Page 50: System Settings
> N your vehicle by means of this security > Enter the correct security code and con- language for the navigation announce- code. If your Becker® MAP PILOT is to firm your entry with ments. > FIN be used in a different vehicle, the security The security code is now disabled. -
Page 51: Map Update Reminder
Factory reset > E tings. Information > Select The following selection displays informa- > P The Becker® MAP PILOT is reset to the tion regarding the Becker® MAP PILOT. factory settings. > NL > Select in the system set- Information tings. -
Page 52: Glossary
>>> GLOSSARY TMCpro Glossary (Greenwich Mean Time) (Push To Talk) (Traffic Message Channel Professional) > D Central European time For this unit it means that after a selection A free TMC traffic alert service which is > GB Standard time at degree of longitude 0 of PTT a address can be spoken. -
Page 53: Index
> DK MAP PILOT ....15 Fast access mode ....17 Zooming out . - Page 54 >>> INDEX Selecting the street ....21 Set map display ....42 >...
-
Page 55: Notice
> S CE declaration of conformity > N Harman/Becker Automotive Systems GmbH declares herewith that the Becker® MAP > FIN PILOT conforms to the basic requirements of applicable EC regulations and especially to the basic requirements and other relevant regulations of the R&TTE directive 1999/5/EC. -
Page 56: Disposal
Customer information on the disposal of electrical and electronic devices (private households) > GB In accordance with the self-imposed principles of Harman/Becker Automotive Systems Gm- > F bH, its product was developed and made from high-quality, recyclable materials and compo- nents. -
Page 57: Disposal Of The Battery
> DK Becker-Göring-Str. 16 D- 76307 Karlsbad- Ittersbach > S The lithium ion battery in the Becker® MAP PILOT is marked with the adjacent symbol, > N consisting of a crossed-out waste bin, and the type of battery used. > FIN Lithium ion >... - Page 58 >>> NOTICE > D > GB > F > I > E > P > NL > DK > S > N > Completely discharge the battery. > FIN > Press the battery cover on the underside of the unit lightly and push the battery cover in the direction of the arrow.
Need help?
Do you have a question about the MAP PILOT and is the answer not in the manual?
Questions and answers