Table of Contents
Advertisement
Advertisement
Table of Contents

Related Manuals for Zoom Wireless-N


Summary of Contents for Zoom Wireless-N
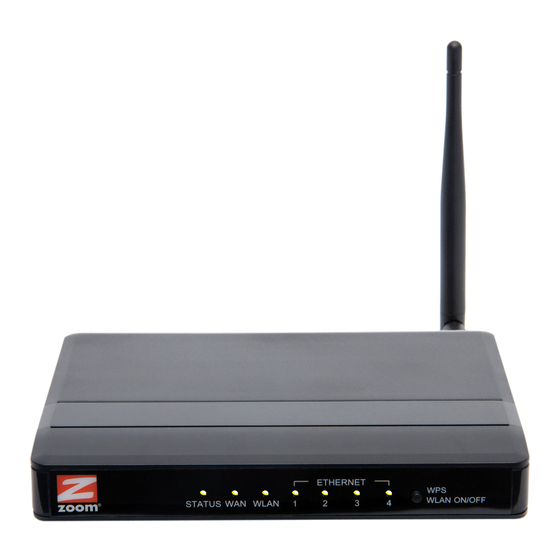
- Page 1 Wireless-N 4-port Router USER MANUAL...
- Page 2 NOTICE This document contains proprietary information protected by copyright, and this Manual and all the accompanying hardware, software, and documentation are copyrighted. No part of this document may be photocopied or reproduced by mechanical, electronic, or other means in any form. The manufacturer does not warrant that the hardware will work properly in all environments and applications, and makes no warranty or representation, either expressed or implied, with respect to the quality, performance, merchantability, or fitness for a particular purpose of the...
-
Page 3: Table Of Contents
Connecting a Windows XP Computer with Built-in Wireless Capabilities ....39 Connecting a Wireless-enabled Computer or Device (including the iPhone® or other cellular phones, the iPod Touch®, etc.) to the Wireless-N 4-port Router ....39 Connecting a Computer with a Wireless Adapter to the Wireless-N 4-port Router... 40 Using the Configuration Manager's Advanced Program .......... - Page 4 Method One ..........................84 Method Two ..........................84 Method Three ......................... 85 Appendix D: Registering Your Product and Getting Help..........86 Appendix E: Regulatory Information ................87 Europe – EU Declaration of Conformity ................... 88 Limited Warranty..........................91 Wireless-N 4-port Router User Manual...
-
Page 5: Getting Started
If anything is missing or damaged, please contact Zoom Customer Support or whoever provided the Wireless-N 4-port Router. Introduction The Wireless-N 4-port Router can be used in 3 different modes. Once you determine which mode you want to use, you can follow the relevant chapters of this User Manual. •... -
Page 6: Using The Router Mode
Cable or ADSL modem and becomes the center of a wired and/or wireless network. Installing the Hardware Place the Wireless-N 4-port Router near a computer to be used for setup. This computer needs an Ethernet (LAN) port. Turn off the computer. -
Page 7: Using The Setup Wizard
Ethernet cable to the computer’s Ethernet port and the other end to any of the Wireless-N 4-port Router’s Ethernet (LAN) ports. Plug the supplied power cube into the Wireless-N 4-port Router and then into a power outlet. Important: Use only the power cube shipped with the Wireless-N 4-port Router. Other power cubes may damage the device. -
Page 8: Step 1. Setup Login Password
On the Setup Login Password page, type the old password (initially admin) in the Old Password field. Type the new password in the New Password field. Type the new password in the Reconfirm field, and then click Next. Wireless-N 4-port Router User Manual... -
Page 9: Step 2. Wan Setup
Configuration), thus losing any changes you made to your Router's configuration. To avoid this problem, we recommend that you write the new password here and on the bottom of your Wireless-N 4-port Router, and that you also save it elsewhere such as a settings document. PASSWORD:______________________________________ Step 2. - Page 10 Note: If you read the discussion above and are still unsure which WAN Type to choose, please check with your service provider. Click Next. The relevant section immediately below depends on the WAN Type you selected. Wireless-N 4-port Router User Manual...
- Page 11 • Host Name (optional) This is the name that identifies your Wireless-N 4-port Router. Some service providers require a host name. Your service provider supplies this name, if needed. Most users don’t need to enter a host name.
-
Page 12: Configuring Pppoe
Assigned IP Address This is the optional IP address assigned by your service provider. Most users will not need to enter an Assigned IP Address. Click Next to continue. Go to Step 3. Wireless Settings. Wireless-N 4-port Router User Manual... - Page 13 • Static IP Address This is the IP address that is given to you by your service provider when you sign up for a Static IP address. This address identifies your Wireless-N 4-port Router when seen from the Internet. •...
-
Page 14: Configuring Pptp
This is the PPTP username that your service provider assigned to you. • PPTP Password This is PPTP password that your service provider assigned to you. Click Next to continue. Go to Step 3. Wireless Settings. Wireless-N 4-port Router User Manual... -
Page 15: Configuring L2Tp
Configuring L2TP The page shown below only appears if you select the L2TP button on the Select WAN Type menu. Otherwise skip this section. • IP Mode This is the mode used to generate the IP address. Select an option from the dropdown menu, based on your service provider's requirements. -
Page 16: Step 3. Wireless Settings
5 channel difference than what you are using. By default, the Wireless-N 4-port Router is set to 10. You may want to try channel 4 or 5, for instance, if you have trouble connecting with the default channel (10). -
Page 17: Wireless Security Settings
Wireless Security Settings If you accepted the default to Enable the Wireless Module (on the Wireless Settings page at Step 3), the following page opens when you click Next. From the drop-down menu, you can choose either none, WEP, or WPA2/WPA. By default, the Router does not have security enabled. - Page 18 Setup) and you wish to use WPS to set up wireless security. We recommend using the Setup Wizard with the options above to set up security for your Wireless-N 4-port Router. However, if you choose to use WPS, please refer to Appendix C: Setting up Your Network Using WPS.
-
Page 19: Step 4. Summary
Next to continue with your edits or to return to the updated Summary page. The Wireless-N 4-port Router is set by default to test your network connection. If you do not wish to test your connection, please uncheck the Do you want to proceed with the network testing? checkbox. -
Page 20: Step 5. Finish
Chapter 6, Connecting Wireless Devices to the Wireless-N 4-port Router for help on connecting wireless computers, phones, tablets and game stations. In the unlikely event you need to make changes to the Wireless-N 4-port Router’s advanced settings please see Chapter 7, Using the Configuration Manager’s Advanced Program. -
Page 21: Resetting The Router To The Factory Configuration
Resetting the Router to the Factory Configuration In the unlikely event that you need to reset the Router to the factory default configuration, insert the blunt end of a paper clip into the RESET hole on the back panel of the Router. Hold the clip in place for five (5) seconds. -
Page 22: Ethernet Client Mode
Configuring the Router by Using a Computer Place the Wireless-N 4-port Router near a computer to be used for setup. This computer needs an Ethernet (LAN) port. This computer will be used to set up the Wireless-N 4-port Router. After the setup is complete, the Router can be connected to the device that needs wireless capability. - Page 23 Important: Use only the power cube shipped with the Wireless-N 4-port Router. Other power cubes may damage the device. Turn on the computer. The connected Ethernet (LAN) port light should start blinking. If the connected Ethernet (LAN) light doesn’t blink, please see Appendix A: Troubleshooting Tips.
- Page 24 Each of the Steps guides you in configuring a specific setting or group of settings. When you click Next or Back, you move from one step to another. If there is a setting that you don’t want to change, simply click Next to go to the next setting. Wireless-N 4-port Router User Manual...
-
Page 25: Step 1. Setup Login Password
Configuration), thus losing any changes you made to your Router's configuration. To avoid this problem, we recommend that you write the new password here and on the bottom of your Wireless-N 4-port Router, and that you also save it elsewhere such as a settings document. PASSWORD:______________________________________ Step 2. -
Page 26: Step 3. Ethernet Client Mode Page
Select the radio button corresponding to the name of the wireless network (the SSID) you want to join. If the wireless network you selected has security enabled, enter the Security Key used by your wireless network. Click Next. Wireless-N 4-port Router User Manual... -
Page 27: Step 4. Summary
Step 4. Summary Click Confirm. Next click Finish to go to the Status page. Chapter 3: Connecting an Ethernet Client... - Page 28 You should now see the Ethernet Client Mode status. If it displays Connected your setup is complete. Congratulations! (You may need to click the Refresh button to update the page if it does not say Connected.) Wireless-N 4-port Router User Manual...
-
Page 29: Step 5. Completing The Installation
In the unlikely event that you need to make changes to the settings, remove the Ethernet cable from the WAN port on the Wireless-N 4-port Router and move it to one of the Ethernet ports. Then reconnect the other end of the Ethernet cable to a PC. Power off the computer and power (This is important because the computer must locate the correct IP address it back on. -
Page 30: Setting Up The Wireless-N 4-Port Router As A Repeater
Chapter 2. If you are using a router other than the Wireless-N 4-port Router as your base station you may need to setup WDS on that router. If you are unsure if you need to setup WDS in your router we recommend first setting up the Wireless-N 4-port Router as your remote station and trying to connect to the base station. -
Page 31: Installing The Hardware
Repeater. WDS Only mode is typically used when you wish to connect two separate wired networks. Most users should select Hybrid mode. Installing the Hardware Place the Wireless-N 4-port Router near a computer to be used for setup. This computer needs an Ethernet (LAN) port. Turn off the computer. -
Page 32: Setting Up The Router In Hybrid Mode Or Wds Only Mode
Note: Later, if you change the System Password, you will use the new password to log Click on Advanced Setup. Click Enter. Click Wireless from the left-side menu. At WDS, click Configure. On the WDS Settings page, select either WDS Only or Hybrid from the AP Mode drop-down menu. Wireless-N 4-port Router User Manual... - Page 33 Click Save to save your WDS settings. Next, set up the Wireless-N 4-port Router to use the same wireless channel and security as the AP you just connected to. Click Wireless from the left-side menu to go to the main wireless page.
-
Page 34: Setting Up A Network
5 Repeat steps 1–4 for each computer you want to add. To Connect a Network Device You can use one of the 4 ETHERNET (LAN) ports on the the Wireless-N 4-port Router to plug in a network device (for example, a hub, switch, router, or Homeplug adapter). - Page 35 Congratulations! You have set up your wired devices. If you have wireless devices that you want to add to your network, go to Chapter 6, Connecting Wireless Devices to the Wireless-N 4-port Router Chapter 5: Using the Configuration Manager's Advanced Program...
-
Page 36: Connecting Wireless Devices To The Wireless-N 4-Port Router
You do need to make sure that each device connecting to the Wireless-N 4-port Router is set up to connect to the Router and its associated SSID, and that each device’s wireless security settings are compatible with the Router’s wireless security settings. -
Page 37: Connecting A Windows 7 Computer With Built-In Wireless Capabilities
By default, the Wireless-N 4-port Router uses channel 10. If you need to change this channel, you must do so using the Wireless Setup page of the Zoom Configuration Manager. After logging in, select Wireless from the left-hand menu. -
Page 38: Connecting A Windows Vista Computer With Built-In Wireless Capabilities
By default, the Wireless-N 4-port Router uses channel 10. If you need to change this channel, you must do so using the Wireless Setup page of the Zoom Configuration Manager. For instructions on how to log in to the Zoom Configuration Manager, see page 7. -
Page 39: Connecting A Windows Xp Computer With Built-In Wireless Capabilities
By default, the Wireless-N 4-port Router uses channel 10. If you need to change this channel, you must do so using the Wireless Setup page of the Zoom Configuration Manager. For instructions on how to log in to the Zoom Configuration Manager, see page 7. -
Page 40: Connecting A Computer With A Wireless Adapter To The Wireless-N 4-Port Router
By default, the Wireless-N 4-port Router uses channel 10. If you need to change this channel, you must do so using the Wireless Setup page of the Zoom Configuration Manager. For instructions on how to log in to the Zoom Configuration Manager, see page 7. - Page 41 By default, the Wireless-N 4-port Router uses channel 10. If you need to change this channel, you must do so using the Wireless Setup page of the Zoom Configuration Manager. For instructions on how to log in to the Zoom Configuration Manager, see page 7.
-
Page 42: Using The Configuration Manager's Advanced Program
The context-sensitive help automatically displays a question mark to the right of the cursor, then opens a message box in the left pane of the page. The message box contains text that describes the active field and its required or recommended entry. Wireless-N 4-port Router User Manual... -
Page 43: Launching The Configuration Manager's Advanced Program
Launching the Configuration Manager's Advanced Program Turn on your computer and Router, then launch your Web browser. In the Web browser address bar, type the Router's default IP address, http://192.168.2.1 and then click Enter to launch the Configuration Manager. When the Configuration Manager's MAIN MENU opens, it displays a Status page that summarizes the basic settings and current values for your setup. -
Page 44: Configuring Basic Settings
Note: The following image depicts the fields that the program displays when Dynamic IP Address is selected as the WAN Type. The fields will differ for each WAN Type. See the online help for a description of each WAN Type and its corresponding fields Wireless-N 4-port Router User Manual... - Page 45 WAN Type You can choose from the dropdown menu, based on the WAN connection type that your service provider supports. Host Name (optional) Enter the host name if provided by your ISP. Enable MAC Cloning (optional) This function can change the WAN MAC Address of this device. Use if your ISP requires it.
-
Page 46: The Lan Setup Page
By default DHCP Server is enabled; this allows the Router to assign IP addresses to the devices connected to your Wireless-N 4-port Router. Disable the DHCP Server if you wish to use static IP addresses on your network or you have another device on your... - Page 47 Lease Time The maximum amount of time, in minutes, that a network device will have the temporary IP address before a new one is issued by the Router’s DHCP server. IP Pool Starting Address The first IP address of a range that you specify using the Start and End IP Address settings.
-
Page 48: The Wireless Settings Page
Click Save and now the computer you selected will always be assigned the same IP address. The Wireless Settings Page You can use the Wireless Settings page to configure your wireless LAN setup. If you want to change the default values, refer to the descriptions below for each item. Wireless-N 4-port Router User Manual... - Page 49 Refers to the Service Set Identifier for your device. By default, the Wireless Network Name for the Wireless-N 4-port Router is Zoom. You can change the SSID to a name of your choice. The SSID can be up to 32 alphanumeric characters. If you change the name, make sure that all devices on your network use the new SSID as the access point.
- Page 50 None (the default): Select this if you don’t plan to use wireless security or if all the devices on your network support WPS (WiFi Protected ® Setup) and you wish to use WPS to set up wireless security. We Wireless-N 4-port Router User Manual...
-
Page 51: The Change Password Page
Click Save to save changes. Click Undo if you need to reset the settings you changed on this page. Wireless Client List: Click to view all clients connected to the Wireless-N 4-port Router. The Change Password Page You can use this page to change your login password. To view or change configuration settings, you must enter a password. -
Page 52: Configuring Forwarding Rules
UPnP will automatically set up the Router to work with the game. You can use the Forwarding Rules page to configure the options mentioned above, for allowing access to devices behind your Router. Wireless-N 4-port Router User Manual... -
Page 53: The Virtual Server Page
The Virtual Server Page You can use the Virtual Server page to configure a virtual server. Because your Router's NAT firewall filters out unrecognized packets to protect your network, all computers behind this product are invisible to the outside world. If you want, you can make some of them accessible by enabling Virtual Server mapping. -
Page 54: The Port Triggering Page
Port triggering opens incoming ports when your computer is using a specified outgoing port for specific traffic. This provides a way for you to automate setting up a Virtual Server with some applications. You can use the Port Triggering page to configure which packets are allowed access. Wireless-N 4-port Router User Manual... -
Page 55: The Miscellaneous Page
Trigger The outbound port number used by the application. Incoming Ports When the outbound trigger packet is detected, the router opens the specified inbound ports and the inbound packets sent to the specified port numbers are allowed to pass through the firewall. Enable Enables access for the specified application. - Page 56 WAN IP address. UPnP setting This feature is enabled by default. Games and applications that are UPnP compatible will automatically open ports for you on your Router. Xbox® Support Enabled by default. Allows connection to an Xbox. Wireless-N 4-port Router User Manual...
-
Page 57: Configuring Security Settings
Configuring Security Settings The Security Settings page lists six configuration menus on the left pane and provides a description of the configuration menus at center. Packet Filters Page Packet Filtering allows you to control what packets are allowed to pass through the Router. Outbound Packet filters control outbound packets and Inbound Filtering controls packets coming from the Internet. - Page 58 (1000-1999). No prefix indicates both TCP and UDP are defined. Leaving this empty implies that all port addresses apply. Each Rule can be enabled or disabled individually. You can use packet filters with scheduling rules for more access control flexibility. Wireless-N 4-port Router User Manual...
-
Page 59: The Domain Filters Page
The Domain Filters Page You can use the Domain Filters page to enable or deny user access to specified URLs. Domain filtering and URL Blocking perform similar functions. The major difference between Domain Filtering and URL Blocking is that Domain Filtering filters an entire Domain (.com, .org) where URL Blocking will block specific WEB sites based on a single word or an enitre URL and everything in between. -
Page 60: The Url Blocking Page
Check if you want to enable URL Blocking. URL Blocking Setting Select Blacklist to block access to any words or URLs that you specify. Select Whitelist to allow access only to the URLs that you specify. Wireless-N 4-port Router User Manual... -
Page 61: The Mac Address Control Page
You can use the MAC Address Control page to provide an added layer of security to your Wireless-N 4-port Router. MAC Address control is used to define connection and association rights for clients whose IP and MAC addresses are specified. Click on the HELP button page for a detailed explanation including examples for setting up MAC address control. -
Page 62: The Miscellaneous Page
The Rule # set on the Schedule Rule page. Click Save to save changes. Click Undo if you need to reset the settings you changed on this page. The Miscellaneous Page You can use the Miscellaneous Items page to enable additional security features. Wireless-N 4-port Router User Manual... - Page 63 Please refer to the online help for details about each of the menu items.
-
Page 64: Configuring Advanced Settings
You can use the System Time page to set and synchronize your Router with the local time zone, the Time Server and your PC. You may use either a NTP server, your local PC or manually set the time in the Router. Wireless-N 4-port Router User Manual... -
Page 65: The System Log Page
To Set the Date and Time using NTP protocol Click the Get Date and Time by NTP Protocol radio button. Select the Time Server from the dropdown menu. If you are unsure which time server to use select Auto. Select your Time Zone then click the Sync Now! button to set the time. Click Save to save your settings. - Page 66 192.168.2.100:26. If you do not specify a port number, the port value will be set to 25. SMTP Username and Password Input the SMTP Username and Password. E-mail addresses The email address of each syslog recipient. E-mail Subject The subject of the email alert. This setting is optional. Wireless-N 4-port Router User Manual...
-
Page 67: The Dynamic Dns Page
The Dynamic DNS Page You can use the Dynamic DNS page to define the Dynamic Domain Name Service (DDNS) that will host your server. For example, the DDNS could host your server when you want to host a website on your network but you do not have a static IP. Your DDNS provider keeps track of changes to your IP address and automatically routes users trying to access your web site to the correct location. -
Page 68: The Qos Rule Page
If you want to give priority to one of the defined services in the Well Known Services dropdown menu select the service and the ID to copy it two and click the Copy to button. Local IP Define the local IP address of packets. Wireless-N 4-port Router User Manual... -
Page 69: The Snmp Page
Remote: IP Define the remote IP address of packets. Remote: Ports Define the remote port of packets. QoS Priority Select a value from the dropdown menu to define the priority level for the local and remote settings. Packets will be serviced based upon the priority level set. For critical applications, select High or Normal. -
Page 70: The Routing Table Page
If you have more than one Router and subnet, you will need to define a routing table that lets packets find the proper routing path and allows different subnets to communicate with each other. Most users do not need to set up Dynamic or Static Routing. Wireless-N 4-port Router User Manual... -
Page 71: The Schedule Rule Page
Dynamic Routing The Routing Information Protocol (RIP) will exchange information about destinations for computing routes throughout the network. Please select RIPv2 only if you have different subnet in your network. Otherwise, please select RIPv1 if you need this protocol. Static Routing For static routing, you can specify up to eight routing rules. - Page 72 Week Day and the Start Time and End Time for each rule that you are creating. c Click Save for each rule that you create. d Click Back to return to the Schedule Rule page. Wireless-N 4-port Router User Manual...
- Page 73 e When the Schedule Rule page opens, the rule(s) that you created and saved appear in the Rule Name column. Click Edit to make changes to a scheduled rule. g Click Delete to remove a scheduled rule.
-
Page 74: Configuring Toolbox Settings
You can use the Firmware Upgrade page to update your Router to the most recent version of the Router firmware, if available or if you can restore your Router’s settings if you have previously backed up your configuration using Backup Settings Wireless-N 4-port Router User Manual... -
Page 75: The Backup Setting Dialog
Click Browse to open the location where you saved the firmware update or backed up configuration file. The firmware upgrade file would have been downloaded from the Zoom web site or received via email and the backed up configuration file would have been created from using the Backup Settings page. -
Page 76: The Reboot Dialog
The following dialog opens. Click OK to reboot the Router. The Miscellaneous Page You can use this page to enter a MAC Address for Wake-on-LAN wake up or Ping a remote device on your network. Wireless-N 4-port Router User Manual... -
Page 77: Appendix A: Troubleshooting Tips
Appendix A: Troubleshooting Tips The following are some problems you may experience and some possible solutions to remedy the situation. Problem After connecting the Wireless-N 4-port Router. to a computer, the connected Ethernet (LAN) port light does not blink. Solution •... - Page 78 Verify that the STATUS light on the Router is on and blinking. If it is off, check that the Router is plugged into a working wall outlet. If the light does not turn on, make sure there is power going to the outlet you are using. If the unit still doesn’t work contact Zoom Technical Support. See Appendix D for contact information.
- Page 79 You should also verify that Zoom (or whatever you changed the SSID/network name to) is selected as the wireless network. If it is not, then you are connected to the wrong network. To verify the network, follow the instructions in Chapter 6, Connecting Wireless Devices to the Wireless-N 4-port Router.
-
Page 80: Appendix B: Tcp/Ip Network Settings
DHCP because your Windows computer will automatically configure them for you. If you are not using DHCP, you will need to set up the TCP/IP settings for your Windows computer. Windows users who are troubleshooting the Wireless-N 4-port Router will need to verify the TCP/IP settings. -
Page 81: Windows Tcp/Ip Settings
3 Under Configure, select Using DHCP Server. Do not enter anything in the DHCP Client ID field. 4 Close the TCP/IP Window. You will be asked if you want to save the changes. Click Save. Windows TCP/IP Settings How you configure your Windows computer’s network settings differs, depending on your operating system. -
Page 82: Windows Xp
Windows XP 1 Open the Internet Protocol (TCP/IP) Properties dialog box. From the desktop, click the Start button, point to Control Panel, and then click Network and Internet Connections. Click Network Connections. Right-click the Local Area Connection icon, and select Properties. Select your NIC card’s TCP/IP entry (it should include “TCP/IP”... - Page 83 2 Ensure the following is selected, depending on whether you are using dynamic (DHCP) or static IP addressing: If you are using DHCP (most users): Ensure that Obtain an IP address automatically is selected and that either Obtain a DNS server address automatically or Enable DNS is selected.
-
Page 84: Appendix C: Setting Up Your Network Using Wps
Press the WPS button on your Wireless-N 4-port Router and hold it in for three (3) seconds. The Wireless light starts blinking rapidly. (Note: Wireless must be disabled for the WPS button to work. To turn on wireless using the button on the Router, press the Wireless button on the Router and hold it for 5 seconds. -
Page 85: Method Three
Method Three Use this method if your client device requests the Router’s PIN number. The client is the Registrar. Use this method if the client(s) are to connect to multiple access points so that a client will control the configuration instead of the Router. If you haven't already done so, open a Web browser and type http://192.168.2.1 in the address bar. -
Page 86: Appendix D: Registering Your Product And Getting Help
Zoom supports this Router. If you need assistance, please contact Zoom directly. We encourage you to register your product and to notice the many support options available from Zoom. Please go to www.zoomtel.com and select Technical Support. From here you can register... -
Page 87: Appendix E: Regulatory Information
207 South Street Boston, MA 02111 USA 617-423-1072 www.zoomtel.com Brand/Marca Zoom Wireless-N 4-port Router Type/Tipo Series 1095 Model 4403 The manufacturer declares under sole responsibility that this equipment is compliant to Directive 1999/5/EC via the following. This product is CE marked. -
Page 88: Europe - Eu Declaration Of Conformity
Regulatory Notices for Wireless-N 4-port Router U.S. FCC Part 15 Emissions Statement This equipment has been tested and found to comply with the limits for a Class B digital device, pursuant to part 15 of the FCC Rules. These limits are designed to provide reasonable protection against harmful interference in a residential installation. This equipment generates, uses and can radiate radio frequency and, if not installed and used in accordance with the instructions, may cause harmful interference to radio communications. - Page 89 English with the essential requirements and other relevant provisions of Directive 1999/5/EC. Por medio de la presente Zoom Telephonics, Inc. declara que el Zoom Wireless-N 4-port Router cumple Español con los requisitos esenciales y cualesquiera otras disposiciones aplicables o exigibles de la Directiva [Spanish] 1999/5/CE.
- Page 90 Zoom Telephonics, Inc. declara que este Zoom Wireless-N 4-port Router está conforme com os português requisitos essenciais e outras disposições da Directiva 1999/5/CE. [portuguese] Zoom Telephonics, Inc. izjavlja, da je ta Zoom Wireless-N 4-port Router v skladu z bistvenimi Slovensko zahtevami in ostalimi relevantnimi določili direktive 1999/5/ES. [Slovenian] Zoom Telephonics, Inc.
-
Page 91: Limited Warranty
Zoom will replace software at no charge if there is a defect in materials or workmanship for a period of 30 days from date of original retail purchase, provided the defective software is returned to Zoom. Shipments from Zoom will normally be via U.S.
Need help?
Do you have a question about the Wireless-N and is the answer not in the manual?
Questions and answers