Table of Contents
Advertisement
Advertisement
Table of Contents

Subscribe to Our Youtube Channel
Related Manuals for Westinghouse PSP632


Summary of Contents for Westinghouse PSP632
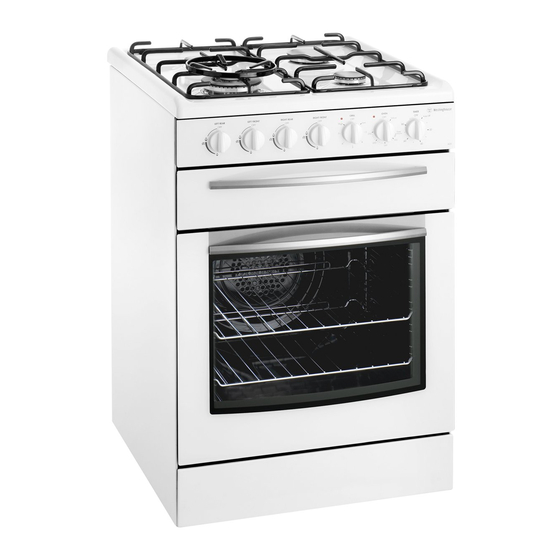
- Page 1 USER MANUAL PSP632, DSP635, GSP625, GSP627 600mm SLOT-IN FREESTANDING COOKER...
-
Page 2: Table Of Contents
CONTENTS CONGRATULATIONS CONTENTS Congratulations and thank you for choosing our Product. Important safety instructions � � � � � � � � � � � � � � � � � � � � � � � � 3 We are sure you will find your new appliance a pleasure to Description of your appliance �... -
Page 3: Important Safety Instructions
SAFETY IMpORTANT SAFETY INSTRUCTIONS GENERAL wARNINGS OvEN • This appliance is not intended for use by persons • During use the appliance becomes hot. Care should be (including children) with reduced physical, sensory taken to avoid touching the hot surfaces inside the oven. or mental capabilities, or lack of experience and •... -
Page 4: Description Of Your Appliance
DESCRIpTION DESCRIpTION OF YOUR AppLIANCE Hotplate power on Grill indicator Oven indicator MODEL pSp632 indicator lamp lamp lamp Hotplate Dual ring Grill Oven 2 hour controls hotplate temperature temperature ‘Auto Off’ control selector selector timer Grill indicator Oven indicator MODEL pSp632... -
Page 5: Before Operating Your Appliance For The First Time
INSTALLATION bEFORE OpERATING YOUR AppLIANCE INSTALLING YOUR OvEN ACCESSORIES FOR THE FIRST TIME SETTING THE TIME SIDE RACKS If you have purchased a model fitted with an electronic timer, The side racks that come with your oven are all fitted the same you must set the time of day before you can operate your way and can be attached to either side of your oven. - Page 6 INSTALLATION TRIvETS GRILL TRAY • The rubber feet on the trivets locate into the recesses on To insert the grill tray, fully open the drawer and position the the hob. tray so that the slots on the outer edges fit over the tabs on •...
-
Page 7: Using The Hotplate
USING THE HOTpLATE USING THE HOTpLATE HOTpLATE DOS AND DON’TS CERAMIC HOTpLATES The cooktop is made from ceramic glass, a tough, durable Do not place heat resistant mats, wire mats or material that withstands heating and cooling without aluminium foil under pots and pans. breaking. -
Page 8: Using The Grill
USING THE GRILL USING THE GRILL GAS HOTpLATES wHAT IS GRILLING? • The grill directs heat from the electric element in the grill Operation • To ignite, push knob in and turn anti-clockwise to the compartment onto the food. ignition symbol •... -
Page 9: Guide To Better Grilling
GUIDE TO bETTER GRILLING No definite times can be given for grilling because this WARNING depends on your own taste and the size of the food. These times should only be used as a guide and remember to turn SAFETY wARNINGS AbOUT THE GRILL the food over half way through the cooking process. -
Page 10: Using The Timer
USING THE TIMER USING THE TIMER USING THE 2-HOUR TIMER 3 bUTTON pROGRAMMAbLE TIMER Manual operation General features The timer needs to be set at the “OFF” marker for the Your 3 button programmable timer has the following features: oven to be used manually. •... - Page 11 Setting the cooking end time 1. Check the clock displays the correct time of day. 2. Select the desired oven function and temperature. The oven indicator light will glow and the heating source will come on. 3. Press the “mode“ button until the “end time” indicator begins flashing.
-
Page 12: Using The Oven
USING THE OvEN USING THE OvEN FAN bAKING COOKING GUIDE The temperature in the oven is controlled by a thermostat. The • Select the correct shelf location for food being cooked. fan distributes the heat throughout the oven compartment. This •... - Page 13 CHOOSING THE bEST OvEN SETTINGS The following tables are intended as a guide and experience may show some variation in cooking times necessary to meet individual requirements. For best results when baking you must preheat your oven for 30 minutes. Electric Oven FOOD TEMpERATURE IN...
- Page 14 ROASTING MEAT • You can use the grill tray and grill tray insert for roasting meat in the oven. • Place the meat in the oven and set the temperature between 180°C and 200°C. (It is recommended to wrap your meats in an oven roasting bag or foil to prevent fats and oils from splattering, making it easier to clean your oven.) •...
-
Page 15: Dealing With Cooking Problems
DEALING wITH COOKING pRObLEMS pRObLEM CAUSES wHAT TO DO Uneven cooking Incorrect shelf position Select shelf that puts food in centre of oven Oven tray too large Try other trays or dishes Trays not in centre Put trays in centre Air flow in oven uneven Rotate food during cooking Grill tray affecting thermostat... -
Page 16: Electronic Burner Control(Models 625 And 627 Only)
ELECTRONIC bURNER CONTROL (models 625 and 627 only) Your gas oven is fitted with an electronic controller which RECOGNISING A SAFETY SHUT-DOwN CONDITION manages the operation of the burner and monitors the During normal cooking the Thermostat indicator light is on flame. -
Page 17: Cleaning Your Appliance
CLEANING CLEANING YOUR AppLIANCE CERAMIC HOTpLATE CAUTION • Remove all spilt food and fat with the supplied razor blade scraper, while the ceramic glass is still warm but not • Always make sure that the oven is electrically isolated hot. Wipe clean with dishwashing detergent on a damp before cleaning. -
Page 18: Cleaning Your Oven Accessories
CLEANING YOUR OvEN ACCESSORIES REMOvING THE SHELvES AND GRILL TRAY FROM THE OvEN REMOvING AND REpLACING THE OvEN LIGHT • Slide the shelves/grill tray towards you until they reach • Turn oven light glass anticlockwise to remove it for globe the front stop. -
Page 19: Solving Problems
SOLvING pRObLEMS SOLvING pRObLEMS FAULTS If there is a problem with the oven and/or grill, please: • Check the points listed below before calling for service. It may be possible to avoid a call by fixing the problem yourself – and so continue cooking. -
Page 20: Installing The Appliance
INSTALLATION INSTALLING THE AppLIANCE CAbINET REqUIREMENTS RECOMMENDED CAbINET DESIGN This appliance has been designed to ‘slot-in’ to a 600mm wide gap built-in standard kitchen cabinets. As such the 6 0 0 m appliance can be installed matching the height and depth of 6 0 0 m benches and behind the kick rail of the cabinets. - Page 21 FITTING THE ANTI-TILT pLATE & STAbILISING bOLT Cooker Stability NOTE: To ensure cooker stability, both the anti-tilt plate and stability bolt MUST be installed on all cookers (electric and gas). INSTALLATION SEqUENCE 1. The cooker is delivered with the anti-tilt plate. Locate the anti-tilt plate against the rear wall.
-
Page 22: Wiring Requirements
wIRING REqUIREMENTS CONNECTING TO SERvICES AND COMMISSIONING The cooker MUST be installed in compliance with: This appliance must be installed by an authorised person, • wiring connections in AS/NZS 3000 Wiring Rules according to all codes and regulations of: • local regulations, municipal building codes and other •... - Page 23 INSTALLING THE GAS COOKER CHECKING GAS pRESSURES The cooker MUST be installed in compliance with: Gas connection Read these points before connecting to the gas supply: • the Australian Standard AS5601 (particular reference to • Slide cooker into final position checking that anti-tilt bracket clause 5.12.1).
- Page 24 a small stable flame results. Turn the knob to maximum LpG CONvERSION – IMpORTANT (MODEL 635 ONLY) and then back to minimum to ensure that the correct This appliance is fitted with Natural Gas burner injectors. Please follow the procedure below if a conversion to suit minimum flame is maintained.
-
Page 25: Testing The Operation Of The Gas Cooker
TESTING THE OpERATION TESTING THE OpERATION OF THE GAS COOKER NOTE: You MUST test the cooker after installation, before you TESTING THE COOKER FEATURES hand it over to the customer. • Observe the flame appearance on each burner. If it is You MUST have a manometer and a connecting tube. - Page 26 NOTES...
-
Page 27: Warranty
Warranty FOR SALES IN AUSTRALIA AND NEW ZEALAND APPLIANCE: WESTINGHOUSE 600mm SLOT-IN FREESTANDING COOKER This document sets out the terms and conditions of product warranties. (iii) normal wear and tear It is an important document. Please keep it with your proof of purchase... - Page 28 The Electrolux Group to consumers including delivery, home service and spare parts. westinghouse. we are part of the Electrolux family. Share more of our thinking at www.electrolux.com © 2009 Electrolux Home Products Pty Ltd ABN 51 004 762 341...
Need help?
Do you have a question about the PSP632 and is the answer not in the manual?
Questions and answers