Table of Contents
Advertisement
Quick Links
USER MANUAL
Enjoy peace of mind.
Register your appliance today.
Stay updated on better living services, safety notices and
shop for accessories.
1. Open the camera app on your smartphone and
point at the QR code to scan
Product Registration QR code is located on the
front of your appliance or inside the door rim*.
2. Tap the notification or link to open the registration form
3. Complete your details and enjoy peace of mind
*Exact location of QR code may vary depending on oven model
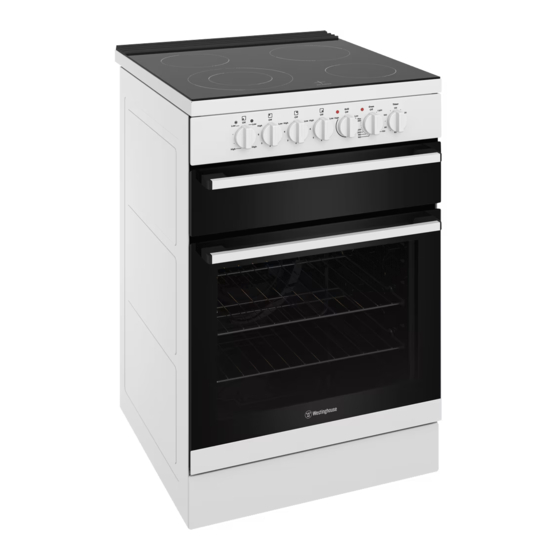
540MM AND 600MM SLOT-IN
UPRIGHT RANGE COOKER
WFE512, WFE542, WFE614, WFE612
WFE642, WFG612, WFE532, WFE616, WFE646
Advertisement
Table of Contents

Subscribe to Our Youtube Channel
Related Manuals for Westinghouse WFE542


Summary of Contents for Westinghouse WFE542
- Page 1 2. Tap the notification or link to open the registration form 3. Complete your details and enjoy peace of mind *Exact location of QR code may vary depending on oven model 540MM AND 600MM SLOT-IN UPRIGHT RANGE COOKER WFE512, WFE542, WFE614, WFE612 WFE642, WFG612, WFE532, WFE616, WFE646...
-
Page 2: Table Of Contents
You may not be able to claim on the Westinghouse manufacturer’s warranty in the event that your product fault is due to failure to adhere this manual. -
Page 3: Important Safety Instructions
IMPORTANT SAFETY INSTRUCTIONS Oven WARNING WARNING • During use the appliance becomes hot. Care should • This appliance is not intended for use by persons be taken to avoid touching the hot surfaces inside (including children) with reduced physical, sensory the oven. -
Page 4: Description Of Your Appliance
Model WFE512 Grill indicator Oven indicator lamp lamp Hotplate Grill Oven 2 hour controls temperature temperature timer selector selector Model WFE542 Grill indicator Oven indicator lamp lamp Grill Oven 2 hour Dual ring Hotplate temperature temperature timer hotplate controls selector... - Page 5 Grill indicator Oven indicator Model WFE642 lamp lamp Hotplate Dual ring Grill Oven 2 hour controls temperature temperature hotplate control timer selector selector Model WFG612 Oven fan button Grill Oven Ignition Oven Hotplate temperature 2 hour Hotplate temperature button light button selector selector controls...
-
Page 6: Installing The Appliance
INSTALLING THE APPLIANCE (600mm wide product) Cabinet requirements Recommended cabinet design This appliance has been designed to ‘slot-in’ to a 600mm wide gap built-in standard kitchen cabinets. As such the Clearance to side wall (refer notes) appliance can be installed to suit the height of the benches 600mm 600mm This allows the cooker to integrate well into contemporary... - Page 7 Fitting the anti-tilt plate & stabilising bolt Rear cover Cooker Stability NOTE: To ensure cooker stability, both the anti-tilt plate and stability bolt MUST be installed on all cookers (electric and gas). Installation Sequence The cooker is delivered with the anti-tilt plate. Locate 48mm to side the anti-tilt plate against the rear wall.
- Page 8 INSTALLING THE APPLIANCE (540mm wide product) Cabinet Requirements Position anti-tilt plate to the rear wall and 25mm from side of cupboard. Securely fix anti-tilt plate to the floor This appliance has been designed to ‘slot-in’ to a 550mm with fasteners. Adjust levelling feet on cooker as required. wide gap built-in standard kitchen cabinets.
-
Page 9: Wiring Requirements
Operate the oven(s), empty, at a MODEL TOTAL KW A1 KW A2 KW temperature of 180°C for approximately 30 minutes. WFE542 10.5 For appliances with a separate grill, run the grill on maximum for 15 minutes WITH GRILL DOOR OPEN WFE642 10.5 Please ensure that the room is well ventilated during this process. -
Page 10: Connections
650mm CONNECTIONS Wiring connection for gas cooker Operation on SNG (WFG612 models only) To allow for disconnection of the appliance after • If the cooker is to be used with SNG, then the grill installation, the plug must be accessible after installation. burner MUST be modified by the replacement of the shutter, which fits into the throat of the grill burner. - Page 11 Gas requirements Intense heat wok burner 1.75mm 1.00mm This appliance must be installed by an authorised person, Models WFG612 according to all codes and regulations of: AS/NZS 5601.1 (particular attention to clause 6.10.1, figure The following table shows the injector sizes for each 6.3, and clause 6.10.1.11.) burner.
-
Page 12: Testing The Operation Of The Gas Cooker
TESTING THE OPERATION OF THE GAS COOKER NOTE: You MUST test the cooker after installation, before Check that the regulator has been fitted to the gas you hand it over to the customer. supply line in the correct orientation, the arrow on the base of the body indicates the direction of gas flow. -
Page 13: Before Operating Your Appliance For The First Time
BEFORE OPERATING YOUR APPLIANCE FOR THE FIRST TIME Preparing your appliance for the first time Fitting the grill dish (WFE532 only) • Please remove all internal boxes and bags from the Separate Grill: Ensure rear of the dish is engaged with oven before operation. -
Page 14: Installing Your Oven Accessories
BEFORE OPERATING YOUR INSTALLING YOUR OVEN APPLIANCE FOR THE FIRST TIME ACCESSORIES Oven shelf location Burner crowns and caps • The burner crown must be fitted correctly into the burner cup or damage will occur during operation. Not a shelf •... -
Page 15: Using The Hotplate
USING THE HOTPLATE Hotplate dos and don’t’s Ceramic hotplates • Do not place heat resistant mats, wire mats or The cooktop is made from ceramic glass, a tough, durable aluminium foil under pots and pans. material that withstands heating and cooling without breaking. -
Page 16: Operating For The First Time
OPERATING FOR THE FIRST TIME Choosing utensils for electric hotplates Choosing utensils for gas hotplates Refer to the diagram below. Refer to the diagram below. Good Good (recessed base) (undersize) (convex base) (oversize) Do not use utensils which are too large or too small. (undersize) Installation and service warning (oversize) -
Page 17: Using The Gas Cooker
USING THE GAS COOKER Gas hotplate Lighting gas hotplate, grill and oven Ensure burner caps, crowns and trivets are properly assembled. Electronic ignition (For models WFE614, WFE612, WFE616 and WFE512) These hobs are fitted with mains powered electronic ignition. When the appliance has been connected and the power is on, depressing any knob will release sparks to all burners. - Page 18 Gas hotplates (Energy rating) Medium heat burner (9.0 MJ/h) Used for normal cooking and simmering with mid size cookware items. High heat burner (12.1 MJ/h) Used for fast heating with large size cookware items. Intense heat wok burner (14.2 MJ/h) Used for very fast heating with woks and other large size cook ware items.
-
Page 19: General Hints And Tips
GENERAL HINTS AND TIPS General hints WARNING CAUTION For best baking results preheat oven for 30 minutes. • DO NOT place baking trays and oven dishes The material and finish of baking trays and dishes used directly against the grid covering the fan at the back will affect the way foods are baked, especially base of the oven. -
Page 20: Guide To Better Grilling
GUIDE TO BETTER GRILLING No definite times can be given for grilling because this depends on your own taste and the size of the WARNING CAUTION food. These times should only be used as a guide and remember to turn the food over halfway through the Using the Grill cooking process. -
Page 21: Operating The 120 Minute Mechanical Ringer Timer
OPERATING THE 120 MINUTE MECHANICAL RINGER TIMER (WHERE SUPPLIED) Operating your 120 minute ringer timer To set the timer, simply turn the knob clockwise to the required number of minutes. Note: For any time below ten minutes, turn the knob past the thirty minute mark, then turn it back to the required number of minutes. -
Page 22: Using The Oven
USING THE OVEN Fan baking Cooking guide The temperature in the oven is controlled by a thermostat. • Select the correct shelf location for food being The fan distributes the heat throughout the oven cooked. compartment. This allows: • The grill tray can be used in the oven as a baking dish. •... -
Page 23: Airfry Cooking
AIR FRY COOKING (FOR APPLICABLE MODELS ONLY) Air Fry Cooking (for applicable models only) FOOD TEMP °C SHELF TIME IN POSITION* MINUTES The Air Fry feature works best for single shelf baking. Scotch fillet steak, 2 or 3 8-12 (rare/ Air Fry is suitable for French Fries, Chicken Wings, seared first med) -
Page 24: Oven Guide
OVEN GUIDE The following is intended as a guide. Cooking variation is natural and to be expected. You should experiment with times, temperatures and recipes to obtain the best results to your own taste. Get to know your oven before making a service call. -
Page 25: Get To Know Your New Oven
GET TO KNOW YOUR NEW OVEN WITH THIS ‘SIMPLE TEST CAKE’ Roasting Meat Although we strive for a perfect performing oven, it’s • You can use the grill tray and grill tray insert for possible that there will be some variation in colour roasting meat in the oven. -
Page 26: Dealing With Cooking Problems
DEALING WITH COOKING PROBLEMS PROBLEM CAUSES WHAT TO DO Uneven cooking Incorrect shelf position Select shelf that puts food in centre of oven Oven tray too large Try other trays or dishes Trays not in centre Put trays in centre Air flow in oven uneven Rotate food during cooking Grill tray affecting thermostat... -
Page 27: Cleaning The Cooker
CLEANING THE COOKER Ovens and hotplates are made from steel and enamel. Do not use abrasives and harsh scourers as they may WARNING CAUTION scratch the surface. DO NOT remove the oven door. Enamel Glass • Keep enamel clean by wiping it with a soft cloth •... -
Page 28: Cleaning Your Oven Accessories
CLEANING THE COOKER CLEANING YOUR OVEN (CONTINUED) ACCESSORIES Cleaning the grill WARNING WARNING Grill tray and grill pan Grill • Wash the grill tray and grill pan in hot soapy water. • Always keep the grill tray and grill tray insert clean, as any fat deposits may catch fire. -
Page 29: Cleaning And Caring For The Oven
CLEANING AND CARING FOR THE OVEN Cleaning the oven door • To remove the top cap, press the ribbed release clips at each end and lift top cap away from the door. Cool air circulates through the door to lower the surface temperature on the outside of the oven door. - Page 30 CLEANING AND CARING FOR THE OVEN (CONTINUED) Re-assembling the oven door inner glass • When replacing the door inner glass, make sure the circle is positioned as shown in the image (where applicable). • Replace the top cap ensuring the clips snap back into position.
-
Page 31: Solving Problems
SOLVING PROBLEMS Faults Further information If there is a problem with the oven and/or grill, please: If you need more information, service, replacement parts or have a warranty enquiry, please contact the Customer • Check the points listed below before calling for Care Centre: service. -
Page 32: Removing The Oven Door
REMOVING THE OVEN DOOR Removing the oven door Lift the door slightly and evenly while continuing to slowly close the door. (To be done by qualified personnel only) With door fully open, rotate the two stirrups to its rest position. Stirrup Remove the door by lowering gently and pull away from the frame of the oven. - Page 33 Replacing the oven door Open door fully and rotate stirrups away from you, and back to their original position. (To be done by qualified personnel only) Procedure to assemble the door Procedure to assemble the door Procedure to assemble the door (to be done by quali ed personnel only) (to be done by personnel only) Hold door with both hands.
-
Page 34: Lpg Conversion
LPG CONVERSION DONG Y ANG – IMPORTANT (MODELS WFE512, WFE614, WFE612 AND WFE616 ONLY) This appliance is fitted with Natural Gas burner injectors. One by one, turn the knobs to minimum and screw in the bypass screw (accessible when the knob is Please follow the procedure below if a conversion to suit removed) until a small stable flame results. - Page 35 LPG CONVERSION CHANT – IMPORTANT (MODELS WFE512, WFE614 AND WFE612 AND WFE616 ONLY) This appliance is supplied set up for Natural Gas usage. One by one, turn the knobs to minimum and screw A conversion kit is included with the product for Universal in the bypass screw (accessible when the knob is LPG usage.
-
Page 36: Warranty
(c) ‘ASC’ means Electrolux’s authorised serviced centres; the Appliance; (d) ‘Westinghouse’ is the brand controlled by Electrolux Home Products In addition, Electrolux is not liable under this warranty if: Pty Ltd of 163 O’Riordan Street, Mascot NSW 2020, ABN 51 004... -
Page 37: Notes
NOTES NOTES... - Page 38 NOTES NOTES...
- Page 39 NOTES NOTES...
- Page 40 NEW ZEALAND phone: 0800 436 245 email: customercare@electrolux.co.nz web: westinghouse.co.nz and WESTINGHOUSE are trademarks of Westinghouse Electric Corporation. Used under license. All Rights Reserved. ANC A21384302 Rev B © 2022 Electrolux Home Products Pty Ltd. ABN 51 004 762 341...
Need help?
Do you have a question about the WFE542 and is the answer not in the manual?
Questions and answers