Table of Contents
Advertisement
Advertisement
Table of Contents

Related Manuals for Westinghouse Westinghouse 540 upright cooker


Summary of Contents for Westinghouse Westinghouse 540 upright cooker
- Page 1 OWNER’S MANUAL 540 UPRIGHT COOKING APPLIANCES...
-
Page 2: Table Of Contents
CONGRATULATIONS CONTENTS Congratulations and thank you for choosing our Westinghouse general safety ..................3 upright cooker. We are sure you will find your new appliance description of cooker and controls............5 a pleasure to use and a great asset to your cooking. Before you use the appliance, we recommend that you read through Before operating your appliance for the first time .......8 the whole user manual which provides a description of the... -
Page 3: General Safety
AN IMPORTANT REAd TO AvOId AN ELECTRIC OvEN WARNINGS SHOCK OR fIRE DO NOT use oven door as a shelf. Meanings of symbols used in this manual are DO NOT push down on open oven door. shown below: If the gas oven does not light in 8 seconds, allow This symbol indicates never to do this 1 minute for gas to clear before trying again. - Page 4 AN IMPORTANT REAd TO AvOId AN ELECTRIC SHOCK OR fIRE INSTALLATION, CLEANING ANd SERvICING An authorised person must install this appliance. (Certificate of Compliance to be retained) Before using the appliance, ensure that all packing materials are removed from the appliance. In order to avoid any potential hazard, the enclosed installation instructions must be followed.
-
Page 5: Description Of Cooker And Controls
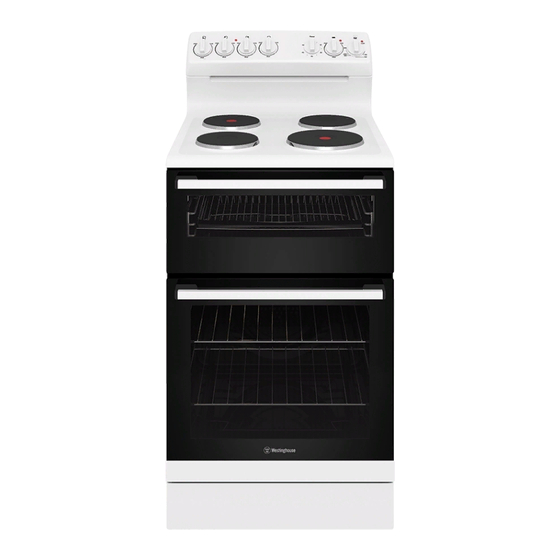
dESCRIPTION Of ELECTRIC COOKER 1. Hotplate Control Knob WITH SEPARATE GRILL • Adjusts temperature of hotplate. Can be rotated in either direction. fAN fORCEd & CONvENTIONAL OvEN 2. Hotplate Indicator Lamp (where fitted) 1. Hob • Comes on when a hotplate is turned on. 2. - Page 6 dESCRIPTION Of GAS COOKER 1. Hotplate Burner Control Knob • Sets the hotplate cooking temperature. fAN fORCEd & CONvENTIONAL OvEN 2. Grill Burner Control Knob 1. Removable Trivet • Sets the grilling temperature. 2. Removable Hotplate Burner 3. Oven Burner Control Knob 3.
- Page 7 dESCRIPTION Of ELECTRIC COOKER WITH GRILL IN OvEN CONvENTIONAL OvEN 1. Control Panel 2. Hob 3. Removable Inner Door Glass 4. Oven Door 5. Power Outlet 6. Power Outlet Switch 7. Flue Vent 8. Grill and Oven Elements 9. Removable Grill Dish & Rack 10.
-
Page 8: Before Operating Your Appliance For The First Time
bEfORE OPERATING yOUR APPLIANCE fITTING OvEN SHELvES 1. Ensure shelf orientation is correct (refer picture). fOR THE fIRST TIME 2. Slide into oven at an angle until raised back of shelf is past the stop on side runners. 3. Lower front of shelf and push in until stop is reached. WARNING SETTING THE TIME NOTE: The top ledge is not a shelf position. -
Page 9: Using The Oven
USING THE OvEN WARNING OvEN SAfETy WARNINGS • ALWAYS follow the instructions for putting the shelves and fittings into the oven, to avoid accidents. • DO NOT line the oven with foil, it will damage the enamel. • DO NOT use polyunsaturated oil when cooking in the oven. - Page 10 USING THE OvEN IGNITING THE GAS OvEN 1. Press the oven burner control knob and turn it a quarter USING THE OvEN Of yOUR GAS COOKER of the way. 2. For manual ignition models keep the oven burner bAKING control knob pushed in and at the same time press the •...
-
Page 11: Cooking Guide & Baking Problems
OvEN COOKING GUIdE The following is intended as a guide and experience may show some slight variation to be necessary to meet individual requirements. Where the gas models vary from electric, details for gas cooking is shown in brackets. For best results when baking, preheat your oven for 30 minutes. - Page 12 HANdLING bAKING PRObLEMS Problem Causes What to do Uneven cooking Incorrect shelf position Select shelf that puts food in centre of oven Oven tray too large Try other trays or dishes Trays not in centre Put trays in centre Air flow in oven uneven Rotate food during cooking Grill tray affecting thermostat Remove grill tray from oven on bake modes...
-
Page 13: Using The Grill
USING THE GRILL WARNING GRILL SAfETy WARNINGS • ALWAYS turn off the grill immediately after you have finished cooking. Fat left in the grill can catch fire. • ALWAYS leave the grill door fully open when grilling in a separate grill model. •... - Page 14 USING THE GRILL GRILL IN OvEN MOdEL • To operate set function control knob to GRILL and set thermostat knob to the required temperature. • The grill directs heat onto food from the powerful upper element. • The grill is suitable for tender cuts of meat, steak, chops, sausages, fish, toasted cheese and other foods which cook quickly.
-
Page 15: Using The Hotplates
USING THE HOTPLATES Of yOUR COOKER WARNING HOTPLATE SAfETy WARNINGS • DO NOT leave the hotplate on with no pot or pan on top. • DO NOT use pots and pans which are unsteady, as these could overbalance. • DO NOT use mats, heat diffusers or wok stands. These will cause a temperature build-up which can damage the cooktop. - Page 16 USING THE HOTPLATES Of yOUR ELECTRIC COOKER Check the hotplates on your cooker against the diagrams below before you use your cooker for the first time. RAdIANT HOTPLATES • The high-speed radiant hotplates heat rapidly from a cold start. This saves power. fRONT CONTROL MOdELS •...
- Page 17 USING THE HOTPLATE bURNERS Of yOUR GAS COOKER MANUAL IGNITION MOdELS ELECTRONIC IGNITION MOdELS To light these hotplates: To light these hotplates: 1. Choose the hotplate you want to use 1. Choose the hotplate you want to use. 2. Turn the hotplate burner control knob to “Hi”. 2.
-
Page 18: Clocks & Timers
OPERATING THE PROGRAMMAbLE CLOCK SETTING THE COOKING dURATION 1. Check the clock displays the correct time of day. 2. Set the oven to the desired temperature. The oven indicator light will glow and the oven will come on. WARNING THE CLOCK MUST bE SET TO OPERATE OvEN 3. -
Page 19: Get To Know Your Oven
OPERATING THE 60 MINUTE RINGER TIMER GET TO KNOW yOUR OvEN To set the timer, simply turn the knob clockwise to the Get to know your new oven with this ‘Simple Test Cake’ required number of minutes. Although we strive for a perfect performing oven, it’s possible that there will be some variation in colour when baking. -
Page 20: Service Fuse, Oven Light Replacement
When replacing the Light Bulb ensure the replacement is (see diagram). suitable for high temperatures. We recommend using a genuine replacement available from Electrolux Spare Parts. Globe Specifications: 25W (maximum)/230 – 240V Temperature Rating 300°C... -
Page 21: Fitting Oven Accessories And Cleaning
fITTING OvEN ACCESSORIES ANd CLEANING SOLId HOTPLATES • For normal cleaning use a moist cloth. • For very dirty hotplates use any commercial cleanser. • After cleaning, remove any cleanser remaining and WARNING SAfETy WARNINGS AbOUT CLEANING dry the hotplate completely by running the element for •... - Page 22 fITTING ACCESSORIES ANd CLEANING REfITTING THE bURNER CROWNS ANd CAPS • The burner crown must be fitted correctly into the CLEANING THE GAS HOb burner cup or damage will occur during operation. • To do this, ensure that the 2 ribs on either side of the REMOvING THE TRIvETS (REfER fIGURE 1) spark plug hole are positioned into the 2 slots on the •...
- Page 23 CLEANING THE GRILL COMPARTMENT AIRWASH dOOR Clean the Grill Compartment with hot soapy water. The door on your cooker is designed to allow cool air to If stronger action is needed use a nonabrasive oven pass up through the middle and out through the vent in the cleaner applied with a nylon scourer.
-
Page 24: Solving Problems
SOLvING PRObLEMS If you have a problem with your appliance, check the table below before calling service. You may be able to avoid a service call by fixing the problem yourself and so continue cooking. For cooking problems refer to Handling Baking Problems. Note: You may be charged for the service call even in the guarantee period if the problem is due to the causes listed below. - Page 25 Problem Causes What to do Electronic clock flashing on display Power failure or interruption Reset time of day (electric cooker only) Household fuse blown or power Check fuses, power supply supply is off Note: if the household fuse continues to blow, call the Service Centre Unit smoking when first used Protective oils being removed Turn grill on high for 10 mins...
-
Page 26: Installation
• You MUST follow the installation instructions in this booklet. • The surrounding kitchen cabinets MUST be able to withstand 85°C. Electrolux WIll NOT accept responsibility for damage caused by installation into kitchen cabinets which cannot withstand 85°C. • The appliance must not be installed in a corner. It must be installed at least 100mm from the side wall. - Page 27 fITTING THE ANTI-TILT PLATE & STAbILISING bOLT REMOvING THE KICK PANEL – SMALL TyPE To remove the kick panel, firstly position one hand COOKER STAbILITy underneath and to one side of the kick panel. Note: To ensure cooker stability, both the anti-tilt plate Then pull the kick panel upwards and the top of the panel and stability bolt mUST be installed on all cookers outwards to disengage the top of the kick panel from the...
- Page 28 INSTALLING yOUR ELECTRIC COOKER HARd WIRING dETAIL Remove rear cover WIRING REqUIREMENTS 2. Fit wires through hole at bottom centre using the The cooker MUST be installed in compliance with: appropriate gland to protect insulation of wires from hole edge. Note that the secondary insulation of the wires will •...
- Page 29 INSTALLING THE GAS COOKER REqUIREMENTS This appliance must be installed by an authorised person, according to all codes and regulations of: • the Australian/New Zealand Standard AS/NZS 5601.1 (particular attention to clause 6.10.1 and figure 6.3 on page 97, and clause 6.10.1.11) •...
- Page 30 650mm 150mm 650mm INSTALLING THE GAS COOKER NG Regulator GAS CONNECTION Read these points before connecting to the gas supply: 1/2” BSP Internal Thread • The gas connection point is a 1/2” BSP external thread located at the rear of the appliance as shown in the Rear View.
- Page 31 1. Check the manometer zero point is correct. NOTE 2. Connect the manometer to the cooker pressure When flame is unsatisfactory, then refer to the Electrolux test point. This is located on the regulator or LPG Technical publications and correct the fault, if possible.
- Page 32 NOTES NOTES...
-
Page 33: Warranty
New Zealand. rights and remedies under a law in relation to the Appliances or services 3. During the Warranty Period Electrolux or its ASC will, at no extra charge to which the warranty relates. if your Appliance is readily accessible for service, without special 11. - Page 34 Top Service encompasses the after sales service provided by The Electrolux Group to consumers including delivery, home service and spare parts. Westinghouse. We are part of the Electrolux family. Share more of our thinking at www.electrolux.com P/No. 0342 001 577 Rev B and ECN 12Q009B ©...
Need help?
Do you have a question about the Westinghouse 540 upright cooker and is the answer not in the manual?
Questions and answers