
Related Manuals for SIIG USB over IP


Summary of Contents for SIIG USB over IP
-
Page 1: Product Registration
USB Over IP User’s Manual SIIG’s ONLINE SUPPORT and Product Registration Visit SIIG’s web site at www.siig.com and click Support for instant technical support. Also, click Support/Register to register your product... - Page 2 Fremont, CA 94538-3152, USA Phone: 510-657-8688 USB Over IP is a trademark of SIIG, Inc. SIIG and the SIIG logo are registered trademarks of SIIG, Inc. Microsoft and Windows are registered trademarks of Microsoft Corporation. All other names used in this publication are for identification only and may be trademarks of their respective owners.
-
Page 3: Table Of Contents
User's Manual Contents Chapter 1: Introduction 1-1 Unpacking the USB over IP ..........1-1 1-1.1 Static Electricity Precaution ......1-2 1-1.2 Record the Serial Number ........ 1-2 1-2 Introducing the USB over IP ..........1-3 1-2.1 Features and Benefits ........1-3 1-2.2 System Requirements ........ - Page 4 Contents Chapter 4: USB Over IP Admin 4-1 Introducing the USB Over IP Admin ......... 4-1 4-2 Using the USB Over IP Admin ..........4-2 4-2.1 Quick Start Icon ..........4-2 4-2.2 USB Devices ............4-2 4-2.2.1 USB Function Buttons ......4-3 4-2.3 Servers ..............
-
Page 5: Technical Support And Warranty
User's Manual About This Manual The purpose of this manual is to introduce you to your USB over IP server. It will guide you to properly configure and install into your system. Please save this manual for future reference. This manual is comprised of the following sections:... -
Page 6: Chapter 1: Introduction
Introduction Chapter 1 Introduction Thank you for your purchase of the USB over IP. SIIG’s goal is to provide reliable, high quality products and fast customer support. The purpose of this comprehensive user’s manual is to: • Introduce you to your USB over IP features and benefits •... -
Page 7: 1-1.1 Static Electricity Precaution
Handle cards only by their edges. 1-1.2 Record the Serial Number In order for SIIG's Technical Support or RMA Department to give you prompt service, you will need the following product information. The serial number label is located on the side of the box and on the adapter. -
Page 8: Introducing The Usb Over Ip
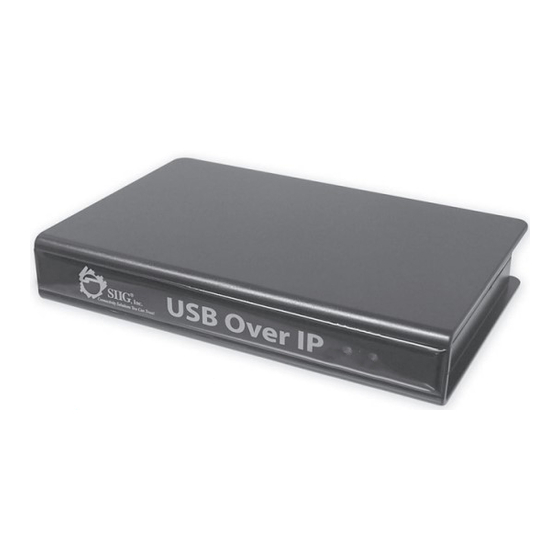
Introduction 1-2 Introducing the USB over IP The USB over IP allows network users to connect remote USB devices like, printers, scanners, digital cameras and USB Flash drives over the network. It is ideal for home office, small office or classroom use! User friendly client... -
Page 9: 1-2.2 System Requirements
This LED will blink for 10 seconds, then it will go off for 10-15 seconds, when it comes back on the USB over IP is ready for use. If the Ready LED ever goes off, power-off then power-on the USB over IP. - Page 10 Figure 2: Back Layout • Reset Button: Use this button to restore the default settings of the USB over IP. Using a paper clip, pen tip or similar size object, press in and hold down the button for 5-10 seconds. The default settings are: SIIG (Server Name), 192.168.3.22 (IP) and...
-
Page 11: Chapter 2: Hardware Installation And Device Compatibility
Connect the other end of the Ethernet cable to an available RJ45 port on your Ethernet switch or hub. Plug the power adapter into the USB over IP, then plug the power adapter into a reliable power source. Wait for the USB over IP to complete it's initialization/bootup sequence and the Ready LED to light up before proceeding to the next section. -
Page 12: Usb Device Support
User's Manual 2-3 USB Device Support USB Over IP Admin client software is based on open architecture, wherein the USB over IP box virtualizes the connected USB devices onto the remote client. The Client, installed on the remote host, interacts with the USB over IP box and enables remote access. - Page 13 QHMPL 500lm-8lm Frontech e-CAM Microsoft LifeCam VX-6000 Logitech Quickcam for Notebooks Pro Sony Sony USB Speakers Microsoft Life Chat LX3000 head Speakers Microsoft phones Turtle Beach Audio Advantage Micro Sound Card USB SoundWave 7.1 Multimedia SIIG USB SoundWave 7.1 Pro...
- Page 14 User's Manual 2-3.1 Device Interoperability List Cont'd. Device Type Make Model Acer Acer Keyboard Apple Mac Mac Extended Keyboard Keyboard Microsoft Comfort curve keyboard Microsoft Intranet Pro Keyboard Apple Apple Optical mouse Apple Apple mouse Microsoft Microsoft Basic mouse Mouse Logitech Logitech mouse Sun mouse...
- Page 15 USB IP Admin Software Utility 2-3.1 Device Interoperability List Cont'd. Device Type Make Model Business InkJet 1200 DeskJet D2360 LaserJet 1020 (GDI printer) DeskJet 3740 PhotoSmart 3200 LaserJet 2200d Printers EPL-6200L Stylus C87 Plus Epson Stylus C58 Plus LX-300 +II Canon iP1700 Samsung...
-
Page 16: Chapter 3: Driver Installation
Connection Sharing (ICS) must be running before installing the USB over IP drivers. 3-1.1 Windows XP (32-/64-bit) Connect the USB over IP to your network. At the Windows desktop insert the driver CD. Autorun should start the installation, if not, click Start, then Run. - Page 17 User's Manual At Choose Components, click Next. At Choose Install Location, click Install.
- Page 18 Driver Installation At the Security Alert, click Yes. (skip this step for 32-bit XP) Click Yes to add the application to Windows Firewall exceptions list, then click Finish.
- Page 19 User's Manual At the Found New Hardware Wizard, select No, not this time, click Next. (skip this step if not prompted) 10. Select Install the software automatically (Recommended), click Next.
- Page 20 Driver Installation 11. At the Security Alert, click Yes. (skip this step for 32-bit XP) 12. Click Finish.
-
Page 21: 3-1.2 Windows Server 2003 (32-/64-Bit)
Yes to add this application to firewall exceptions list on step 8) 14. Repeat steps 9-12 for each USB over IP connected that matches your subnet address. 15. Click Finish then restart XP to complete the installation. - Page 22 Driver Installation At the USB Over IP screen, click Install. At Choose Components, click Next.
- Page 23 User's Manual At Choose Install Location, click Install. At Security Alert, click Yes.
- Page 24 Driver Installation Click Yes to add the application to Windows Firewall exceptions list, then click Finish. At the Found New Hardware Wizard, select No, not this time, then click Next.
- Page 25 User's Manual 10. Select Install the software automatically (Recommended), click Next. 11. At Security Alert, click Yes. 3-10...
-
Page 26: 3-1.3 Windows Server 2008 (32-Bit)
Driver Installation 12. Click Finish. 13. Repeat steps 9-12 for each USB Over IP connected that matches your subnet address. 3-1.3 Windows Server 2008 (32-bit) Make sure that Windows Firewall is configured before installing the USB over IP driver. Connect the USB over IP to your network. - Page 27 User's Manual At the USB Over IP screen, click Install. At Choose Components, click Next. 3-12...
- Page 28 Driver Installation At Choose Install Location, click Install. At Windows Security, click Install this driver software anyway two times. 3-13...
-
Page 29: 3-1.4 Windows Vista (32-Bit)
Click Yes to add the application to Windows Firewall exceptions list, then click Finish. Click Finish. 3-1.4 Windows Vista (32-bit) Connect the USB over IP to your network. At the Windows desktop insert the driver CD. At the Auto Play window: click Open folder to view files. - Page 30 If Auto Play doesn't start: click Start, in the Start Search box, type D:\Launch.exe. (Change D: to match your CD-ROM drive letter) Right click Launch, click Run as administrator. Click Allow. At the USB Over IP screen, click Install. 3-15...
- Page 31 User's Manual At Choose Components, click Next. At Choose Install Location, click Install. 3-16...
- Page 32 Driver Installation At Windows Security, click Install this driver software anyway two times. Click Yes to add the application to Windows Firewall exceptions list, then click Finish to complete the installation. 3-17...
-
Page 33: 3-1.5 Windows 7 (32-Bit)
User's Manual 3-1.5 Windows 7 (32-bit) Connect the USB over IP to your network. At the Windows desktop insert the driver CD. At the Auto Play window: click Open folder to view files. If Auto Play doesn't start: Double click Computer, right click the CD\DVD-ROM drive showing the SIIG USBIP icon, click Open. - Page 34 Driver Installation At the USB Over IP screen, click Install. At Choose Components, click Next. 3-19...
- Page 35 User's Manual At Choose Install Location, click Install. At Windows Security, click Install this driver software anyway two times. 3-20...
- Page 36 Driver Installation Click Yes to add the application to Windows Firewall exceptions list, then click Finish to complete the installation. Right click the USB Over IP Admin icon located on the desktop, click Properties. 3-21...
- Page 37 User's Manual 10. Click Compatibility tab. Check Run this program as an administrator, click OK (after clicking OK, wait up to 30 seconds to complete). 11. Click Start, All Programs, USB Over IP. 3-22...
- Page 38 Driver Installation 12. Right click the USB Over IP Admin icon, click Properties. 13. Click Compatibility tab, check Run this program as an administrator, click OK. 3-23...
-
Page 39: To Verify Installation
User's Manual 14. Double click the USB Over IP Admin icon on the desktop. If prompted click Yes at the User Account Control box to continue. 3-2 To Verify Installation Verify installation in Device Manager. For Windows 7: Right click Computer, click Manage, click Device Manager. -
Page 40: Set Ip Address
Driver Installation 3-3 Set IP Address 3-3.1 Change Subnet Address The factory default IP address given to the USB Over IP is 192.168.3.22. This address may not match your network's subnet address, in this case, your USB devices will not be detected by the USB Over IP Admin. This section guides you through setting the IP address to match the subnet mask of your network. - Page 41 User's Manual At the Welcome to USB Server Setup screen, if your USB Over IP doesn't show up, go directly to section 3-3.2 IP Config - DiscoveryUtility. Otherwise type in the Mac address of the server and click Next. At Server Settings, select either Static to assign IP and Gateway address manually or DHCP to have your DHCP server assign the addresses.
-
Page 42: 3-3.2 Ip Config - Discoveryutility
Driver Installation Click Yes to save your settings, then click OK. 3-3.2 IP Config - DiscoveryUtility Insert the USB Over IP CD. Click the Start button. For Windows 7 / Vista / 2008: In the Start Search box, type D:\IPConfig\DiscoveryUtility.exe, press Enter. - Page 43 User's Manual At List of Servers, double click the MAC address of the USB Over IP you want to change. At IP Configuration screen, either type in the IP Address, subnet mask, and gateway or select DHCP to have them assigned by your DHCP server, then click Change.
- Page 44 Driver Installation At the List of Servers box click Refresh to view your changes. When ready, click Exit to close the utility. 3-29...
-
Page 45: Chapter 4: Usb Over Ip Admin
Chapter 4 USB Over IP Admin 4-1 Introducing the USB Over IP Admin The USB Over IP Admin is a user friendly PC software which supports High speed USB cameras, USB audio, USB Printers, Multi-function printers, scanners, storage devices, PDAs, digital cameras, serial adapters, mice, keyboards and much much more. -
Page 46: Using The Usb Over Ip Admin
User's Manual Using the USB Over IP Admin The USB over IP Admin is used to connect to your USB devices and configure your USB Over IP server. 4-2.1 Quick Start Icon The USB Over IP Admin Quick Start Icon installs automatically during driver installation and is located on the right side of the taskbar by the system clock. -
Page 47: 4-2.3 Servers
4-2.3 Servers The Servers screen is divided into three sections, Server Manager, Server Details and Connected Clients. Server Manager: displays all USB Over IP servers • connected to the network Server Details: displays basic USB Over IP server •... -
Page 48: 4-2.3.1 Servers Function Buttons
Upgrade: upgrades server firmware • Setup: enters Server Configuration. This button is disabled whenever a server is password enabled Restore: restores the USB Over IP to factory default • IP settings of 192.168.3.22 4-2.4 Global Commands Global commands effect every device and USB Over IP connected to your network. -
Page 49: 4-2.4.2 Help
4-2.4.3 Exit Disconnects the system from all devices and USB Over IP servers and closes the USB Over IP Admin. 4-2.5 Notes In Windows XP SP1 (32-bit) without Windows Firewall installed, everytime the USB Over IP... -
Page 50: How To's
User's Manual 4-3 How To's 4-3.1 Device Mapping 4-3.1.1 How to Connect - Status Free In the Device Mapping window, select a device who's status is Free, then click the Connect button. The Status will change to Connected. Depending on the device, Windows will either automatically install a driver for it or prompt you for a driver. -
Page 51: 4-3.1.2 How To Connect - Status Busy
Configuration Utility 4-3.1.2 How to Connect - Status Busy Instead of waiting for a device to become Free, you may send a request to release the device to the system that controls it. In the Device Mapping window, select a device who's status is Busy and do either A or B: A) Click the Request icon located on the top of the window. -
Page 52: 4-3.1.3 How To Disconnect
User's Manual 4-3.1.3 How to Disconnect In the Device Mapping window, select a device who's status is Connected, then click the Disconnect button. The Status will change to Unloading then to Free. -
Page 53: Disable Auto Connect
Configuration Utility 4-3.1.4 USB Device - Disable Auto Connect Auto Connect is enable, by default, whenever the USB Over IP is started. However, it can be disabled on a device by device basis. If you choose to do so, follow the directions below. -
Page 54: 4-3.1.5 Printer Sharing
User's Manual 4-3.1.5 Printer Sharing The Printer Sharing feature automatically connects and disconnects your printer from your computer everytime you send a print job to the printer. Make sure the printer driver has been installed and the printer is configured to print from your computer before enabling this feature. -
Page 55: 4-3.2 Server Manager
Configuration Utility 4-3.2 Server Manager 4-3.2.1 Setup (Server Configuration) Use the Setup button to change server name, modify IP settings and enable or disable password. If the server is password protected the setup button will be disabled. To enable the Setup button, go to section 4-4.2.2 Unlock Server and Reset Password. - Page 56 User's Manual Select IP Settings tab. Check Modify, then either select Static and type in your IP address and gateway or, to have your server configured automatically, select DHCP. Select Password tab. Check Modify, then enable, disable or change your password. Click Save to save your changes and exit.
- Page 57 Configuration Utility 4-3.2.2 Unlock Server and Reset the Password Whenever the USB Over IP is password protected, Locked will display in the Status column. Follow the steps in the order that they appear to unlock the server. Select the server and click the Unlock button.
- Page 58 User's Manual Your password will be confirmed or denied, click OK. If failed, try again. If you continue to have problems, check with your system administrator for the correct password. Click the Refresh button, the server's status should be Unlocked. To reset the password, click the Setup button.
- Page 59 Configuration Utility Select the Password tab. Check Modify, uncheck Enable Password, then click Save. 4-15...
-
Page 60: 4-3.2.3 Refresh (Refresh Servers)
User's Manual 4-3.2.3 Refresh (Refresh Servers) Click the Refresh button. The Searching for Servers box will pop up. 4-16... - Page 61 Configuration Utility The Server Manager list will be refreshed. 4-3.2.4 Restore (Restore Factory Default Settings) The factory default settings are: SIIG (Server Name), 192.168.3.22 (IP) and 192.168.3.1 (Gateway). Select a server, click the Restore button. 4-17...
- Page 62 User's Manual Click OK. Click OK again. Click Refresh to display the server list. 4-18...
-
Page 63: 4-3.2.5 Upgrade (Upgrade Firmware)
Select a server, click the Upgrade button. In Select File box, browse to or type in the location of the file, then click Transfer. Do not unplug the power adapter from the USB Over IP during the update process. 4-19... - Page 64 User's Manual 4-3.2.6 Configure IP Address: Server Not On the Same Subnet At the Server Manger screen, select the server that is not on the same subnet, then double click it. Click Yes to add this application to Windows firewall exceptions list.
- Page 65 Configuration Utility In Server Settings, either select Static and type in the IP address and Gateway or select DHCP to have them assigned by the DHCP server. After making your changes, click Update. Click Yes to save your changes, then click OK. Click Exit to close the USB Server setup screen.
- Page 66 Same Subnet? column of the server. 4-3.2.7 Configure IP Address: Server On Different Subnet Insert the USB Over IP CD. Click the Start button. For Windows 7 / Vista / 2008: In the Start Search box, type D:\IPConfig\DiscoveryUtility.exe, press Enter.
- Page 67 Configuration Utility At List of Servers, double click the MAC address of the USB Over IP you want to change. At IP Configuration screen, either type in the IP Address, subnet mask, and gateway or select DHCP to have them assigned by your DHCP server, then click Change.
- Page 68 User's Manual At the List of Servers box, click Refresh to view your changes. When ready, click Exit to close the utility. 4-24...
-
Page 69: Overview
Technical Support & Product Return Chapter 5 Technical Support & Warranty 5-1 Overview This chapter will give you instructions on how to obtain product information, contact technical support and return defective product. This user's manual is written with easy-to-understand instructions on how to configure and install this product in your system. -
Page 70: Technical Support And Warranty
(5) years from the date of purchase of the product. SIIG will, at our discretion, repair or replace (with an identical product or product having similar features and functionality) the product if defective in materials or workmanship. - Page 71 Technical Support & Product Return Blank Page...
- Page 72 03-0315B...
Need help?
Do you have a question about the USB over IP and is the answer not in the manual?
Questions and answers